Table of Contents

Summary of Contents for Aston Global Langham SDR978
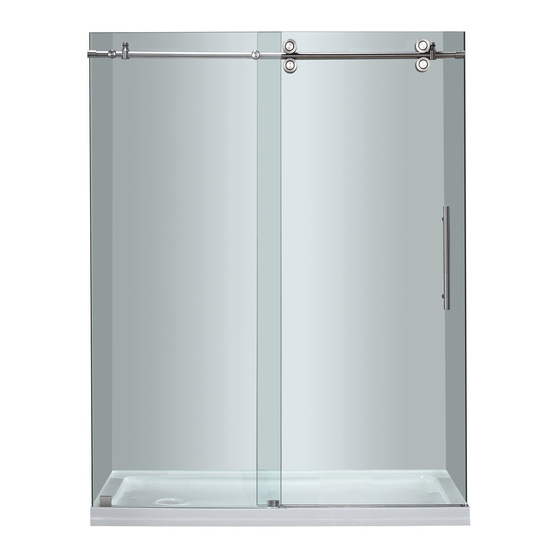
- Page 1 ESCAPE THE EVERYDAY INSTALLATION AND OWNER'S MANUAL LANGHAM (SDR978) Shower Door Model Number: SDR978.00-48-L Please carefully read these instructions before you begin to install the products. 05/16 Rev C P/N :SDR978.00-48-L...
- Page 2 Before you start Thank you for purchasing your Aston shower door. We hope that it will provide you with years of satisfying use and enjoyment. Please read this manual carefully because it contains information and instructions about the proper installation of the unit. If you do not follow certain conditions of installation and maintenance, your warranty may be affected.
- Page 3 Detailed Diagram of Shower Door Components � � �i== � === �a: Number Description Number Description Door Stopper Door Threshold Door Threshold End Cap 2 Top Rail Fixed Glass Door Seal Sliding Door Door Seal Rail End Door Seal Wall Mount Door Handle Glass Clamp Screw Pack 1...
- Page 4 SUPPLIED HARDWARE M5x40 � SCREW PACK M4x40 � Anchor [$:::::; M4x40 SCREW PACK � Anchor Cµz3 8nmnn> M4x40 SCREW PACK ( 3 ) Anchor ctzc:;::) SUPPLIED PARTS 60" 12" B3_k <I'' 60"...
- Page 5 Installation Guide Please read and follow the installation instructions and guidelines in this section. Failure to follow the recommended instructions and installation techniques may lead to possible damage to the unit or the surrounding area. This can affect warranty claims. ATTENTION: This unit requires assembly.
- Page 6 Preparation of base for installation of shower tray Tile or Finished Surfa e Stud --- Dry Wall Or Wall Board WARNING: THE Aston shower door and tray are designed to be used with tile walls. If you are using a pre-made Acrylic/ABS/FRP shower stall that will be thicker than average wall board plus tile then you must consider the offset of the pre-made panel.
- Page 7 This can be accomplished by leveling the subfloor by use of Shims, Leveling compound or placing the shower tray into a mortar base The shower tray must be installed so that the tile lip is against the wall studs. It is recommended that the tray is attached to the studs using screws.
- Page 8 Left-Handed Shower Tray Installation Note: This shower door is not reversible when in use with the shower tray. The left-handed shower base requires the door to open from right to left and cannot be reversed. Note the location of the fixed glass panel, and sliding door for the left-handed shower tray installation.
- Page 9 Shower Door Installation 1. Measure the width of the shower opening at the top between the 2 walls. Note this is dimension "X". The following equation is used to determine the length to be cut from the rail in order to fit the shower opening. Y = X - 1/2"...
- Page 10 Mark the Top Rail Location ATTENTION: A minimum of two people are required for the next assembly steps. Pre-assembly the top rail (2) onto the fixed glass (3) to locate the mounting points on the wall to your desired location. Painters tape or masking tape in the general location of the of the final installation will aid in marking the wall and floor.
- Page 11 Slide door stopper (1) onto end of top rail (2) See figure 1. The bumpers on door stopper (1) should be positioned on the top of top rail for final installation. Note: One door stopper comes pre-assembled on top rail between fixed glass bolt assembly.
- Page 12 Top Rail Assembly To Shower The set screw The set screw locations in rail end cations in rail en a re not centered. are not centered Assemble per Assemble per drawing. drawing. O mm 14mm 12mm 1. Loosen set screws in both rail ends (5) and remove from top rail (2). See figure 1- 1. Next remove wall mounts (6) from both rail ends (6).
- Page 13 2. Using the appropriate drill bit for your wall surface drill the hole locations with a 5/ 16" diameter drill bit. Install the plastic anchors provided into the drilled holes. Repeat for the other side. See figure 2 3. Attach wall mounts (6) to wall using M5 x 40 screws from Screw Pack 1. Repeat the installation of wall mounts for other side.
- Page 14 Install Wheel Rollers onto the Door Assemble the upper roller assemblies (9) onto sliding door (4) as seen in figure1 Note: The door handle mounting holes should be positioned to left. The upper roller assemblies (9) will be on the outside of sliding door (4 ). The sliding door should be to the inside of shower area.
- Page 15 Hanging the Door ROLLER CAM ADJUSTMENT Rotate the outer edge of roller assembly usin- g ---�� the small hex, while holding the large hex wrench -- in place. End View upper roller assembly top rail (2) bottom roller assembly Suspend the sliding door (4) on the top rail (2). Slide the bottom edge of sliding glass door (4) into the groove of the sliding door track divider (8).
- Page 16 Install the Door Threshold ¾6" 0½" M4X40 The Door Threshold is used to prevent water from seeping out while bathing. Install the threshold according to these instructions. 1. Measure the distance between the fixed glass (3) and the shower wall. See figure 1 2.
- Page 17 NOTE: If your surface is prone to cracking or chipping then it is recommended that you pilot drill first using a smaller drill bit, and then step up to the final size. 4. Using the appropriate drill bit for your tray surface drill the hole locations with a 1 /8"...
- Page 18 Installing the door seals Install the door seals according to the drawing.
- Page 19 Installing the door handle ·-@a- Install the door handle (16) using hardware provided. Follow the assembly sequence seen in drawing.
- Page 20 Final sealing Using Bath & Kitchen silicone sealant, seal the fixed glass (3) along bottom edge on shower base, and side edge along shower wall. Next seal around sliding door track divider (8).
- Page 21 Care and Maintenance As with any other luxury item, maintenance and care are critical to the long lasting quality and enjoyment of your shower door and tray. The proper care and maintenance outlined in this section are necessary to ensure the longevity of the unit.
- Page 22 Product shall be replaced, or in the alternative, repaired, shall be made solely by Aston Global. If a Product is determined to be covered by the above Warranty, Aston Global will ship the replacement part(s) to Customer by either ground shipping or US postal service.
- Page 23 Aston Global and it representatives shall not be liable for any injury, loss, cost or other damages, whether incidental or consequential, arising out of any defect covered by this...
- Page 24 For prompt service, notify the original installer who, in turn, will notify the Aston Global distributor who supplied the Product. If this does not result in prompt service, contact Aston Global, Inc. at the address below with details in support of the warranty claim. For any questions about coverage of this Warranty, contact Aston Global at the address below.
- Page 25 Notes...
- Page 26 Notes...
- Page 27 ESCAPE THE EVERYDAY Customer Service 877-424-9699 If further assistance is required, you have a question or need additional product information, please visit our website: www.astonbath.com...
Need help?
Do you have a question about the Langham SDR978 and is the answer not in the manual?
Questions and answers