Table of Contents
Advertisement
Quick Links
Advertisement
Table of Contents

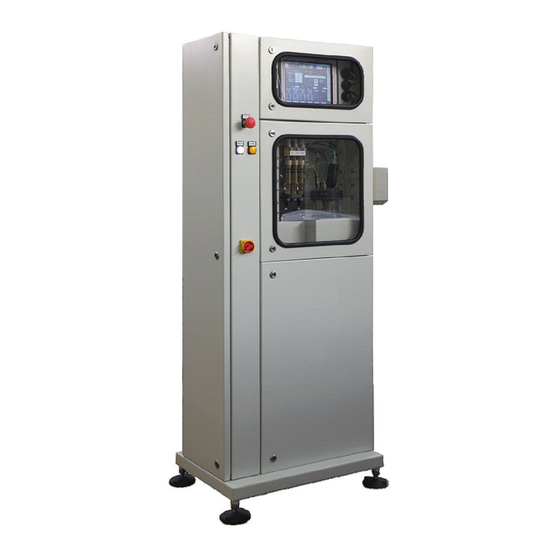
Summary of Contents for Henkel Lineguard AT05
- Page 1 Manual Lineguard® AT05...
-
Page 2: Table Of Contents
Contents SOFTWARE UTILITY AT05 Introduction ......................3 Real Time and Home Menu..................4 2.1. Home Menu ......................8 Setup Session......................9 3.1. Login Access ......................9 3.2. Generic Setup ....................... 10 3.3. Control Device....................... 12 3.4. Port Configuration ....................13 3.5. -
Page 3: Introduction
1. Introduction AT-05 Panel is the interface software installed on the AT-05 Multiparametric Titrator which allows the user to manage and configure appliance functions: Production line monitoring, control and management; Providing data and information on plant performance in real time; Modifying current operating parameters directly on the line;... -
Page 4: Real Time And Home Menu
2. Real Time and Home Menu When the appliance is switched on, after the logo has appeared, if the "Login" identification function has been enabled, the system will ask the user to enter his credentials. After the identification data is entered (or if this step is not required), the main “REAL TIME” session is displayed. - Page 5 indicates a serious error indicates that maintenance is displays levels icon, alarms which stops the appliance requested Contact the icon, maintenance icon from working properly, click Assistance Service on the icon to see which error tank levels indicator icon has occurred. Notify the yellow = pre-alarm: reagent Assistance Service of this almost finished Red = Alarm:...
- Page 6 type of operation (remote/automatic) REM: the appliance accepts the start on the lines exclusively from the panel, the external supervisor or the special input contacts WAIT: the appliance starts on the lines automatically, with a frequency set in the menu (“Wait Time”...
- Page 7 The upper section of this panel holds a number of short-cut icons for calling up the main sessions available in the HOME MENU. The 4 main sessions highlighted by the colored icons are: These icons can be found on each main panel and allow the operator to move from one session to another at any time.
-
Page 8: Home Menu
2.1. Home Menu to access the HOME MENU from which it is possible to access all the main sessions to access the software to exit the software to access the general to exit the software using your own login and change the access settings session and turn off the and password... -
Page 9: Setup Session
3. Setup Session to access the panel to follow the various functions in detail 3.1. Login Access to access the users management panel It is possible to setup 40 users with different passwords and access levels; the data of 10 users is displayed at a time, press the "Next"... -
Page 10: Generic Setup
If the option Confirm Password = NO is selected, upon user access it will suffice to specify the password and seek system recognition just the once, after which all operations associated with the user will be possible without the need for any further confirmation. If the option Confirm Password = YES is selected, each critical operation will involve a password request to make sure that the user operating on the system is in fact the person appointed by the administrator. - Page 11 AT-05 setup: it is possible to assign a name to the appliance you are working on. To do this use the Change button, which allows you to enter a line identification name up to 20 characters long. The name will automatically appear on the various panels. Lines Name: to chance the name of the various lines to be analyzed.
-
Page 12: Control Device
Recipes Confirm.: in this box it is possible to request confirmation to update the active recipe should any modifications have been made during its execution. At this point, the operator may decide whether or not to update the recipe or discard the modifications made because they were introduced only on a temporary basis. -
Page 13: Port Configuration
3.4. Port Configuration to select the serial ports To avoid the risk of malfunctions, the appliance is supplied configured by the factory, DO NOT modify this setting. 3.5. Recipe Editor for production recipe management On the left-hand side you will find the Product Operations box which holds the main operations which can be performed: Capture from line, Send to Line, New Product, Save on Disk, Recall from Disk, Delete Product. - Page 14 to identify the type and name of the product displays the main values of the selected recipe In order to save the parameters received from a certain line or create a new recipe, enter the data by which the system will subsequently identify the product. If the name and number have already been selected, they can be used to save the newly received parameters.
- Page 15 to consult and modify, if necessary, the values acquired from the line or to create new recipes Press the Parameters button to access the section for configuring the variables to be managed in the recipes. The variables which can be selected are active depending on the hardware and software configurations of the analysis equipment.
-
Page 16: Measure/Calibration
to select the recipe to be recalled or deleted to display a panel containing the main data of the selected recipe Using the "Listed by Order" function it is possible to list the products already saved in the program in 2 ways: in alphabetical order according to the name of the product in numerical order, according to the identification number of the product;... - Page 17 instant display of display of the the measured parameters values (depending relative to the on configuration) last calibration activation of the bowl or stirrer drain and start of a new calibration; depending on the washing commands results of the calibration, specific messages and updates of the relative parameters will appear click on the Advanced button...
-
Page 18: Service
4. Service to carry out appliance diagnostics, update the instrument and perform backup operations. N.B: THE SUBMENU ICONS CHANGE COLOR DEPENDING ON THEIR STATUS 4.1. System to access the "diagnostics" menu The various icons allow the user to activate the valves on the manifold or check the levels in the manifold or the air pressure sensor. - Page 19 displays the electrodes analog values activation of the activation of the activation of the activation of the activation of the dilution system extravolume washing system discharge stirrer system system to activate the product/reagent delivery pumps to check the level in the tanks Installation &...
- Page 20 to check the status of the external start inputs to activate the alarm relays to activate the appliance ready output to check the stop titration input to manage the dispenser valves and movements Installation & Programming Manual Page 20...
-
Page 21: Serial Com
to check the serial communication with the I/O devices to check the serial communication with the dispenser Displays the software version MR04 Deletes the appliance's operating parameters WARNING: only perform Function reserved this operation when for the assistance directed to do so by the Assistance Service 4.2. -
Page 22: Info And Miscellaneous
4.3. Info and Miscellaneous to display information on the software being used to save and reset the data stored in the database present in the PC Panel. to save in txt format all the machine operating parameters or make a backup of them to update the various appliance softwares (PC Panel and MR04) to restore in the appliance's electronic section (MR04) all the data saved during the last backup operation... -
Page 23: Data Session
5. Data Session to consult and export the date in graphical and numerical reports 5.1. Data View to display the report in a numerical format It is possible to filter the data relative to a single measurement. To activate filtering, enable the "Filtering"... -
Page 24: Graph View
to select the time interval during which you wish to analyze the data to select which parameters to be displayed 5.2. Graph View to display the report in a numerical format Installation & Programming Manual Page 24... - Page 25 to regenerate and/or delete a portion of the previously found data It is possible to select data using the left-hand mouse button and dragging the dotted lines which appear over the area of interest. At the end of the selection, press the “Redraw” button. to search for data in the newly selected time interval Installation &...
-
Page 26: Registers
6. Registers to check when and how the various calibration procedures were performed, the alarms and events register and the list of operations executed. Installation & Programming Manual Page 26... - Page 27 Installation & Programming Manual Page 27...
Need help?
Do you have a question about the Lineguard AT05 and is the answer not in the manual?
Questions and answers