Table of Contents
Advertisement
Advertisement
Table of Contents

Related Manuals for Helac L20 Series


Summary of Contents for Helac L20 Series
- Page 1 Helical Hydraulic Rotary Actuators L20 Series Service & Repair Manual...
-
Page 2: Table Of Contents
Helical, Hydraulic Rotary Actuators Catalog HY34-1120 Table of Contents L20 Series Service & Repair Manual Table of Contents Introduction Table of Contents ..............................2 Product Introduction..............................3 General Safety Guidelines ............................3 Product Identification ............................... 4 Operation Technology .............................. 5 Tools Tools Required ................................. -
Page 3: Product Introduction
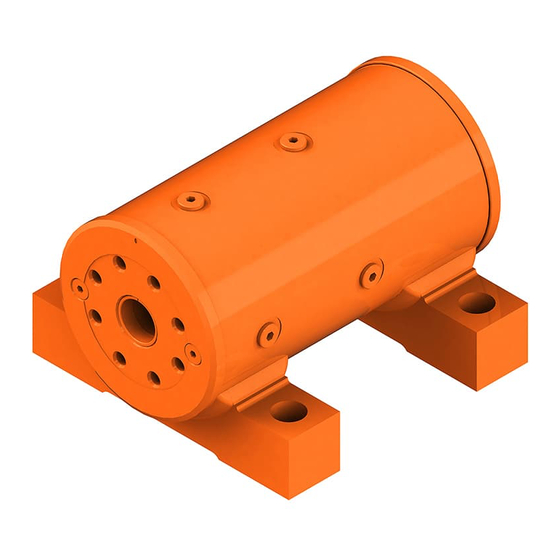
The L20 Series is available in different sizes load bearing capabilities, and rugged, and various mounting configurations (for more reliable performance. Over 1,000 mobile, industrial, construction and mining machinery details see page 4). -
Page 4: Product Identification
Helical, Hydraulic Rotary Actuators Catalog HY34-1120 Product Indentification L20 Series Service & Repair Manual Product Identification Each Helac actuator is individually serial Manufacturer). Typical sample tag locations are numbered. The serial number is a five or six digit seen below. Note that the model number may number and must be provided before parts and/ begin with either "HP"... -
Page 5: Operation Technology
Operation Technology L20 Series Service & Repair Manual Operation Technology The L20 Series rotary actuator is a simple The shaft is supported radially by the large upper radial bearing and the lower radial bearing (see mechanism that uses Helac's sliding spline technology which converts axial piston motion drawings on pages 8 and 9). -
Page 6: Tools Required
Helical, Hydraulic Rotary Actuators Catalog HY34-1120 Tools Required L20 Series Service & Repair Manual Tools Required 14. 15. 9. 10. Several basic tools are required for the 14. SEAL TOOLS disassembly and reassembly of the actuator. The Removal and installation of seals and wear tools and their intended functions are outlined guides. -
Page 7: Spare Parts
Spare Parts Technical Support Technical support is available from Helac Corporation, Monday through Friday 7 am to 4 pm Pacific Standard Time by calling 800-327-2589. If possible, please have the serial number of the actuator available. (The serial number is stamped into the housing of the actuator-see page 4). -
Page 8: Assembly Drawing
Helical, Hydraulic Rotary Actuators Catalog HY34-1120 Assembly Drawing L20 Series Service & Repair Manual Assembly Drawing Typical L20 Series Actuator Clevises May Be Different 420.1 420.2 VIEW A-A 90° Parker Hannifin Corporation Helac/Cylinder Division www.helac.com Enumclaw, Washington USA... -
Page 9: Exploded View
Helical, Hydraulic Rotary Actuators Catalog HY34-1120 Exploded View L20 Series Service & Repair Manual Exploded View Parker Hannifin Corporation Helac/Cylinder Division www.helac.com Enumclaw, Washington USA... -
Page 10: Parts List
Helical, Hydraulic Rotary Actuators Catalog HY34-1120 Parts List L20 Series Service & Repair Manual Parts List Spare Parts Spare parts must be ordered through the vehicle/machine OEM. Seals and bearings are available as complete kits only. In order to obtain the correct parts, it is essential to provide the serial number for the actuator to be repaired. -
Page 11: Disassembly
Helical, Hydraulic Rotary Actuators Catalog HY34-1120 Disassembly L20 Series Service & Repair Manual Before Disassembly Before Disassembly All numbers that appear in parenthesis ( ) refer to items in parts list on page 10. Inspect the actuator for corrosion prior to disassembly. - Page 12 Helical, Hydraulic Rotary Actuators Catalog HY34-1120 Disassembly L20 Series Service & Repair Manual Disassembly Remove the end cap (04) and carefully 4. Remove the lock pins using a screw extracting tool such as an Easy Out set aside for later inspection.
- Page 13 Helical, Hydraulic Rotary Actuators Catalog HY34-1120 Disassembly L20 Series Service & Repair Manual Disassembly 10. Prior to removing the shaft (02), use a Every actuator has two sets of small punched timing marks that indicate timing felt marker to clearly indicate the timing between shaft and piston sleeve (03).
- Page 14 Helical, Hydraulic Rotary Actuators Catalog HY34-1120 Disassembly L20 Series Service & Repair Manual Disassembly 13. To remove the piston (03) use a rubber 16. Remove the wear guide (302) from the end cap (04) and shaft (02). mallet and a plastic mandrel so the piston and housing bore are not damaged.
- Page 15 Helical, Hydraulic Rotary Actuators Catalog HY34-1120 Disassembly L20 Series Service & Repair Manual Disassembly 19. Remove the O-ring (206) from its groove in the end cap (04) and shaft (02). 20. Remove the outside diameter piston seal (202) from the piston.
-
Page 16: Inspection
Helical, Hydraulic Rotary Actuators Catalog HY34-1120 Inspection L20 Series Service & Repair Manual Inspection Prior to assembly of actuator, these steps must be closely followed to insure proper operation of the actuator. Clean all parts in a solvent tank and dry with compressed air prior to inspecting. -
Page 17: Assembly
Helical, Hydraulic Rotary Actuators Catalog HY34-1120 Assembly L20 Series Service & Repair Manual Assembly Gather all the components and tools into one location prior to re-assembly. Use the Avoid personal injury and machinery damage: cut away drawing to reference the seal... - Page 18 Helical, Hydraulic Rotary Actuators Catalog HY34-1120 Assembly L20 Series Service & Repair Manual Assembly Using a seal tool (see Tools Required on Install the inner T-seal (200) into the appropriate groove in the piston (03). page 6) install the main pressure seal (205) onto shaft (02) and end cap (04).
- Page 19 Helical, Hydraulic Rotary Actuators Catalog HY34-1120 Assembly L20 Series Service & Repair Manual Assembly Insert the piston (03) into the housing (01) 10. Looking into the bore from the opposite as shown, until the outer piston seal (202) end of the housing (01) be sure the timing contacts the inside housing bore.
- Page 20 Helical, Hydraulic Rotary Actuators Catalog HY34-1120 Assembly L20 Series Service & Repair Manual Assembly 14. Install the stop tube (400) onto the shaft 12. Looking at the actuator from the end opposite the shaft flange, use the existing end if necessary. Stop tubes are an...
- Page 21 In most cases the original holes for the lock pins will align. 18. Insert the lock pins (109) provided with the Helac seal kit into the holes with the dimple side up. Then, using a punch, tap the lock pins to the bottom of the hole.
-
Page 22: Grease Thrust Washers
Helical, Hydraulic Rotary Actuators Catalog HY34-1120 Greasing Thrust Washers L20 Series Service & Repair Manual Greasing Thrust Washers After the actuator is assembled but before it is put into service, the thrust washer area must be packed with Lithium grease. -
Page 23: Testing The Actuator
Helical, Hydraulic Rotary Actuators Catalog HY34-1120 Testing the Actuator L20 Series Service & Repair Manual Testing the Actuator If the equipment is available, the actuator should be tested on a hydraulic test bench. Avoid personal injury and machinery damage: The breakaway pressure — the pressure at Read the Service and Repair Manual which the shaft begins to rotate —... -
Page 24: Installation And Bleeding
Helical, Hydraulic Rotary Actuators Catalog HY34-1120 Installation and Bleeding L20 Series Service & Repair Manual Installation and Bleeding TYPICAL CONFIGURATION OF Avoid personal injury and ACTUATOR USED FOR WORK To avoid injury or damage machinery damage: to product: Read the Service and Repair Manual... -
Page 25: Troubleshooting Guide
Re-build the actuator. Use fluid that is compatible with 6. Swollen seals and composite bearings caused by incompatible hydraulic fluid seals and bearings. Contact Helac for more information (Standard actuators only) 7. Air in actuator Purge air from actuator. See bleeding procedure starting on page 24. -
Page 26: Warranty Information
In no event shall Helac Corporation be liable for any incidental or consequential damages. Helac Corporation reserves the right to make changes in the design or construction of any of its products at any time without incurring any obligations to make changes or alterations to products previously sold. - Page 27 Helical, Hydraulic Rotary Actuators Catalog HY34-1120 Notes L20 Series Service & Repair Manual Notes Parker Hannifin Corporation Helac/Cylinder Division www.helac.com Enumclaw, Washington USA...
- Page 28 11/17 / Catalog HY34-1120 Parker Hannifin Corporation Helac/Cylinder Division 225 Battersby Avenue Enumclaw, WA 98022 USA phone (360) 825-1601 fax (360) 825-1603 www.helac.com...
Need help?
Do you have a question about the L20 Series and is the answer not in the manual?
Questions and answers