Table of Contents
Advertisement
Advertisement
Table of Contents

Subscribe to Our Youtube Channel
Summary of Contents for SE3D r3bEL mini
- Page 1 User Guide Version 1.0...
-
Page 2: Table Of Contents
User Manual Contents r3bEL mini Overview ....................5 Safety Precautions ....................6 2.1 General Safety ....................6 2.2 Protection ......................6 Accessory Checklist ....................7 3.1 Additional Items ....................7 Software Installation ....................8 4.1 USB Control ...................... 8 4.1.1 Step 1: Download Printer Control Software .......... - Page 3 User Manual 9.3 Cleaning the printer ..................45 Advanced Settings .................... 45 10.1 G-codeAdjustments ..................45 10.2 G-code Customization ..................46 Troubleshooting guide ..................48 Technical support ....................50 Specifications ....................51...
- Page 4 SE3D waives all liability for any indirect, incidental, collateral, exemplary, punitive, special or consequential damages, including loss of use or loss of profits, even if SE3D has been advised of the possibility of such claims or damages. SE3D reserves the right to modify or update without obligation to replace any Product delivered prior to any such change.
-
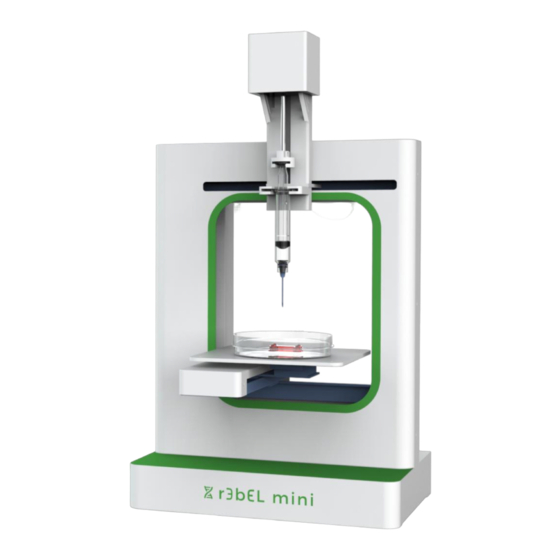
Page 5: R3Bel Mini Overview
User Manual 1 r3bEL mini Overview Printer axis... -
Page 6: Safety Precautions
User Manual 2 Safety Precautions Please read this section carefully before using the printer. 2.1 General Safety ● The r3bEL bioprinter should only be used with the supplied power adapter to avoid the risk of fire or damage to the bioprinter. -
Page 7: Accessory Checklist
User Manual 3 Accessory Checklist Your r3bEL mini bioprinter will arrive with the following accessories: 1. User Guide and bed templates ● One petri dish bed template ● One well-plate bed template 2. Power supply cable 3. Accessory bag •... -
Page 8: Software Installation
User Manual 4 Software Installation You can control the r3bEL mini bioprinter through a USB cable or wirelessly through Wi-Fi. Follow the instructions according to the operating system you have on your computer and the choice of USB or Wi-Fi connection to the r3bEL mini bioprinter. -
Page 9: Step 2: Download Arduino Ide
User Manual 4.1.2 Step 2: Download Arduino IDE You must install the Arduino software before connecting to the printer, so that the correct device drivers are installed. For installation of Arduino IDE, you must go directly to their website: 1. - Page 10 User Manual 4. Once the file is downloaded, the contents of the folder must be extracted, which can be done in two ways: a. Find the file in your Download folder. Right-click and select “Extract All,” then select a folder destination and click “Extract.”...
-
Page 11: Step 3: Download Slic3R
You should find the Slic3r program in the Programs to Download zip file when you downloaded Pronterface earlier. To download the Config files for Slic3r settings, go to Startup guide – r3bEL mini and click on the Config files folder to download this folder. Extract the contents to a folder in your computer. - Page 12 User Manual 1. You will first be prompted with the Welcome screen. Click Next. 2. For G-code flavor, select RepRap (Marlin/Sprinter/ Repetier). 3. For Bed Size, use the default x = 120 and y = 130 setting since our print bed...
- Page 13 User Manual 4. Set the nozzle diameter to 0.5 mm. 5. Set the filament diameter to 3 mm. 6. Set extrusion temperature to 0°C since there is no heating element on the r3bEL mini bioprinter tool head. 7. Set bed temperature to 0...
- Page 14 User Manual Once you have completed the configuration wizard, the Slic3r program should look like this: Now, to load the “lotion” config file by following these steps: Note: we use lotion as the mock biomaterial to perform baseline tool calibration 1.
- Page 15 We do not recommend using this config file to print any model at this point. Each material that you will use for the r3bEL mini bioprinter will require its own unique set of parameter settings. You will learn more about these features and parameters...
- Page 16 User Manual If you are a previous 3D printer user and already have Slic3r installed on your computer, please note the warning below: WARNING Do not use the default configuration settings in Slic3r. The default settings will cause the extruder to heat to high temperatures and melt your syringe.
- Page 17 User Manual 3. You should now see that your printer, filament and print settings on the right panel have all changed to Lotion.ini instead of the default settings. 4. Save the lotion settings in each Slic3r tab so that it...
-
Page 18: Setting Up Pronterface
Familiarize yourself with the interface by recognizing each feature and function as listed below: Port Selection X, Y, Z Control Panel Heater Control (Note: this feature is not used on the r3bEL mini) Extruder Control Custom Button Area Command Line Command Window To connect the bioprinter to Pronterface, select the proper COM port. - Page 19 To test the motors, use the circular control pad to move the X and Y motors. The 0.1, 1, 10, and 100 increments represent actual distances in millimeters. X-Y-Z coordinate system on r3bEL mini X-coordinate: The X-motion moves the extruder head left or right. +X will move the extruder head to the right relative to the user facing the front of the printer and –X will move the...
-
Page 20: Custom Buttons
Proceed to create these custom buttons for r3bEL mini. To add a button, click on the “+” box in the custom button area (you will find this at the bottom of the yellow gridded print area shown below). - Page 21 User Manual ROW 2 Button title: Button title: Command: G1 X-48 Y-52 F6000 Command: G1 X-48 Y52 F6000 Color: #66b3ff Color: #66b3ff Button title: Button title: Command: G1 X48 Y52 F6000 Command: G1 X48 Y-52 F6000 Color: #66b3ff...
-
Page 22: Understanding The Custom Button Functions
Function Set Home This sets a new home (0,0,0) position for your r3bEL mini printer. This function serves as a manual override to the default setting, such as for adjusting the home position based on differences in needle tip heights. Note that once you turn off the printer or use the Home All function, the home position will restore to the factory default. -
Page 23: Connect Via Wi-Fi
Windows. 1. To download the Duet driver files, go to the Startup-guide – r3bEL mini, scroll to the “Programs to download” section and download the Duet Driver file. Unzip the two files (duet.inf and duetinf.cat) to a local folder on your PC. - Page 24 User Manual Right-click on the Device and select Update Driver Software as shown below. 5. Click on Browse my computer for driver software option and choose the folder where you extracted the files from the DuetWiFi driver.zip folder and click on Next.
- Page 25 User Manual 6. You will get a Windows installer pop-up window click on Install and wait until it says Windows successfully updated the driver software and click on close. 7. Once you close the window you should see that the Unknown device should show up as...
-
Page 26: Configuring The Wi-Fi
User Manual 5.2 Configuring the Wi-Fi To setup the Wi-Fi connection you must download YAT terminal (for Windows) or Coolterm (for macOS) depending on the operating system of your computer. Windows users can follow the instructions listed under section 5.2.1 YAT Terminal and macOS users can skip to section 5.2.2 for instructions. - Page 27 User Manual 4. You will now be able to send commands to the board by typing it in the Send Text command box. Send the following command: M552 Wait until you get the "Wi-Fi module is idle" reply:...
- Page 28 User Manual 5. Next, send the following command to save the access point parameters: M587 S”Name of the Wifi you want to connect to” P”Password for the network” Note: The Wi-Fi module operates at 2.4 Ghz not 5 Ghz. Make sure you enter the details for the 2.4 Ghz network.
- Page 29 User Manual 6. To verify that the network you entered has been stored, send: M587 This command will display a list of networks it has been connected, the last one is the most recent network. You can set up connection to additional access points in the same...
- Page 30 User Manual 7. Send the following command to connect to the access point: M552 S1 After a few seconds, it should confirm the connection and give you an IP address. If you have configured multiple access points and more than one is in range, the bioprinter will connect to the strongest one.
-
Page 31: Coolterm (Macos)
User Manual 5.2.2 Coolterm (macOS) Coolterm is used to configure the Wi-Fi module on the bioprinter for MacOS users. If you are running a MacOS operating system follow the steps below: 1. Download the MacOS version of the Terminal Emulator program Coolterm from the link http://freeware.the-meiers.org/... - Page 32 User Manual 4. Choose the Terminal section and under Terminal Mode choose the Line mode and click on OK.
- Page 33 User Manual 5. Click on Connect in the main window and send the following command and wait till you get the output “Wifi module is idle”: M552...
- Page 34 User Manual 6. Next, send the following command to save the access point parameters: M587 S”Name of the Wi-Fi you want to connect to” P”Password for the network” Note: The Wi-Fi module operates at 2.4 Ghz not 5 Ghz. Make sure you enter the details for the 2.4 Ghz network.
- Page 35 User Manual 7. To verify that the network you entered has been stored, send: M587 This command will display a list of networks it has been connected, the last one is the most recent network. You can set up connection to additional access points in the same...
- Page 36 User Manual 8. Send the following command to connect to the access point: M552 S1 After a few seconds, it should confirm the connection and give you an IP address. If you have configured multiple access points and more than one is in range, the bioprinter will connect to the strongest one.
-
Page 37: Web Control Interface
Enter that IP address you got when you configured the Wi-Fi in the browser address bar on your PC, tablet or smartphone to connect. The web control works best in Google Chrome and Firefox. When you connect, it will prompt you for a password, enter se3d and hit enter. The interface will look like: 1. -
Page 38: Setting Up For Printing
User Manual 6 Setting up for Printing 6.1 Loading and Unloading Syringes Before loading or unloading syringes, ensure that the r3bEL mini bioprinter is connected to your computer via USB and open the Pronterface program. 6.1.1 Loading a syringe Insert the barrel flanges into the barrel flange slot and try to align the syringe plunger to fit in the slot in the extruder (see figure below). -
Page 39: Your First Print
Set Z0 button. Download the Bone mini-5ml-22g.gcode file from the SE3D portal if you haven’t already done so. This file can be found in the G-codes files section in the Startup Guide – r3bEL mini. - Page 40 User Manual In the top toolbar of Pronterface, click Load File. Choose the Bone mini-5ml-22g.gcode file. To load and print your own files, simply use the Load File button, as shown in this example. Click the Print button to start your print in Pronterface. The print should look similar to the picture below.
-
Page 41: Shutdown Procedure
User Manual 8 Shutdown Procedure 1. Click the Disconnect button on Pronterface, then exit the application. 2. Unplug the microUSB cable from your computer. 3. Turn off the bioprinter. EMERGENCY SHUTDOWN: In the event of an emergency, use the power switch on the back of the bioprinter. -
Page 42: Maintenance
User Manual 9 Maintenance 9.1 Calibration Guide The HOME position is set to be the center of the bed, and is defined as (0, 0, 0). If the X, Y and Z axes did not home properly after you received and set up your bioprinter, or if you wish to recalibrate the bioprinter, follow the steps below to properly set new XYZ coordinates for your printer. - Page 43 User Manual Click the Get Position custom button to obtain the actual physical position of (0, 0, 0) relative to the previous incorrect position of (0,0,0). For example: >>>M114 SENDING:M114 X:1.1 Y:0.7 Z:-0.9 ……………… Record the results below: Turn off the bioprinter and unplug the microUSB cable.
-
Page 44: Resetting Bed Leveling Plane
User Manual 9.2 Resetting Bed Leveling Plane To reset the bed levelling plane, you will need to be connected to your bioprinter in Web Control and have your microSD card adapter ready. Home all axes by clicking the Home All button in Pronterface. This will bring the extruder to (0,0,0). -
Page 45: Cleaning The Printer
3D printer what to do and how to move. This section outlines the relevant commands used to control the r3bEL mini bioprinter. A full reference guide for G-codes can be found at http://reprap.org/wiki/G-code. -
Page 46: G-Code Customization
User Manual G4: Wait Usage G4 Pnnnn Parameters Pnnn Time to wait, in milliseconds Example G4 P2000 (Wait 2000 milliseconds (2 seconds) before next command) G21: Set Units to Millimeters Example G21 (The software default is in millimeters, but this is still good to know) - Page 47 User Manual Below is a table of recommended extrusion commands to have a droplet release from the needle tip for different materials. All testing was done for printing a 3x3 array using a 22-gauge needle tip. The parameters being changed are extrusion volume (G1 E### F###), extrusion speed (G1 E### F###), retraction volume (G1 E-### F###), retraction speed (G1 E-### F###), and wait time between drops (G4 P####).
-
Page 48: Troubleshooting Guide
Solution No power Is the small green light on the power supply turned on? 1. Contact SE3D technical support for replacement power supply. 1. Check wires connecting the V+ and V- terminals on the power supply to the controller board. Secure any loose connections. - Page 49 User Manual For further issues, you will need to use the Arduino IDE to troubleshoot: 1. With the power to the printer turned off, connect the controller board to your computer. 2. Select the “Arduino Due (Native USB Port)” from the list of board (Tools >...
-
Page 50: Technical Support
User Manual recommend that you consult one of our technical staff who can provide recommendations and help you through the process. Printing issue related to For printing issues related to droplet not forming or 2 droplets droplets being released as one time, please reference the G-code Adjustment section above. -
Page 51: Specifications
User Manual 13 Specifications Print bed area 120 mm x 130 mm Printer dimensions 18.41 cm x 25.4 cm x 34.3 cm WEIGHT AND DIMENSIONS (7.25 in x 10.0 in x 13.5 in) Printer weight 4.5 kg (10 lbs)
Need help?
Do you have a question about the r3bEL mini and is the answer not in the manual?
Questions and answers