Table of Contents
Advertisement
Advertisement
Table of Contents

Subscribe to Our Youtube Channel
Related Manuals for urban drivestyle UNIMOKE


Summary of Contents for urban drivestyle UNIMOKE
- Page 1 USER MANUAL UNIMOKE e-Bike (PEDELEC ) Original Instructions...
- Page 2 User manual revision 13/08/2018...
-
Page 3: Table Of Contents
8. Before every ride ......... 19 9. Safe riding ............ 21 10. Passenger and Cargo Transport ....23 11. Transporting your UNIMOKE .......27 12. Basics of Pedelec/ebike....... 28 13. Battery charge and recommendations ..29 14. Tips for Riding a Pedelec ......32 15. -
Page 4: Introduction
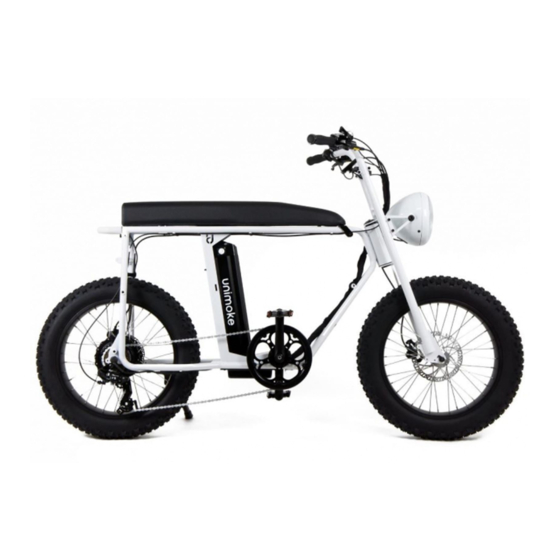
The UNIMOKE is a cool and tough crossover urban utility e-bike that blends the amazing looks of a vintage moped with the latest of e-bike technology. Its super strong steel frame, high built quality and extra long seat makes UNIMOKE the perfect e- bike for heavy and tall riders and for biking with children. -
Page 5: General Information
CAUTION ! This symbol marks sections of high importance . Neglecting this information may lead to injury or damage to your UNIMOKE WARNING ! This symbol marks sections of extreme importance . Neglection of this information may lead to severe injuries or death. - Page 8 UNIMOKE PART LIST...
-
Page 9: Legal Details
Contact: service@urbandrivestyle.com / Website: urbandrivestyle.com Marking on Bike If your UNIMOKE is a pedelec, it will have a CE frame sticker which confirms that it has passed all tests outlined in EN 15194. Declaration of Conformity This user manual complies with the requirements of EN 15194 and Machinery Directive EC/2006/42. - Page 10 S t V Z O ( G e r m a n y ) The lighting system needs to have the K-number mark to be legal on public roads. The front and rear lights must be powered by the same power source. The front light projection center must be no more than 10 meters from the front of the bike on the road.
-
Page 11: Intended Use
Maximum carrying capacity = Rider weight + Cargo weight If you have a fstandard UNIMOKE , the standard carrying capacity is 102 kg (204lbs ). If the capacity stated here differs from your pedelec’s CE Frame Sticker’s, follow the CE Frame Sticker... -
Page 12: Unpack And Adjusting Handlebar
Handlebar adjustment The handlebars of your UNIMOKE are folded inwards for transport. To adjust them, sit on the bike in a comfortable position and HORIZONTALLY unfold the handle bars until you find your most comfortable setting. Fasten ALL 6 SCREWS TIGHTLY to fix the position of your handlebars. - Page 13 Use recommended tightening torque values stated in chapter 15. The UNIMOKE pedals are designed to FOLD when your bike tips over. To unfold, press on the pedal towards the frame and fold it back until it snaps into place. Tighten the...
-
Page 14: Before The First Ride
R e a d t h e M a n u a l b e f o r e Y o u R i d e Spend some time to understand how to operate and use your new UNIMOKE bike before hitting the road. Operating manuals for individual components and folding instructions for your specific bike are supplied together with this manual. - Page 15 Brake Pads should remain firmly in place. Does your UNIMOKE feel solid? If you feel a clunk with each forward or backward movement of the bike, you probably have a loose Headset. Have your dealer check it. Note that for certain Disc Brakes you may feel a bit of play when attempting to rock the bike back and forth.
- Page 16 GEARS Test ride in a safe area away from traffic to familiarize yourself with the function of the Gear Shifters and how to upshift and downshift. Check that indexing (shifting from gear to gear) is crisp and that you are able to shift into the lowest and highest gears without the Chain skipping.
- Page 17 Unimoke comes standard with hydraulic disc brakes both front and rear. Disc brakes consist of the brake calliper, the rotor/ disk, the hyraulic tubing and the brake lever. Actuating the brake lever compresses the hydraulic pistons through hydraulic pressure pushing the brake pads against the rotor.
- Page 18 The best riding position is the one that you are most comfortable in, but a badly adjusted bicycle may lead to back or joint pain and reduce your control . The UNIMOKE features a very long seat allowing riders from 160 cm to 185 cm to find their perfect position by sliding for and aft on the seat .
-
Page 19: Before Every Ride
8. Before Every Ride Be sure to check the following before every ride: Electrical System Check that the battery is seated properly in the carrier on the frame and fully plugged in. Check the controller display for any warnings or error messages. Resolve the error before riding. Check that the battery is adequately charged for the length of ride you are planning to do. - Page 20 General reccomendations before each ride, it is essential that make sure you check the following points (cont.): Brake: Check for wear on the brake pads. Test the brakes at a standstill. Pull on the brake levers and make sure the levers do not touch the handlebars and brakes are acting correctly.
-
Page 21: Safe Riding
, so you need lights to make sure you are seen with all around visibility . If you use your UNIMOKE on public roads, make sure you have front and rear lights in working condition when necessary by local rules and regulations Using Brakes Braking distances increase in wet weather or under heavy load, so brake more gently and earlier under those circumstances. - Page 22 WARNING! Do not manipulate the battery, controller or engine. Manipulating electronics, battery or controller may lead to permanent damage, short circuits, fire or even explosion of your battery. Do NOT temper with electronic parts or attempt to “tune” or speed up your UNIMOKE...
-
Page 23: Passenger And Cargo Transport
Kickstand and Parked Weight If your UNIMOKE is equipped with a kickstand, it can make loading and unloading easier. However, please note the kickstand’s maximum weight limit. When loading cargo/passengers onto your pedelec with the kickstand down, do not exceed the maximum weight limit of the kickstand. - Page 24 Approved Child Seat The Thule Yepp Maxi Easyfit has been tested to work with your UNIMOKE pedelecs with long seat extension racks An additional adapter rack on the long seat extension rack allows for 99% compatibility with other EN14344 compliant seats Safety and Precautions Children –...
- Page 25 PASSENGER GUIDELINES UNIMOKE was designed to allow occasional double seat riding on flat and dry surfaces for short urban distances. It is not designed as a everyday two-place vehicle and regular heavy load/ passenger riding will rsult in higher wear and tear of your bikes components such as brakes, spokes, drivetrain and engine/ controller.
- Page 26 CARGO GUIDELINES Riding With Cargo If the rear of the pedelec is fully loaded, test that the front wheel does not lift off and make the pedelec tip over. Cargo Positioning Position cargo so that the center of gravity is as close to the centerline of the pedelec as possible. Secure the cargo as close to the center of the bike as possible.
-
Page 27: Transporting Your Unimoke
Your Unimoke can be transported with a standard roof or rear-mounted bicycle carrier provided it is under the maximum load capacity of the bike carrier. To reduce the weight, remove the battery from your Unimoke and place it inside the vehicle. -
Page 28: Basics Of Pedelec/Ebike
fit your specific style and road topographies. Unimoke has 9 assist levels (Assist level : 1~9), ranging from "0" (no assist), "1" (minimum assist) to "9" (maximum assist). Always choose the lowest level of assist neccesary for comfortable riding and use you gears correctly for maximum range and durability. -
Page 29: Battery Charge And Recommendations
, even if the plug fits. UNIMOKE batteries can be charged on-bike or off-bike. When your UNIMOKE battery has reached the end of its service life, it should be treated as hazardous waste material and should not be disposed of in normal household trash. Ask your dealer for advice on proper disposal. Batteries must not be disposed of in landfills... - Page 30 CHARGING THE BATTERY PACK MOUNTED ON THE BICYCLE 1. Ensure the battery key is in position LOCK -OFF or UNLOCK. Connect the power plug of the battery charger to a household power outlet ( top circled plug in side image). Always use the supplied or recommended Li - Ion battery charger.
- Page 31 CHARGING THE BATTERY PACK 1. Switch the battery key to UNLOCK position. 2. Take out the battery key to allow extration from the bike. 3. Fold the seat up and pull up the battery from its folding handle along the mounting rail until it is outside the bicycle, then fold the seat down again.
-
Page 32: Tips For Riding A Pedelec
When the controller is on, the power assist will be applied immediately when you step on the Pedal. It is, therefore, recommended to mount your Unimoke with controller off. After you are seated,make sure no weight is on the pedals to prevent accidental movement, then turn on the controller. - Page 33 Riding without Power Assistance Your UNIMOKE is designed to be ridden normally like a conventional bike if the power assist is turned off. If you are going downhill or want to extend your range you can turn off the assistance but keep the display on to watch your speed. However, if the battery runs empty during your ride, the lights will not function since they are connected to the motor battery.
-
Page 34: Service
E-bikes are more heavy loaded and faster than normal bikes and therefore have a higher demand for maintenance. Due to the higher weight and faster speeds, your UNIMOKE requires more attention to safety and maintenance than a normal bicycle. Always check the condition of your bike before riding and never ride with defective components like brakes, engine or... - Page 35 Chain, Cranks, and Cables UNIMOKE drivetrain has an Internal hub motor. The drivetrain consists of the Cranks (1), Chainring (2), Cassette/Freewheel (4), Chain (5), and Rear Derailleur (7). Bicycle gears are numbered from 1 upwards, with 1 being the lowest and easiest gear. The lower gears are used for climbing and the higher ones are for descending.
- Page 36 Use light detergents and dust off the bike carefully to avoid scratches Do not clean your UNIMOKE using a pressurized spray or steam because water can be forced into sealed areas and damage your bike.
- Page 37 Brake check: 1. Pull on the brake levers. At the end of their travel, they should not be in contact with the handlebars. 2. Lift and spin the wheels. They should spin freely. If this is not the case, you will need to adjust the brake caliper. This is a complex operation that needs a lot of care: loosen the clamping bolts, fully tighten the brake lever and tighten the clamping bolts.
- Page 38 Wheels and tires Repairing a punture or flat tire, is performed the same way as with a standard bicicle. If you have any doubt take the bike to a bike mechanc for tube repair or replacement. Maximum tire pressure as recommended by the vehicle manufacturer: 200 kPa WARNING: Never inflate a tire beyond the maximum pressure marked on the tire’s sidewall or the wheel rim.
-
Page 39: Torque Settings
16. Torque Settings Torque Values are standard measures of how much you must tighten a bolt and are listed below. Recommended Tightening Values - Torque Values... - Page 40 In case the torque setting value is not mentioned in the table please refer to these general values: WARNING! If the torque settings are not respected, you run the risk of a sudden break of either one or several components on your bicycle.
-
Page 41: Service And Maintenance Schedule
17 . UNIMOKE Service and Maintenance Service Intervals Break-in All bikes go through a normal break-in period. Your bike will last longer and work better if you break it in before riding it hard. We recommend all riders get a quick tune-up one month after purchase so that the dealer can adjust cables and other key parts. - Page 42 UNIMOKE Service Record Inspection nr Inspection nr Inspection nr Within 1 month of purchase or 200 km Date Date Date Work Done Work Done Work Done Replaced or Repaired Parts Replaced or Repaired Parts Replaced or Repaired Parts Stamp/Signature of dealer...
- Page 43 UNIMOKE Service Record Inspection nr Inspection nr Inspection nr Date Date Date Work Done Work Done Work Done Replaced or Repaired Parts Replaced or Repaired Parts Replaced or Repaired Parts Stamp/Signature of dealer Stamp/Signature of dealer Stamp/Signature of dealer...
-
Page 44: Warranty
Should a product defect become known, the Owner should stop riding the bicycle and transport the bike or part(s) to an Authorized Urban Drivestyle Dealer for warranty repair (within the applicable warranty period). - Page 45 Any part that is replaced pursuant to this warranty will be replaced by parts of the same or similar design. However, Tern reserves the right to replace defective parts with other parts of different design or color manufactured by or on behalf of Urban Drivestyle provided that such replacement will not reduce the function of the original part.
-
Page 46: Declaration Of Conformity
final user. The declaration is no longer valid if the product is modified. Herewith, we declare, that your UNIMOKE Pedelec complies with all essential requirements of the Machinery Directive 2006/42/EC and Directive 2004/108/EC relating to electromagnetic compatibility.
Need help?
Do you have a question about the UNIMOKE and is the answer not in the manual?
Questions and answers