
Related Manuals for Sanuvox ASEPT.1X

Summary of Contents for Sanuvox ASEPT.1X
- Page 1 INSTALLATION INSTRUCTIONS FOR THE ASEPT.1X Patent pending INSTALLATION QUESTIONS? CALL SANUVOX 1-888-726-8869 Version A 11/2017...
- Page 2 INCLUDED ITEMS INCLUDED ITEMS A. ASEPT.1X Unit (1) B. Cover (1) C. Lamps (2) D. Detectors (2) E. Screws (2) F. Gloves (1) G. Magnetic Contact (1) NOTES...
- Page 3 CAUTION Only certified electricians should be installing and maintaining this unit. The lamp change can be performed by regular maintenance staff. All other operations must be performed by trained and certified electricians. Please read instructions, name plates carefully. CHOOSE APPROPRIATE INSTALLATION LOCATION...
- Page 4 INSTALLATION INSTRUCTIONS FOR THE ASEPT.1X Electrical wiring connection 1. Choose which one of the 5 holes knock-outs will be used where your electrical connection will be inserted (3 in the back and 1 on each side) of the unit. 2. Open accordingly (½ or ¾ inch npt).
- Page 5 INSTALLATION : STEP BY STEP Unit mounting installation 1. Drill 2 holes 31 inches apart center to center at a minimal distance of 8'' from the frame of the door. - For optimal performance the unit should be installed at a minimum of 84'' from the floor. 31 po.
- Page 6 INSTALLATION : STEP BY STEP 4. Insert the base of the unit on the screws previously mounted on the wall. Tighten the screws to make sure the unit is safely secured against the wall. 5. The grey wire for the door interrupter is inside the base of the unit. a.
- Page 7 INSTALLATION : STEP BY STEP 8. Connect line black, neutral white and ground green to your electrical connection. ONLY CERTIFIED ELECTRICIANS SHOULD BE INSTALLING THE UNIT. 9. Install the cover on the unit (make sure that the motion detectors are clear when you are closing the cover).
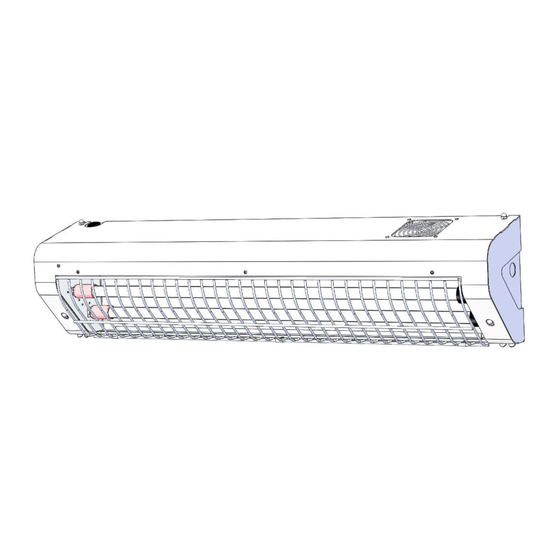
- Page 8 INSTALLATION : STEP BY STEP 10. Install the lamps inside the unit. a. Please use the gloves supplied with the unit to manipulate the lamps in order not to leave any oil imprint on the surface of the glass. b. Remove the screw on the top side that holds the front grill and lower the grill towards the bottom of the unit. c.
Need help?
Do you have a question about the ASEPT.1X and is the answer not in the manual?
Questions and answers