Advertisement
Advertisement
Table of Contents

Related Manuals for WitGarage GD801C

Summary of Contents for WitGarage GD801C
- Page 1 Installation Manual...
- Page 2 Thank you for purchasing WitGarage! Installation will be quick and easy and will take about 10 minutes to complete. For more installation instructions, please visit our website or email to us. Website: http://www.witgarage.com Product Return: return@witgarage.com Customer Service / Support Email:...
-
Page 3: Table Of Contents
2) Install Mobile App & Create Account ......9 3) Add witgarage device to app ........10 4) Test App settings ............18 5) Mount WitGarage to garage door opener ....20 6) WitGarage system test ..........24 WitGarage app introductions ..........26 WitGarage Alexa skill setup .......... -
Page 4: Introduction
INTRODUCTION WitGarage is a companion device to an existing garage door opener which makes your garage door be smarter and securer. It allows multiple users to control and monitor their garage door from anywhere in the world. You can also open and close garage door by voice command. -
Page 5: Contens Of The Box
CONTENTS OF THE BOX The WitGarage box is packaged with the following parts: 1) GD801C(WitGarage controller) 2) GD801S (WitGarage door sensor) 3) User manual Note: When unpacking, please make sure all these items are included in the box. -
Page 6: Keys & Leds
Switch the mode of Wi-Fi configuration If you havn’t configured Wi-Fi setting of GD801C, and the led indicator of GD801C blinks fast with red color, it is “Smart config”. Long press key until the led indicator of GD801C blinks slowly with red color then release,it changes to “AP MODE”. - Page 8 2) Led indications Led indicator blinks fast with red color The Wi-Fi setting of GD801C has not been configured and the mode is “Smart config”. Led indicator blinks slowly with red color The Wi-Fi setting of GD801C has not been configured and the mode is “AP Mode”.
-
Page 9: Installation
Please follow the steps as detailed in the order below for best results. We recommend seriously that put all parts of WitGarage on your table and finish step 1, step 2, step3, step4 first which will make your installation easier and save your time. - Page 10 How to check the compatibility yourself? Please read the garage door opener user manual document and check: Can your garage door opener be controlled by wall console? -----Yes. It is compatible with witgarage. Go to step 2. -----No. It is incompatible with witgarage.STOP and contact with us.
-
Page 11: Install Mobile App & Create Account
Step 2 INSTALL MOBILE APP & CREATE ACCOUNT Install app follow next steps. 1) Download and install "WitGarage" app from Google Play Store or Apple App Store. 2) Launch "WitGarage" app. 3) Create new account by click “Create New Account now”... -
Page 12: Add Witgarage Device To App
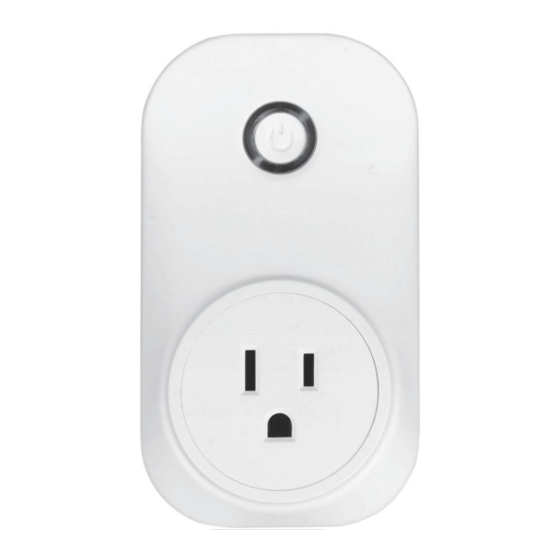
Step 3 ADD WITGARAGE DEVICE TO APP Make sure your phone have connected to a Wi-Fi router or a Wi-Fi hotspot which can access to internet quickly before you start next steps. 1. Power on GD801C Plug your WitGarage device... - Page 13 2. Add your witgarage device to witgarage app Open the WitGarage app, and login, it show as the follow right figure; Click “Add device” to configure Wi-Fi; Note: Our WitGarage device supports two modes of configuring Wi-Fi network,one mode is “smart config”,one mode is “AP Mode”.
- Page 14 You have added your WitGarage device to your WitGarage app by “smart config” now.
- Page 15 GD801C until the led indicator blinks slowly with red color, it is “AP mode” now. 2) Launch your WitGarage app, Click “Add device”, then click “AP mode” on the right top of the page; the following three figures show all steps of “ AP mode”.
- Page 17 You have added your WitGarage device to your WitGarage app by “AP mode” now.
- Page 18 Now, you have finished most of the app settings, tap the item of the list for more interesting functions.Give your new WitGarage device a new name first, this new name is used for voice command control. If you don’t want to rename it, it has a default name which shows on the item.
- Page 19 3. Bind GD801S to GD801C Take GD801S out from your box and put it close to GD801C before following operations. Check the led state of the GD801C. The led indicator of GD801C will be one of the following two states after previous operations.
-
Page 20: Test App Settings
How to unbind GD801S from GD801C and rebind them? (1) press switch key for 3 seconds or above then release,the led indicator will bink with blue color. (2) Flip the GD801S 90 degrees, wait for about 5 seconds until the led Indicator of GD801C is solid green color. -
Page 22: Mount Witgarage To Garage Door Opener
Step 5 MOUNT WITGARAGE TO GARAGE DOOR OPENER 1. Stick GD801S to the top of garage door Close your garage door completely, take away the sticker back of GD801S, stick the GD801S on the top of the garage door, make sure the GD801S is vertical to the... - Page 23 Note: Please pay more attention to the direction of GD801S. Make sure the GD801S is almost horizontal with out tilt or with a small tilt.
- Page 24 2. Connect GD801C to garage door opener Locate the two exposed wires coming out of the WitGarage device. Connect these two exposed wires to your garage door opener . Connect them to the same wire as your wall console or manual button to open/close the garage door...
- Page 25 Plug GD801C into an outlet. GD801C will work and the led indicator should be solid green after several seconds if you have finished settings of GD801C as previous steps.
-
Page 26: Witgarage System Test
WitGarage smart system. Launch your WitGarage app. The app shows the state of your garage door. Tap the garage door icon on the top of the app view, your garage door will open or close base on the previous state. - Page 27 If you have any questions please email to us. support@witgarage.com. Also visit http://witgarage.com/support/ for FAQs, troubleshooting, and detailed installation instructions with examples and videos.
-
Page 28: Witgarage App Introductions
Tapping garage door icon will control the garage door opener. (2) Manage devices add new device by using button “Add device”; active WitGarage device by using switch delete WitGarage device by using button find More fuctions by tapping the item of device list;... - Page 29 (3) Door state notification you will receive a push notification if the door is opened or closed, or the door is opened for 10 minutes. All functions below are on the setting page. (4) Share access and rename device Rename by clicking Share access by clicking , then select region and input the account name who you want to share;...
- Page 30 Note: Continued use of GPS running in the background when you turn on smart control fuction can dramatically decrease your phone’s battery life. (6) Door state notification and operation history View door state notification and operation history by clicking There are two tabs on history page, one is notifications, the other is operation history;...
-
Page 31: Witgarage Alexa Skill Setup
WITGARAGE ALEXA SKILL SETUP WitGarage integrated with Alexa Skill allows you to control the opening or closing of garage door by voice command. Warning: The following steps are for reference only. The operations may be changed by amazon alexa app. The newest operation guide will be update on our website. - Page 33 5) Select “Smart Life” skill and press “Enable” button. 6) Select region according to your WitGarage account, and input the account name and password of WitGarage app account; then press “Link Now”. 7) Click “Authorize” to finish setup. 8) Once you have successfully logged in, the message...
- Page 35 Possible AlexaVoiceCommand Please check the name of your witgarage device before you control the garage door by alexa voice command. The image below shows the name your witgarage device, you also can rename it. Voice command: “Alexa,turn on Witgarage” “Alexa,turn off Witgarage”...
-
Page 36: Witgarage Google Home Setup
WITGARAGE GOOGLE HOME SETUP WitGarage integrated with Google Assistant Action allows you to control your garage door by voice command. Following steps describes how to setup Google Home for WitGarage. Warning: The following steps are for reference only. The operations may be changed by google home app. The newest operation guide will be update on our website. - Page 37 Launch Google Home app on your cell phone. Press menu button on the top left corner of screen.
- Page 38 Click “Explore” from the menu. Scroll down to find “Home Control” and click “More”.
- Page 39 Select “Smart life”. click “LINK” on smart life screen.
- Page 40 Select region according to your WitGarage account, and input the account name and password of WitGarage app account; Click “Link Now”.
- Page 41 Click “Authorize” to finish setup. Please check the name of your WitGarage device before you control the garage door by Google Home. The left image shows the nameof your WitGarage device, you also can rename it.
- Page 42 Possible GoogleVoiceCommand Voice command: “Ok Google,turn on Witgarage” “Ok Google,turn off Witgarage” If you renamed your Witgarage device to “Mike”, you can say: “Ok Google,turn on Mike” “Ok Google,turn off Mike”...
Need help?
Do you have a question about the GD801C and is the answer not in the manual?
Questions and answers