Table of Contents
Advertisement
Quick Links
6. Installing the Display
TV
TV
M-A/
M-
B/M-C
M-F/M-G
Note: Choose the appropriate screws, washers and spacers (if necessary) according to the type of screen.
Lift the display and match the holes on your display with the holes on the VESA plate. Secure your
display to the mount by tightening screws.
Tighten all screws but do not over tighten.
7. Adjustment
180°
Use the tilt adjusting knob to adjust your display to the desired angle then tighten it.
Maintenance
• Check that the bracket is secure and safe to use at regular intervals(at least every three months).
• Please contact your dealer if you have any questions.
FOR CUSTOMER SERVICE CALL 855-449-8833 TUFF
7
TV
TV
M-
D
M-C
M-I
M-H
M-E
M-G
M-G
or
M-C
M-D
M-
D
M-I
M-E M-G
M-E
M-G
M-H
M-H
M-H
+20°
-20°
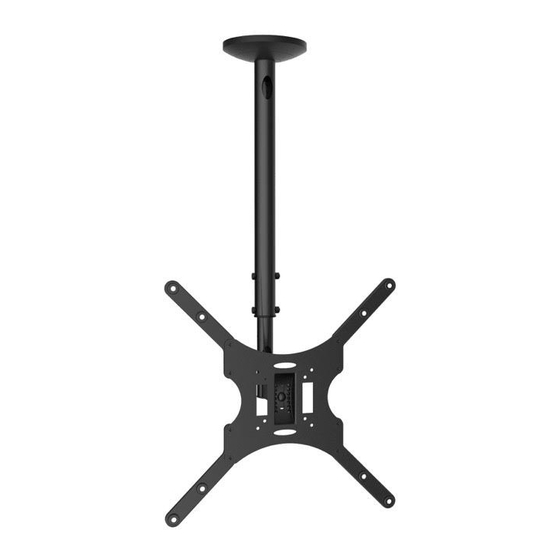
LCD Ceiling Mount
75x75 100x100
/
C7016
200x100/200x200
300x300/400x400
INSTALLATION MANUAL
CAUTION:
DO NOT EXCEED
RATED LISTED WEIGHT. SERIOUS
INJURY OR PROPERTY DAMAGE
MAY OCCUR!
55"
30kg
30kg
MAX
(66lbs)
(66lbs)
RATED
RATED
ISSUED: DEC. 2015
Advertisement
Table of Contents

Related Manuals for Tuff Mount C7016

Summary of Contents for Tuff Mount C7016
- Page 1 DO NOT EXCEED RATED LISTED WEIGHT. SERIOUS INJURY OR PROPERTY DAMAGE MAY OCCUR! Use the tilt adjusting knob to adjust your display to the desired angle then tighten it. 55" 75x75 100x100 C7016 Maintenance 30kg 30kg 200x100/200x200 (66lbs) (66lbs) • Check that the bracket is secure and safe to use at regular intervals(at least every three months).
- Page 2 Component Checklist NOTE: Read the entire instruction manual before you start installation and assembly. IMPORTANT: Ensure that you have received all parts according to the component checklist prior to installation. If any parts are missing or faulty, telephone your local distributor for a replacement. WARNING plastic bushing (x2) plastic cover...
- Page 3 1a. For Wooden Joist Ceiling Mounting 1b. Solid Brick and Concrete Block Mounting: 1b. For Solid Brick and Concrete Mounting 55mm 55mm 60mm 60mm (2.2") (2.2") (2.4") (2.4") ø 4.5mm ø 10mm (ø 3/16") (ø 3/8") Mark the exact location of Find and mark mounting the exact location...
- Page 4 4. Assembling the VESA Plate 2. Installing the Outer Column to the Ceiling Plate 5. Installing the VESA Plate 3. Installing the Inner Column and Routing Cables Run the power cable through columns. Insert the plastic bushing and the inner column into the outer column and fix them at the desired height using the correct combination of screws and nuts.
Need help?
Do you have a question about the C7016 and is the answer not in the manual?
Questions and answers