
Summary of Contents for ROUSH 422011
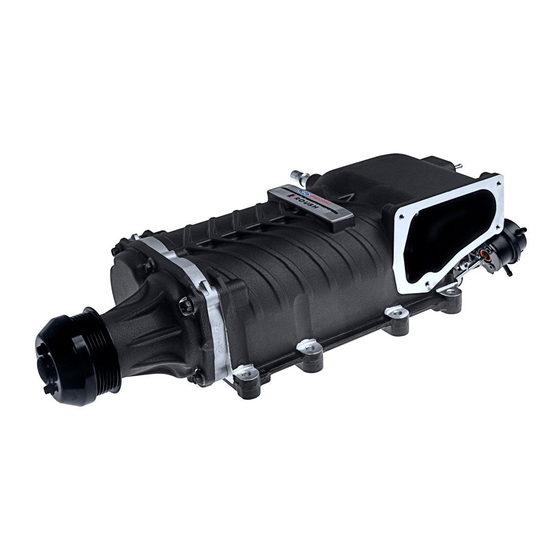
- Page 1 2015-2017 5.0L Mustang Phase 1/2 Right Hand Drive ROUSHcharger Kit Installation Instructions P/N: 422011 (1316-RHD-AA) 39555 Schoolcraft Rd, Plymouth MI, 48170 | 800.59.ROUSH...
- Page 2 • The use of fuel additives (i.e. octane boosters) is not recommended. There is a possibility that these chemicals can damage your engine and cause drivability issues with your vehicle. • Operating your engine without the Roush PCM recalibration will result in engine damage or failure and will void your warranty.
-
Page 3: Table Of Contents
Limit of Liability Statement ............................7 Safety Precautions ..............................7 Section A – Disassembly............................8 Instructions for Returning the PCM to Roush for Calibration ................10 Section B – Modifi cations ............................ 28 Brake Booster Vacuum and Aspirator Hose Assembly Modifi cation ..............28 Vaporative Emissions Canister Purge Line ...................... -
Page 4: Packing Listf Or 422011 (1316-Rhd-Aa) Roushcharger Kit
2015-2017 5.0L Mustang Phase 1/2 RHD ROUSHcharger Kit PACKING LIST FOR 422011 (1316-RHD-AA) ROUSHCHARGER KIT Description Part Number Quantity Air Induction Upper Airbox Cover/Lid 1315-9643 MAF Tube Assembly 1315-12B579HC Lower Airbox Tray 1315-9A612 Dirty Air Duct 1315-9F763 Tube Assembly, Clean Air w/fi ttings 1315-9R504 Filter w/Clamp –... - Page 5 1315-8D029 3/4" Hose Assembly - Intrclr Pmp to LTR 1315-8K236 3/4" Hose Assembly - Intrclr LTR Outlet 1315-8D030 3/8" Hose Assembly - Engine Bottle Degas Hose 1315-8276 Heater Hose Assembly 1315-18K579 Hardware Kit G - Clamps 1315-TVSHKG 1316-RHD-AA 12152016 800.59.ROUSH...
- Page 6 Hardware Kit - RHD 1316-RHDHWK-AA RHD Closeout Foam Seal 1316-RHDFOAM-AA Clamps - 3/4" Hoses (Constant Tension) CT19x12-B0 Connector, 3/4" x 3/4" 28605 Foam, Battery Closeout 1316-BATFOAM-AA RHD Brake Aspirator Extension 1316-9D690RHD-AA Bypass Hose R18140001-00-AA Fastener Battery Closeout 50249 1316-RHD-AA 12152016 800.59.ROUSH...
-
Page 7: Equipment And Supplies Required
Positive Crankcase Ventilation (PCV) Throttle Position Sensor (TPS) ROUSH Diagnostic Tool (RDT) Vapor Management Valve, or Evaporative Emissions Canister Purge Valve (EECPV) Breakout Point – A place in an electrical harness where the wiring for an individual component leaves (breaks out of) the main harness to attach to an individual component. -
Page 8: Information About The Supercharger Bypass Operation
The information contained in this publication was accurate and in effect at the time the publication was approved for printing and is subject to change without notice or liability. Roush Performance Products reserves the right to revise the information presented herein or to discontinue the production of parts described at any time. -
Page 9: Section A - Disassembly
4. Loosen the retaining nuts and disconnect the (-) negative and (+) positive connections to the battery. Stow the cables out of the way. b. Disconnect the fuel pump control module electrical connector located under the driver side back seat. 1316-RHD-AA 12152016 800.59.ROUSH... - Page 10 6. Remove the battery. at a preferred ROUSH dealer, proceed to step 12. If sending the PCM to ROUSH for a ROUSH performed PCM fl ash, continue with step 9. 7. Remove the battery tray by fi rst removing the three (3) 8 mm head bolts.
-
Page 11: Instructions For Returning The Pcm To Roush For Calibration
INSTRUCTIONS FOR RETURNING THE PCM TO ROUSH FOR CALIBRATION Outlined below are the instructions for returning your stock PCM to Roush Performance Products so we can install our calibration to make the engine run properly with the new components. Please complete the “Base Limited Warranty Registration”... - Page 12 Upon receipt of the PCM, a customer service representative will contact you to arrange payment. Once you receive your ROUSH fl ashed PCM, reverse step 8 for PCM installation. If fl ashing the vehicle using RDT, proceed with step 9.
- Page 13 16. If equipped, remove the four (4) nuts and the strut tower cross brace (15 mm socket). The strut tower cross brace cannot be reused after the supercharger has been installed. Discard the nuts. 1316-RHD-AA 12152016 800.59.ROUSH...
- Page 14 (10 mm). Remove the induction resonance tube from the cowl. The induction resonance tube will not be reused. 19. Remove the eight (8) bolts holding the HVAC/ battery closeout. 20. Remove the HVAC/battery closeout. 1316-RHD-AA 12152016 800.59.ROUSH...
- Page 15 23. Disconnect the vacuum line from the air cleaner tube. 26. Loosen the clamps securing the clean air tube at the airbox and throttle body. Remove the clean air tube from the throttle body and airbox lid. The clean air tube will not be reused. 1316-RHD-AA 12152016 800.59.ROUSH...
- Page 16 Disconnect the MAF wiring harness retainer from the front edge of the upper airbox lid. Remove the lid from the vehicle and set it aside. The MAF sensor will be reused and the airbox lid will be discarded. 1316-RHD-AA 12152016 800.59.ROUSH...
- Page 17 Remove from vehicle and set it aside. Both connectors will be transferred to the new line in Hardware Kit E Wiring. (Pictures show left hand drive model. Line routing may vary.) 1316-RHD-AA 12152016 800.59.ROUSH...
- Page 18 2015-2017 5.0L Mustang Phase 1/2 RHD ROUSHcharger Kit SECTION A – DISASSEMBLY EECPV electrical connector Remove tube from retainer EECPV tube quick connector with green lock Disconnect green quick connect fi tting Remove retainer on cam cover 1316-RHD-AA 12152016 800.59.ROUSH...
- Page 19 37. Disconnect the brake boost vacuum hose from the port at the fi rewall (driver side of vehicle). 34. Disconnect the brake booster vacuum hose from the intake manifold. This port is located directly behind the throttle body. 1316-RHD-AA 12152016 800.59.ROUSH...
- Page 20 39. Remove the LH heater hose support bracket and 41. Disconnect the heater feed and return hoses fuel rail cover from the LH side of the cylinder located at the front of both the LH and RH head. cylinder head intake fl anges. 1316-RHD-AA 12152016 800.59.ROUSH...
- Page 21 44. Disconnect the eight (8) fuel injector electrical connectors (four [4] on each side). 43. Remove the four (4) fuel rail bolts. These bolts will be reused. NOTE: It is not necessary to remove the fuel rail from the intake manifold assembly. RH shown 1316-RHD-AA 12152016 800.59.ROUSH...
-
Page 22: Fuel Rail Assembly
Disconnect the CMCV harness connector. Cut the retaining clip to remove the harness. Use care – Do not cut the harness. Disconnect the four (4) harness connectors. Release/remove the two (2) pushpins. Connector 1316-RHD-AA 12152016 800.59.ROUSH... - Page 23 48. Remove the intake manifold and fuel rail assembly from the vehicle. This hardware will not be 50. Disconnect the vent hose from the engine coolant reused. degas bottle and at the water pump inlet. Degas vent 1316-RHD-AA 12152016 800.59.ROUSH...
- Page 24 Some coolant will still be inside the hose. Use a rag to catch coolant when removing the hose. 1316-RHD-AA 12152016 800.59.ROUSH...
- Page 25 55. Disconnect the electric fan harness connector on the cooling module. Remove the two (2) bolts (10 mm socket) securing the shroud to the cooling module, then remove the electric fan and shroud assembly from the vehicle. RH bolt 1316-RHD-AA 12152016 800.59.ROUSH...
- Page 26 57. Cut and remove the A/C compressor belt. Discard belt. 3-harness clip points 59. Loosen the clamp and disconnect the coolant hose, at the outlet neck. 1316-RHD-AA 12152016 800.59.ROUSH...
- Page 27 60. Remove the two (2) bolts from the thermostat housing (8 mm socket). 61. Remove the thermostat housing assembly and set it aside. 63. Place a clean towel in the water pump inlet cavity. 1316-RHD-AA 12152016 800.59.ROUSH...
- Page 28 66. Tape off and block the thermostat housing ports. Use care to prevent coolant from leaking from the housing and hose. 65. Tape off the radiator hose port and inlet port. 1316-RHD-AA 12152016 800.59.ROUSH...
-
Page 29: Section B - Modifi Cations
VALVE 7. Use the supplied brake aspirator plug (CS2575) to plug the black port that is diagonal to the 1/2- inch grey port of the aspirator assembly. (The STRAIGHT arrow indicates the 1/2 inch grey port.) CURVED 1316-RHD-AA 12152016 800.59.ROUSH... - Page 30 (1315-9D690RHD) into the black port on the brake aspirator assembly. Then install the check valve that plugs into the brake booster. 11. Install the hose that goes to the clean air tube (1315-9D691) into the remaining port on the brake aspirator assembly. 1316-RHD-AA 12152016 800.59.ROUSH...
-
Page 31: Vaporative Emissions Canister Purge Line
1. Mark the K-brace where it meets the windshield wiper close-out panel. 2. Modify the K-brace as shown below. Perform modifi cations with K-brace out of vehicle. Discard the right hand side of the K-brace (cut on the red line). 1316-RHD-AA 12152016 800.59.ROUSH... - Page 32 4. Paint the cut area with Motorcraft High Temperature Anti-Corrosion Coating to prevent corrosion. 5. Cut the cross brace (blue) and cowl support (green) as indicated by the white lines shown. Using Motorcraft High Temperature Anti-Corrosion Coating, coat the ends to prevent corrosion. 1316-RHD-AA 12152016 800.59.ROUSH...
-
Page 33: Electric Fan Shroud Modification
(3) rectangular areas marked as well as the two (2) holes. 3. Install two (2) J-clips (N623332-M6) found in Hardware Kit H (1315-TVSHKH) in the two (2) areas on the edge of the shroud. 1316-RHD-AA 12152016 800.59.ROUSH... -
Page 34: Front Cover Modification
Crosshatched surfaces A and B must be lower than or 2. Block off the grinding area to prevent debris and equal to this rib height. metal shavings from spreading through the engine compartment. 1316-RHD-AA 12152016 800.59.ROUSH... - Page 35 2015-2017 5.0L Mustang Phase 1/2 RHD ROUSHcharger Kit SECTION B – MODIFICATIONS REMOVE MATERIAL OFF OF BOSS ‘C’ UNTIL THE 20 MM HEIGHT IS ACHIEVED 20 MM 1316-RHD-AA 12152016 800.59.ROUSH...
-
Page 36: Intake Valley Modification
2. Use a grinder or suitable tool to grind the boss down across the entire length. Make sure to take off material uniformly along the angle. If high spots are left, the intake manifold will not seat properly on the engine. 1316-RHD-AA 12152016 800.59.ROUSH... -
Page 37: Tps/Etc Wiring
3, the blue with orange wire is in position 4, the yellow wire is in position 5 and the green with violet wire is in position 6. Install the red plastic lock into the connector to secure the wires in place. 1316-RHD-AA 12152016 800.59.ROUSH... -
Page 38: Evaporative Emissions Canister Purge Valve Wiring
Populate the new connector such that the white with brown wire is in position 1 and the green wire is in position 2. Depress the white locking tab to secure the wires. 1316-RHD-AA 12152016 800.59.ROUSH... -
Page 39: Air Charge Temperature (Act) Wiring
Route the harness along the main wiring harness to the rear of the passenger side cam cover. Use tape or zip ties to secure the extension harness to the main harness. 1316-RHD-AA 12152016 800.59.ROUSH... -
Page 40: Tps/Etc And Eecpv Harness Routing
2015-2017 5.0L Mustang Phase 1-2 RHD ROUSHcharger Kit SECTION B – MODIFICATIONS TPS/ETC AND EECPV HARNESS ROUTING 1. Remove the wiring retainer and clip on the engine harness. 2. Route both extension harnesses along the engine harness. Secure them in place with zip ties. 1316-RHD-AA 12152016 800.59.ROUSH... -
Page 41: Engine Harness Ground Wire
2. Peel back the insulation at the base of the ground as shown. wire that was attached to the stud on the front cover. Trim back part of the insulation until the ground wire is exposed. CMCV connectors taped up 1316-RHD-AA 12152016 800.59.ROUSH... -
Page 42: Intercooler Pump Wiring
2. Install the relay and fuse from the intercooler pump wiring harness (1315-8W501) through the hole and secure it with one (1) M6 x 14 bolt (N605771) and one (1) M6 nut (W520412). These parts can be found in Hardware Kit E (1315-TVSHKE). 1316-RHD-AA 12152016 800.59.ROUSH... - Page 43 Tighten the the driver side inboard cylinder head. Disconnect nut to 10 Nm. the radio capacitor and plug the intercooler pump harness in line with this connector. 1316-RHD-AA 12152016 800.59.ROUSH...
- Page 44 Secure it in place with zip ties. 8. Retain the engine harness to the front cover using the zip tie with fur tree (156-00329) found in Hardware Kit E (1315-TVSHKE). 1316-RHD-AA 12152016 800.59.ROUSH...
- Page 45 Disconnect the radio capacitor and plug the intercooler pump harness in line with this connector. 10. Zip tie the excess harness out of the way and secure it to a safe location. 1316-RHD-AA 12152016 800.59.ROUSH...
- Page 46 RH strut tower and retighten the bolt to 10 Nm (coil up extra wire slack). 10. Route the intercooler pump wire harness over the top and in front of the wiper washer bottle. Secure it in place with zip ties as necessary. 1316-RHD-AA 12152016 800.59.ROUSH...
-
Page 47: Knock Sensor Orientation Adjustment
3. Peel back the tape from the connectors and 5. Reinstall the convolute and rewrap the wires with remove the convolute approximately 1-1/2" past electrical tape as required. where they meet at the harness. 1316-RHD-AA 12152016 800.59.ROUSH... -
Page 48: Changing The Factory Spark Plugs
These will not be re-used. NOTE: Use a universal swivel socket at the rear RH plug. 3. Remove the eight (8) fasteners holding the coil on plug assemblies in place (8 mm socket). Save the fasteners for re-use. 1316-RHD-AA 12152016 800.59.ROUSH... - Page 49 RH cover is installed. the spark plugs. Install the ignition coil on plugs in their original position. Install the coil on plug bolts and torque to 6 Nm. 1316-RHD-AA 12152016 800.59.ROUSH...
-
Page 50: Section C - Subassembly
2. Install the valve into the rear of the supercharger (1315-6F066) using two (2) M6 x 1.0 x 35.5 mm bolts (N808429) found in Hardware Kit B (1315-TVSHKB). Torque bolts to 8-12 Nm. 1316-RHD-AA 12152016 800.59.ROUSH... -
Page 51: Fuel Rail Assembly
6. Install the supercharger badge (1315-6F066BDG) modifi cation process. onto the top of the supercharger. FUEL RAIL ASSEMBLY 1. Carefully install the eight (8) new anti-rotation fuel injector clips (1311-9C995) onto the new fuel injectors (13119F593K fuel injector kit). 1316-RHD-AA 12152016 800.59.ROUSH... -
Page 52: Airbox Assembly
(1315-9A612) as shown. NOTE: These may be separated if needed to ease installation to the vehicle. 2. Insert the two (2) J-clips (W520823) from Hardware Kit A (1315-TVSHKA) onto the airbox tray as shown. 1316-RHD-AA 12152016 800.59.ROUSH... - Page 53 J-clips on the airbox tray. Install two (2) bolts (W500224) (M8 X 25) from Hardware Kit A (1315-TVSHKA) and torque to 10 Nm (10 mm socket). 6. Remove the MAF sensor from the factory airbox lid. Retain the bolts for reuse. 1316-RHD-AA 12152016 800.59.ROUSH...
- Page 54 8. Install the upper airbox cover (1315-9643) on the airbox tray. Using a T-30 Torx head bit, install six (6) bolts (W506976) from Hardware Kit A (1315-TVSHKA). 1316-RHD-AA 12152016 800.59.ROUSH...
-
Page 55: Section D - Installation
3. Install the engine harness ground wire tab at the RH front of the intake manifold using one (1) of NOTE: If the ROUSH boost gauge kit is going to be the M6 x 1.0 x 40 mm bolts (R18020004) found in installed onto the vehicle, the above grommet can Hardware Kit B (1315-TVSHKB). - Page 56 Stage 2; tighten bolts an additional 45 degrees. 5. Check that the hose in back of the intake manifold is routed around the electrical harness and towards the RH cam cover. 6. Connect the ACT sensor from ACT harness (1315-12A690) to the intake manifold. 1316-RHD-AA 12152016 800.59.ROUSH...
- Page 57 8. Connect the eight (8) fuel injector electrical connectors. 9. Carefully place the supercharger assembly (1315- 6F066) on top of the intake manifold. Ensure that the supercharger is fully seated on the intake mounting dowels. Remove protective shipping covers. 1316-RHD-AA 12152016 800.59.ROUSH...
- Page 58 16. Install the spacer-to-throttle body gasket (R07060153-13) found in Hardware Kit B 13. Connect the check valve on the brake vacuum (1315-TVSHKB) as shown. and aspirator assembly to the brake booster. 1316-RHD-AA 12152016 800.59.ROUSH...
- Page 59 These parts can be found in Hardware Kit B (1315-TVSHKB). Torque the fasteners to 10 Nm. 20. Install the ETC and TPS electrical connectors to the throttle body. 18. Connect the fuel supply line to the fuel rail and lock it into position. 1316-RHD-AA 12152016 800.59.ROUSH...
- Page 60 22. Install the evaporative emission canister purge valve line to the body line tube below the brake booster. Route the rest of the line behind the cylinder head to the RH rear of the supercharger. 1316-RHD-AA 12152016 800.59.ROUSH...
- Page 61 26. Route the hose along the RH fuel rail and down to and secure with tape on either end of the sleeve. the heater outlet at the fi rewall. Reinstall the RH factory heater hose to the tube at the RH front of the engine. 1316-RHD-AA 12152016 800.59.ROUSH...
-
Page 62: Fead Assembly
31. Install the end of the PCV purge hose (13116K817) from the hose section previously disassembled onto the bottom rear fi tting of the intake manifold. Install the clamp. ONE OF THESE TWO BOLTS WILL BE REUSED 1316-RHD-AA 12152016 800.59.ROUSH... - Page 63 3. Install the water pump on the front cover and install the three (3) bolts only. Leave out the bolt 5. Install the two (2) thermostat housing mounting at the 10 o’clock position. Torque the bolts to 25 bolts and torque to 10 Nm. 1316-RHD-AA 12152016 800.59.ROUSH...
- Page 64 FEAD bracket. Secure the pulleys using two (2) M8 x 1.25 x 28 mm idler bolts (R18020060) with washers found in Hardware Kit C (1315-TVHSKC). Torque bolts to 25 Nm (13 mm socket). 1316-RHD-AA 12152016 800.59.ROUSH...
-
Page 65: Fead Tensioner Bracket Assembly
11. Using a 17 mm socket, rotate the new tensioner clockwise to install the belt on to the supercharger pulley. Inspect each pulley to ensure the belt is properly seated. Ensure all supercharger pulley bolts have been torqued to 10 Nm. 1316-RHD-AA 12152016 800.59.ROUSH... -
Page 66: Intercooler Low Temperature Radiator (Ltr) Assembly
Ford belt routing. 3. Install the low temperature radiator (LTR) assembly (1315-8K229) and secure the low temp radiator into position with the two M8 x 16 mm bolts included in Hardware Kit H. 1316-RHD-AA 12152016 800.59.ROUSH... - Page 67 Mark the LH radiator close-out panel where the hose should pass through. Use snips to cut a notch in the close-out panels as required for the hose to pass through. 1316-RHD-AA 12152016 800.59.ROUSH...
- Page 68 10. Install the hose onto the LTR outlet and secure it with the clamp (CT19X12) from Hardware Kit G (1315-TVSHKG). 11. Install the hose onto the intake manifold inlet and secure it with the clamp (CT19X12) from Hardware Kit G (1315-TVSHKG). 1316-RHD-AA 12152016 800.59.ROUSH...
-
Page 69: Intercooler Pump, Mounting Bracket And Hoses
3. Install the intercooler pump (F8YH-8501) into the pump retainer (R07070065-4G) and onto the intercooler pump bracket. Secure the pump and retainer to the bracket using one (1) M6 x 16 bolt (N605891). Torque the bolt to 10 Nm. 1316-RHD-AA 12152016 800.59.ROUSH... - Page 70 Intercooler pump outlet hose (1315-6K236) 5. Install the intercooler pump outlet hose (1315- 8K236) from the pump outlet, over the side of the frame rail and to the inlet on the lower RH side of LTR. Pump hose to LTR connection 1316-RHD-AA 12152016 800.59.ROUSH...
-
Page 71: Electric Fan, Intercooler Reservoir And Hoses
(2) mounting bolts previously with a zip tie to the bracket. removed. Torque to 10 Nm. 8. Collect the excess intercooler pump harness and secure it with zip ties as needed. 1316-RHD-AA 12152016 800.59.ROUSH... - Page 72 (N605891) found in Hardware Kit H (1315-TVSHKH) and torque to 10 Nm. 4. Install the intercooler pump inlet hose (1315- 8D029) to the bottom of the intercooler degas bottle and secure it with the clamp (CT19X12). 1316-RHD-AA 12152016 800.59.ROUSH...
-
Page 73: Radiator Hoses, Engine Degas Bottle And Hoses
1. Reconnect the coolant hose to the outlet on thermostat housing. Outlet hose connection at top port of intercooler 9. Install the hose to the intercooler degas bottle inlet using one (1) clamp (CT19X12) from Hardware Kit G (1315-TVSHKG). 1316-RHD-AA 12152016 800.59.ROUSH... - Page 74 LH radiator. Secure both ends of the hose with the clamps. 7. Install the other end of the hose to the engine degas bottle as shown. Secure the constant tension clamp. 1316-RHD-AA 12152016 800.59.ROUSH...
-
Page 75: Air Induction System
4. Secure the airbox using the M6 bolt from the original airbox and torque to 10 Nm. 2. Install the dirty air duct (1315-9F763) at the LH side of the radiator. 1316-RHD-AA 12152016 800.59.ROUSH... -
Page 76: R504
PCV fi tting in clamps to 3 Nm. the clean air tube. 7. Route the MAF wire harness around the airbox assembly and connect the harness to the MAF sensor. Make sure the red lock is engaged on the connector. 1316-RHD-AA 12152016 800.59.ROUSH... -
Page 77: K-Brace And Battery Shield
2. Reinstall the eight (8) M6 bolts and torque to 9 Nm. 9. Connect the brake aspirator hose assembly (hose 3) to the fi tting on the clean air tube. 3. Reinstall the battery tray, torque the three (3) M6 bolts to 10 Nm. 1316-RHD-AA 12152016 800.59.ROUSH... - Page 78 Watch the pushpin retainer above the supercharger; it may interfere with the vacuum line below the cowl panel. 5. Reinstall the modifi ed cross brace, torque the M6 bolts to 35 Nm, torque the M8 nuts to 55 Nm. 1316-RHD-AA 12152016 800.59.ROUSH...
-
Page 79: Section E - Final Assembly
6. Reinstall the radiator trim cover by reversing the removal instructions. 7. If the PCM was removed and shipped to ROUSH for a ROUSH performed fl ash, reinstall it once the PCM is returned from ROUSH. If you are... -
Page 80: Pcm Flashing
SECTION E – FINAL ASSEMBLY 15. If performing the PCM Flash procedure, proceed to the “PCM Flashing” section. If the PCM was sent to ROUSH for the Optional ROUSH Performed Flash and it has been reinstalled, start the engine and check for unusual noise, dash service lights, and/or unusual operation.
Need help?
Do you have a question about the 422011 and is the answer not in the manual?
Questions and answers