Advertisement
Advertisement

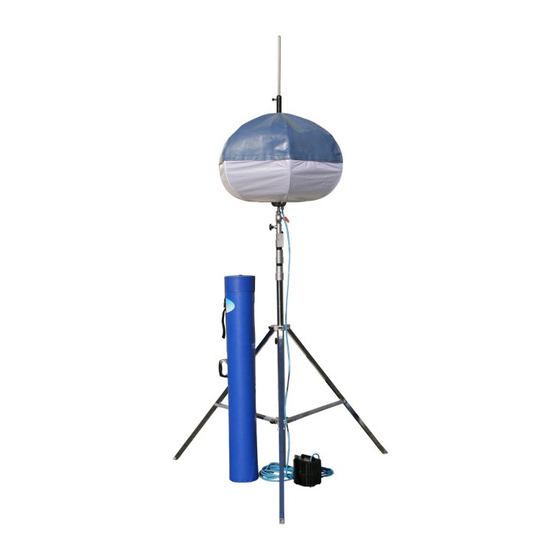
Summary of Contents for POWERMOON Profi1
- Page 1 ® Profi1 1000 Watt HQI USING INSTRUCTIONS...
- Page 2 Congratulations on your purchase of a POWERMOON® balloon-lighting system. Your POWERMOON® Profi1 is the most up to date glare free floodlight system on the market and worldwide the only balloon-light that works on basis of a solid and robust steel spring open- and close mechanism.
-
Page 3: Table Of Contents
Table of contents: Page 4 Safety Instructions Page 7 POWERMOON Using Instructions Page 10 Electrical Requirements Page 11 Care And Maintenance Page 11 Parts Replacement (incl. bulb replacement) Page 13 Trouble Shooting... -
Page 4: Safety Instructions
If the POWERMOON® has already been used check the following before reuse: Cables should not be cut or damaged! Power plug and plug between Ballast and POWERMOON® lamp should be checked for burn damage. In case of any damage check with a professional electrician before continuing! Safety instructions and restrictions for your own operational safety: The POWERMOON®... - Page 5 Keep safety distance to roads, pedestrians, animals, cars, mobiles, buildings etc.! We advise the usage of fixing lopes when lighting traffic routes (for example POWERMOON® fixing lopes). One guy rope should then be in right angle to road to secure tripod from toppling on to road.
- Page 6 Do not attach electronic equipment like computers, televisions or hi-fi’s. This equipment could be damaged when turning the POWERMOON® on and off due to the surge in voltage. This occurs especially if the electronic control unit is defective.
-
Page 7: Powermoon Using Instructions
2) Take POWERMOON® out of cylinder by gripping pin and gently pulling the POWERMOON® 3) Place POWERMOON® with bottom pin on solid ground. Grip black handle bar, pull pin and press down until POWERMOON is fully opened and locked in place. - Page 8 4) Check if Velcro is closed all around and if transparent balloon cover is not damaged. In case of bigger damages repair with delivered repair kit or change cover 5) Lift POWERMOON® by gripping bottom pin with one hand and upper cover with other hand. Mount POWERMOON® on suitable tripod or other mast.
- Page 9 Attention: Make sure that inner steles are horizontal and all three tripod stands are on ground. (This could for example not be the case if middle pole is touching ground as well!) 8) Plug POWERMOON® cord in to ballast. (Pay attention to red markings) and attach firm by closing lid.
-
Page 10: Electrical Requirements
UL/TÜV US/CSA regulations. The condenser will be discharged through a discharging resistor. 3) Close POWERMOON® by holding black handle bar and pulling pin! Slowly close POWERMOON® by letting handle bar slide up POWERMOON® middle axis. Attention: Wait until bulb has cooled off (Approx. 5 – 10min). -
Page 11: Care And Maintenance
4) Care and maintenance The POWERMOON® may get damp with use. Always let the POWERMOON® dry out before storing it in cylinder. Small holes in translucent cover can be pasted with self adhesive repair kit. Dirt on both, top and bottom cover can be wiped off with (thin) soap liquid. - Page 12 Bulb replacement Attention: Precautions!! Completely unplug POWERMOON from any power source. Allow used bulb to cool off before replacing. Wear gloves and protective goggles. (Bulb is under high pressure and could explode/implode.) Caution: Do not look in to burning bulb. Lamp radiates strong UV Light.
-
Page 13: Trouble Shooting
6. Trouble Shooting 6.1. Mechanical Defects The POWERMOON won’t open! Should the POWERMOON not open properly (grip handle won’t slide easily over glider), twist and turn grip handle while holding POWERMOON main bell firm! Try to press down and open POWERMOON again. - Page 14 Then check current coming from ballast.110V are required. Should ballast not deliver required voltage it might be broke! A possibly necessary exchange of the micro-fuse, the capacitor or the electromagnetic coil should only be executed by a professional electrician! All necessary spare parts are available from POWERMOON Enterprises Ltd.!
Need help?
Do you have a question about the Profi1 and is the answer not in the manual?
Questions and answers