Table of Contents
Advertisement
Quick Links
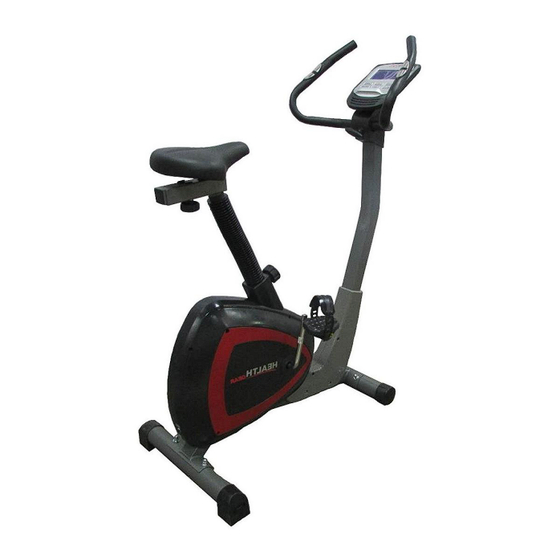
Programmable Exercise Bike with
CAUTION:
WARNING: CHECK WITH YOUR
PHYSICIAN BEFORE STARTING ANY
EXERCISE PROGRAM
Do Not Allow Children to Play on or
Around this Product.
Read all instructions carefully before
using.
Tighten all bolts before using
equipment.
Leave adequate space to properly
exercise
Questions/ Comments
PLEASE DO NOT CONTACT THE STORE
Extreme Products Group is committed to
providing the very best of quality and
customer satisfaction for all of the products
we distribute. If for any reason , you are
dissatisfied with the product you have
purchased or need assistance in any way,
please do not hesitate to contact our
knowledgeable support staff at: 623-888-
6379 or visit our webstie at:
www.extremeproductsgroup.com
Mon.-Fri 9:00 am – 5: 00 pm Phoenix Time
Pulse Monitoring System
Model UB 500
Owner's Manual
S
Photo may differ from actual product
Version 7517
Version 8417
1
Advertisement
Table of Contents

Summary of Contents for Health UB 500
- Page 1 Programmable Exercise Bike with Pulse Monitoring System Model UB 500 Version 7517 Version 8417 CAUTION: WARNING: CHECK WITH YOUR PHYSICIAN BEFORE STARTING ANY EXERCISE PROGRAM Do Not Allow Children to Play on or Around this Product. Read all instructions carefully before using.
- Page 2 BEFORE BEGINNING ASSEMBLY… Take a few moments to familiarize yourself with the specific parts and hardware included with your product. Make sure all the parts and hardware are included in the carton and examine them for any damage that may have occurred in transport. Some parts may be pre-assembled and pre-installed. CAUTION WARNING: BEFORE STARTING ANY EXERCISE PROGRAM, CONSULT YOUR PHYSICIAN.
- Page 3 Exploded View This page will reference each part of the Inversion Table. Some parts may be pre-installed by the factory.
- Page 4 Parts Listing Part Description Part Description Main Frame Sensor Handlebar Upright Motor Wire Nylon Nut Handlebar Self Tapping Screw Front Stabilizer Screw M4x20mm Rear Stabilizer Self Tapping Screw Seat Stem Screws M5x 12mm Seat Support Bar Self Tapping Screw M4x25mm Exercise Monitor Sense Base Seat...
-
Page 5: Main Frame (
Assembly the Front and Rear Stabilizer STEP 1- Attach the Front Stabilizer (4) to the Main Frame (1) with 2 - M8 x 75mm Carriage Bolts (45), 2 - M8 Curved Washers (50), 2 - M8 Spring Washers (49) and 2 - M8 Dome Nuts (48). - Page 6 Pedals Assembly STEP 2 Attach the Pedals (Left and Right) (11L/R) to the Pedal Crank (21) (See note). Both Pedals MUST be tightened securely other wise damage may occur to the Crank. Fit the Pedal Straps to ensure a snug, but not tight fit with your normal footwear.
-
Page 7: Handlebar Upright 1
Handlebar Upright Assembly STEP 3 Remove the 6 - M8 x 20mm Allen Bolts (44), 4 - M8 Flat Washers (51) 2 from the front and 1 on each side and 2 - M8 Curved Washers (50) at the rear from the Main Frame. -
Page 8: Seat Stem (
Seat Assembly STEP 4 Remove the 3 - M8 Nylon Nuts (47) and 3 - M8 Flat Washers (51) from underneath the Seat (9), then attach the Seat (9) to the Seat Support Bar (7) using the 3 - M8 Nylon Nuts (47) and 3 - M8 Flat Washers (51) that were removed STEP 5 Now slide the Seat Support Bar (7) into the Seat Stem (6) and secure it with 1 - M8... - Page 9 Seat Stem Assembly STEP 6 Slide the Seat Stem (6) through the Seat Stem Cover (15), now slide the Seat Stem (6) into the Seat Stem Protector (70) and Main Frame (1) adjust the Seat to the desired height allowing for a slight knee bend at the bottom of the pedaling action. Tighten the Adjustment Knob (16) after adjustment.
-
Page 10: Exercise Monitor 1
Exercise Monitor Assembly STEP 7 Feed both Pulse Sensor Wires (59) through the hole on the right side of the Handlebar Upright (2) and out of the top hole. Attach the Handlebar (3), and the Handlebar Cover (14A & B) to the Handlebar Upright (2) with 1 - M4 x 20mm Self Tapping Screw (40), 1 - M4 Flat Washer (68), 1 - M8 Flat Washer (51), 1 - T-Shape Knob Bushing (32), 1 - T-Shape Knob (31), 2 - M3.5 Self Tapping Screw (38), 1 - M4 Flat Washer (68) and 1 - M4 x 20mm Self Tapping Screw (40). - Page 11 Final Assembly Make Sure All Nuts Bolts and Screws are Completely Tightened Before Use. Extreme Products Group 6635 W. Happy Valley Rd. Suite A-104, #213 Glendale, AZ 85310 Phone: 623-888-6379 Fax: 623-434-9100 www.extremeproductsgroup.com...
- Page 12 Handlebar Cover / Monitor Assembly Note: Make sure metal spacer is put on end of knob bolt to tighten shroud to handlebar Note: Once the monitor wires are connected, assemble the front of the handlebar shroud first and tighten with knob bolt and then screw...
- Page 13 Handlebar Cover / Monitor Assembly Note: Carefully push all of the connected monitor wires back inside the front tube with finger Note: Attached Monitor to flat metal monitor plate with 2 screws...
- Page 14 Handlebar Cover / Monitor Assembly Note: Connect Front handlebar shroud to handlebar post using 3 screws...
- Page 15 Exercise Monitor Function KEY FUNCTION: 1. START/STOP a) Quick Start function: Allows you to start the computer without selecting a program. Manual workout only and time automatically begins to count up from zero. b) During the exercise mode, press the key to STOP exercising. c) During the stop mode, press the key to START exercising 2.
- Page 16 Exercise Monitor Function EXERCISE MONITOR FUNCTION: 1. TIME: Shows your elapsed workout time in minutes and seconds. Your computer will automatically count up from 0:00 to 99:59 in one second intervals. You can also program your computer to count down from a set value by using the UP and DOWN keys.
- Page 17 Exercise Monitor Function EXERCISE MONITOR FUNCTION: 4. The distance will now be flashing, this can be adjusted using the UP / DOWN keys. Press the ENTER button to confirm the selection. 5. The calories will now be flashing, this can be adjusted using the UP / DOWN buttons. Press the ENTER button to confirm the selection.
- Page 18 Exercise Monitor Function EXERCISE MONITOR FUNCTION: P2: Steps P3: Hill P4: Rolling P5: Valley P6: Fat Burn P7: Ramp P8: Mountain P9: Intervals P10: Random P11:Plateau P12:Fartlek P13:Precipice...
- Page 19 Exercise Monitor Function EXERCISE MONITOR FUNCTION: Custom Programs P14-P17 1. Programs P14-P17 are user-definable programs with regard to Time / Distance / Calories / Resistance in 10 sections. The values and profiles are calculated according to setting. The values can be adjusted during the workout, without changing the stored program. 2.
- Page 20 Exercise Monitor Function EXERCISE MONITOR FUNCTION: P15: User 2 P16: User 3 P17: User 4...
- Page 21 Exercise Monitor Function EXERCISE MONITOR FUNCTION: Heart rate programs 1. Programs P18-P22 are heart rate programs Program 18: 55% Maximum heart rate → target heart rate = (220 - age) x 55% Program 19: 65% Maximum heart rate → target heart rate = (220 - age) x 65% Program 20: 75% Maximum heart rate →...
- Page 22 Exercise Monitor Function EXERCISE MONITOR FUNCTION: P18: 55% HRC P19: 65% HRC P20: 75% HRC P21: 85% HRC...
- Page 23 Exercise Monitor Function EXERCISE MONITOR FUNCTION: P22: TARGET H.R.C. Watt Program 1. Program 23 is a speed-independent program. Press the ENTER button to set target Watts, Time, Distance, and Calories. During exercise the resistance level can not be changed. The resistance level is automatically increased when the speed is too low and automatically decreased when the speed is too high.
- Page 24 Exercise Monitor Function EXERCISE MONITOR FUNCTION: P23: WATT. Body fat value measurement: 1. Program 24 calculates the body fat value of the user and suggests one corresponding degree of severity. It is divided into 3 types. Type 1: body fat value > 27 Type 2: 27 ≥...
-
Page 25: Pulse Pad.
Exercise Monitor Function EXERCISE MONITOR FUNCTION: 8. Press the START / STOP button to start the body fat measurement and place the palms of your hands on the pulse pads.. 9. When the display shows "E", make sure that your hands are placed on the hand pulse pads or the chest belt is fitted correctly and then press the START / STOP button again. - Page 26 Exercise Monitor Function EXERCISE MONITOR FUNCTION: Error messages E1 (Error 1): During operation: If the Monitor for more than 4 seconds receives no signal from the motor, E1 is displayed. In the "Power On" state: If the monitor has no signal for more than 4 seconds the motor stops, resets the counter to zero, and the display shows E1.
-
Page 27: Screw
YOU SHOULD NOT START ANY EXERCISE WITHOUT CONSULTING A PHYSICIAN TO DETERMINE IF YOU HAVE ANY MEDICAL OR PHYSICAL CONDITIONS THAT COULD PUT YOUR HEALTH AND SAFETY AT RISK, OR PREVENT YOU FROM USING THE EQUIPMENT PROPERLY. YOUR DOCTORS ADVICE IS ESSENTIAL IF YOU ARE TAKING MEDICATION THAT AFFECTS YOUR HEART RATE, BLOOD PRESSURE OR CHOLESTEROL LEVEL. - Page 28 Health Gear is a licensed Trademark and Distributed By: Extreme Products Group 6635 W. Happy Valley Rd Suite A-104, #213 Phoenix, AZ 85310 Technical Support: 623-888-6379 Fax: 623-434-9100 Email: service@extremeproductsgroup.com For All parts requests, please do not call our Technical service number but visit our web site at www.extremeproductsgroup.com...
Need help?
Do you have a question about the UB 500 and is the answer not in the manual?
Questions and answers
Is there a place for a battery?