Table of Contents
Advertisement
Quick Links
Advertisement
Table of Contents

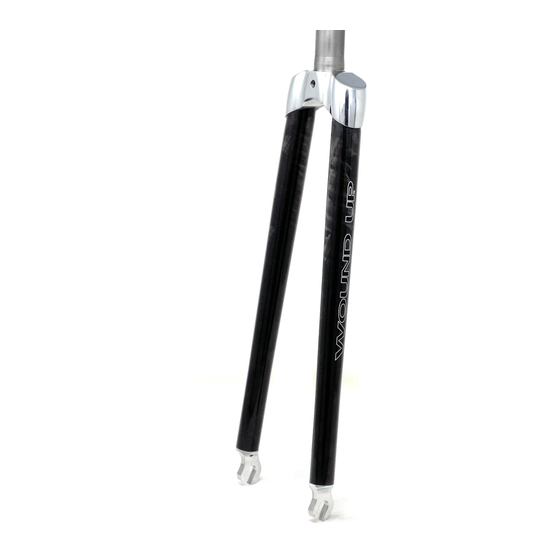
Summary of Contents for Wound-Up Composites Tandem Duo 2
- Page 1 Owners Guide with Installation Manual www.woundupcomposites.com...
-
Page 2: Table Of Contents
Wound Up ™ Composites Contents Welcome to Wound Up ! . . . . . . . . . . . . . . . . . . . . . . . . . . . .4 ™... -
Page 4: Welcome To Wound Up
Wound Up ™ Composites Welcome to Wound Up ™ Thank you for purchasing a Wound Up™ carbon fork. You have in your possession what we believe to be the best fork you can put on your bicycle. In order to make sure you get the most out of our fork it is imperative for your fork to be installed correctly. -
Page 5: Rider Weight Limits
Rider Weight Limits All Wound Up™ forks have a specific rider weight limit. This weight includes the rider with all gear including, backpacks, hydration systems, etc. See below for each forks specific weight limit: Road, Cyclocross, and light touring forks with 1” Steel or 1-1/8”... -
Page 6: Intended Use Of Fork
Wound Up ™ Composites Intended Use of Fork Each Wound Up™ fork model is intended to be used for a specific condition. Road forks are for road bike use only, tandem forks are for tandem bike use only, cyclocross forks are for cyclocross bike use only, track forks are for track bike use only and touring forks are for touring bike use only. -
Page 7: Necessary Tools
Necessary Tools To start installation you will need to make sure you have the following tools. Additional tools may be necessary depending on other components being installed (i.e. stem, brakes, etc.): • Crown race tool • Hacksaw with fine-tooth blade (32 TPI) •... -
Page 8: Wound Up™ Steerer Tube Diameters Are As Follows
Wound Up ™ Composites Before Installation Every good relationship starts with compatibility, and your bike is no different. In order for your Wound Up™ fork to work with your bicycle it is critical that your frame, fork, headset, and stem are all compatible with each other. Wound Up™... -
Page 9: Tips For Installation
Tips for Installation Installation of components is one of the most important jobs to pay attention to when working on a bicycle. To make sure components are installed correctly please follow the following tips. • Check component specifications to make sure all components are compatible with each other prior to installation. -
Page 10: Schematic 1: Overview - Upper
Wound Up ™ Composites Schematic 1: Overview - Upper TOP CAP BOLT STEM TOP CAP HEADSET SPACER HEADSET SPACER STEM BOLT STEM BOLT (MAY BE DIFFERENT THAN SHOWN) (MAY BE DIFFERENT THAN SHOWN) HEADSET COVER HEADSET WEDGE UPPER HEADSET BEARING HEAD TUBE LOWER HEADSET BEARING CROWN RACE... -
Page 11: Schematic 2: Overview - Lower
BOLT STEM HEADSET SPACER HEADSET SPACER BOLT BOLT (MAY BE DIFFERENT THAN SHOWN) (MAY BE DIFFERENT THAN SHOWN) HEADSET COVER T WEDGE UPPER HEADSET BEARING HEAD TUBE Schematic 2: Overview - Lower LOWER HEADSET BEARING CROWN RACE STEERER TUBE CROWN FORK LEG DROPOUT... -
Page 12: Step 1: Install Crown Race
Wound Up ™ Composites Step 1: Install Crown Race First, you will need to install the Crown Race onto the steerer tube. Clean both the steerer tube and race with a clean rag and isopropyl alcohol to remove any oils left over from the manufacturing process. - Page 13 Figure 1: Crown Race Tool DRIVE CROWN RACE ONTO FORK CROWN CROWN RACE TOOL CROWN RACE FORK CROWN...
-
Page 14: Step 2: Measure/Mark Steerer Tube
Wound Up ™ Composites Step 2: Measure/Mark Steerer Tube Install the lower headset bearing onto the steerer tube. Refer to Schematic 1 or the installation manual for the headset if unsure. Slide the fork into the head tube of the bicycle, and install the upper headset bearing, wedge, cover, any necessary headset spacers (44mm/1.73in Max), and the stem. - Page 15 Figure 2: Mark Steerer Tube...
-
Page 16: Step 3: Prepare The Steerer Tube
Wound Up ™ Composites Step 3: Prepare the Steerer Tube Remove the stem, fork, and headset assembly created in Step 2. Find the pencil mark created in Step 2. Wrap a strip of masking tape around the steerer tube 3mm (maximum) below the pencil mark. - Page 17 Figure 3: Prepare Steerer Tube...
-
Page 18: Step 4: Cut The Steerer Tube
Wound Up ™ Composites Step 4: Cut the Steerer Tube Using a steerer tube cutting guide (saw guide), cut the excess steerer tube material off at the top edge of the masking tape applied in Step 3. See Figure 4. Once the steerer tube is cut, remove the fork from the saw guide and lightly sand the edges of the cut to remove any loose fibers or sharp edges. - Page 19 Figure 4: General Overview HACKSAW WITH FINE TOOTH BLADE STEERER TUBE STEERER TUBE CUTTING GUIDE...
-
Page 20: Step 5A: Install The Star-Nut
Wound Up ™ Composites Step 5a: Install the Star-Nut If you are installing a fork that is a 1” steel steerer tube or a 1-1/8” carbon steerer tube with an aluminum sleeve in the steerer tube, install the provided star-nut. For full carbon steerer tube (Duo or Tapered Steerer Tube), refer to Step 5b. - Page 21 Figure 5: Star-Nut Diagram STAR-NUT TOOL STAR-NUT DRIVE STAR-NUT INTO STEERER TUBE (15mm MINIMUM DEPTH) STEERER TUBE...
-
Page 22: Step 5B: Install A Compression Plug
Wound Up ™ Composites Step 5b: Install a Compression Plug If you are installing a fork that does have a full carbon steerer tube without an aluminum insert, proceed as follows. Remove the top cap/bolt from the supplied compression plug assembly and set it aside. Unthread the compression plug assembly and apply a small amount of assembly grease to the first few threads of the compression bolt. - Page 23 Figure 6: Compression Plug...
-
Page 24: Step 6: Installing The Fork
Wound Up ™ Composites Step 6: Installing the Fork Reinstall the headset bearings, bearing wedge, top-cover, necessary spacers (44mm/1.73 in MAX), and stem per the manufacturer’s recommendations. Install the top cap and bolt making sure to grease the threads of the top cap bolt. Tighten the top cap bolt to remove all play from the headset assembly while maintaining the smooth rotation of the headset assembly. - Page 25 Figure 7: General Overview TOP CAP BOLT STEM TOP CAP HEADSET SPACER HEADSET SPACER STEM BOLT STEM BOLT (MAY BE DIFFERENT THAN SHOWN) (MAY BE DIFFERENT THAN SHOWN) HEADSET COVER HEADSET WEDGE UPPER HEADSET BEARING HEAD TUBE LOWER HEADSET BEARING CROWN RACE STEERER TUBE CROWN...
-
Page 26: Step 7: Installing The Front Wheel
Wound Up ™ Composites Step 7: Installing the Front Wheel Remove the quick-release skewer from the front hub. Slip the front wheel into the fork dropouts, and reinstall the quick-release into the hub per the manufacturer’s recommendations. Make certain the quick release holds the wheel securely in place, but can be removed if necessary. - Page 27 Figure 8: Front Wheel Installation FRONT WHEEL SKEWER DROPOUT QUICK RELEASE NUT FRONT WHEEL SLIDE FRONT WHEEL INTO DROPOUTS...
-
Page 28: Step 8: Installing The Front Brake
Wound Up ™ Composites Step 8: Installing the Front Brake Installation of the front brake will vary depending on the type of brake being used, whether it be road caliper, cantilever, or disc. When installing brakes it is always best to consult the brake manufacturer’s installation guide to insure all necessary procedures are followed. -
Page 30: Care And Maintenance
Wound Up ™ Composites Care and Maintenance Polishing Aluminum Crowns and Dropouts Use Mothers brand Mag & Aluminum Polish and a soft cloth for optimum results. Polishing Fork Blades Fork Blades can be polished using a mirror glaze polishing compound like Meguiars Mirror Glaze #205 Ultra Finishing Polish and a soft rag. - Page 31 Continued Normal Wear and Stress Check Wound Up™ recommends a six-month inspection schedule of the fork, steerer tube and fork crown area. This is best done through your local bike shop. Ensure a thorough examination, looking for signs of impact damage and/or fatigue stress.
-
Page 32: Ongoing Inspections
Wound Up ™ Composites Ongoing Inspections The proper inspection of your fork and components are critical. Before every ride refer to the checklist below to inspect your Wound Up™ fork and components. This checklist does NOT cover all possible types of damage and is NOT a substitute for regular maintenance performed by a certified bicycle shop mechanic. - Page 33 Continued Check that all brakes are working correctly and that cables are secure and connected. CAUTION: If any of the these inspection conditions are noted through inspection – DO NOT RIDE YOUR BIKE! Take it in for additional inspection and/or maintenance to your local bike shop. Notes:...
-
Page 34: Wound Up Composites Warranty
Wound Up ™ Composites Wound Up Composites Warranty ™ All Wound Up™ Composite products are warranted against defects in workmanship and materials to the original consumer purchaser for three years from date of original sale from an authorized Wound Up™ dealer, distributor, and frame builder or through the manufacturer. - Page 35 Continued 4) Any defects, damage, loss or failure caused in whole or in part by accidents or while damaged in transit through shipping and/or on bicycle racks. Product defects resulting solely from workmanship and/or materials will be repaired or replaced (at our discretion) at no cost solely to the original purchaser with proof of purchase.
-
Page 36: Professional Installation Rebate Offer
Wound Up ™ Composites Professional Installation Rebate Offer Wound Up™ offers a $50 rebate to those customers purchasing new Wound Up™ forks direct from the retail manufacturer and, specifically, applies only to the professional installation of your Wound Up™ fork at bicycle shops with professional service and repair operations. - Page 38 Wound Up ™ Composites Notes:...
- Page 39 Notes:...
- Page 40 Wound Up Composites ™ 2575 South 3270 West Salt Lake City, UT 84119 801.467.1204 www.woundupcomposites.com Made in the USA...