
Subscribe to Our Youtube Channel
Summary of Contents for Vanguard System VM-5500
- Page 1 2018 Operator’s Manual VM-5500 The Daugherty Companies, Inc. P.O. Box 306 Warren, IN 46792 Ph. 260-375-2415 - Fax 260-375-3800 www.ag-electronics.com Rev 0418.1...
-
Page 2: Vm-5500 Operator's Manual
VM-5500 Operator’s Manual 2018 NOTES: Introduction | Rev 0418.1... -
Page 3: Table Of Contents
System Overview ....................................6 Specifications ....................................... 7 Installation ......................................8 Monitor and Power Connections (Harness 647103) ..........................8 VM-5500 Console Main Harness (Harness 647117) ..........................9 Internal GPS ......................................9 Quick Start ........................................10 Entering Setup Assistant ..................................10 Setup Assistant Features ................................... 10 Quick Start Screens .................................... - Page 4 18 Pin Console Pinout ..................................45 4 Pin Power In/ Alarm Out Pinout ..............................45 4 Pin Bottom Speed In Pinout (Radar/Speed) ............................ 45 Appendix D VM-5500 Implement Pinouts ..............................46 37 Pin Harness Pinout ..................................46 Appendix E Part Numbers ..................................47 Monitor......................................
- Page 5 VM-5500 Operator’s Manual 2018 Table of Figures Figure 1 Monitor Mounting ................................8 Figure 2 Setup Assistant Region explanation ..........................10 Figure 3 Setup Assistant Start Page ..............................11 Figure 4 Implement Configuration Dialog ............................11 Figure 5 Implement Configuration with All Sensors ........................12 Figure 6 Row, Spacing and Width Setup ............................
-
Page 6: Introduction
1 Introduction System Overview The VM-5500 Planter Monitor is designed for maximum performance in the field and is easy to install and use. The system is capable of monitoring up to 16 rows and provides not only seed population, but also will display area, hopper level, RPM and vacuum information when sensors are connected, and has capabilities of monitoring liquid flow with Vanguard “Visu-Flo... -
Page 7: Specifications
VM-5500 Operator’s Manual 2018 1.2 Specifications Power 10–16 VDC, 3.5 A maximum Operating temperature -20°C to 70°C (-4°F to 158°F) range Storage temperature -40°C to 85°C (-40°F to 185°F) range Size 27.30 cm W x 16.50 cm H x 5.08 cm D (10.75"... -
Page 8: Installation
VM-5500 Operator’s Manual 2018 1.3 Installation Your VM-5500 comes with a RAM 1 ½” Mounting Ball. Any RAM Mount 1 ½” fixtures will adapt to your monitor. Figure 1 Monitor Mounting Install the RAM-238-U 1 ½” Ball supplied with your console by removing the two screws from the rear of the unit and use them to attach the ball. -
Page 9: Vm-5500 Console Main Harness (Harness 647117)
Once your implement is connected, you are ready to operate your monitor. 1.6 Internal GPS The VM-5500 can be purchased with the optional onboard GPS enabled, or it may be enabled by the customer upon the purchase of a valid license. -
Page 10: Quick Start
VM-5500 Operator’s Manual 2018 2 Quick Start The Quick Start feature of the Monitor is a method that will step you through a complete setup of your monitor. This feature will insure proper configuration while providing you with a good working knowledge of the parameters that need to be set for your implement. -
Page 11: Quick Start Screens
VM-5500 Operator’s Manual 2018 2.3 Quick Start Screens Your Monitor is very configurable, however it is very easy to setup. We will walk you through a typical Seed and Liquid Flow implement configuration. Don’t worry if this configuration is not exactly what you have we will discuss more details in a later section. -
Page 12: Implement Type Select
VM-5500 Operator’s Manual 2018 2.3.2 Implement Type Select Use the Check Boxes to select if your monitor is connected to seed sensors, flow meters or both. If you select Flow 1, you may select Flow 2 as well if you are using two different flow rates on your system. -
Page 13: Figure 6 Row, Spacing And Width Setup
VM-5500 Operator’s Manual 2018 Figure 6 Row, Spacing and Width Setup By pressing the Red 0 Button under the Rows column a “Enter Row Spacing” Dialog Box will appear. Press the Spacing and Width Buttons to open up the Numeric Keypad and enter each parameter. -
Page 14: Display Assignments
VM-5500 Operator’s Manual 2018 2.3.4 Display Assignments The Display Assignments page is a visual cross reference between the Display Rows and the cable harness Row wires. Only 8 Display Rows can be seen at 1 time, navigation buttons are available to navigate to the next set of 8 Rows. -
Page 15: Product Sensor "Seeds
VM-5500 Operator’s Manual 2018 Product Sensor “Seeds” 2.3.6 If you had selected Seeds at the start of this Quick Start the following Screen will appear. The Product Sensors Seed screen is where you can set your Desired target rate for your Seeds/Acre. After you enter this rate the default Maximum and Minimum Limits will be calculated with +/- 20%. -
Page 16: Product Sensor "Flow
VM-5500 Operator’s Manual 2018 population numbers up or down by percentages. Generally used when drilling soybeans to compensate for doubles. Suggested beginning number is an increase of 12% for most drills. If you configured your monitor with Seeds ONLY, at this point the Exit button would have changed to GREEN and the text would read “Exit Finish”. -
Page 17: Exiting Quick Setup (Setup Assistant)
VM-5500 Operator’s Manual 2018 If you had selected two Flow inputs at the beginning of this Quick Start, you will need to press “Next Page” again, and enter this same information for Flow 2. With our example at this point the Exit button would have changed to GREEN and the text would read “Exit Finish”. -
Page 18: Optional Setup
VM-5500 Operator’s Manual 2018 3 Optional Setup In this section we will go back to some options that we passed by in the Quick Start Section above, as some implements require Extra Product Sensor (Section 3.1) configurations. We will also navigate through setting up Accessory Sensors (Section 3.2) as well as some User Interface Setup (Section 3.3) parameters. -
Page 19: Area Monitor Setup
VM-5500 Operator’s Manual 2018 After you have set the Sensors Type, a “Quick Set” button will appear next to the Copy and Clear Buttons. With this button you can Reset the Default Seed Rows to Harness Row Wires. 3.1.2 Area Monitor Setup... -
Page 20: Section Control
VM-5500 Operator’s Manual 2018 Figure 12 Manual Harness Assignment Dialog The figure above shows an 8 Row implement with 8 Rows of Seed, and 8 Rows of Flow. The Flow sensors are assigned to two different rates. The funnel “Flow Seeds” is for flow blockage sensors often used on air seeders. -
Page 21: Accessory Sensors
VM-5500 Operator’s Manual 2018 and not report continuous row failures. Select section number at top, and then touch the row pad to add it to that section. Figure 14 Section Control Press the “<” and “>” arrows to change the Section Sector Number. Press the Section Sector Number for a few seconds to bring up dialog box to go directly to the Sector Number you desire. -
Page 22: Rpm Shaft
VM-5500 Operator’s Manual 2018 3.2.1 RPM Shaft In the First Accessory Sensor Screen above you start with the RPM Shaft Sub Page. You have the ability to setup two RPM sensors. Select the which RPM sensor with the left and right arrow buttons. -
Page 23: Figure 18 Vac / Pressure Sensor Select
VM-5500 Operator’s Manual 2018 To select the desired Sensor type Press on the Sensor Selection button. This button will provide a selection dialog box as follows. The list includes Off, Raven – Pressure, Dickey John – Pressure, Dickey John – Vacuum and John Deere – Vacuum. -
Page 24: Figure 19 Zero Pressure Calibration Start
VM-5500 Operator’s Manual 2018 Figure 19 Zero Pressure Calibration Start If you Press the “Calibrate Now” button the system will show the following screen while it performs the Calibrate function. Figure 20 Zero Press Calibration Processing Optional Setup | Rev 0418.1... -
Page 25: Lift Switch Configuration
VM-5500 Operator’s Manual 2018 3.2.3 Lift Switch Configuration The Lift switch may now be configured to be Normally Open or Normally Closed to accommodate different lift switches. Figure 21 Lift Switch Setup Screen Hopper Type Sensor Setup 3.2.4 The Hopper Input Type may now be configured as an Active Low or Active High Hopper Sensors. -
Page 26: User Interface Setup
VM-5500 Operator’s Manual 2018 3.3 User Interface Setup 3.3.1 Alarm Setup In this screen you may set the volume of the Alarm or Turn the Sound Off for all. In the Disables tab you can change the Enable state of each accessory sensors. -
Page 27: Misc. Settings
VM-5500 Operator’s Manual 2018 3.3.3 Misc. Settings Sensitivity is the amount of averaging time used to calculate rates. The longer times may show more accuracy, but changes will come less often. This is normally set to Low or Medium. Figure 25 Misc. Settings Press “Next Page”... -
Page 28: Speed Calibration
VM-5500 Operator’s Manual 2018 3.3.5 Speed Calibration When using an external Radar or GPS, you will need to calibrate the device. This is done by driving a 400 foot course. It is suggested that you do 4 runs and the monitor will store and average them for you. -
Page 29: Setup Screen
VM-5500 Operator’s Manual 2018 3.4 Setup Screen Figure 29 Setup Screen The Setup Screen can be moded as a step through Assistant just as it has since the start of this manual. You may also navigate directly in Normal mode. All setup attributes are available by selecting the appropriate Vertical and Horizontal tabs. -
Page 30: Monitor Operation Screens
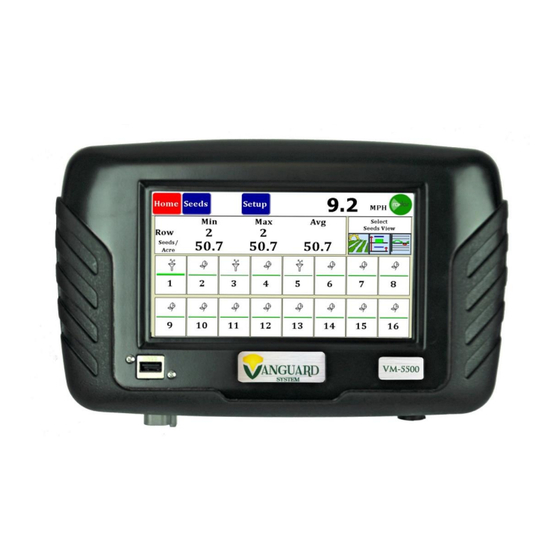
VM-5500 Operator’s Manual 2018 4 Monitor Operation Screens The Monitor has 6 different Operation Screens. Depending on your Implement Setup, some screens may or may not be accessible. Name Available Description Snap Shot Home Any Sensor The Home screen provides a... -
Page 31: Menu Bar
VM-5500 Operator’s Manual 2018 4.1 Menu Bar The Menu Bar provides a way to navigate to all of the Operational Screens, as well as providing status information. The Menu Bar resides at the Top of the Monitor display and is always visible. -
Page 32: Manual Speed
VM-5500 Operator’s Manual 2018 4.1.4 Manual Speed If Manual Speed is selected the Icon on the Right will look like this Circle with a Red Dot. Two additional Buttons will be provided, which allows a quick way of adjusting the speed up or down by 0.5 mph. -
Page 33: Figure 33 Individual Parameter Selection
VM-5500 Operator’s Manual 2018 By pressing 1 of the other available Product Sensor the Console Area will change to providing specific information on that Product Sensor. The Sensor Selection buttons will also be replaced with Individual Parameter selections buttons, these selections will disappear in time if nothing is selected. -
Page 34: Bar Graph Area
VM-5500 Operator’s Manual 2018 4.2.2 Bar Graph Area The Bar Graph Area provides individual indicators of Product Sensor readings. The center vertical line represents the Desired Value for that Product. The Bar Graph will be filled in for readings above and below the Desired Value. -
Page 35: Seed Dash Board
VM-5500 Operator’s Manual 2018 4.3 Seed Dash Board The Seed Dash Board provides summary information for seeds as well as other Accessory Sensors. Acre Counters are also available. The Seed Dash is only available is the selected Implement includes Seed Product Sensors. -
Page 36: Accessory Sensor Tiles
VM-5500 Operator’s Manual 2018 4.3.4 Accessory Sensor Tiles The Accessory Sensor Tiles across the bottom left tiles can be assigned per your desires. These Tiles have a peel indicator in the bottom right corner of the Tile, this indicates optional values. -
Page 37: Singulation Screen
VM-5500 Operator’s Manual 2018 Center right shows Acre/Hour rate followed by a calculated Field Flow 1 and Total Flow 1. Both of these may be started/stopped or cleared by holding the button down for three seconds. On the bottom row you will see the current average GPM flow rate (This will toggle between Flow 1 and Flow 2 if you have both) and finally, you have Field Flow 2 and Total Flow 2 which may be started/stopped or cleared by holding the button down for three seconds. -
Page 38: Area Monitor
VM-5500 Operator’s Manual 2018 Figure 40 Singulation Screen The screen shot above shows 12.2% Skips on Row 1 as shown in yellow. The Multiples are at 24.5 and are shown in Red. 4.6 Area Monitor Figure 41 Speed/Area Monitor Screen Speed/Area Mode provides a very simple screen that calculates the acres covered. -
Page 39: Appendix A Internal Gps Status
VM-5500 Operator’s Manual 2018 Appendix A Internal GPS Status The Internal GPS status is provided in the ICON located in the upper right corner of the monitor display. This upper right corner area is described more fully in the MPH INDICATOR section on page 19. -
Page 40: Appendix B Flow Meters
VM-5500 Operator’s Manual 2018 Appendix B Flow Meters Flow Meter Installation A plumbing diagram for a typical system used on a planter for the pop up/side by side fertilizer has been included. Starting with the product tank that is normally mounted on the planter frame each of the components used in the system will be discussed regarding their function and installation. -
Page 41: Figure 44 Pluming Diagram
VM-5500 Operator’s Manual 2018 Figure 44 Pluming Diagram There are some important items to observe when getting ready to install the precision flow meters in the system. On both the inlet and outlet end of the flow meter, there are two different sized hose barbs. - Page 42 VM-5500 Operator’s Manual 2018 ¼” Hose Barb ⅜” Hose Barb Flow Direction ⅜” Male John Guest Please note on the cable close to the harness connector the tag that shows the part number for the flow meter you have. There are 5 different flow meters offered, and they all look the same from the outside.
-
Page 43: Master Flow
VM-5500 Operator’s Manual 2018 This is an example of a 4 Row System Using John Guest style flowmeters With our Manifold and Bracket Kit. 8 Row Manifold Kit PN: 6698-8 4 Row Manifold Kit PN: 6698-4 Figure 45 Flow Manifold It is also recommend that once you have commenced planting and the lines and the flow meters have been filled with fertilizer that they remain fully charged until finished planting for the season. -
Page 44: Post Season Storage For The Vanguard Visu-Flo
VM-5500 Operator’s Manual 2018 To accommodate configuring of the Master Flow sensor a Implement Configuration screen was developed. In this screen you can select Flow type for each flow setup. The flow type would be the normal Per Row of the Master Flow sensor. -
Page 45: Appendix Cvm5500 Console Pinouts
VM-5500 Operator’s Manual 2018 Appendix C VM5500 Console Pinouts 30 Pin Console Pinout 18 Pin Console Pinout Pin # Description Pin # Description Row 1 (green) No Connection Row 2 (white) No Connection Row 3 (brown) No Connection Row 4 (blue) -
Page 46: Appendix Dvm-5500 Implement Pinouts
VM-5500 Operator’s Manual 2018 Appendix D VM-5500 Implement Pinouts 37 Pin Harness Pinout Pin # Description Row 1 (green) Row 2 (white) Row 3 (brown) Row 4 (blue) Row 5 (orange) Row 6 (yellow) Row 7 (purple) Row 8 (gray) -
Page 47: Appendix E Part Numbers
VM-5500 Operator’s Manual 2018 Appendix E Part Numbers Monitor Description Part Number VM-5500 Console Only 647550 RAM Ball Mount RAM-238U RAM Arm and Base Kit (Optional) 647141 647142 647143 Fuse, AGC 5A (Pkg. of 12) PR050 Visual Alarm (Optional) 647105... -
Page 48: Visu-Flo Tm Parts And Accessories
VM-5500 Operator’s Manual 2018 Visu-Flo Parts and Accessories E.4.1 Flowmeters Description Part Number .013 to .132 GPM 6663 .032 to .400 GPM 6664 .053 to 1.189 GPM 6667 .08 to 2.65 GPM 6665 1.32-3.96 GPM 6668 E.4.2 Flowmeter Bracket Description... - Page 50 VM-5500 Operator’s Manual 2018 The Daugherty Companies, Inc. P.O. Box 306 609 E 1 Warren, IN 46792 Ph. 260-375-2415 - Fax 260-375-3800 Email: sales@ag-electronics.com www.ag-electronics.com...
Need help?
Do you have a question about the VM-5500 and is the answer not in the manual?
Questions and answers
I have a vm5500 monitor and it keeps shutting down and it’s not the power supply going in . what else could it be , a circuit board?
If the power supply is not the issue, a Vanguard System VM-5500 monitor may keep shutting down due to improper strain relief or harness protection. If the harness is not securely tied off in the cab, movement or vibration may cause intermittent power loss or connection issues.
This answer is automatically generated