
Summary of Contents for MJK MagFlux
- Page 1 Electromagnetic Flow Meter Electromagnetic Flow Meter Installation and User Manual FW: 841012/842009 GB MagFlux Manual 0812...
- Page 2 EN61000-6-3/-4:2001, EN61000-6-3/-4:2001, EN61000-6-3/-4:2001, EN61000-6-1/-2:1999 EN61000-6-1/-2:1999 EN61000-6-1/-2:1999 conformément aux dispositions conformemente alla disposizioni según las disposiciones de la(s) de Directive della Direzione directiva(s) 89/336/EEC; 92/31/EEC 89/336/EEC; 92/31/EEC 89/336/EEC; 92/31/EEC 21.11.2006 Jens Kruse GB MagFlux Manual 0812...
-
Page 3: Table Of Contents
Operating Principles ..........10 The MagFlux Flow Meter . - Page 4 Service Menu ............86 GB MagFlux Manual 0812...
- Page 5 Appendix A. Pop-up and Error Messages Appendix B. MJK-Field Link Software Important Notes! ..........111 A.
- Page 6 Electromagnetic Flow Meter This page intentionally left blank GB MagFlux Manual 0812...
-
Page 7: Introduction
The flow meter is easy to install and put into service. However, read this manual first to learn about the MagFlux electromagnetic flow meter and ® all its features. You can always contact your local representative or the MJK hot lines for advice and guidance: • Europe Tel.: +45 45 56 06 56 E-mail: mjk@mjk.com... -
Page 8: About This Manual
The manual is divided into a table of contents, eight chapters, seven ap- pendices, four gatefolds and an index. 1. Introduction Contains a presentation of the MJK MagFlux electromagnetic flow ® meter, the structure of this manual and the operating principles. - Page 9 Electromagnetic Flow Meter Appendix B. MJK-Field Link Software Upgrade Describes in detail how to utilise the unique and intuitive MJK-Field Link software program to upload new display and converter firmware versions. Appendix C. FAQs - Frequently Asked Questions Contains answers to questions that are often asked.
-
Page 10: Operating Principles
E = K x B x D x Q x 4 / ( x D x D) = 4 K x B x Q / ( x D) Evidently the voltage E is proportional to the actual flow. GB MagFlux Manual 0812... -
Page 11: The Magflux ® Flow Meter
Electromagnetic Flow Meter The MagFlux Flow Meter ® Measurement Electromagnetic flow meters may have either direct current (DC) or alter- nating current (AC) excitation. When systems are AC excited, electrostatic and/or electromagnetic noise may influence the measurements. A DC excited system however, is less sensitive to noise produced by electromagnetic induction, simply be- cause the voltage induced over the electrodes will be a DC voltage. - Page 12 Electromagnetic Flow Meter This page intentionally left blank GB MagFlux Manual 0812...
-
Page 13: Safety, Repair And Product Identification
MagFlux is being serviced. ® Physical Mounting The MagFlux flow converter/flow meter must not be mounted in ® explosion hazardous areas! Repair Repair must only be made by MJK or by a service representative ap- proved by MJK. FW: 841012/842009... -
Page 14: Product Identification
(see example below). This calibration code (Cal. code) is unique and provides the MagFlux ® converter with information about flow sensor number, nominal diameter of the flow sensor and calibration data for the flow sensor. -
Page 15: Flow Sensor
Electromagnetic Flow Meter 3. Flow Sensor The following conditions must be satisfied to get the full benefit of the MagFlux flow sensor. ® Minimum conductivity • conductivity of the media must be greater than 5 µS/cm. Liner selection • lining for chemicals and food industries Teflon ®... -
Page 16: Pressure Loss
The flow directions A or B are clearly shown on the name plate. Default flow direction is "A". Pressure loss The pressure loss can easily be determined, if the nominal pipe diameter is greater than the MagFlux flow sensor. See the diagram below: ® Pressure loss graph 0.003... -
Page 17: Accuracy
The flow sensor should be selected so the flow velocity through the sensor will be between 0.2 - 10 m/s. MJK recommends that flow velocities in tubes are kept between 1 - 3 m/s for reliable and safe operation. See also the dimensioning table below and the dimensioning chart on the following page. -
Page 18: Sizing Chart
Electromagnetic Flow Meter Sizing Chart Example: A MagFlux with an internal diameter of 100 mm can measure flow rates between approx. 290m /h and 5.6 m /h, and the fluid velocity is 1.5 m/s at a flow rate of approx. 42 m... -
Page 19: Pipe System
Electromagnetic Flow Meter Pipe System 1. The flow sensor must be mounted in a location which is free from inter- fering elements like valves, Ts, bends, pumps, etc. to ensure a laminar flow without turbulence upstream of the flow sensor. For that reason the flow sensor must be mounted in a straight pipe at a distance from interfering elements of minimum 3 x DN upstream and minimum 2 x DN downstream. - Page 20 4. The flow sensor should always be filled with liquid. For that reason the flow sensor must not be mounted at the highest point of the pipe sys- tem or in free outlets, where gravity could empty or partially empty the pipe. GB MagFlux Manual 0812...
- Page 21 Electromagnetic Flow Meter 5. The flow sensor can be mounted vertically or horizontally. If the flow sensor is mounted vertically, the flow direction should always be upwards. In that way the effect from possible bubbles in the liquid will be significantly reduced, just as it will ensure that the flow sensor is always filled with liquid.
-
Page 22: Cabinet Mounted On The Flow Sensor
If the flow sensor is rotated more than 45°, one of the electrodes may not be in full contact with the liquid. Cabinet Mounted on the Flow Sensor The cabinet is mounted on the flow sensor with four pcs. 6x12 hex cap screws. GB MagFlux Manual 0812... -
Page 23: Potential Equalization And Grounding
Electromagnetic Flow Meter Potential Equalization and Grounding Type 7100/7200/7600 in Conductive Pipes Conductive pipes Equalization connection Soft gasket Ground connection. NB! The flow sensor must be connected to an effective ground connection, and the wire dimension must be at least 1.5 mm Type 7100/7200/7600 in Non-conductive Pipes Non-conductive pipes Grounding ring (Min. -
Page 24: Type 7300/7400 In Conductive Pipes
Grounding ring (Min. thickness = 5 mm.) Potential equalization connection Soft gasket Soft gasket Non-conductive pipe Non-conductive pipe Ground connection. NB! The flow sensor must be connected to an effective ground connection, and the wire dimension must be at least 1.5 mm GB MagFlux Manual 0812... -
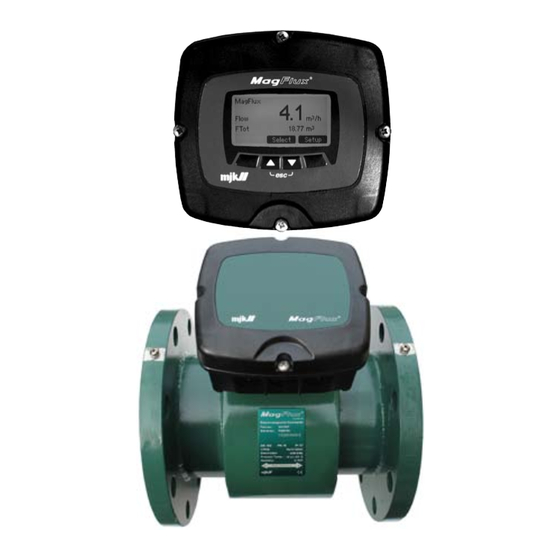
Page 25: Flow Converter
Loosen the four screws (position indicated by arrows) and remove the display unit to gain access to the terminals. www.mjk.com Up to four MagFlux ® flow sensors can be connected to one operator panel: Operator... -
Page 26: Power Supply
Technical Specifications for 10 - 30 V DC Power Supply Power consumption without display < 5 W Power consumption with display < 8 W Peak start current @12 V DC,1 second Approx. 1,5 A Peak start current @24 V DC,1 second Approx. 1 A GB MagFlux Manual 0812... -
Page 27: Changing The Power Supply Voltage 230/115 V Ac
Electromagnetic Flow Meter Changing the Power Supply Voltage 230/115 V AC To change the input mains voltage from 230 VAC to 115 VAC (or vice versa) proceed as follows: 1. Loosen the four screws on the front and lift out the display (see also page 25). - Page 28 9. Turn around the PCB and replace the 63 mAT fuse on the right side with a 125 mAT fuse ( or vice versa going from 115 VAC to 230 VAC). 10. Re-insert the PCB and re-assemble the flow meter (see also steps 4, 3, 2 and 1). GB MagFlux Manual 0812...
-
Page 29: Analogue Output
See details on pages incl. Digital Outputs MagFlux has two digital outputs - DO 1 with an opto (light triggered) ® relay and DO 2 with an electro-mechanical relay. They can both be programmed for the following functions:... -
Page 30: Digital Input
Important: Terminals 1 and 4 must be shunted! Compact Flow Sensor Terminal Signal Designation Colour from sensor Built-in liquid Liquid GND Black/shield ground electrode Electrode Electrode White Ground Black Coil Blue Coil Brown 7, 8 and 9 not used GB MagFlux Manual 0812... -
Page 31: Remote Flow Sensor
The extension cable length between converter and sensor must under normal circumstances not exceed 100 meters. Power lines running in par- allel and noisy environments may reduce the max. length to 50 meters. Consult MJK personnel for advice and guidance. Remote Flow Sensor Terminal... -
Page 32: Converter Connection Board - Local
Electromagnetic Flow Meter Converter Connection Board - Local Connection for Flow Sensor Converter Connection Board - Remote Connection for Plug for local local sensor display unit Connection for Connection for remote converter remote display unit GB MagFlux Manual 0812... -
Page 33: System Configuration Examples
Electromagnetic Flow Meter 5. System Configuration Examples Compact Converter and Display Unit on Flow Sensor Configuration: The MagFlux Converter and Display Unit is mounted ® directly on the MagFlux Flow Sensor. ® Order numbers for this configuration: 207xxx MagFlux Flow Sensor ®... -
Page 34: Remote Converter With Connection Box On Flow Sensor
Gel Potting Kit IP68 ® 207920 207925 consists of: 207940 Display Unit 207020 MagFlux connection PCB (see picture below) 820050 Blind Lid 800070 Cabinet bottom part for sensor mounting 800075 Cabinet bottom part for wall mounting Converter connection PCB GB MagFlux Manual 0812... -
Page 35: Wiring Schematic #1
"Remote Converter with Connection Box on Flow Sensor" on the op- posite page (page 34). Flow Sensor Connect one end of the MJK cable to the flow sensor as de- scribed in the table below. All 3 shields are twisted and connected in slot 1. -
Page 36: Remote Display And Multiple Converters Wiring
Electromagnetic Flow Meter Remote Display and Multiple Converters Wiring Configuration: Two locally mounted MagFlux Flow Sensors and con- ® verters with blind lid and one remote mounted Display Unit. The communication between the sensors and the Display Unit is executed... -
Page 37: Wiring Schematic #2
Electromagnetic Flow Meter Wiring Schematic #2 for the "Remote Display and Multiple Converters Wiring" example on the opposite page (page 36). Local flow sensor 1 2-wire twisted shield cable: Connect lead "1" to slot "A", lead "2" to slot "B" and the twisted shield to slot "-". - Page 38 Electromagnetic Flow Meter This page intentionally left blank GB MagFlux Manual 0812...
-
Page 39: Startup
Electromagnetic Flow Meter 6. Startup Initial Checks Before switching on power the following steps must be checked. 1. The local mains power supply voltage corresponds to the voltage printed on the identification label of the flow converter. 2. All electrical connections are made in accordance with the electrical connection diagram shown on page 32. -
Page 40: Display Read-Out, One Connected Unit
® Chapter 6. MagFlux Menus (on page 47) gives a detailed description of the displays shown during setup, configuration and normal operation. A 5-line LCD screen displays symbols and the actual status during setup, configuration, servicing and normal operation (see also page 48). -
Page 41: Display Read-Out, Several Connected Units
Electromagnetic Flow Meter Display Read-out, several connected units When several MJK units are interconnected, for example an Oxix dis- ® solved oxygen transmitter and MagFlux flow meter with different names ® and Modbus ID numbers, a "Display Overview Menu" is available at top level (press "Back"... - Page 42 A system reset immediately sets the display language to (GB) English. The system reset must not be confused with the ultimate "Recover factory settings" (see page 99) which deletes all local configurations/settings and replaces them with default factory settings. GB MagFlux Manual 0812...
-
Page 43: Initial Setup
Electromagnetic Flow Meter Initial Setup Initial setup is normally performed by MJK personnel and is required to get started with the MagFlux flow meter. ® A unique sensor calibration code provides the MagFlux flow converter ® with information about flow sensor number, nominal diameter and calibra- tion data. - Page 44 OK. See also details regarding the calibration code on page 14. 5. Select the correct flow direction in the "Set Flow Direction" menu and press OK. GB MagFlux Manual 0812...
- Page 45 Track 00025 Back Select > The MagFlux is now configured with default settings and is ready for use. ® Note: If the sensor has not been pre-configured from the factory with a sensor calibration code, the calibration code procedure is somewhat different form the just mentioned.
- Page 46 3. Select the correct flow direction from the "Set Flow Direction" menu Set Flow Direction and press OK. Follow Arrow A 4. Sensor calibration code configuration is now finished, and you are Follow Arrow B returned to the Main Menu. <A ----------------------------- B> Back Select GB MagFlux Manual 0812...
-
Page 47: Magflux Menus
(page Gf-2) • Service Menu Overview (page Gf-3) • (page Gf-4) Display Setup Menu Overview Main Menu 1. Press the "Setup" key on the MagFlux display (see below) to enter the ® MagFlux Main Menu. ® MagFlux Flow 4.1 m FTot 18.77 m... -
Page 48: Specify Main Screen
Electromagnetic Flow Meter Specify Main Screen The "Specify Main Screen" menu allows you to customize the MagFlux ® display to suit your requirements. You can add and remove the five avail- able display lines and configure them individually. Specify Main Screen... - Page 49 Electromagnetic Flow Meter The available options are: Not in use The line will not be used. The set free space will be used by the other lines. Sensor Name The actual sensor name like a number, a location, a name or a function will be displayed Note: The actual sensor name is defined later on in the "Set Sensor Name"...
- Page 50 Batch 2 Volume Clock Time and date The size of the display lines will automatically increase or decrease as the number of display lines is removed or added to maximize the field of view for the measured values GB MagFlux Manual 0812...
-
Page 51: Factory Settings
Electromagnetic Flow Meter Factory Settings The "Factory Settings" menu resets the display to default settings, to met- ric settings or to US settings. Note: The converter settings are not changed from this menu. Converter settings are covered in "Converter Setup" on page 61. 1. - Page 52 • MagFlux Default DI/DO Settings • MagFlux Default 20 mA Settings MagFlux Default DI/DO Settings Digital Output 1 (opto) - DO1 Digital Output 2 (mech.) - DO2 Digital Input - DI...
- Page 53 Electromagnetic Flow Meter MagFlux Default 20 mA Settings Metric DN [mm] Flow [m3/h] Size Flow [GPM] 0,25 1/4¼" 3/8" ½" 3/4" 1" 1¼" 1½" 2" 2½" 3" 4" 1000 5" 2000 6" 3000 1000 8" 5000 2000 10" 7700 2500 12"...
- Page 54 Flow Unit Totalizers /sec RFTot RRTot RSTot FTot RTot l/sec l/min Set to US All converter-related units can be set to the following units (default values in bold italics) Totalizers Flow Unit RFTot RRTot RSTot FTot RTot GB MagFlux Manual 0812...
-
Page 55: Data Logger
Electromagnetic Flow Meter Data Logger provides a data logger with a capacity of approx. 20,000 entry Magflux ® points. See Appendix E on page for examples and descriptions of log files. The data logger operates after the FIFO principle (First In, First Out). If the data logger is full and new data are coming in, the oldest data are dis- carded. - Page 56 The log data can be shown on the Display Unit or be stored in an external CSV file. MJK-Field Link software is needed for transfer of data into CSV file format via the USB port in the display unit. The format can be read in...
-
Page 57: Graph Display
Electromagnetic Flow Meter Graph Display The content of the Data Logger can displayed on the Display Unit by Innlet flow 32,5 flow m3/h pressing the up/down keys simultaneously (esc), highlighting "Flow" and cnt 1 312535 Select Graph selecting "Graph" 10.000M3/H Inlet flow 32,5 flow... -
Page 58: Password
2. Press the up/down keys to highlight the required option and then press OK to select it. Password Login Activate/Deactivate Change Password Back Select Activate/ Login Change Password Deactivate Type Password Activate Set New Password 00000 Deactivate 00000 Back Select > Back Select Back Select > GB MagFlux Manual 0812... -
Page 59: Set Sensor Name
Electromagnetic Flow Meter The available options are: Login Use the up/down keys to set the digits one by one. Continue with > until all digits have been set and then press OK. Activate/Deactivate Write protection. Selecting "Activate" means that a password must be entered to change vital settings. - Page 60 A B C D E F G H I J K L M N O P Q R S T U V W X Y Z <space> 1 2 3 4 5 6 7 8 9 and 0. GB MagFlux Manual 0812...
-
Page 61: Converter Setup
Electromagnetic Flow Meter Converter Setup "Converter Setup" provides configuration options for volumes, batches, units, etc. See detailed descriptions in the following sections, and a con- tinuous fold-out overview on page Gf-2 at the end of this manual. 1. Press the up/down keys to highlight the required menu line (here: Con- verter Setup) and then press OK to select it. -
Page 62: Minimum Flow
Back Select > Back Select > 1. Select the digits one by one with the left/right keys and set the value with the up/down keys. Back Select 2. Press OK to save the final setting. GB MagFlux Manual 0812... -
Page 63: Units
Output mA Output 20 mA = 1.000 m When a MagFlux is connected to a power supply for the first time, the ® mA output is automatically set to provide 4 mA at zero flow and 20 mA at a flow corresponding to the theoretical Q of the flow sensor. -
Page 64: Flow Forward
Electromagnetic Flow Meter Using the factory setup MagFlux returns to default mA settings corre- ® sponding to the chosen MagFlux flow sensors Q and Q ® The mA output is an active output, and the maximum load is 800 Ohm. -
Page 65: Flow Reverse
Select > -100% -800 -600 -400 -200 100% Flow 2006 - 09 - 29 MJK AUTOMATION A/S Date: FW: 841012/842009 yageren 7 KJ/LSP Constructor: DK-2800 Nñrum ax: +45 45 56 06 46 Part no.: el.: +45 45 56 06 56... -
Page 66: Forward & Rev. (4Ma=0)
0,00 m 20 mA = -1.000 m 20 mA = 1.000 m Back Select > Back Select > -100% -800 -600 -400 -200 100% Flow Not in use The "mA Output" option is not being used. GB MagFlux Manual 0812... -
Page 67: Totalizers
Electromagnetic Flow Meter Totalizers The MagFlux provides six totalizers, each with two or three output op- ® tions. Up to two totalizers can be assigned to one digital ouput. The totalizers are: RFTot Resettable Forward Totalizer RRTot Resettable Reverse Totalizer... - Page 68 Electromagnetic Flow Meter Volume between Pulses Select a volume between pulses in steps of: 0,001, 0,01, 0,1, 1, 10, 100 and 1000. MagFlux Totalizer Output Setting Metric Optical DO 1 Mechanical DO 2 @100 mSec. @100 mSec. DN [mm] min.
- Page 69 Minimum flow unit pr pulses = 300 m x 100 mSec / 1800000 = 0,016 m which is rounded to 0,1 m by the MagFlux. The formula for the maximum flow unit pr pulses is: (flow at 20mA) Example: DN 100 max. flow 300 m...
-
Page 70: Resettable Totalizers
Back Select Back On-time On-time On-time 00100 mSec 00100 mSec Back Select > Back Select > Back Volume between Pulses Volume between Pulses Volume be 01.00000 m 01.00000 m Back Select > Back Select > Back GB MagFlux Manual 0812... -
Page 71: Resettable Forward Totalizer
Electromagnetic Flow Meter Resettable Forward Totalizer RFTot The Totalizer counts the forward flow volume according to the primary flow direction selected at startup. The Totalizer counts in selected units and is resettable. The counter can be connected to the relays or to the display only. To reset the counter, the totalizer must be present in the Main display and be selected by the up/down keys followed by a click on Reset. -
Page 72: Non-Resettable Totalizers
The Totalizer counts in selected units and cannot be reset. On-time The counter can only be selected from the Main display. Back Number o preselecte GB MagFlux Manual 0812 Back... -
Page 73: Batch Counters 1 & 2
Electromagnetic Flow Meter Batch Counters 1 & 2 NR Totalizer Reverse / NR Totalizer Sum / Batch Counter 1 / Batch The batch counters can operate in three different ways: automatically, manually or adaptively, and they deduct a reverse flow from the forward flow. - Page 74 Tel.: +45 45 56 06 56 ux Converter Software version Function or DO activated 841010 erse Batch Counter 2 Function or DO deactivated V (volume) Automatic Preset Volume Time DO 1 or 2 V (volume) GB MagFlux Manual 0812 Manual...
- Page 75 Fax: +45 45 56 06 46 V (volume) KJ/LSP Part no.: Tel.: +45 45 56 06 56 Automatic u system for MagFlux Converter Software version Preset Volume verter setup, 841010 zer Forward, Totalizer Reverse zer Sum, Batch Counter 1, Batch Counter 2...
- Page 76 Tel.: +45 45 56 06 56 Pause ux Converter Software version DO 1 or 2 841010 erse V (volume) Batch Counter 2 Adaptive overflow % Preset Volume Dynamic stop of Batch Time Start Stop DO 1 or 2 GB MagFlux Manual 0812...
- Page 77 Reseting the Reseting the Reseting the Batch Counter 2 Batch Counter 1 Batch Counter Automatic Automatic Automatic Electromagnetic Flow Meter Manually Manually Manually Adaptive Adaptive Function or DO activated Adaptive Adaptive Batch Counter Back Select Back Select Back Function or DO deactivated The counter adapts compensates for overrun and insufficient flow.
-
Page 78: Settings And Limits For Batch Counters
Select a volume between pulses as listed in the table overleaf. The relays are limited to a minimum and a maximum of pulses pr. hour depending on the 20 mA scale and the on-time of the relay in milli- seconds. GB MagFlux Manual 0812... - Page 79 Electromagnetic Flow Meter MagFlux Batch Counter Output Settings Metric Optical DO 1 @100 mSec. Mechanical DO 2 @100 mSec. DN [mm] min. max. min. max. Unit Automatic Manually/ Automatic Manually/ adaptive adaptive 0,0000139 0,0006944 0,25 0,0020833 0,0006944 0,25 0,0000556 0,0027778...
- Page 80 Limitation of the manual and adaptive batch counter on DO 1 or DO 2 The formula for minimum flow unit pr pulses is: (flow at 20mA) / 360 Example: DN 100 max. flow 300 m /h ? Minimum flow unit pr pulses = 300 / 360 = 0,833 m GB MagFlux Manual 0812...
-
Page 81: High Flow/Low Flow
Electromagnetic Flow Meter The formula for maximum flow unit pr pulses is: (flow at 20mA) Example: DN 100 max. flow 300 m3/h ? Maximum flow unit pr pulses = 300 m High Flow/Low Flow Path: Main Menu -> Converter setup -> High Flow / Low Flow The high and low flow options provide alarms and trigger relays when certain volume limits are exceeded or not reached. - Page 82 The lenght is the time between an incident and set- ting an alarm. Relay Function NO (Normally Open) determines the relay state under normal conditions. NC (Normally Closed) determines the relay state under normal conditions. GB MagFlux Manual 0812...
-
Page 83: Flow Direction
Electromagnetic Flow Meter Flow Direction The "Flow Direction" option indicates the flow direction of the flow and determines the open/closed state of the relay. Path: Main Menu -> Converter setup -> Flow Direction / Empty Pipe / Service Menu / The default Flow Direction is set to "Direction A". -
Page 84: Empty Pipe
The lenght is the time between an incident and set- ting an alarm. Relay Function NO (Normally Open) determines the relay state under normal conditions. NC (Normally Closed) determines the relay state under normal conditions. GB MagFlux Manual 0812... -
Page 85: Status
Electromagnetic Flow Meter Status The "Status" option provides an overview of the in- and output status. The check boxes can contain four different characters to indicate the current status at that very moment: X A cross (X) in a check box indicates an active state A blinking forward slant (/) in a check box indicates that the input/ output is in the process of being activated. -
Page 86: Service Menu
6 characters plus two "Ok"s. If the code is dw5uq4, enter: d w 5 u q 4 "Ok" "Ok" where "Ok" indicates that you press the "Ok" key without selecting any character. Only small letters can be entered from the MagFlux key- ®... - Page 87 Back Select > Electromagnetic Flow Meter Sensor Calibration Code Converter SW Ver. IMPORTANT: All letters are small letters (e.g. “a” and not “A”), and Product Data numbers are big characters (e.g. “0”, zero and not “o”, small o). Reset Counter Time Internal Meas.
- Page 88 Product type No. 0000207910 HW type No. 00000510250 ------------- B> Back Select > Back Select > View Vga Track No. 00000 Back 00025 Back Select > > View HW type No. 00000510250 View ADC Back Select > Back GB MagFlux Manual 0812...
- Page 89 Fax: +45 45 56 06 46 Part no Tel.: +45 45 56 06 56 Reset Counter Time Menu system for MagFlux Converter Softwa The counter reset and runtime can be reset for fault finding, error cor- Converter Setup rection and similar service procedures.
- Page 90 1163.1950000000 m Release mA Minimum mA 4mA = Back Select Back 12 mA 20 mA Maximum mA Back Select Set volume 1163.1950000000 m Calib. current Back Select 20500 uA Back Select > GB MagFlux Manual 0812 DAC zero current 3955 uA...
- Page 91 Electromagnetic Flow Meter Calibrate mA From this menu the mA reading can be calibrated against a multimeter. Calibration Volume Calibrate mA Test Velocity Freez Current Reset counter Set velocity Freeze coil Set fixed current 00.000 m/sec Positive Calib. current Negative DAC zero current DAC top current Back...
- Page 92 Back Select 12 mA 20 mA Maximum mA Back Select 0000000 m Calib. current 20500 uA Back Select > DAC zero current 3955 uA Back Select > DAC top current 19997 uA 3814 Back Select > GB MagFlux Manual 0812...
- Page 93 Electromagnetic Flow Meter Freeze Coil For service technician use only. The sensor coil current and voltage val- ues can be "frozen" to enable read-out using an standard multimeter. Test Velocity Freeze Coil Read Event Log Read se Set velocity Freeze coil No Hour Event Extension 00.000 m/sec...
- Page 94 Access the sensor's key data. DK-2800 Nñrum Constructor: Fax: +45 45 56 06 46 Part no.: Tel.: +45 45 56 06 56 Menu system for MagFlux Converter Software version e Coil Read Event Log Read sensor data Back On Stock...
-
Page 95: Display Setup
Electromagnetic Flow Meter Display Setup The "Display Setup" menu provides configuration options for language, clock and factory settings, Modbus parameters and software version display. 1. Press the up/down keys to highlight the required menu line (here: Dis- play Setup) and then press OK to select it. Main Menu Specify Main Screen Factory Settings... -
Page 96: Language
Soumalainen Svenska Back Select Additional languages can be added using the MJK-Field Link software program (see also Appendix B on page 116). 1. Chose the required language using the up/down keys up and then press OK. GB MagFlux Manual 0812... -
Page 97: Set Clock
Electromagnetic Flow Meter Set Clock The "Set Clock" menu provides setting of the built-in clock and the time format. Set Clock Time Format 24 hour AM/PM Back Select Set Clock 2006-09-19 12:43:11 Back Select > 1. Select the date and time digits with the left/right keys and change the setting with the up/down keys. -
Page 98: Modbus
The Display Unit can easily be moved to another converters for readout and configuration. 1. Select "Add Device", click OK and wait for the scan process to finish. 2. The found converters are finally displayed. GB MagFlux Manual 0812... -
Page 99: Factory Settings
1. Press the up/down keys to highlight the required option and press OK. Important: The Data Logger will be reset, and all devices will be deleted from the display Unit. This is indicated by the MJK start-up screen which is displayed within a few seconds. FW: 841012/842009... -
Page 100: Display Sw Version
The "Display SW Version" menu provides a read-out of the display soft- ware (actually firmware) version, the build date and last-edited date of the the multiple languages file. Display SW Version Display 841xxx-xxx Build Sep 15 2006 11:18:24 Language 2006 09 21 Back GB MagFlux Manual 0812... -
Page 101: Mechanical Dimensions
Electromagnetic Flow Meter 8. Mechanical Dimensions Standard Flanges - EN-1092-1:2001 - Europe Flange marking: zzz/EN 1092-1/01 A/DN xxxx/PN ww/S235JR/yyyyy where: zzz = Manufacturer's name/trademark EN 1092-1 = Standard 01 A = Flange type DN xxxx = DN (size) PN ww = PN (pressure) S235JR = Material symbol/no/grade yyyyy = Traceable ID or control no. -
Page 102: Standard Flanges - Ansi B 16.5 - U.s.a
16" 23.5 21.75 1.44 1.12 18” 25.0 22.75 1.56 1.25 20” 27.5 25.00 1.69 1.25 24” 32.0 29.50 1.88 1,38 28” 36.5 32” 41.4 36” 46.0 40” 50.2 48” 59.4 ➀ 300-600-900 psi: Consult the factory. GB MagFlux Manual 0812... -
Page 103: Standard Flanges - As-4087-2004 - Australia
Electromagnetic Flow Meter Standard Flanges - AS-4087-2004 - Australia Flange Dimensions - PN 16 - AS-4087-2004 Size Outer diameter Bolt diameter Thickness No. of holes Hole diameter [mm] [mm] [mm] [mm] [mm] 1060 1175 1092 1000 1255 1175 1200 1490 1410 FW: 841012/842009... -
Page 104: Standard Flanges - As-4087-2004 (Cont'd)
Standard Flanges - AS-4087-2004 (cont'd) Flange dimensions - PN21 - AS 4087-2004 Size Outer diameter Bolt diameter Thickness No. of holes Hole diameter [mm] [mm] [mm] [mm] [mm] 1060 1185 1105 1000 1275 1194 1200 1530 1441 GB MagFlux Manual 0812... -
Page 105: Standard Flanges - As-4087-2004 (Cont'd)
Electromagnetic Flow Meter Standard Flanges - AS-4087-2004 (cont'd) Flange dimensions - PN35 - AS-4087-2004 Size Outer diameter Bolt diameter Thickness No. of holes Hole diameter [mm] [mm] [mm] [mm] [mm] 1060 1185 1105 1000 1275 1194 1200 1530 1441 FW: 841012/842009... - Page 106 Electromagnetic Flow Meter This page intentionally left blank GB MagFlux Manual 0812...
-
Page 107: Appendix A. Pop-Up And Error Messages
Electromagnetic Flow Meter Appendix A. Pop-up and Error Messages Alarms Sensor Error Alarm - The converter has expe- rienced HW problems measuring flow (see log for details/time) Sensor cal. Code error Alarm - The calibration code con- flicts with the sensor HW. Output Coil Error Alarm - The converter has experi- enced problems with connection to... - Page 108 Batch2 Adaptive Error Alarm - Batch 2 adaptive flow is over/under the limit for error cor- rection Low flow Alarm - Low flow is detected. High flow Alarm - High flow is detected GB MagFlux Manual 0812...
- Page 109 Data has a non-valid value Missing user login User password required to access Missing MJK login MJK password required to access Relay used for pulse counter posi- The relay is already in use by tive another function. Select a different relay.
- Page 110 Unknown command flash user text Unvalid command issued. Flash address overrun A write error hos occured. File phase error Internal USB error. File write failure A write error hos occured. USB protocol overrun A communication error has oc- cured. GB MagFlux Manual 0812...
-
Page 111: Appendix B. Mjk-Field Link Software
1. Insert the MagFlux MJK-Field Link CD-ROM into the PC's disk drive. ® The MJK-Field Link opening menu will appear after a short while (see below). If the auto-run function does not execute, locate the "MJK-Field-Link 840110-007.exe" file (or similar) and click "Run". - Page 112 If the connection is successful, a "Device Clock" window for PC and device time synchronisation is displayed (if PC and device clock were out of sync.) along with a link status display (see below). If the connection fails, first remove the cable and then re-connect it. GB MagFlux Manual 0812...
-
Page 113: Save Log Data
1. Select "Firmware" in the menu bar and click "Display". 2. Locate the "MJK Field FW" directory on the CD-ROM, select the 841xxx-xxx.hex file (or similar 841*.hex) and click "Open". 3. Click OK when the "Display Firmware" dialogue box appears and prompts for programming the display Flash memory. - Page 114 Electromagnetic Flow Meter 4. A "Searching for MJK-Field" dialogue box then appears and prompts for disconnecting and re-connecting the USB cable. Do as suggested and click OK. 5. Meanwhile the MagFlux Display Unit restarts and displays the MJK ® logo, the new link status is displayed, and the Display Unit informs that the PC is once again connected.
-
Page 115: Upgrade Converter Firmware
Electromagnetic Flow Meter D. Upgrade Converter Firmware 1. Select "Firmware" in the menu bar and click "Converter". 2. Locate the "MJK Field FW" directory on the CD-ROM, select the "842xxx-xxx.hex" file (or similar) and click "Open". 3. Select the required MagFlux (option 1, 2, 3 or 4) and click OK when ®... -
Page 116: Install/Add Languages
You can now either add or delete the required languages. 3. Click "Add", select the required language text file (or language pack) in the "MJK Field Display Unit text files" directory on the CD-ROM (for example 841511-000.txt) and click "Open". -
Page 117: Appendix C. Faqs - Frequently Asked Questions
Electromagnetic Flow Meter Appendix C. FAQs - Frequently Asked Questions ****************************************************************************************** Question: Which size flow meter should I choose for my installation? I would prefer a flow meter with the same diameter as the tube(s). Answer: The minimum and the maximum flows determine the size. Use the size chart (on page 18) to find the correct flow meter size, and avoid tend- ing to select a too large size. - Page 118 MJK flow meters with DN ≤ 50 must always be equipped with ground- ing rings. MJK flow meters with DN > 50 have a built-in ground elec- trode that makes grounding rings superfluous. Coated metal tubes always require grounding rings.
- Page 119 Electromagnetic Flow Meter ****************************************************************************************** Question: I have an "Empty pipe" indication, but the pipe is not empty! Answer: There aren't any grounding rings, or the rings have not been properly grounded. See examples on page 23. ****************************************************************************************** Question: I can't set the counter to the required output, only to a value that is higher.
-
Page 120: Appendix D. Front Panel Cut-Out Drawing
Electromagnetic Flow Meter Appendix D. Front Panel Cut-out Drawing Frontpanel outline The dotted line indicates the front panel outline and measures 155 x 145 mm. GB MagFlux Manual 0812... -
Page 121: Appendix E. Test Certificate
Electromagnetic Flow Meter Appendix E. Test Certificate Part no.: 207222 Size: DN50 Serial no.: 23734 Protection: IP67 Calibration code: au2921 Pressure rating: PN16 Lining: Hard rubber Electrodes: AISI 316 TI Media temp.: -10 to 80°C Test conditions: The meter tests were carried by a volume method with flying start. Test facility: Helios AG, SRN electro-mechanical weighing machines of capacities 4800 kgs production series numbers 9229012, 47583. -
Page 122: Appendix F. Log Files
(see "Save Log Data" procedure on page 113) having been opened in with Microsoft Excel spread sheet utility. ® ® This example below illustrates four MagFlux converters being logged every 10 secs. The entries are described on the following page. GB MagFlux Manual 0812... - Page 123 Index Converter ID (here 4 converters: 32, 33, 34 and 35) MB Address Modbus address (here: 1, 2, 3 and 4) Unit SI unit according to the MJK unit codes (here: 19 = m MJK Unit Codes Code no. Unit...
- Page 124 To plot the log file's data, proceed as follows: 1. Start Excel and open the csv log file. 2. Sort by "Index", click the "Diagram Guide" tool in the toolbar and select the required curve or graph (see example below). GB MagFlux Manual 0812...
-
Page 125: Appendix G. Digital Input/Output Connections
The digital in- and outputs, DI and DO, can be interconnected to exter- nal equipment to achieve a number of functions such as alarms, counter reset, flow direction indication, etc. The two schematics below illustrate a simplified mode of operation. MJK Field MagFlux com = common (-) External equipment MJK Field MagFlux... -
Page 126: Main Menu Overview
Cancel Change Password Line 2 - Flow Default Line 3 - FTot Set to Metric Line 4 Set to US Line 5 Back Select > Back Select Back Select Back Select GB MagFlux Manual 0808 Gf-1 GB MagFlux Manual 0812... - Page 127 Converter Setup Set Sensor Name Language 0010 sec Activate/Deactivate Minimum Flow Set Clock Change Password MagFlux1 Modbus Factory Settings Status Display SW Version Service Menu Select > Back Select Back Select Back Select > Back Select GB MagFlux Manual 0812...
-
Page 128: Converter Setup Menu Overview
Back Select mA Output 20 mA = 20.000 m Back Select > Main Menu Converter Setup Specify Main Screen Data Logger Password Set Sensor Name Display Setup Factory Settings Service Menu GB MagFlux Manual 0812 Gf-2 GB MagFlux Manual 0808... - Page 129 20.000 m 4 mA = 0.00 m 20 mA = -20.000 20 mA = 20.000 m Back Select > Back Select > Back Select > Back Select > Back Select nverter Setup Display Setup Service Menu GB MagFlux Manual 0812...
- Page 130 00100 mSec 00010 Sec Back Select > Back Select > Back Select > Volume between Pulses Volume between Pulses Volume between Pulses 01.00000 m 01.00000 m 01.00000 m Back Select > Back Select > Back Select > GB MagFlux Manual 0812...
- Page 131 Electromagnetic Flow Meter R Totalizer Sum NR Totalizer Forward NR To R Totalizer Reverse Totalizer Forward Unit Totalizer Forward Unit Totaliz Electro-mechanical Relay Opto Relay Display only Back Select Back Select Back Select Back Display only Electro-mechanical Relay Opto Relay play only Reset with Digital Input ward Unit...
- Page 132 Automatic Automatic Manually Manually Adaptive Adaptive Back Select Back Select Automatic Manually On-time Number of 00100 mSec preSelected (Units) 00.002778 m Back Select > Back Select > Number of preselected (Units) 00.002778 m Back Select > GB MagFlux Manual 0812...
- Page 133 Electromagnetic Flow Meter Counter 1 Batch Counter 2 Electr anical Relay Electro-mechanical Relay Opto Opto Relay Displa Not in use Not in Select Back Select echanical Relay Opto Relay Not in use Electro-mechanical Relay Opto Relay Not in use er 1 Unit Batch Counter 1 Unit Batch Counter 2 Unit Batch Counter 2 Unit...
- Page 134 > Back Select > Back Select > Manually Adaptive ber of Number of elected (Units) preselected (Units) 00.002778 m 00.002778 m Select > Back Select > Maximum Correction Back Select > Reset Batch Error Back Select GB MagFlux Manual 0812...
- Page 135 Electromagnetic Flow Meter Low Flow Flow Direction Electro-mechanical Relay Electro-mechanical Relay Opto Relay Opto Relay Display only Display only Not in use Not in use Back Select Back Select Electro-mechanical Relay Electro-mechanical Relay Opto Relay lay only Opto Relay Display only Delay Delay ON at Flow...
- Page 136 > Back Select > Back Select > Back Select > Function Relay Function Relay Function Relay Function Relay Function Relay Function Select Back Select > Back Select > Back Select Back Select > Back Select > GB MagFlux Manual 0812...
- Page 137 Electromagnetic Flow Meter Service Menu Status Not in use Type Password R Totalizer Forward 00000 R Totalizer Forward mA output 6.250 mA Back Select Back Select > to Relay Display only Sensor Calibration Code Converter SW Ver. Delay Product Data 00010 Sec 00010 Sec Reset Counter Time...
-
Page 138: Service Menu Overview
Follow arrow A 0000207910 Follow arrow B <A--------------------------B> Back Select > Back Select > Track No. 00000 00025 Back Select > Back Select > HW type No. 00000510250 Back Select > GB MagFlux Manual 0808 Gf-3 GB MagFlux Manual 0812... - Page 139 Electromagnetic Flow Meter Main Menu Data Logger Password Display Setup Specify Main Screen Factory Settings Set Sensor Name Converter Setup Service Menu Reset Counter Time Internal Meas. & Cal. Minimum Velocity Calibrate Flow now uct Data View Vgate View flow now Reset Counter Minimum Velocity Coil Current...
- Page 140 4.89011 2270 View counter Enable test 1163.1950000000 m Select > Back Select > Back Select Back Select View Vwater View/Calibrate Vref Set volume 1163.1950000000 m Vwater View/Calibrate Vref 1208 Back Select Select > Back Select > GB MagFlux Manual 0812...
- Page 141 Electromagnetic Flow Meter Velocity Freeze Coil Read Event Log Back On Stock Freeze coil No Hour Event Extension Recover Factory Settings 00.000 m/sec Positive 1956 Cancel Negative 1956 Back On Stock 1956 205 Select > Back Select Back Next Back Select Freeze coil No Hour...
-
Page 142: Display Setup Menu Overview
Back Select Devices Found Change Device 1 Device 1 Back Back Select Main Menu Display Setup Specify Main Screen Factory Settings Data Logger Password Set Sensor Name Converter Setup Service Menu GB MagFlux Manual 0808 Gf-4 GB MagFlux Manual 0812... - Page 143 Electromagnetic Flow Meter Factory Settings Modbus Display SW Version Add Device Recover Factory Settings Display 841xxx-xxx Cancel Change Device Address Build Sep 15 2006 11:18:24 Delete Log Remove Device Language 2006 09 21 Restore Default Language Restore Factory Settings Back Select Back Back...
- Page 144 Electromagnetic Flow Meter This page intentionally left blank GB MagFlux Manual 0812...
- Page 145 Electromagnetic Flow Meter Electromagnetic Flow Meter Index Display Setup ......95 Display SW Version ......100 DI Totalizer Forward ......85 accuracy .......... 17 DO1 Not in use ......... 85 activate/deactivate ......59 DO2 Totalizer Forward ...... 85 Add Device ........98 analogue output .......
- Page 146 Flow ........... 49 NR Totalizer Sum ......72 Flow Direction ....... 49 Flow Forward ......64 Flow Reverse ......65 Forward & Rev. (12mA=0) ... 65 Forward & rev. (4mA=0) ....66 Freeze Coil ........93 GB MagFlux Manual 0812 Index-2...
- Page 147 Electromagnetic Flow Meter Electromagnetic Flow Meter FTot ..........49 High Flow/Low Flow ....81 password ......... 58 Internal Meas. & Cal....89 password, change ......59 Language ........96 pipes Login .......... 59 conductive ........23 mA Output ........63 non-conductive ......
- Page 148 ..........10 Totalizer Forward Unit ....67 totalizers ........... 67 totalizers, non-resettable....72 totalizers, resettable ......70 trademark ........... 7 Units ..........63 upgrade ....... 9 valves ..........19 Volume between Pulses ....68 GB MagFlux Manual 0812 Index-4...
- Page 149 Electromagnetic Flow Meter Electromagnetic Flow Meter This page intentionally left blank GB MagFlux Manual 0812 Index-5...
- Page 150 Electromagnetic Flow Meter Electromagnetic Flow Meter Liability MJK Automation A/S are liable to the common rules of Danish law on product liability, however, the liability is MJK Automation A/S reduced to coverage of our public liability insurance of +45 45 56 06 56 products .
Need help?
Do you have a question about the MagFlux and is the answer not in the manual?
Questions and answers