Table of Contents
Advertisement
Advertisement
Table of Contents

Related Manuals for Moomba PV480

Summary of Contents for Moomba PV480
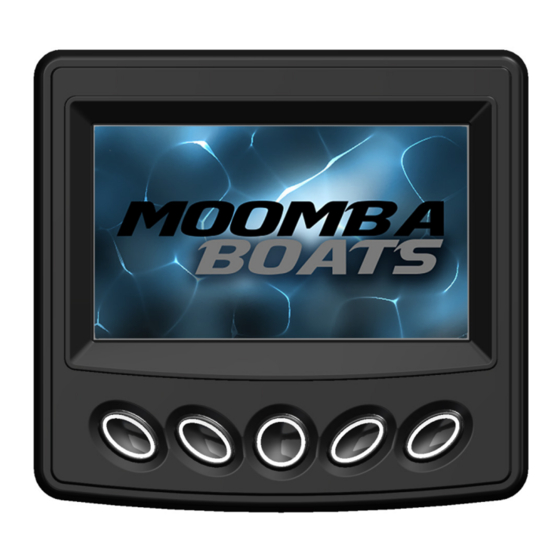
- Page 1 Moomba ® Boats PV480 Color Display 2018 Owner’s Manual 1715055 2017-08-30...
- Page 2 Trademarks & Patents Moomba® is a U.S and Canadian registered trademark owned by Skier’s Choice, Inc. and AutoWake® is a U.S. registered trademark owned by Skier’s Choice, Inc. Skier’s Choice™, the Skier’s Choice logo, the Moomba logo, Mondo™, Mojo™, Craz™, Helix™...
-
Page 3: Table Of Contents
Table of Contents Product Information ........................5 Care and Maintenance....................5 Basic Navigation Features ....................... 6 Display Keys and Menu Bar ..................6 Screen Features ........................12 Main ........................... 12 AutoWake ® ........................ 14 Ballast ........................18 Maps (Optional) ......................20 Settings ............................. - Page 4 THIS PAGE INTENTIONALLY LEFT BLANK 1715055 2017-08-30...
-
Page 5: Product Information
Product Information The Moomba PV480 Color Display integrates instrumentation and control from electronically controlled engines communicating via SAE J1939 and NMEA 2000. The display is a multi- functional tool that enables the boat operator to view many different display settings, engine parameters and service codes. -
Page 6: Basic Navigation Features
Basic Navigation Features Display Keys and Menu Bar Navigate by pressing the display keys. The Menu Bar changes according to the screen displayed. To navigate to a feature, press the display key under your desired feature or action. The display provides the following features and actions: Screen Features Main... - Page 7 Screen Features Display Maps • Center • Drop Waypoint • Zoom In (+) • Zoom Out (-) • Create Track • Clear Track • 1715055 2017-08-30...
- Page 8 Screen Features Display Settings / Brightness • Users Paddlewheel Offset • Units • Digital Gauges 1-3 • Settings / Ballast Fill/Drain Times • Vessel Reset Ballast Levels • Edit AutoWake Set • Points Roll Set Point • Pitch Set Points •...
- Page 9 Screen Features Display System Application, OS, • Information Bootloader and Software Information 1715055 2017-08-30...
- Page 10 The following icons/actions are utilized within the display: Icon Action Arrow – opens the next or previous page Down – highlights the next setting down Up – highlights the next setting up Plus – (1) increases the value or setting (2) Map zoom-in function Minus –...
- Page 11 Icon Action Close – closes the opened pop-up screen Pan – opens Menu Bar to move cross hairs on maps More – opens additional Map options Back – returns to the previous screen Center – centers the Map on display Drop Waypoint –...
-
Page 12: Screen Features
Screen Features Main The Main screen is your home screen by default. This may be accessed by pressing the button below the icon seen on screens within the system. NOTE: The display in this document is set to US Standard Units. You may change it to Metric on the display screen. - Page 13 In addition to these four features, three of the following can be chosen for display: • Fuel Level • Water Temperature • Water Depth • Battery Voltage • Coolant Temperature • Oil Pressure • SmartPlate™ Position • Engine Hours Display Home Screen Function Button First...
-
Page 14: Autowake
AutoWake ® AutoWake* is a patented system that will manipulate the ballast levels in order to achieve and maintain the best possible wake for surfing and wakeboarding. Using an inclinometer (a device that measures angle of pitch and roll) the boat will orient itself for the best boating experience. To activate AutoWake, press the first display button twice on the unit. - Page 15 The text above the Potential / Actual bar will show the current state of the system: AutoWake Inactive: This will occur when: • AutoWake is turned off • Cruise setpoint is below 7mph or above 26mph, or • When actual speed is between 3mph and within 0.1mph of setpoint.
- Page 16 return to inactive if a ballast switch is used, speed is not between 7 mph and 26 mph, or cruise set speed is not within 7 mph and 26 mph. If the display is powered down, it will come back with AutoWake off. AutoWake Countdown: Once all conditions are met in the AutoWake Inactive state, a countdown of 10 seconds will begin.
- Page 17 other side has reached the minimum (rear ballasts only), there will be a pop-up that prompts the user to adjust weight in the boat to achieve the desired roll values. The pitch value will have a similar pop-up but will only occur once the roll is finished moving (either achieved or maxed out).
-
Page 18: Ballast
The system will attempt to fill and/or drain ballasts to reach a static pitch, roll and amplitude setpoint. If pitch or roll setpoints cannot be achieved, a pop-up will occur indicating this to the driver (AutoWake will remain in this state). Static AutoWake Achieved: This will occur when: •... - Page 19 press the fifth (last) display button on the unit when on the Home screen. The following screen will appear: This screen retrieves information from the PDM regarding the amount of fluid in each ballast, along with the position of the Port and Starboard plates and the SmartPlate™.
-
Page 20: Maps (Optional)
Maps (Optional) From the Ballast screen, press the fifth (last) display button below the icon and the Maps screen will appear as shown on the right. NOTE: The Maps feature is optional. Please contact your dealer for details. The Maps screen shows your position with a red square. - Page 21 For example, the Menu Bar has the following features: Minus (-) – zooms out from the map Plus (+) – zooms in closer to the map – Displays the Menu screen Choose MORE for the following features: Drop Waypoint – opens screen to save a specific location Center –...
- Page 22 Drop Waypoint On the Maps screen, you can drop a marker or Waypoint on the map to mark a favorite location by latitude and longitude . Once the location is saved, an icon is placed on the map to represent the waypoint. To Drop a Waypoint: From the Menu Bar on the Maps screen, zoom the cross hairs in to the desired location.
- Page 23 You may change the Waypoint icon and make edits from the Waypoint Manager screen. See Waypoint Manager. You may choose to hide the Waypoint icon or name from the maps screen on the Chart Settings screen. See Chart Settings. 1715055 2017-08-30...
- Page 24 Create Track On the Maps screen, you can track a specific route taken by the vessel. The track can be saved and viewed on the Maps screen. To navigate, press the display key under a chosen action. From the Menu Bar on the Maps screen, choose MORE to open a new Menu Bar and choose CREATE TRACK.
-
Page 25: Settings
Settings Press the middle display key to access the Settings pop- The Settings pop-up provides access to: o User Settings o Vessel Settings o Map Settings o Engine Diagnostic Information o System Information o Dealer Settings (Dealer Access Only) Press the display key under the Up and Down pointers to scroll the list and highlight a function. -
Page 26: User Settings
User Settings From the Menu pop-up, highlight User Settings and press the middle display key under Select. Brightness: Use buttons below the arrows to highlight Brightness and press Select. The arrow keys then become ̶ and + to adjust the percentage. Each press will decrease or increase the brightness by 10%. -
Page 27: Vessel Settings
Paddlewheel Offset and press Select. The arrow keys then become ̶ and + to adjust the offset. Press the button below Done when finished. Digital Gauges 1, 2 and 3: These areas control the gauge presentation on the Main screen. Use the buttons below the arrows to highlight the specific gauge to be altered and press Select. - Page 28 Ballast Fill / Drain: Use the Up and Down arrow keys to highlight Ballast Fill / Drain and press Select. Highlight the particular ballast to be filled or drained and press Select. Utilize the + and – keys to adjust the fill/drain times, then press the display key under Done.
- Page 29 AutoWake Settings: Use the arrow keys to highlight the area to edit and press the display key under Toggle or Select. Edit AutoWake Set Points: Use the arrow keys to highlight this selection and press the Toggle button to choose Surf Starboard, Surf Port or Wake.
- Page 30 Roll Set Point: This is the angle of roll that the boat is trying to achieve in the specified mode. Factory default settings are colored gray. User-edited set points are colored orange. Use the arrow keys to highlight this selection and press Select. Use the ̶ and + keys to adjust, then press Done.
-
Page 31: Map Settings (If Enabled)
Clear: The AutoWake will use the inclinometer defaults for 0 degrees pitch and roll. This will usually be off by a few degrees due to the mounting of the inclinometer. This returns the screen to the AutoWake Settings page. Confirm: This changes the current values of the selection (pitch or roll) to be 0 degrees. - Page 32 Edit Name will display a keyboard to revise the existing Track name. Show Track will have an illuminated asterisk (*) if the Track will be displayed. To make the Track invisible, press Select when Show Track is highlighted, and the asterisk will dim (signifies turning it off).
- Page 33 Waypoint Manager Highlight the desired waypoint and press the display key under Select. The Waypoint Editor screen will appear. Edit Name will display a keyboard to revise the existing Waypoint name. Icon allows you to choose between an anchor, a marina, a flag or a fish to classify the waypoint.
- Page 34 Chart Settings To show or hide grids, tracks, text, navigation aids, waypoints or waypoint names, highlight the desired setting and press Toggle. The asterisk will illuminate (show) or dim (hide). Depth Settings Set the Depth Contour value to display the following water depths on the Maps screen: •...
- Page 35 Set the Safety Contour value to a water depth above what the vessel can safely navigate: • 6 feet (1.8 meters) • 16 feet (5 meters) • 33 feet (10 meters) 66 feet (20 meters) • • • When a Safety Contour value is set, the Maps screen displays the areas with depths up to that value in shades going from darker blue (for lower depths) to lighter blue (for higher depths).
- Page 36 Satellite Status The Satellite Status screen displays the detectable satellites in the area of the craft. Press the display key under Back to return to the previous screen or Close to return to the main screen. 1715055 2017-08-30...
-
Page 37: Engine Diagnostic
Engine Diagnostic The Diagnostic Message area will provide a description of an existing fault and a corrective action, if necessary. Also present will be the source, SPN, FMI and count information. Display keys 2 and 4 serve to call the previous and next fault, respectively. -
Page 38: System Information
System Information The System Information screen provides the version and part number for the Application, Operating System, Bootloader and Software. This information will be useful should the unit require troubleshooting. 1715055 2017-08-30... - Page 39 1. Check that display supply wires are connected properly to battery. 2. Verify battery is charged properly. 3. Check battery for efficient starter current. Display has no backlight. Contact your Moomba service center. Display has no keypad backlight. Contact your Moomba service center. 1715055...
- Page 40 - NOTES - ___________________________________________________________________ ___________________________________________________________________ ___________________________________________________________________ ___________________________________________________________________ ___________________________________________________________________ ___________________________________________________________________ ___________________________________________________________________ ___________________________________________________________________ ___________________________________________________________________ 1715055 2017-08-30...
Need help?
Do you have a question about the PV480 and is the answer not in the manual?
Questions and answers