Table of Contents
Advertisement
Installation, Programming Operation,
& Maintenance Manual
V2.00.09.17
CAUTION, SAFETY WARNING
As with all electrical products, read manual thoroughly before
operating. Only qualified, expert personnel should perform
maintenance and installation. Contact the nearest authorized
service facility for examination, repair, or adjustment. Do not
disassemble or repair unit; death or injury due to electrical shock
or fire hazard may result.
Product improvement is a continual process at Franklin Control
Systems. Specifications and manual data subject to change.
Consult factory for additional information.
1
Base Drive,
Bypass Drive,
Drive with Disconnect
200~480V (3~28A)
franklin‐controls.com | 1 .800.962.3787
Advertisement
Table of Contents

Summary of Contents for Franklin Q-link
- Page 1 Do not disassemble or repair unit; death or injury due to electrical shock or fire hazard may result. Product improvement is a continual process at Franklin Control Systems. Specifications and manual data subject to change. Consult factory for additional information.
- Page 2 Thank you for purchasing an Franklin Control Systems (formerly Cerus Industrial) VFD SAFETY INSTRUCTIONS To prevent injury and property damage, follow these instructions during the installation and operation of VFD. Incorrect operation ignoring these instructions may cause harm or damage to...
- Page 3 WARNING Do not remove VFD cover for wiring or periodic inspections while power is applied or the unit is in operation. Otherwise, electric shock could occur. Wiring and periodic inspections should be performed at least 5 minutes after disconnecting the input power with ...
- Page 4 PRECAUTIONS (1) Handling and installation Check VFD environmental conditions and electrical requirements before purchasing VFD. Do not stack VFD boxes higher than standard 48” cube height when palletizing for storage. Do not place heavy items on VFD. ...
- Page 5 (4) Operation When the Auto restart function is selected, VFD can restart multiple times automatically during operation. If restart after fault reset is selected, the VFD can start automatically after fault reset. Do not modify VFD internal components and circuits. ...
-
Page 6: Table Of Contents
TABLE OF CONTENTS CHAPTER 1 – PRODUCT OVERVIEW ...................... 8 NTRODUCTION ............................. 8 VFD M .......................... 9 ODELS CHAPTER 2 – BASIC INFORMATION ...................... 1 1 UMBER ODE AND NITIAL NSPECTION .................. 1 1 VFD U ... - Page 7 VFD .............................. 4 1 ETUP CHAPTER 7 – PARAMETER LISTS ...................... 4 2 ........................ 4 2 RIMARY ARAMETER ROUP VFD P ......................... 4 7 ARAMETER ROUP I/O T ...................... 5 0 ERMINALS ARAMETER ROUP...
-
Page 8: Chapter 1 - Product Overview
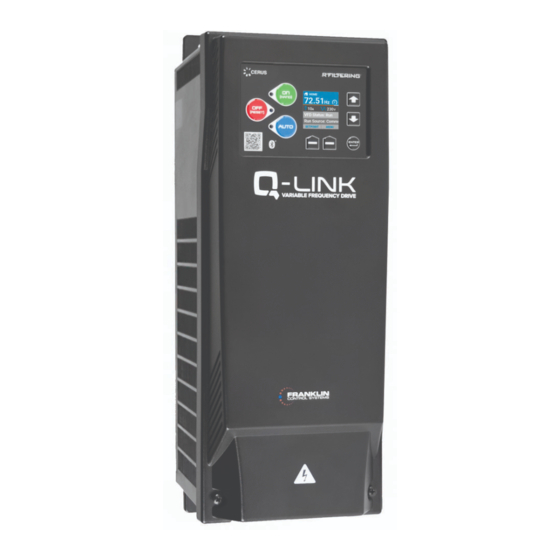
Introduction The Quick Link (Q-Link) variable frequency drive (VFD) provides a higher quality user experience. Q-Link features an organic light emitting diode (OLED) display, with an easy to use control interface and onboard navigation menu. Q-Link’s iOS and Android applications interface affords secure Bluetooth connectivity for the added convenience of device monitoring and increased serviceability response times. -
Page 9: Q-Link Vfd Models
Q-Link VFD Models Q-Link Base Drive: Current rated stand-alone VFD. Q-Link Smart Bypass: Current rated drive, with integrated smart bypass. ... - Page 10 Q-Link Drive with Disconnect: Current rated drive, with integrated disconnect switch. Q-Link HP Rated Drive: HP rated stand-alone VFD. ...
-
Page 11: Chapter 2 - Basic Information
CHAPTER 2 – BASIC INFORMATION CHAPTER 2 - BASIC INFORMATION Part Number Code and Initial Inspection 2.1.1 Part Number Anatomy Amperage Rated VFD (Base Drive, Smart Bypass, and Drive with Disconnect) Horsepower Rated VFD ... - Page 12 2.1.2 UL Label ...
-
Page 13: Vfd Unpacking And Inspection
VFD Unpacking and Inspection Remove VFD from its packing and inspect its exterior for shipping damage. If there is damage, notify the shipping agent and your FCS (Franklin Control Systems) sales representative. (Figure 2.2.1) Remove the VFD cover and inspect VFD for any damage or foreign objects. Check VFD part number, current rating and nominal voltage on the sticker attached to the side of the VFD. -
Page 14: Basic Configuration
Basic Configuration The following are the most common devices used in motor control branch operated by VFD. Adequate peripheral devices must be selected and correct connections made to ensure proper VFD operation. An incorrectly applied or installed VFD can result in system malfunction or reduction in product life as well as component damage. You must read and understand this manual thoroughly before proceeding with installation. Note: Do not install magnetic contactor in the motor circuit for start/stop or emergency stop purpose. Opening the motor circuit when VFD runs at above 50% its rated capacity can cause VFD power components failure. ... -
Page 15: Chapter 3 - Specifications
CHAPTER 3 – SPECIFICATIONS CHAPTER 3 – SPECIFICATIONS Standalone VFD Ratings VFD Smart Bypass Ratings ... -
Page 16: Vfd With Disconnect Ratings
VFD with Disconnect Ratings VFD HP-Rated Ratings ... -
Page 17: Standalone And Hp-Rated Vfd Torque Ratings
Standalone and HP-Rated VFD Torque Ratings VFD Smart Bypass Torque Ratings VFD Disconnect Torque Ratings ... -
Page 18: Standalone And Hp-Rated Vfd Dimensions
Standalone and HP-Rated VFD Dimensions ... -
Page 19: Smart Bypass And Vfd With Disconnect Dimensions
Smart Bypass and VFD with Disconnect Dimensions ... -
Page 20: Common Specifications
3.10 Common Specifications Voltage 200‐480V (+15%/‐10%) Frequency 50/60 (+/‐5%) Input Ratings Efficiency >= 98%, full load and full voltage Displacement Power >.99 Factor HP 1‐10 HP (200V), 1‐20HP (460V) Output Frequency 0‐240Hz Ratings Voltage 0‐100% of Supply Voltage Control Method V/F Scalar Pulse Width Modulation Carrier Frequency 2kHz ‐ 10kHz, 0.1kHz resolution, Default 2.5kHz Output Frequency 0.01Hz Resolution Control Digital: 0.01 % of Max. Output Frequency Analog: 1 % of Frequency Accuracy Max. Output Frequency V/F Ratio Linear, Squared Pattern Overload Capacity 110% for 60s OLED display and keypad, HOA buttons, Terminals, Operation Method Bluetooth mobile app, Communications Keypad, Analog Voltage and Current 0‐10V, 4‐20mA, Frequency Setting ... -
Page 21: I/O Specifications
Status, Run, Fault, SW Configurable Outputs Control Power Rating 125VAC, 1.25Amp Max, Max switching voltage 250VAC 3.12 Environment VFD’s are to be used in a controlled environment. The following table lists the Q-Link VFD’s environmental requirements: -10 to 40°C (104°F), 50°C (122°F) by following De-rating table on Ambient Appendix A Temperature Storage -20 to 65°C (149°F) -
Page 22: Certification
3.13 Certification The following table lists the Q-Link VFD’s certifications: Agency UL, cUL Approvals UL Type 1, Plenum-rated (UL508C), Available packaged as UL Enclosure Type 12/IP54, UL Type 3R/IP54, UL Type 4X/IP66 Rating Certifications Keypad UL Type 1 (IP21) Rating Harmonic Filtering ≤... -
Page 23: Chapter 4 - Installation And Wiring
CHAPTER 4 – INSTALLATION AND WIRING CHAPTER 4 - INSTALLATION AND WIRING Refer to the flowchart pictured below (Figure 4.1.1) for proper installation of the Q-Link VFD. (Figure 4.1.1) Installation and Precautions Carefully review all installation warnings and instructions before proceeding. - Page 24 Do not mount VFD in direct sunlight or near other heat sources. The VFD should be mounted in a Pollution Degree 2 environment. If VFD is going to be installed in an environment with a high probability of dust, metallic particles, mists, corrosive gas or other contaminants, the VFD must be mounted inside the appropriate electrical enclosure with proper NEMA, UL or IP rating and adequate cooling.
-
Page 25: Conduit Guidelines
Conduit Guidelines Follow the conduit guidelines as shown in the figure below. Refer to Figure 4.2.1. (Figure 4.2.1) CAUTION VFD can malfunction or be damaged if motor and power wires are in the same conduit or motor wires from two or more VFDs are in the same conduit. ... -
Page 26: Wiring Schematic - Standalone & Hp-Rated Vfd
Wiring Schematic – Standalone & HP-Rated VFD’s ... -
Page 27: Wiring Schematic - Smart Bypass
Wiring Schematic – Smart Bypass ... -
Page 28: Wiring Schematic - Vfd With Disconnect
Wiring Schematic – VFD with Disconnect ... -
Page 29: Power Wiring Recommendations
Power Wiring Recommendations The VFD provides the high‐voltage and high‐current connections for input power and output power. The input power is fused (3 phases) and filtered for EMC compliance. Do not connect input power to VFD Motor Terminals U/T1, V/T2, and W/T3 otherwise VFD can be damaged. Do not run input power and motor wires in the same conduit, otherwise the VFD can malfunction or be damaged. (See Figure 4.3.1) Do not run input power wires or motor leads for multiple VFDs in common conduit. (See Figure 4.3.1) Do not install power factor correction capacitors, surge suppressors, or RFI filters on the VFD output. These devices can trigger some VFD faults or even damage the VFD. Do not leave wire fragments, metal shavings or other metal objects inside the VFD, otherwise VFD can be damaged. Size power wire to maintain a voltage drop less than 2% at VFD or motor terminals. Install a load (output) reactor to protect motor windings if distance from 460V or 600V VFD to a motor is in the range 45‐100 feet or output dV/dt filter for a range 100‐1000 feet (800 feet for submersible pumps) or a sine wave filter for greater distances. ... -
Page 30: Grounding
Grounding Ground VFD to the power source ground and motor ground to avoid electrical shock. Connect a dedicated ground wire from power transformer or power distribution panel to VFD ground terminal and dedicated ground wire from VFD to the motor for ground fault protection proper operation. If metal construction or conduits are used as ground leak current path, the VFD can have inadequate grounding and ground fault protection. Connect ground wire first before any other wires and only connect it to the dedicated ground terminal of the VFD. Do not use the case or the chassis assembly screws for grounding. VFD Grounding wire should be as short as possible. Do not install a ground rod at VFD package if it is not a service entrance rated panel, otherwise the VFD cannot provide proper ground fault protection or it can intermittently trip on Ground Fault. ... -
Page 31: Digital And Analog Control Circuit Terminal Layout
Digital and Analog Control Circuit Terminal Layout Description Name Type Description Details A+ Terminal 24VDC Damper out V+ (positive) Damper Output 24VDC Damper supply, 0.5A max A‐ Terminal 24VDC Damper out V‐ (negative) 24VDC supply capable of 24 Terminal 24VDC Control Power Output 50mA maximum. 1A Terminal Input (0‐10V / 0‐24V / 4‐20mA) Analog PID reference or Analog In/Out speed reference. 2A Terminal Configurable Input / Output 0‐10V Max Error allowed is 1% of ... - Page 32 Description Name Type Description Details Fault, Run and Proof of Run O1 Terminal Default Selection: Fault/N.O. Relay Output relay ‐ SW Configurable Terminal (1.25A @ 125VAC, Max O2 Terminal Default Selection: Fault/N.O. Switching Voltage 250VAC) Default Selection: Speed A/Active High Shutdown / Permissive / V1 Terminal 1 (V) Fireman's Override / Limit Switch / Speed A / Speed B Wet Input V2 Terminal 1 Common 1 / None ‐ SW configurable Terminals (Default N.O.) Wet Input 2 default: External V3 Terminal 2 12‐240VAC/VDC, 5mA Trip/Active High (V) maximum V4 Terminal 2 Common 2 ...
-
Page 33: Signal Wiring
Signal Wiring 4.10 Analog DIP Switch Configurations The analog I/O configuration DIP switches 1 through 4 can be found to the right of the analog I/O terminals. DIP switches must be configured per the illustrations below to operate as desired. ... -
Page 34: Bypass Controller Dip Switch Configurations
4.11 Bypass Controller DIP Switch Configurations The Bypass Controller (BPC) DIP switches can be found on the upper left of the unit BPC, present only in the Q‐Link Smart Bypass packages. The default position for both switches is OFF. The BPC module functions can be enabled by moving the desired switch inward (right) toward the center of the module (see image below). ... -
Page 35: Pid Control Diagram
4.12 PID Control Diagram ... -
Page 36: Chapter 5 - Operation
4. Bluetooth Quick Response (QR) Code [Quick Connect]: Scanning QR code using the Q-Link mobile application allows for instant access to VFD. Indicates that the VFD is 5. Bluetooth Connection (Device Pairing Available): capable of supporting a Bluetooth connection. -
Page 37: Control Interface
Control Interface ... -
Page 38: Basic Startup
Basic Startup During initial power-up, the VFD will show the message [Initializing VFD] and the HOA will be locked in the OFF position. At minimum, parameters BASIC-01 through BASIC-09 should be set prior to starting the VFD. To access the Basic Parameter group from the Home screen press 'Enter' to access 'Menus' and 'Enter' once more to select 'Basic Setup,' see below: ... -
Page 39: Main Menu Displays
Main Menu Displays 5.4.1 Home Screen The “HOME” screen displays horizontal rows, each containing information regarding the immediate status of the VFD. The home screen rows from top to bottom display: Motor Frequency Motor Current Output Voltage ... -
Page 40: Quick Monitor Screen
5.4.3 Quick Monitor Screen The “Quick Monitor” screen displays four horizontal rows. The first three rows contain information relating to: Phase A Motor Current Phase B Motor Current Phase C Motor Current Average Motor Current DC Bus Voltage ... -
Page 41: Setup Bluetooth Connection
CHAPTER 6 – Q-LINK ANDROID MOBILE APPLICATION CHAPTER 6 - Q-LINK iOS & ANDROID MOBILE APPLICATION The Q-Link Companion App can be downloaded from either the Apple App Store™ or the Google PlayStore™. Setup Bluetooth Connection From the Home screen, tap “Connect New Product.”... -
Page 42: Chapter 7 - Parameter Lists
CHAPTER 7 – PARAMETER LISTS CHAPTER 7 - PARAMETER LISTS Primary Parameter Group Modbus OLED Display Parameter Setting Range Code Full Parameter Name Address Name 1 101 Application Application 0‐ Basic No 1‐ Supply Fan 2‐ Exhaust Fan 3‐ Cooling Tower 4‐ Surface/Booster Pump 2 102 Rated Motor Voltage Motor Voltage 200/400V model: 200 to No 480V; default 230V 400V model: 380 to 480V; default 460V 3 ... - Page 43 Modbus OLED Display Parameter Setting Range Code Full Parameter Name Address Name 17 117 Run after Fault Reset Fault Reset & Run 0 ‐ Disable Yes 1 ‐ Enable 18 118 Torque Boost Torque Boost 0 ‐ Disable No 1 ‐ Enable 19 119 Torque Boost Level Torque Boost 0.00 to 15.00 No Level 20 120 Start Mode Start Mode 0 ‐ Accelerate No 1 ‐ DC Start 2 ‐ Flying Start 21 121 DC Start Level * DC Start Level ...
- Page 44 Modbus OLED Display Parameter Setting Range Code Full Parameter Name Address Name 43 143 Reference Loss Condition Anlg Ref Loss 0 ‐ Disabled No 1 ‐ Below 1/2 of Min 2 ‐ Below Min 44 144 Ref. Loss Action Anlg Ref Loss Act 0 ‐ Fault No 1 ‐ Stop (uses selected stop mode) 2 ‐ Hold Speed 45 145 Ref. Loss Delay Anlg Ref Loss 0 to 20 [Sec] No 46 146 PID Mode Select PID Mode 0 ‐ Direct No 1 ‐ Inverse 47 147 PID Setpoint Source ...
- Page 45 Modbus OLED Display Parameter Setting Range Code Full Parameter Name Address Name 61 161 Feedback Loss Action Fdbk Loss Action 0 ‐ Fault No 1 ‐ Stop (uses selected stop mode) 2 ‐ Hold Speed 62 162 Feedback Loss Delay Fdbk Loss Delay 0 to 10 [Sec] No Primary Group Application Defaults Surface/ OLED Display Cooling Code Basic Supply Fan Exhaust Fan Booster Name Tower Pump 2 Motor Voltage 200V / 575V 200V / 575V 200V / 575V ...
- Page 46 Surface/ OLED Display Cooling Code Basic Supply Fan Exhaust Fan Booster Name Tower Pump 23 Hand Run Cmd 0‐ HOA in 0‐ HOA in 0‐ HOA in 0‐ HOA in 0‐ HOA in Hand Hand Hand Hand Hand 24 Hand Speed Ref 0‐ Keypad 0‐ Keypad 0‐ Keypad 0‐ Keypad 0‐ Keypad 30 Stop Mode 1(Coast) 1(Coast) 1(Coast) 1(Coast) 1(Coast) 31 Stop Mode 10 [Hz] 10 [Hz] ...
-
Page 47: Vfd Parameter Group
VFD Parameter Group Parameter Setting Modbus OLED Display Code Full Parameter Name Range Address Name 4 204 Auto Bypass Selection Auto Bypass 0 ‐ Disabled No 1 ‐ On VFD Fault 2 ‐ Bypass Comms Loss 3 ‐ VFD Fault & Bypass Comms Loss 6 206 Damper Damper Control 0 ‐ Disabled No 1 ‐ Damper* 7 207 Damper Damper Delay 0 to 6000 [Sec] Yes 10 210 Skip Frequency 1 Selection Skip Freq 1 0 ‐ Disabled ... - Page 48 Parameter Setting Modbus OLED Display Code Full Parameter Name Range Address Name 39 239 Reset User Settings 0 ‐ No No 1 ‐ Factory Defaults 40 240 Custom Param 1 0 ‐ Output Frequency Yes 1 ‐ Motor Speed (RPM) 2 ‐ Energy Usage 3 ‐ Average Power 4 ‐ Average Current 5 ‐ Line A Current 6 ‐ Line B Current 7 ‐ Line C Current 8 ‐ DC Bus Voltage 9 ‐ Output Voltage 10 ‐ HOA Mode 11 ‐ IGBT Temp 12 ‐ Ambient Temp 13 ‐ Motor Run Time 14 ‐ D1‐SG Input 15 ‐ D2‐SG Input 16 ‐ V1‐V2 Input 17 ‐ V3‐V4 Input 18 ‐ O1‐O2 Output ...
- Page 49 VFD Group Application Defaults OLED Display Cooling Surface/ Code Basic Supply Fan Exhaust Fan Name Tower Booster Pump 4 Auto Bypass (0) Disabled (0) Disabled (0) Disabled (0) Disabled (0) Disabled 6 Damper Control (0) Disabled (0) Disabled (0) Disabled (0) Disabled (0) Disabled 7 Damper Delay 120 [sec] 120 [sec] 120 [sec] 120 [sec] 120 [sec] 10 Skip Freq 1 (0) Disabled (0) Disabled (0) Disabled (0) Disabled (0) Disabled Enable 11 ...
-
Page 50: I/O Terminals Parameter Group
I/O Terminals Parameter Group Parameter Setting Modbus OLED Display Code Full Parameter Name Range Address Name 1 301 Dry Input 1 Function D1‐SG Function 0 ‐ None No 1 ‐ Enable 2 ‐ Fireman's Override 3 ‐ Speed‐ A 4 ‐ Speed‐ B 5 ‐ Setpoint‐A 6 ‐ Setpoint‐B 7 ‐ Damper LSW 9 ‐ External Trip 10 ‐ Run Forward 13 ‐ 3‐Wire Start 14 ‐ 3‐Wire Stop 15 ‐ HOA Auto 16 ‐ HOA Hand 17 ‐ Shutdown 18 ‐ Fault Reset 19 ‐ Bypass 2 302 Dry Input 1 Contact D1‐SG Input 0 ‐ Normally Open ... - Page 51 Parameter Setting Modbus OLED Display Code Full Parameter Name Range Address Name 5 305 Wet Input 1 Function V1‐V2 Function 0 ‐ None No 1 ‐ Enable 2 ‐ Fireman's Override 3 ‐ Speed‐ A 4 ‐ Speed‐ B 5 ‐ Setpoint‐A 6 ‐ Setpoint‐B 7 ‐ Damper LSW 9 ‐ External Trip 10 ‐ Run Forward 13 ‐ 3‐Wire Start 14 ‐ 3‐Wire Stop 15 ‐ HOA Auto 16 ‐ HOA Hand 17 ‐ Shutdown 18 ‐ Fault Reset 19 ‐ Bypass 6 306 Wet Input 1 Type V1‐V2 Input 0 ‐ Active High No 1 ‐ Active Low 7 307 Wet Input 2 Function ...
- Page 52 Parameter Setting Modbus OLED Display Code Full Parameter Name Range Address Name 9 309 Relay Output Select O1‐O2 Function 0 ‐ Fault No 1 ‐ Run 2 ‐ Proof of Run 10 310 Relay Contact O1‐O2 Output 0 ‐ Normally Open No 1 ‐ Normally Closed 14 314 1A mA Min Value 1A Input Min mA 0.00 to 20.00 [mA] No 15 315 1A Min Hz 1A Min Hz 0.00 to [Prime‐07] [Hz] No 16 316 1A mA Max Value 1A Input Max mA 0.00 to 20.00 [mA] ...
- Page 53 Parameter Setting Modbus OLED Display Code Full Parameter Name Range Address Name 49 349 Dry Input 3 Function D3‐SG Function 0 ‐ None 1 ‐ Enable 2 ‐ Fireman's Override 3 ‐ Speed‐ A 4 ‐ Speed‐ B 5 ‐ Setpoint‐A 6 ‐ Setpoint‐B 7 ‐ Damper LSW 8 ‐ Reserved 9 ‐ External Trip 10 ‐ Run Forward 11 ‐ Reserved 12 ‐ Reserved 13 ‐ 3‐Wire Start 14 ‐ 3‐Wire Stop 15 ‐ HOA Auto 16 ‐ HOA Hand 17 ‐ Shutdown 18 ‐ Fault Reset 19 ‐ Bypass 20 ‐ Reserved 50 350 Dry Input 3 Contact D3‐SG Input ...
- Page 54 Parameter Setting Modbus OLED Display Code Full Parameter Name Range Address Name 52 352 Dry Input 4 Contact D4‐SG Input 0 ‐ Normally Open 1 ‐ Normally Closed 53 353 Relay 3 Output Select O3‐O4‐O5 0 ‐ Fault Yes Function 1 ‐ Run 2 ‐ Proof of Run 64 364 3A mA Min Value 3A Input Min mA 0.00 to 20.00 [mA] No 65 365 3A Min Hz 3A Min Hz 0.00 to [Prime‐07] [Hz] No 66 366 3A mA Max Value 3A Input Max mA ...
- Page 55 I/O Group Application Defaults Surface/ OLED Display Cooling Code Basic Supply Fan Exhaust Fan Booster Name Tower Pump 1 D1‐SG Function (10) Run (10) Run (10) Run (10) Run (10) Run FWD FWD FWD FWD FWD 2 D1‐SG Input (0) Normally (0) Normally (0) Normally (0) Normally (0) Normally Open Open Open Open Open 3 D2‐SG Function (0) None (0) None (0) None ...
-
Page 56: Protection Parameter Group
Surface/ OLED Display Cooling Code Basic Supply Fan Exhaust Fan Booster Name Tower Pump 53 O3‐O4‐O5 (0) Fault (0) Fault (0) Fault (0) Fault (0) Fault Function 64 3A Input Min mA 4.00 [mA] 4.00 [mA] 4.00 [mA] 4.00 [mA] 4.00 [mA] 65 3A Min Hz 0.00 [Hz] 0.00 [Hz] 0.00 [Hz] 0.00 [Hz] 0.00 [Hz] 66 3A Input Max 20.00 [mA] 20.00 [mA] 20.00 [mA] 20.00 [mA] 20.00 [mA] ... - Page 57 Parameter Setting Modbus OLED Display Code Full Parameter Name Range Address Name 39 439 Critical Faults Retry Delay Crit Fault Retry 1 to 360 [Min] Yes Delay 40 440 Light Faults Number of Auto Light Fault Retries 0 to 10 Yes Retries 41 441 Light Faults Retry Delay Light Fault Retry 1 to 360 [Min] Yes Delay Protection Group Application Defaults Surface/ OLED Display Cooling Code Basic Supply Fan Exhaust Fan Booster ...
-
Page 58: Communications Parameter Group
Communications Parameter Group Parameter Setting Modbus OLED Display Code Full Parameter Name Range Address Name 1 501 Protocol Protocol 0 ‐ Modbus RTU Yes 1 ‐ Modbus TCP/IP 2 ‐ BACnet MS/TP 3 ‐ BACnet IP 3 503 Write Access Write Access 0 ‐ Disabled Yes 1 ‐ Enabled 4 504 Loss of Comms Com Loss Action 0 – Fault Yes 1 – Stop (uses selected stop mode) 2 – Hold Speed 5 505 Timeout Com Loss Delay ... - Page 59 Communications Group Application Defaults Surface/ OLED Display Cooling Code Basic Supply Fan Exhaust Fan Booster Name Tower Pump 1 Protocol (0) Modbus (0) Modbus (0) Modbus (0) Modbus (0) Modbus RTU RTU RTU RTU RTU 3 Write Access (1) Enabled (1) Enabled (1) Enabled (1) Enabled (1) Enabled 4 Comms Loss (2) Hold (2) Hold (2) Hold (2) Hold (1) Stop Action Speed Speed ...
-
Page 60: View Information Parameter Group
View Information Parameter Group Modbus OLED Display Parameter Setting Range Code Full Parameter Name Address Name 1 601 VFD Output Frequency Output Frequency 0.00 to 240.00 [Hz] N/A 2 602 Motor Speed Motor Speed 0 to 3600 [RPM] N/A 603 Wattmeter [1] Wattmeter 0 to 4,294,967,295 [kWh] N/A 3 604 Wattmeter [2] 5 605 Average Output Current Average Current 0.0 to 6xVFD FLA [A] N/A 6 606 Line U Current ... - Page 61 Full OLED Modbus Parameter Setting Range Code Parameter Display Address Name Name 0 ‐ None 13 613 Fault Fault N/A 1 ‐ Motor Overload (C) 2 ‐ Motor Over Current (C) 3 ‐ VFD Over Current (C) 4 ‐ VFD Over Heat (C) 5 ‐ VFD Short Circuit (C) 6 ‐ Over Voltage (L) 7 ‐ Under Voltage (L) 8 ‐ Input Phase Open (L) 9 ‐ Output Phase Open (L) 10 ‐ No Motor (L) 11 ‐ Incorrect Output Wiring 12 ‐ Power Board Uncalibrated 13 ‐ Ground Fault (L) 21 ‐ Bypass Motor Overload 22 ‐ Bypass Phase Unbalance 23 ‐ Bypass Phase Loss 24 ‐ Bypass Board Error 25 ‐ Bypass Stall 26 ‐ Bypass Max Time 27 ‐ Bypass Ground Fault 28 ‐ Bypass Communications Error 29 ‐ Bypass Contactor 30 ‐ Bypass Current At Power On 31 ‐ Bypass No Motor Current ...
- Page 62 Modbus OLED Display Parameter Setting Range Code Full Parameter Name Address Name 15 615 PID Feedback Value PID Feedback 0.0 to 6000.0 [Unit] N/A 17 617 Inverter temperature IGBT Temp 0 to 160 /0‐100 [°C]/ % N/A 18 618 PCB temperature Ambient Temp 0 to 160 [°C] N/A 619 Power‐On Time [1] Power‐On Time 0 to 4,294,967,295 [Sec] N/A 19 620 Power‐On Time [2] 621 Run time [1] Motor Run Time 0 to 4,294,967,295 [Sec] N/A 21 ...
- Page 63 Modbus OLED Display Parameter Setting Range Code Full Parameter Name Address Name 41 641 Speed Reference Source Speed Reference 0 ‐ None N/A 1 ‐ Keypad 2 ‐ Analog 1A 3 ‐ Analog 2A 4 ‐ Communication 5 ‐ Mobile 6 ‐ PID 46 646 VFD Cooling Fan RPM Cooling Fan 0‐7200 RPM Yes 47 647 1A Type N/A 0 ‐ 0‐10 V Input N/A 1 ‐ 4‐20mA Input 48 648 2A Type N/A 0 ‐ 0‐10 V Input N/A 1 ‐ 0‐10 V Output 2 ‐ 4‐20mA Output ...
-
Page 64: Fault Codes
Modbus OLED Display Parameter Setting Range Code Full Parameter Name Address Name 116 N/A Bluetooth MAC ID Bluetooth MAC ID Yes 128 N/A Bluetooth Name Bluetooth Name Yes Fault Codes Full Parameter OLED Display Parameter Setting Range Code Name Name 1 Fault Fault 0 ‐ None N/A 1 ‐ Motor Overload (C) 2 ‐ Motor Over Current (C) 4 ‐ VFD Over Heat (C) 8 ‐ Input Phase Open (L) 9 ‐ Output Phase Open (L) 10 ‐ No Motor (L) ... - Page 65 Full Parameter OLED Display Parameter Setting Range Code Name Name 6 Line W Current Line W Current 0.0 to 6xVFD FLA [A] N/A 7 DC Bus Voltage 1 DC Bus Voltage 1 0 to 1000 [V] N/A 8 DC Bus Voltage 2 DC Bus Voltage 2 0 to 1000 [V] N/A 9 Target Frequency Target Frequency 0.00 to 240.00 [Hz] N/A 10 Output Frequency Output 0.00 to 240.00 [Hz] N/A Frequency 12 System Status System Status 0 ‐ VFD stop N/A 1 ‐ VFD run 2 ‐ VFD disabled 3 ‐ VFD fault ...
-
Page 66: Administration
Administration Parameter Setting Modbus OLED Display Code Full Parameter Name Range Address Name 1 1101 Reset Motor Run Time Motor Run Time 0 ‐ No No 1 ‐ Yes 2 1102 Reset Wattmeter Wattmeter 0 ‐ No Yes 1 ‐ Yes 4 1104 Product Type Product Type 0 ‐ VFD No 1 ‐ VFD‐Bypass 5 1105 VFD Model VFD Model 0 ‐ QLNK‐003‐DV No 1 ‐ QLNK‐005‐DV 2 ‐ QLNK‐009‐DV 3 ‐ QLNK‐012‐DV 4 ‐ QLNK‐017‐DV ... - Page 67 Parameter Setting Modbus OLED Display Code Full Parameter Name Range Address Name 8 1108 Product Package SW Product Package Software versions use No Version the format xx.xx.xxy, where xx is a number from 0‐99 and y is a 1109 Product Package SW Product Package letter representing the Version release variant. 10 1110 Power CPU SW Version Power Board See Product SW Version No 1111 Power CPU SW Version 12 1112 Power CPU Bootloader SW Power Bootloader See Product SW Version No Version ...
- Page 68 Parameter Setting Modbus OLED Display Code Full Parameter Name Range Address Name 24 1124 Bluetooth CPU SW Version Bluetooth Module See Product SW Version No 25 1125 Bluetooth CPU SW Version 26 1126 Power CPU HW Version See Product SW Version No 1127 Power CPU HW Version 30 1130 Date/Time Date Date and time is Yes formatted using the 1131 Date/Time Time epoch time. This is the total number of seconds ...
-
Page 69: Chapter 8 - Parameter Descriptions
CHAPTER 8 – PARAMETER DESCRIPTIONS CHAPTER 8 - PARAMETER DESCRIPTIONS VFD speed and system temperature. The inverse Primary – Basic Setup Group PID control increases fan motor speed if temperature is above set point. The Surface/Pump selection provides constant PRIMARY PARAMETERS pressure PID control with pressure transducer PRIMARY-1: Application Selection feedback. The process unit is set to PSI with 0‐ Application Default: Basic 100PSI ... - Page 70 PRIMARY-5: Rated Motor RPM Motor RPM Min: 500 1750RPM Max: 3600 Default: 1750 Motor RPM can be changed to motor nameplate RPM if different from default. It is used for motor speed display proper scaling. PRIMARY-6: Power Line Frequency PRIMARY-9: High Frequency Limit Line Frequency 0 - 50Hz High Frequency Limit Min: PRIMARY-10 60Hz 1 - 60Hz 60Hz...
- Page 71 PRIMARY-11: Carrier Frequency Carrier Frequency Min: 2.0 PRIMARY-19: Torque Boost Level 2.5kHz Max: 10.0 Fault Reset Min: 0.00 Default: 2.5 kHz Enabled Max: 15.00 Default: 2.00 The carrier frequency determines how many pulses the inverter transistors will create during Torque boost value is set as % of line voltage. one cycle. Some motors can create an audible ...
- Page 72 PRIMARY-22: HOA Type PRIMARY-23: Run Command in Hand Hand Run Cmd 0 - HOA in Hand HOA Type 0 - Keypad HOA Always Run 1 - Terminal Keyboard HOA 1 - Auto Only 2 - 3-Wire 2 - Keypad Off/Auto 3 - Comms 3 - External HOA Default: (0) HOA in...
- Page 73 cure provides more energy efficient control for variable torque applications such as: Fans, PRIMARY-31: DC Brake Frequency Stop Mode Default: Decelerate Blowers and Pumps. Coast 0 - Decel 1 - Coast PRIMARY-34: Acceleration Time Accel Time Min: 1.0s 30.0s Max: 6000.0s Default: 30.0s Time it takes to accelerate from 0.00 Hz to Max Frequency. ...
- Page 74 Anlg Ref Loss 0 - Disabled Half of Min 1 – Below ½ of Min PRIMARY-42: Speed Reference in Auto 2 – Below Min Auto Speed Ref 0 - Keypad Default: (1) Half of Min Keypad 1 - 1A Analog Input ...
- Page 75 PRIMARY-49: PID Feedback Unit PID Feedback Unit 0 - PSI PRIMARY-45: Reference Loss Delay 1 - GPM Anlg Ref Loss Min: 0s 2 - inWC Delay 1s Max: 20s 3 - CFM Default: 1s 4 - inHg 5 - Feet Low ...
- Page 76 PRIMARY-57: Out Ramp Time PRIMARY-62: Feedback Loss Delay PID Ramp Time Min: 0.0 Fdbk Loss Delay Min: 0s Max: 10.0 Max: 10s Default: 0.0s Default: 1s Sets PID output ramp‐up. Ramp‐down time will Low reading on a sensor could be normal be set to 150% of PRIMARY‐57. Extra ramp time condition ...
-
Page 77: Vfd - Advanced Setup Group
VFD – Advanced Setup Enabled: Skip frequency allows you to skip from the VFD reference short frequency Group range of system resonant frequencies. VFD-4: Auto Bypass Auto Bypass 0 - Disabled Disabled 1 - On VFD Fault 2 - Bypass Comm Loss 3 - VFD Fault & Bypass Comm Loss Default: Disabled ... - Page 78 VFD-16 Skip Freq 3 Enable Skip Freq 3 Enable 0 - Disabled VFD-10 Skip Freq 1 Enable Disabled 1 – Enabled Skip Freq 1 Enable 0 - Disabled Default: Disabled Disabled 1 – Enabled Default: Disabled Skip frequency 3 enable/disable. Used to Skip frequency 1 enable/disable. Used to ...
- Page 79 When Factory Defaults is selected, VFD will load VFD-19 Speed A factory defaults for motor and power line Speed A Min: PRIMARY-10 parameters. 30Hz Max: PRIMARY-7 Default: 30.00Hz VFD-40 Custom Param 1 Custom Param 1 0 - Output Frequency Preset frequency‐A by digital input for Auto 40) Output Frequency 1 - Motor Speed (RPM) 2 - Energy Usage mode ...
-
Page 80: I/O Terminals
I/O Terminals Dry Input 2 function selection. VFD does not allow more than one DI to be set to the same I/O-1: D1-SG Function D1-SG Function 0 - None selection except (None). (21) Analog input Run Forward 1 - Enable switch is not for first release 2 - Fireman's Override 3 - Speed- A I/O-4: D2-SG Input 4 - Speed- B D2-SG Input 0 – Normally Open 5 - Setpoint-A N.O. - Page 81 I/O-15: 1A Input Min Hz 1A Min Hz Min: 0.00 Hz I/O-7: V3-V4 Function Max: PRIMARY-7 V3-V4 Function 0 - None Default: 0.00 Hz External Trip 1 - Enable 2 - Fireman's Override 3 - Speed- A 1A V noise filtering: 0=100ms, 1= 250ms, 4 - Speed- B 2=500ms ...
- Page 82 2A Analog output scaling. For max Frequency 60Hz at 50% setting, 2A output will provide 5VDC I/O-24: 2A Input Min V 2A Input Min V Min: 0.0V or 12mA (depending on 2A DIP Sw position). Max: 10.0V Default: 0.0V I/O-48: Option Board Enable Option Board 0 - Disable 2A Voltage Input minimum value. For 2‐10VDC Enabled 1 – Enable Default: Enabled signal set it to 2V ...
- Page 83 2A Analog output scaling. For max Frequency I/O-52: Dry Input 4 Contact D4-SG Input 0 – Normally Open 60Hz at 50% setting, 2A output will provide 5VDC N.O. 1 – Normally Closed or 12mA (depending on 2A DIP Sw position). Default: N.O. I/O-53: Relay 3 Output Select O3-O4-O5 Function 0 - Fault Fault 1 - Run 2 - Proof of Run...
-
Page 84: Protection
Protection PROT-6: DC Trip Prevention DC Trip Prevention 0 - Disabled PROT-1: Preheat Mode Enabled 1 – Enabled Preheat Mode 0 - Disabled Default: Enabled Disabled 1 - Low Heat 2 - Medium Heat 3 - High Heat Enables prevention of DC Trip. ... - Page 85 Crit Fault Retry Delay Min: 0s PROT-9: Bypass MOL Class 180s Max: 6000s Bypass MOL Class 0 - Class 5 Default: 180s 1 - Class 6 (Pump) 2 - Class 10 3 - Class 20 Sets time delay before retry attempts. Available Default: (2) 10 when PRIMARY‐18 is greater than 0 ...
-
Page 86: Communication
COMMS‐1 ‐ 0,2 Communication COMMS-9: ModBus RTU Address COMMS-1: Communication Protocol Selection ModBus RTU Addr Min: 1 Protocol 0 - Modbus RTU Max: 247 1) ModBus RTU 2 - BACnet MS/TP Default: 247 Default: ModBus RTU Comms Protocol Selection. Modbus Device Address ... - Page 87 COMMS-29: Comms PID Setpoint Min: 0 60 PSI Max: [Prime-50] *0.95 Default: 60 [PSI] COMMS-30: Comms Reset Fault 0 - None None 1 – Reset Default: None COMMS-36: Bluetooth Enable Bluetooth Enable 0 - Disable Enable 1 – Enable Default: Enable ...
-
Page 88: View Information
View Information Displays the DC bus voltage. VIEW-1: VFD Output Frequency Output Frequency Min: 0.0 Max: 240.00 [Hz] VIEW-10: Output Voltage Output Voltage Min: 0.0 Max: 600.0 Displays the VFD output frequency. Displays the VFD calculated output voltage VIEW-2: Motor Speed Motor Speed Min: 0.0 (RMS). Max: 3600 [RPM] ... - Page 89 53 - Transducer Signal Loss (A) VIEW-13: Fault 54 - EEPROM Error HOA Mode 0 - None 55 - Calibration CRC 1 - Motor Overload (C) Failed 2 - Motor Over Current 56 - Bluetooth Key CRC Failed 3 - VFD Over Current (C) 57 - Invalid Firmware 4 - VFD Over Heat (C) ...
- Page 90 VIEW-21: Motor Run Time VIEW-37: Power Motor Run Time Min: 0 Average Power Varies depending Max: 4294967295 on VFD size [kW] VIEW-39: Target Frequency Target Frequency Min: PRIMARY-10 Max: PRIMARY-9 VIEW-23: D1-SG Input D1-SG Input 0 - Open 1 - Closed VIEW-40: Run Command Source Run Command 0 - None...
-
Page 91: Fault Codes
26 - Bypass Max Time VIEW-51: O3-O4 Output 27 - Bypass Ground 2A Type 0 - Open 1 - Closed Fault (L) 28 - Bypass Communications Error 29 - Bypass Contactor Displays status of Relay Output 2 (N.C., form C). 30 - Bypass Current at VIEW-52: O4-O5 Output Power On (L) - Page 92 5 - VFD fireman's FAULT-5: Line V Current override Line V Current Min: 0.0 6 - VFD auto reset Max: 6x VFD FLA (A) 8 - Power-on delay 12 - Signal loss 14 - PID run 15 - Open damper Displays the phase B output current at the time ...
- Page 93 FAULT-14: VFD Input Terminals FAULT-34: Time I/O Terminals Min: 0x00 Time Display: Time of Fault Max: 0xFF HH:MM:SS Bit field of flags representing terminal inputs at Displays the system time. Only the 3 least the time of the fault. For bits 0‐1, a cleared flag will read "Open and a set flag will read significant bytes are used. From least "Closed". For bits 2‐3, a cleared flag reads "De‐ significant byte: second, hour, day. Displayed Energized" and a set flag reads upon VFD or Bypass fault. "Energized". Displayed upon VFD or Bypass fault. Bit 0 ‐ Damper Status Bit 1 ‐ O1O2 Status Bit 2 ‐ O3O4 Status Bit 3 ‐ O4O5 Status Bit 10 ‐ D4 Status Bit 11 ‐ D3 Status Bit 12 ‐ V3/V4 Status Bit 13 ‐ V1/V2 Status ...
-
Page 94: Administration
ADMIN-10: Power CPU SW Version Administration Power Board See Product SW Version ADMIN-1: Reset Motor Run Time Motor Run Time 0 - No 1 - Yes ADMIN-12: Power CPU Bootloader SW Version Power Bootloader See Product SW Version Resets the run time. ... - Page 95 ADMIN-35: Serial Number Serial Number 0 – 99,999,999 XXXXXXXX ...
-
Page 96: Chapter 9 - Troubleshooting And Maintenance
CHAPTER 9 – TROUBLESHOOTING AND MAINTENANCE CHAPTER 9 - TROUBLESHOOTING AND MAINTENANCE The following troubleshooting information is also available via the Q‐Link mobile app. When a fault occurs, the mobile app will offer the same potential remedies seen below for the corresponding faults in section 9.1. 9.1 Fault Remedy Fault Cause Remedy Motor Overload (C) A motor overload fault Check that your FLA setting in occurs when the overload PRIMARY‐04 matches the motor sees more than the adjusted nameplate percentage of the FLA For submersible pumps, check if setting. This follows the there is a sand in the water. industry‐standard overload Check motor shaft spins freely trip class curve, adjustable in For high inertia loads set higher PROTECTION‐07 & 08. ... - Page 97 Fault Cause Remedy VFD Short Circuit (C) A VFD short circuit fault Check if power line wiring is occurs when there is an connected to VFD motor terminals internal or external short Check that there are no shorts circuit on the VFD output visible on the output circuit of the circuit. This is an VFD instantaneous fault. Disconnect the motor wires at the VFD, disable the no motor protection in PROTECTION‐03, and run the VFD with no load. If problem persists, then the VFD output is shorted internally. Consider replacing the VFD and don’t forget to check the motor circuit also for shorts. This may have caused the damage and could possibly damage a newly installed VFD if not corrected. Check that there are no shorts in the wires running between your VFD and the motor Over Voltage (L) A VFD over voltage fault Check that the measured line occurs when the VFD’s ...
- Page 98 Fault Cause Remedy Under Voltage (L) A VFD under voltage fault Check that the measured line occurs when the VFD’s voltage matches the VFD rated internal DC bus voltage low nominal voltage limit has not been met. Check your motor wiring Check the VFD’s DC bus value before running a motor and while running a motor. If the voltage drops after a motor load has been applied, there may be a motor issue. Disconnect the motor wires at the VFD, disable the no motor protection in PROTECTION‐03, and run the VFD with no load. If problem persists, then the VFD may have internal damage. Check the motor with a megger meter. If the motor tests fine, the VFD works fine with no load, and the DC bus still drops when a load is applied, check the line voltage to see if it may be an overloaded utility transformer causing the issue. If the line voltage is fine, consider replacing the VFD. Input Phase Open (L) ...
- Page 99 Fault Cause Remedy Ground Fault (L) Occurs when: Ground fault Ensure Motor and VFD are grounded current exceeds the internal per the installation guide. ground fault level value. Disconnect motor wires from package and Check the output wiring and insulation of motor windings with Megger tester. Bypass Motor The Bypass Motor Overload Check FLA, Trip Class, Overload protection provides motor Check if motor is overloaded overload protection when in Bypass mode only. If the motor pulls more current than set motor FLA, it will trip based on selected trip class to prevent motor damage. Bypass Phase Loss The bypass did not see Check wiring passing through the current in one or more of the bypass current sensors for loose phases. connections. Bypass Board Error ...
- Page 100 Fault Cause Remedy Bypass Bypass communication error Check the connection between the Communications Error occurs when the Bypass and Bypass board and the I/O board, I/O board loses the that the connector is firm and that it connection between them. is in the correct socket. Also check condition of wire that there are no insolation issues along it’s length. Bypass Contactor A Bypass Contactor trip Check that a motor is hooked up to occurs when there is an issue the contactor output. with the contactors. It Ensure contactor is FCS brand and usually indicates that either properly sized for application motor is disconnected or Check for contactor coil connection contactor didn’t pull in or to bypass board contactor coil pulls too much Check for shorts in the contactor coil current and activated 24VDC or in the wiring to the contactor. power overload protection or ...
- Page 101 Fault Cause Remedy Limit Switch Occurs when: The Damper Ensure a Damper switch is being Switch input is not detected used and wired to appropriate within an adjustable time Digital Input set for Damper Switch. delay (VFD‐07) when using Ensure the Damper Time Delay Damper Mode (VFD‐06). (VFD‐07) is set to a longer time than it normally takes to open the Damper and close the Damper Switch. Damper Overload (L) Occurs when: The Damper Ensure rating of the Damper Motor current exceeds 0.5A does not exceed 0.5A Ensure Damper is not blocked or stuck and is free‐moving. No Flow (L) When flow switch is open Check if time delay is not long for time delay during no enough to provide flow during start flow condition in VFD run Check if there is a suction pressure mode, VFD will trip. or water in well. ...
- Page 102 Fault Cause Remedy Analog Signal Loss (A) Occurs when speed signal is Check wiring and speed signal to less than minimum value for VFD Speed Reference Signal Loss Check Min Value: I/O‐14, I/O‐19, Delay Time I/O‐24 Check signal Loss Delay: PRIMARY‐ 45 Transducer Signal Loss Occurs when: signal is below Verify wiring and signal from (A) minimum value OR at transducer maximum value for Feedback Check signal input value: VIEW‐31, Loss Delay time. VIEW‐35 (4‐20 mA) or VIEW‐32, VIEW‐34 (0‐10V) Check Min Value: I/O‐14, I/O‐19, I/O‐24 Check signal Loss Delay: PRIMARY‐ 62 EEPROM Fail ...
-
Page 103: Fan Replacement
9.2 Fan Replacement ... -
Page 104: Battery Replacement
9.3 Battery Replacement ... -
Page 105: Chapter 10 - Modbus-Rtu Communication
CHAPTER 10 – MODBUS-RTU COMMUNICATION CHAPTER 10 - MODBUS- RTU COMMUNICATION 10.1 Introduction The VFD can be controlled and monitored through the Modbus RTU protocol over an RS‐485 connection. Modbus follows a simple client‐server model. Server devices perform data read/write requests which are issued from a client device such as a PLC or building management system. Assignable addresses for server devices range from an address of 1 to a theoretical maximum of 247. As a server device, the VFD communicates all data using only 16‐bit holding registers. Addressing for the registers is partitioned into blocks that are multiples of 100 to group functionally similar data. If the drive is configured to accept commands via remote communications, it can be commanded to start, stop, run at a specified output frequency, target a setpoint in PID control, and reset faults. Modbus addresses can be found in Chapter 7 – Parameter Lists ... -
Page 106: Chapter 11 - Bacnet-Rtu Communication
CHAPTER 11 – BACNET-RTU COMMUNICATION CHAPTER 11 - BACnet- MS/TP COMMUNICATION 11.1 Introduction The VFD can be controlled and monitored through the BACnet MS/TP protocol over an RS‐485 connection. The VFD operates as an MS/TP master device, which the protocol can support addressing for up to 128 master devices in a single MS/TP network. BACnet conveys control and monitoring data as a collection of BACnet objects. The VFD supports Analog Input, Analog Value, Positive Integer Value, Binary Input, Multi‐State Value, and Character String object types. The Read Property and Write Property services can be used to interface to these objects. If the drive is configured to accept commands via remote communications, it can be commanded to start, stop, run at a specified output frequency, target a setpoint in PID control, and reset faults. 11.2 Parameter Code Lists Analog Input Object: BACnet Read/ Object Full Parameter Name OLED Display Name Units Parameter Setting Range Write Instance 0.1 0 R PID Feedback Value PID Feedback ... - Page 107 Analog Value Object: BACnet Read/ Object Full Parameter Name OLED Display Name Units Parameter Setting Range Write Instance 200/400V model: 200 to 480V; def 230V 0 R/W Rated Motor Voltage Motor Voltage [V] 400V model: 380 to 480V; def 460V [HP/k 1 R/W Rated Motor HP/kW Motor Horsepower 1 to 600HP/ 0.75 to 450kW W] 0.1 2 R/W Rated Motor Current Motor Current 1.0 to VFD Rating [A] 0.01 3 R/W Maximum Frequency Max Frequency 30.00 to 240.00 [Hz] ...
- Page 108 BACnet Read/ Object Full Parameter Name OLED Display Name Units Parameter Setting Range Write Instance Skip Frequency 2 0.01 22 R/W Skip Freq 2 Low 0.50 to [Skip‐2 High Hz] Low* [Hz] Skip Frequency 2 0.01 23 R/W Skip Freq 2 High [Skip‐2 Low Hz] to [VFD Max Hz] High* [Hz] Skip Frequency 3 Low 0.01 24 R/W Skip Freq 3 Low 0.50 to [Skip‐3 High Hz] * [Hz] Skip Frequency 3 High 0.01 25 R/W Skip Freq 3 High [Skip‐3 Low Hz] to [VFD Max Hz] * ...
- Page 109 BACnet Read/ Object Full Parameter Name OLED Display Name Units Parameter Setting Range Write Instance Average Output 0.1 43 R Average Current 0.0 to 6xVFD FLA Current [A] 0.1 44 R Line U Current Line U Current 0.0 to 6xVFD FLA [A] 0.1 45 R Line V Current Line V Current 0.0 to 6xVFD FLA [A] 0.1 46 R Line W Current Line W Current 0.0 to 6xVFD FLA [A] 0.1 47 R ...
- Page 110 Binary Input Object: BACnet Read/ Full Parameter Name Object OLED Display Name Units Parameter Setting Range Write (manual) Instance 0 ‐ Open 0 R D1‐SG Status D1‐SG Input x 1 ‐ Closed 0 ‐ Open 1 R D2‐SG Status D2‐SG Input x 1 ‐ Closed 0 ‐ Deenergized 2 R V1‐V2 Status V1‐V2 Input x 1 ‐ Energized 0 ‐ Deenergized 3 R V3‐V4 Status V3‐V4 Input x 1 ‐ Energized 0 ‐ Open ...
- Page 111 Character String Object: BACnet Read/ Object Full Parameter Name OLED Display Name Units Parameter Setting Range Write Instance Software versions use the format xx.xx.xxy, where xx is a Product Package SW number from 0‐99 and y is a 0 R x Version letter representing the release variant. Power CPU SW 1 R Power Board x See Product SW Version Version Power CPU 2 R Bootloader SW Power Bootloader x See Product SW Version Version Control CPU SW ...
- Page 112 Multi‐State Objects: BACnet Read/ Object Full Parameter Name OLED Display Name Units Parameter Setting Range Write Instance 0‐ Basic 1‐ Supply Fan 2‐ Exhaust Fan 0 R/W Application Application x 3‐ Cooling Twr 4‐ Surface/Booster Pump 0‐ 50 [Hz] 1 R/W Power Line Frequency Line Frequency x 1‐ 60 [Hz] 0 ‐ Disable 2 R/W Power‐On Run Power‐On Run x 1 ‐ Enable 0 ‐ Disable 3 R/W Run after Fault Reset Fault Reset & Run ...
- Page 113 BACnet Read/ Object Full Parameter Name OLED Display Name Units Parameter Setting Range Write Instance 0 ‐ Keypad 1 ‐ 1A Analog Input Speed Reference in 13 R/W Auto Speed Ref x 2 ‐ 2A Analog Input Auto 3‐ Comms 4 ‐ PID* 0 ‐ Disabled Reference Loss 14 R/W Anlg Ref Loss x 1 ‐ Below 1/2 of Min** Condition 2 ‐ Below Min** 0 – Fault 1 – Stop (uses selected stop 15 R/W Ref. Loss Action** Anlg Ref Loss Act x mode) 2 – Hold Speed 0 ‐ Direct 16 R/W ...
- Page 114 BACnet Read/ Object Full Parameter Name OLED Display Name Units Parameter Setting Range Write Instance Skip Frequency 1 0 ‐ Disabled 25 R/W Skip Freq 1 Enable x Selection 1 ‐ Enabled* Skip Frequency 2 0 ‐ Disabled 26 R/W Skip Freq 2 Enable x Selection 1 ‐ Enabled* Skip Frequency 3 0 ‐ Disabled 27 R/W Skip Freq 3 Enable x Selection 1 ‐ Enabled* 0 ‐ Class 5 VFD Motor Overload 1 ‐ Class 6 28 R/W VFD MOL x (MOL) Class ...
- Page 115 BACnet Read/ Object Full Parameter Name OLED Display Name Units Parameter Setting Range Write Instance 0 ‐ None 1 ‐ Enable 2 ‐ Fireman's Override 3 ‐ Speed‐ A 4 ‐ Speed‐ B 5 ‐ Setpoint‐A 6 ‐ Setpoint‐B 7 ‐ Damper LSW 32 R/W Dry Input 2 Function D2‐SG Function x 9 ‐ External Trip 10 ‐ Run Forward 13 ‐ 3‐Wire Start 14 ‐ 3‐Wire Stop 15 ‐ HOA Auto 16 ‐ HOA Hand 17 ‐ Shutdown 18‐ Fault Reset 19‐ Bypass 0 ‐ Normally Open 33 R/W Dry Input 2 Contact D2‐SG Input 1 ‐ Normally Closed 0 ‐ None 1 ‐ Enable 2 ‐ Fireman's Override ...
- Page 116 BACnet Read/ Object Full Parameter Name OLED Display Name Units Parameter Setting Range Write Instance 0 ‐ None 1 ‐ Enable 2 ‐ Fireman's Override 3 ‐ Speed‐ A 4 ‐ Speed‐ B 5 ‐ Setpoint‐A 6 ‐ Setpoint‐B 7 ‐ Damper LSW 36 R/W Wet Input 2 Function V3‐V4 Function x 9 ‐ External Trip 10 ‐ Run Forward 13 ‐ 3‐Wire Start 14 ‐ 3‐Wire Stop 15 ‐ HOA Auto 16 ‐ HOA Hand 17 ‐ Shutdown 18‐ Fault Reset 19‐ Bypass 0 ‐ Active High 37 R/W Wet Input 2 Type V3‐V4 Input 1 ‐ Active Low 0 ‐ Fault 38 R/W ...
- Page 117 BACnet Read/ Object Full Parameter Name OLED Display Name Units Parameter Setting Range Write Instance 0 – Fault 1 – Stop (uses selected stop 48 R/W Comms Loss Action Com Loss Action x mode) 2 – Hold Speed 0 ‐ None, 2 Stop 1 ‐ Even, 1 Stop 49 R/W Parity/Stop Bits Modbus RTU x 2 ‐ Odd, 1 Stop 3 ‐ None, 1 Stop 0 ‐ Disable 50 R/W Bluetooth Enable Bluetooth x 1 ‐ Enable 0 ‐ VFD Off 1 ‐ Accelerate 2 ‐ Decelerate 3 ‐ Steady 4 ‐ Speed search 5 ‐ Flying start ...
- Page 118 BACnet Read/ Object Full Parameter Name OLED Display Name Units Parameter Setting Range Write Instance 0 ‐ No 61 R/W Reset Wattmeter Wattmeter x 1 ‐ Yes 0 ‐ None 1 ‐ Motor Overload (C) 2 ‐ Motor Over Current (C) 3 ‐ VFD Over Current (C) 4 ‐ VFD Over Heat (C) 5 ‐ VFD Short Circuit (C) 6 ‐ Over Voltage (L) 7 ‐ Under Voltage (L) 8 ‐ Input Phase Open (L) 9 ‐ Output Phase Open (L) 10 ‐ No Motor (L) 11 ‐ Incorrect Output Wiring 12 ‐ Power Board Uncalibrated 13 ‐ Ground Fault (L) 21 ‐ Bypass Motor Overload 22 ‐ Bypass Phase Unbalance 23 ‐ Bypass Phase Loss 24 ‐ Bypass Board Error 25 ‐ Bypass Stall 26 ‐ Bypass Max Time 27 ‐ Bypass Ground Fault 28 ‐ Bypass Communications Error 62 ...
- Page 119 BACnet Read/ Object Full Parameter Name OLED Display Name Units Parameter Setting Range Write Instance 0 ‐ No 69 R/W Bypass Commanded x 1 ‐ Yes 0 ‐ None 1 ‐ Run Run Command 2 ‐Terminals 75 R Run Command x Source 3 ‐ 3 Wire 4 ‐ Communication 5 ‐ Mobile 0 ‐ None 1 ‐ Keypad 2 ‐ Analog 1A Speed Reference 76 R Speed Reference x 3 ‐ Analog 2A Source 4 ‐ Communication 5 ‐ Mobile 6 ‐ PID ...
- Page 120 BACnet Read/ Object Full Parameter Name OLED Display Name Units Parameter Setting Range Write Instance 0 ‐ None 1 ‐ Enable 2 ‐ Fireman's Override (H) 3 ‐ Speed‐ A 4 ‐ Speed‐ B 5 ‐ Setpoint‐A 6 ‐ Setpoint‐B 7 ‐ Damper LSW (H) 8 ‐ Flow Switch 9 ‐ External Trip 87 R/W Dry Input 3 Function D3‐SG Function x 10 ‐ Run Forward 11 ‐ Run Reverse 12 ‐ 2nd Acc/Dec Time 13 ‐ 3‐Wire Start 14 ‐ 3‐Wire Stop 15 ‐ HOA Auto 16 ‐ HOA Hand 17 ‐ Shutdown 18‐ Fault Reset 19‐ Bypass 20‐ Switch 1A to 3A 0 ‐ Normally Open 88 R/W Dry Input 3 Contact D3‐SG Input x ...
- Page 121 BACnet Read/ Object Full Parameter Name OLED Display Name Units Parameter Setting Range Write Instance 0 ‐ None 1 ‐ HW Comms Fail 2 ‐ No "Adv Off" Rsp 3 ‐ No "Cfg" Response 4 ‐ No "Cfg Val" Rsp 5 ‐ No "Write" Rsp 6 ‐ No "Adv On" Rsp 7 ‐ No "LNAME" Rsp 8 ‐ No "SNAME" Rsp 9 ‐ No "Disconnect" Rsp 10 ‐ No "Satus Ok" Rsp 93 R Bluetooth Error Bluetooth Error x 11 ‐ No "Version" Rsp 12 ‐ No "Transparent" Rsp 13 ‐ No "Tx Comp" Rsp 14 ‐ Unexpected Reset 15 ‐ Unexpected Element 16 ‐ Invalid Firmware 17 ‐ No "Exit Trans" Rsp 18 ‐ Procedure Overrun 19 ‐ Not In Trans Mode 20 ‐ No "LBD" Response 21 ‐ No "DCN" Response 22 ‐ FW Upgrade Failure ...
- Page 122 Positive Integer Objects: BACnet Read/ OLED Display Object Full Parameter Name Units Parameter Setting Range Write Name Instance 0 R/W Rated Motor RPM Motor RPM 1[RPM] 500 to 3600 Damper/Lube/ScreenClean 1 R/W Damper Delay [sec] 0 to 6000 Delay* 2 R/W Feedback Loss Delay * Fdbk Loss Delay 1[Sec] 0 to 10 Motor Overload (MOL) VFD MOL 3 R/W [%] 50 to 135 Level Continuous Continuous 4 R/W ...
-
Page 123: Chapter 12 - Warranty
If the defective part has been identified under normal and proper use within the guarantee term, contact your local authorized Franklin Control Systems distributor or Franklin Control Systems Service center. OUT-OF WARRANTY service information Franklin Control Systems warranty will not be applied in the following cases, even if the guarantee term has not expired. ... -
Page 124: Appendix A - De-Rating Table
APPENDIX A – De-Rating Table APPENDIX A – DE-RATING TABLE DE‐RATING: The following de‐ratings are established based on the ambient and adjustable carrier frequency. Where applicable, linear interpolation of the rated output current is allowed for carrier frequencies between 5kHz and 10kHz. ... - Page 125 Thank you for choosing Franklin Control Systems, formerly Cerus Industrial. franklin‐controls.com | 1 .800.962.3787 ...
Need help?
Do you have a question about the Q-link and is the answer not in the manual?
Questions and answers