Table of Contents
Advertisement
Quick Links
WH9
3 PHASE ELEMENTS
WH9A
WH9B
WH9D
3-PHASE ELEMENTS
WH9F
MUST BE WIRED IN
STAR FASHION
WH10
WH10A
WH11
N
WH12
WH12A
WH13
TO SET DIGITAL CLOCK (for every day use)
See clock's own manual for other settings.
THIS IS A 24 HOUR CLOCK
SET CURRENT TIME
Press and Hold Down CLOCK button whilst setting hours
and minutes to input current time
SET HEATER ON/OFF TIMES
Press and release TIMER until C1 appears on right
and 1-ON comes up at left, set first element ON time by
pressing HOUR and MIN
Press Timer again, 1-OFF will appear at left
set first element OFF time by pressing HOUR and MIN
Press Timer again, 2-ON will appear at left
set second element OFF time by pressing HOUR and MIN
Press Timer again, 2-OFF will appear at left
set second element OFF time by pressing HOUR and MIN
(repeat above steps for third and fourth on/offs if needed
if not required, press TIMER repeatedly to step through
3on/off and 4on/off)
SET WATER SOLENOID to re-fill heater
Press and release TIMER until C2 appears on right
and 1-ON comes up at left,
set first Solenoid OPEN time by pressing HOUR and MIN
Press TIMER again, 1-OFF will appear at left
set first SOLENOID OFF (close) time by pressing HOUR and
MIN
(this will shut water solenoid - allow 2 - 3 hours to refill
heater)
Press TIMER again and 2-ON comes up at left, set second
SOLENOID OPEN time by pressing HOUR and MIN
Press Timer again, 2-OFF will appear at left,
set Second SOLENOID OFF (close) time by pressing HOUR
and MIN, (this will again shut water solenoid - allow 2 - 3
hours to refill heater)
(repeat above sequences to set thirdon/offs if required,(no
fourth setting) if not required, press TIMER to step through
3on/off and return to C1)
Finalise settings by pressing CLOCK
SET AUTO OPERATION
Press CH A until line at bottom of display is above AUTO,
repeat for CH B
if stepping from ON to AUTO, timing starts immediately,
if stepping from OFF to AUTO timing will start at NEXT
clock point
ELEMENTS AND THERMOSTATS
3kw
1 phase 18" & stat pocket
3kw
1 phase 14" & stat pocket
3kw
1 phase 9" & stat pocket
4kw
1 phase 14" & stat pocket
3kw
1 phase 11" & stat pocket
4.8kw
1 phase 18" & stat pocket
4.8kw
3 phase 18" & stat pocket
6kw
1 phase 18" & stat pocket
6kw
3 phase 18" & stat pocket
9kw
3 phase 18" no stat pocket
Hi Range Stat 30° - 110/120°
x
x
x
x
x
10
9
8
7
6
Th
12:34
C1
OFF CH B
CH A ON
AUTO
OFF
ON
AUTO
CLOCK
TIMER
DAY
MIN
HOUR
CLS/RCL
CH A MANUAL CH B
CH A
CH B
RESET
1
2
3
4
5
x
x
x
x
x
CLOCK CONNECTIONS
Channel A (Heater Element)
Series 1 (Up to Approx Aug'08): 7 & 6
Series 2 (After Approx Aug'08): 2 & 3
Channel B (Water Inlet Solenoid)
Series 1 (Up to Approx Aug'08): 10 & 9
Series 2 (After Approx Aug'08): 1 & 2
Illustration is of Series 2 Clock, fitted August 2008 on
(both types of clock have
same set-up, but different connections)
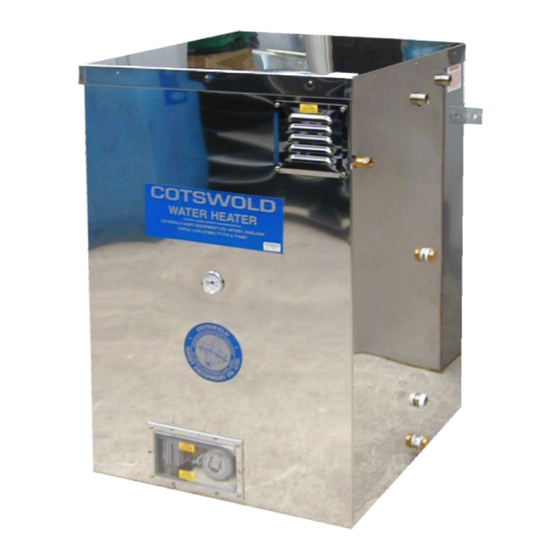
"All STAINLESS STEEL"
DAIRY WATER HEATER
INSTRUCTIONS
Installation & Maintenance
Dual Clock (S2) and
Digital Thermostat Versions
Cotswold Dairy Equipment Co Ltd
Avenue 3 Station Lane
Witney
Oxford
OX28 4BP
UK
Tel +44 (0)1993 774567
Fax +44 (0) 1993 771776
e-mail sales@cotswold-dairy.co.uk
www.cotswold-dairy.co.uk
CE
MADE IN ENGLAND
COTSWOLD
Advertisement
Table of Contents

Summary of Contents for COTSWOLD DAIRY WATER HEATER
- Page 1 CLOCK CONNECTIONS heater) Channel A (Heater Element) Cotswold Dairy Equipment Co Ltd Press TIMER again and 2-ON comes up at left, set second SOLENOID OPEN time by pressing HOUR and MIN Series 1 (Up to Approx Aug’08): 7 & 6...
- Page 2 WATER HEATER IMPORTANT INSTALLATION INFORMATION MAINTAIN WATER PRESSURE AT THE INLET. all stainless-steel construction including inner tank and outer cabinet The cold water inlet is controlled by an electrically operated solenoid valve suitable high quality internal insulation for maximum economy, (including lid) for water pressures between 10 and 150 psi (1 - 10 BAR).
Need help?
Do you have a question about the DAIRY WATER HEATER and is the answer not in the manual?
Questions and answers