
Related Manuals for Whirlpool MWC25


Summary of Contents for Whirlpool MWC25
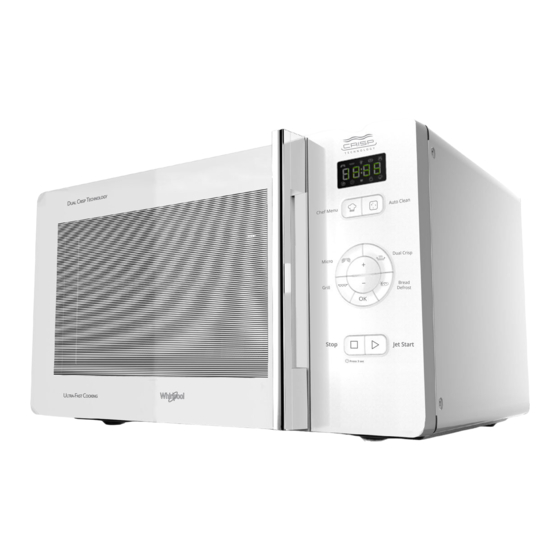
- Page 1 Instruction for use Bruksanvisning Gebruiksaanwijzing Manual de utilização Instrucţiuni de utilizare www.whirlpool.com.au...
-
Page 2: Table Of Contents
INDEX INSTALLATION Installation SAFETY Important safety instructions Trouble shooting guide Precautions ACCESSORIES AND MAINTENANCE Accessories Maintenance & Cleaning CONTROL PANEL Control panel GENERAL USE 10 Stand-by mode 10 Start Protection / Child Lock 10 Pause or Stop cooking 10 Add / Stir /Turn food 11 Clock COOKING FUNCTIONS 12 Jet Start... -
Page 3: Installation
INSTALLATION Prior to connecting Position the oven at a distance from other heating sources. For sufficient ventilation there must be a space of at least 30 cm above the oven. The microwave oven shall not be placed in a cabinet. This oven is not intended to be placed or used on a working surface lower than 850 mm above the floor. - Page 4 IMPORTANT SAFETY INSTRUCTIONS READ CAREFULLY AND KEEP FOR FUTURE REFERENCE If material inside / outside the oven should ignite or smoke is emitted, keep oven door closed and turn the oven off. Disconnect the power cord or shut off power at the fuse or circuit breaker panel.
-
Page 5: Trouble Shooting Guide
IMPORTANT SAFETY INSTRUCTIONS The appliances are not intended to be operated by means of an external timer or separate remote-control system. Do not leave the oven unattended if you are using a lot of fat or oil since they can overheat and cause a fire! Do not heat, or use flammable materials in or near the oven. -
Page 6: Precautions
PRECAUTIONS GENERAL This appliance is intended to be used in household and similar applications such as : - Staff kitchen areas in shops, offices and other working environments; - Farm houses; - By clients in hotels, motels and other residential environments; - Bed and breakfast type environments. - Page 7 ACCESSORIES GENERAL There are a number of accessories available on the market. Before you buy, ensure they are suitable for microwave use. Ensure that the utensils you use are oven proof and allow microwaves to pass through them before cooking. When you put food and accessories in the microwave oven, ensure that they do not come in contact with the interior of the oven.
-
Page 8: Maintenance & Cleaning
MAINTENANCE & CLEANING Failure to maintain the oven in a clean condition could lead to deterioration of the surface that could adversely affect the life of the appliance and possibly result in a hazardous situation. Do not use metal scouring pads, abrasive cleansers, steel-wool pads, gritty washcloths, etc. - Page 9 CONTROL PANEL Crisp icon Jet Defrost Menu icon Jet Reheat Menu icon Chef menu icon Microwave power (watt) Display Microwave icon Chef menu button Grill icon Microwave button Clock setting / Time selection Grill button Food type selection OK button Weight (grams) Stop/Clock button Auto Clean button...
-
Page 10: Start Protection / Child Lock
STAND-BY MODE The oven is in Stand-by mode when the clock is displayed (or, if the clock has not been set, when the display will show “:”). START PROTECTION / CHILD LOCK This automatic safety function is activated one minute after the oven has returned to “Stand-by mode”. When the safety function is active the door must be opened and closed in order to start the cooking, otherwise the display will show “door”. -
Page 11: Clock
CLOCK To set the Clock of your appliance: Press & hold the Stop button for 3 seconds. Press the Plus/Minus buttons to set the hours. Press OK/Jet Start button. The minutes will start blinking. Press the Plus/Minus buttons to set the minutes. Press OK/Jet Start button.The clock is set. -
Page 12: Jet Start
JET START This function allows to start the Microwave function at maximum power for 30 seconds, simply pressing the Jet Start button. It is suggested for quick reheating of food with a high water content such as clear soups, coffee or tea. Press the Jet Start Button. -
Page 13: Microwave
MICROWAVE Microwave function allows to quickly cook or reheat food and beverages. Suggested Plate Cover Accessory: (sold separately) Press the Microwave button. The maximum power level (800 W) will be shown on the display and the watt icons starts blinking. Press Plus/Minus buttons to set the power. -
Page 14: Bread Defrost
BREAD DEFROST This exclusive Whirlpool function allows you to defrost frozen bread. Combining both Defrost and Crisp technologies, your bread will taste and feel as if it were freshly baked. Use this function to quickly defrost and heat frozen rolls, baguettes & croissants. -
Page 15: Grill
GRILL This function uses a powerful grill to brown foods, creating a grill or a gratin effect. Grill function allows to brown foods like cheese toast, hot sandwiches, potato croquettes, sausages, and vegetables. Dedicated Accessory: High Rack Press the Grill button. Press Plus/Minus buttons to set the cooking time. -
Page 16: Combi Grill (Microwave + Grill
COMBI GRILL (MICROWAVE +GRILL) This function combines Grill and Microwave heating, allowing you to cook gratin in less time. Dedicated High Rack Accessory: Press the Grill button. Press the Microwave button. Press Plus/Minus buttons to set the Microwave power (see the below table). -
Page 17: Crisp
CRISP This exclusive Whirlpool function allows for perfectly golden brown results both on the top and bottom surfaces of the food. Using both Microwave and Grill cooking, the Crisp Plate will rapidly reach the right temperature and begin to brown and crisp the food. -
Page 18: Quick Reference Guide
CHEF MENU A selection of automatic recipes with pre-set cooking parameters values to offer optimal cooking results. Press the Chef Menu button. Press and hold Plus/Minus buttons to select the food type (see the CHEF MENU table in your Quick Reference Guide). Press the OK button to confirm. - Page 19 AUTO CLEAN This automatic cleaning cycle will help you to to clean the microwave oven cavity and to remove unpleasant odors. BEFORE STARTING THE CYCLE: Put 235ml water into a container (see our recommendations in the be- low section “Tips and suggestions”). Place the container directly on the Glass Turntable.
-
Page 20: Technical Specifications
Pyrex 3.827 13.3 (Manual defrost) 500 g 12-14 min. 160W 3mm plastic plate TECHNICAL SPECIFICATION Data Description MWC25 Supply Voltage 240V~50 H Rated Input Power 1750W Outer dimensions (HxWxD) Inner dimensions (HxWxD) W 1 1 2 2 5 3 3 5...
Need help?
Do you have a question about the MWC25 and is the answer not in the manual?
Questions and answers