
Summary of Contents for REDROTOR RC RROSD PRO V2
- Page 1 Please contact your retailer or email SUPPORT@REDROTORRC.COM if you have any questions or enquiries.
- Page 2 Return Policy– Without soldering anything to the board, please apply power to the board using alligator clips and make sure the Green LED is on. Contact us immediately if green LED doesn't turn on! Return and Warranty claims are only considered on units that have not been soldered and within 30 days of purchase date.
- Page 3 What is RROSD-PRO V2 PDB? RROSD PRO V2 is an easy to use power distribution board and OSD designed to maximize FPV experience while minimizing mini quad build time and reducing the wire clutter mess! Built-in features Thick copper and wide power routing to handle the most demanding power setup ...
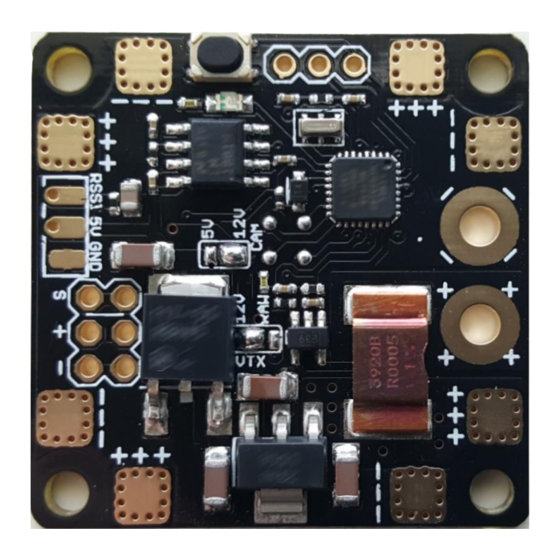
- Page 4 BATT + => Flight battery positive input BATT - => Flight battery negative input ESC + => ESCs positive input (top and bottom) ESC- => ESCs negative input (top and bottom) LED => Indicator led ...
- Page 5 Solder Bridge Setting: 1. VTX – Connect Middle pad and ‘RAW’ or ‘12V’ pad to set VTX voltage to Battery input and regulated 12V respectively. *Do not short all 3 pads together or very bad things will happen 2. CAM – Connect middle pad to ‘5V’ or ‘12V” pad to set CAM voltage. *Do not short all 3 pads together or very bad things will happen ...
- Page 6 The onboard LED can provide useful information to help trouble shoot the RR LED Behavior: Stays full on: this means the RROSD is running but not getting valid video signal from the camera. Check camera cable Blinks steadily: this is an indication that the RROSD is running properly and getting valid video input.
Need help?
Do you have a question about the RROSD PRO V2 and is the answer not in the manual?
Questions and answers