Table of Contents
Advertisement
Quick Links
- 1 Battery Care and Storage
- 2 Charging & Installing the Cocoon Fpv Hd Camera Drone Battery
- 3 Turning on and Pairing the Remote Control with the Drone
- 4 Flying the Cocoon Fpv Hd Camera Drone
- 5 Fly the Cocoon Fpv Hd Camera Drone Using the 'Drone Go' App
- 6 Drone Go' Application Interface
- Download this manual
Advertisement
Table of Contents

Related Manuals for Cocoon FPV HD Camera Drone

Summary of Contents for Cocoon FPV HD Camera Drone
- Page 1 Model Number: HE180101 INSTRUCTION MANUAL Version 1.3...
-
Page 3: Warranty Note
Warranty Note Important Getting the most out of your Cocoon FPV HD Camera Drone: Read the manual carefully It will help you set up with ease Visit www.cocoonproducts.com.au We have additional support videos and guides Call After Sales Support - 1300 663 907 Email customercare@winplus.com.au... -
Page 5: Warranty Details
Warranty Details FPV HD CAMERA DRONE Warranty Details REGISTER YOUR PURCHASE AT www.aldi.com.au/en/about-aldi/product-registration/ TO KEEP UP-TO-DATE WITH IMPORTANT PRODUCT INFORMATION The product is guaranteed to be free from defects in workmanship and parts for a period of 12 months from the date of purchase. Defects that occur within this warranty period, under normal use and care, will be repaired, replaced or refunded at our discretion. -
Page 6: Safety Instructions
Safety Instructions Follow all instructions and take notice of all warnings to reduce risk of fire or electric shock. • Read the instructions in this manual thoroughly before operating your Cocoon FPV HD Camera Drone • This drone must be operated safely at all times. It is the operator’s responsibility to always fly in safe conditions •... -
Page 7: Warnings
Australasia does not take any responsibility if local rules and regulations are not followed • Winplus Australasia does not take any responsibility for the loss of the Cocoon FPV HD Camera Drone and it is NOT covered by warranty. We recommend that users test their drone in a safe indoor environment before attempting to fly the drone outdoors •... -
Page 8: Rules & Regulations
Rules & Regulations The following regulations must be followed when operating a camera drone or quadcopter in Australia. • You must only fly during the day and keep your drone within visual line-of-sight. This means being able to see the aircraft with your own eyes (rather than through a device) at all times. •... -
Page 9: Disposal
Disposal At the end of its working life, do not throw this product out with your household rubbish. Electrical and electronic products contain substances that can have a detrimental effect on the environment and human health if disposed of inappropriately Observe any local regulations regarding the disposal of electrical consumer goods and dispose of it appropriately for recycling. -
Page 10: Table Of Contents
3.9 Headless / Normal Modes 3.10 Recalibrate the Cocoon FPV HD Camera Drone 3.11 Capture Photos & Videos 3.12 Replacing Parts 3.13 Fly the Cocoon FPV HD Camera Drone using the ‘Drone Go’ App Operation 3.14 ‘Drone Go’ Application Interface FAQs... -
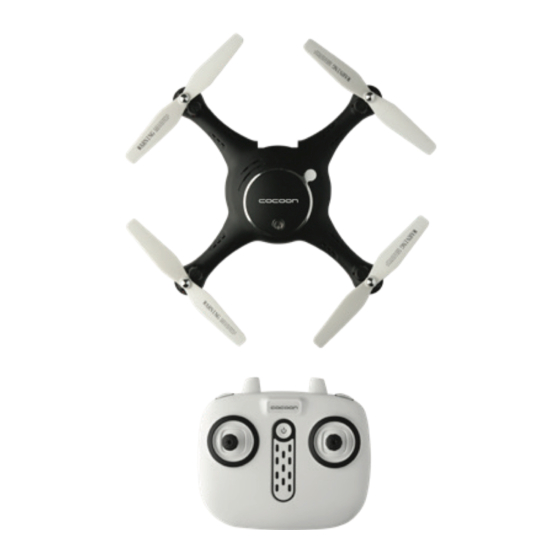
Page 11: Parts List
Parts List 1x Cocoon FPV HD 4x Landing Skids (On the drone) Camera Drone 4x Spare Blades 1x 2.4GHz Remote Control 1x Instruction Manual 1x USB Charging Cable (Not shown) 1x Rechargeable Battery 1x Getting Started Guide 1x Phone Mount... -
Page 12: Product Overview
Product Overview 1.1 Cocoon FPV HD Camera Drone *Illustration shows front/ head of drone 1. Propeller 4. Landing Skid 6. Battery (Behind) 2. ON/OFF Button 5. Camera/MicroSD Card 3. Propeller Guard Slot (Rear) NOTE: MicroSD Card not included. Maximum card capacity 32GB... -
Page 13: Remote Control
Product Overview 1.2 Remote Control 1. Phone Holder 4. Right Thumb Stick - 5. Photo 2. ON/OFF Button Headless mode, Slow/ 6. Video 3. Left Thumb Stick - Fly Up/ 7. 360º Flip Stunt Fast Speed Control, Fly Down, Turn Left/Right, Forwards/Backwards, 8. -
Page 14: Setup & Installation
Replace the cover and reinstall the screw NOTE: For best performance, do not mix different types of batteries. 2.2 Charging & installing the Cocoon FPV HD Camera Drone Battery a. Fully charge the drone’s battery before use b. Insert the battery power port into the small end of the supplied USB charging cable c. -
Page 15: Install The Camera And Propeller Guards
Setup & Installation 2.3 Install the Camera and Propeller Guards a. Connect the camera wires to the plug port located on the base of the drone. Coil any remaining cable into the cavity b. Insert the camera into the base of drone by twisting the camera 90 degrees into place until you feel a ‘click’... -
Page 16: Operation
Operation WARNING: Incorrect operation of the Cocoon FPV HD Camera Drone may result in severe injury, loss of property or fines. Winplus Australasia does not take any responsibility if local rules and regulations are not followed. Winplus Australasia does not take any responsibility for the loss of the Cocoon FPV HD Camera Drone and it is NOT covered by warranty. -
Page 17: Switching Off The Propellers & Drone
Operation 3.2 Switching OFF the Propellers & Drone To power down the drone and its propellers, there are three methods that can be used. Each method is different and should be used based on the situation at hand: Method 1: Slow Shutdown - Push the left thumb stick down to the lowest level and hold for approximately 5 seconds until the drone has landed and powered down. -
Page 18: Flying The Cocoon Fpv Hd Camera Drone
Operation 3.3 Flying the Cocoon FPV HD Camera Drone Hover Up & Down Push the left thumb stick up or down to move the drone upwards or downwards TIP: If you begin to lose control of the drone refer to the three methods outlined on page 17 to land your drone safely. -
Page 19: Fine Tuning / Trimming
If you find the drone is veering in a particular direction, you may need to fine tune the control to keep the Cocoon FPV HD Camera Drone steady. This should only be done when there is no or very minimal wind. -
Page 20: Level Calibration
3.6 Speed Control The Cocoon FPV HD Camera Drone can be operated in a low and a high-speed setting. When you turn on the drone, it will automatically be set to low speed. To change to high speed, depress the right thumb stick in towards its centre, you will hear two beeps. -
Page 21: Hovering Height Adjustment
Operation 3.8 Hovering Height Adjustment To auto-hover at your desired height, manoevere the drone up and down using the left thumb stick. At your desired height, simply remove your thumb from the thumbstick and the drone will auto-hover. You can continue to use the right thumbstick to control the direction of flight, whilst maintain the hover. -
Page 22: Recalibrate The Cocoon Fpv Hd Camera Drone
Photos and videos can be captured either directly on your mobile device if connected to the FPV Application (see page 23 Fly the Cocoon FPV HD Camera Drone using the ‘Drone Go’ App) or using a MicroSD Card (not supplied) a. -
Page 23: Fly The Cocoon Fpv Hd Camera Drone Using The 'Drone Go' App
To purchase additional propellers or parts for your drone, visit www.cocoonproducts.com.au 3.13 Fly the Cocoon FPV HD Camera Drone using the ‘Drone Go’ App The Cocoon FPV HD Camera Drone can be operated using the remote control and/or a smartphone. To setup your smart phone: a. -
Page 24: Operation
Operation 3.14 ‘Drone Go’ Application Interface Take Photo Show/Hide Thumbsticks WiFi Signal Level Calibration Engage/Switch off Propellers High/Low Speed Mode Take Video Check SD Card (SD Card not included) Left Thumbstick / Phone Memory Gravity Induction Mode - Uses phone Auto Take Off Right Thumbstick movement to control drone rather than... -
Page 25: Faqs
Question Solution My Cocoon FPV HD Camera Drone didn’t At times the Cocoon FPV HD Camera Drone may pair with my remote control fail to pair with the remote control. Attempt to pair again, ensuring the drone is resting on a level surface. -
Page 26: Repair And Refurbished Goods Or Parts Notice
Repair and Refur- bished Goods or Parts Notice FPV HD CAMERA DRONE Repair and Refurbished Goods or Parts Notice Unfortunately, from time to time, faulty products are manufactured which need to be returned to the Supplier for repair. Please be aware that if your product is capable of retaining user-generated data (such as les...
Need help?
Do you have a question about the FPV HD Camera Drone and is the answer not in the manual?
Questions and answers