
Related Manuals for Thermo Scientific Ion GeneStudio S5


Summary of Contents for Thermo Scientific Ion GeneStudio S5
- Page 1 ™ Ion GeneStudio S5 Food Protection Instrument USER GUIDE Catalog Numbers A39513 Publication Number MAN0017965 Revision A.0 For testing of Food and Environmental samples only.
- Page 2 Manufacturer: Life Technologies Corporation | 5781 Van Allen Way | Carlsbad, CA 92008 The information in this guide is subject to change without notice. DISCLAIMER: TO THE EXTENT ALLOWED BY LAW, THERMO FISHER SCIENTIFIC INC. AND/OR ITS AFFILIATE(S) WILL NOT BE LIABLE FOR SPECIAL, INCIDENTAL, INDIRECT, PUNITIVE, MULTIPLE, OR CONSEQUENTIAL DAMAGES IN CONNECTION WITH OR ARISING FROM THIS DOCUMENT, INCLUDING YOUR USE OF IT.
-
Page 3: Table Of Contents
Contents About this guide ............5 Purpose of the guide . - Page 4 Contents ■ APPENDIX A Touchscreen reference ....... . . 17 Clean, Initialize, and Run .
-
Page 5: About This Guide
About this guide CAUTION! ABBREVIATED SAFETY ALERTS. Hazard symbols and hazard types specified in procedures may be abbreviated in this document. For the complete safety information, see the “Safety” appendix in this document. IMPORTANT! Before using this product, read and understand the information in the “Safety”... -
Page 6: Chapter 1 Product Information
Product information Contents ™ The Ion GeneStudio S5 Food Protection System (Cat. No. A39513) contains the following boxes and components. Ion GeneStudio ™ S5 Food Protection System (Cat. No. A39513) Components Part No. Ion GeneStudio ™ S5 Food Protection A37904 Instrument Ion S5 ™... -
Page 7: Instrument Installation By Trained Personnel Only
Chapter 1 Product information Instrument installation by trained personnel only Instrument installation by trained personnel only IMPORTANT! The Ion GeneStudio ™ S5 Food Protection System is installed by trained service personnel and must not be relocated without assistance from trained service personnel. -
Page 8: Chapter 2 System Components
System components Network configuration ™ The Ion GeneStudio S5 Food Protection Instrument is not connected to an external Torrent Server and requires connection only to a local area network (see figure). Figure 1 Network configuration Ion GeneStudio ™ S5 Food Protection Instrument Ion Chef Food Protection Instrument ™... -
Page 9: Internet Connectivity
Chapter 2 System components Internet connectivity Internet connectivity The Ion GeneStudio ™ S5 Food Protection Instrument should be connected to a network with Internet access. Connecting to the Internet allows you to update your software and access remote system support easily. Software updates through the network/Internet are free. -
Page 10: Ion Genestudio ™ S5 Food Protection System Component Positions
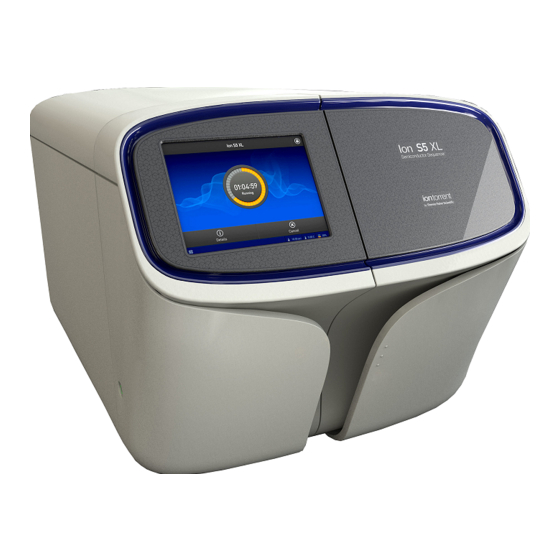
Chapter 2 System components Ion GeneStudio S5 Food Protection System component positions ™ ™ Ion GeneStudio S5 Food Protection System component positions Ion GeneStudio S5 Ion GeneStudio S5 Ion GeneStudio S5 Touchscreen Power button Ion S5 Sequencing Reagents cartridge ™... -
Page 11: Ion Genestudio ™ S5 Food Protection Instrument Input And Output Connections
Chapter 2 System components Ion GeneStudio S5 Food Protection Instrument input and output connections ™ ™ Ion GeneStudio S5 Food Protection Instrument input and output connections USB ports–Connects a USB device to the instrument. Ethernet port—An RJ45 port that provides Ethernet (gigabit) communication between the instrument and a local area network. -
Page 12: Chapter 3 Instrument Operation
Instrument operation ™ Power the Ion GeneStudio S5 Food Protection Instrument on or off ™ Note: If the Ion GeneStudio S5 Food Protection Instrument is powered on, and the touchscreen is blank, touch the screen to "wake" the touchscreen. Power on If the touchscreen is unresponsive, check the power switch on the back of the instrument to ensure that the switch is in the on (|) position. -
Page 13: Instrument Run Times
Chapter 3 Instrument operation Instrument run times The instrument automatically restarts when the software update is complete. Instrument run times ™ Approximate run times for the Ion GeneStudio S5 Food Protection Instrument for a given chip type, read length, and number of reads are shown in the following table. Run times indicate the typical time from run start to delivery of a BAM file (1 run/initialization). -
Page 14: Maintain The Ion Genestudio
Chapter 3 Instrument operation Maintain the Ion GeneStudio S5 Food Protection Instrument ™ ™ Maintain the Ion GeneStudio S5 Food Protection Instrument Materials required • Lint-free wipes • 70% isopropanol • (Optional) 10% bleach solution ™ Clean or In the event of a spill or leak on or inside the Ion GeneStudio S5 Food Protection Instrument, perform the following steps. - Page 15 Chapter 3 Instrument operation Maintain the Ion GeneStudio S5 Food Protection Instrument ™ When a manual cleaning is necessary, use the following procedure: 1. On the home screen, press Settings4Clean Instrument. The instrument door unlocks allowing access to the consumables. 2.
-
Page 16: Perform An Instrument Reset Run With An Initialized, Unused Ion S5
Chapter 3 Instrument operation Maintain the Ion GeneStudio S5 Food Protection Instrument ™ Perform an Cleaning is normally performed automatically at completion of a sequencing run. instrument reset ™ If the Ion GeneStudio S5 Food Protection Instrument is initialized and run with an •... -
Page 17: Appendix A Touchscreen Reference
Touchscreen reference Clean, Initialize, and Run Ion GeneStudio S5 In the Home screen, the Clean, Initialize, and Run programs lead you through the necessary steps to prepare the instrument for sequencing and to start a sequencing run. Press the main dial to start a program. Simple, easy to follow instructions are provided on the touchscreen. -
Page 18: Settings
Appendix A Touchscreen reference Settings Settings In the Settings menu, users can view and/or change instrument settings, manage data and network configurations, and update the installed software. Note: The Service tools option is for use by trained service personnel only. Network Settings Use the Network Settings menu to configure IP address, Torrent Server, and FTP settings. - Page 19 Appendix A Touchscreen reference Settings Item Description When/How to use IP Address Set or change the IP configuration (DHCP or Static IP). 1. Select either the DHCP or Configuration Static IP option. 2. Touch the screen in the field you want to edit to activate the field.
- Page 20 Appendix A Touchscreen reference Settings Item Description When/How to use FTP Server Change the FTP Server IP address and user information. When a change to the FTP Server IP Configuration address or user information is required. Enter the IP address in the FTPserver field. Update Server Update the software update server.
-
Page 21: System Tools
Appendix A Touchscreen reference Settings System Tools The System Tools menu enables you to upload instrument diagnostics, manage data, and shut down or reboot the instrument. Item Description When/How to use RFID Lists the product, product expiration date, and remaining To determine if reagents that were left uses of the product. - Page 22 Appendix A Touchscreen reference Settings Item Description When/How to use Noise Test Provides real-time measurement of electrical noise For troubleshooting if directed to do so readings on the chip. by Technical Support. Chip Calibration Checks the status of a chip. 1.
- Page 23 Appendix A Touchscreen reference Settings Item Description When/How to use Reagent Check Reagent Check, performed by the instrument as part of If directed to do so by Technical initialization, confirms that initialization passes by testing Support as part of a troubleshooting reagent flow and signal detection.
- Page 24 Appendix A Touchscreen reference Settings Item Description When/How to use Filesystems Provides real-time drive activity status and disk space Use if directed to do so as part of a and disks used. troubleshooting procedure: 1. In the System Tools menu, press Disk Drives.
- Page 25 Appendix A Touchscreen reference Settings Item Description When/How to use Pulse clean Provides step by step instruction to perform a pulse clean Use if directed to do so by Technical of the instrument if a solid‑state buffer leak occurs. Support as part of a troubleshooting procedure: 1.
-
Page 26: Check For Software Updates
Appendix A Touchscreen reference Settings Item Description When/How to use Shut Down Access to "Shut Down" and "Reboot" commands. If directed to do so by Technical Support as part of a troubleshooting procedure. Note: It is not necessary/recommended to shut down the instrument overnight or over the weekend. -
Page 27: Data Management
Appendix A Touchscreen reference Settings Data Management The Data Management function allows users to manually delete run data, analyze the data, or transfer the data to the Torrent Server. Under normal conditions, run data is automatically transferred to the server, then deleted from the instrument hard drive. Item Description When/How to use... - Page 28 Appendix A Touchscreen reference Settings Item Description When/How to use Analysis Allows the user to stop or reanalyze the data of individual 1. Touch the screen in the Controls runs. Experiment Name row of the individual experiment to be analyzed, then press Analysis. 2.
-
Page 29: Manually Delete Run Data
Appendix A Touchscreen reference Settings Manually delete To troubleshoot data management issues the Data Management function allows users to manually delete run data or transfer the data to the server. Under normal run data conditions, run data is automatically transferred to the Torrent Server, then deleted from the instrument hard drive. -
Page 30: Perform The Instrument Clean Operation
Appendix A Touchscreen reference Settings Perform the The Clean operation is normally performed automatically at the completion of the previous sequencing run. Manually run the Clean operation under any of the instrument Clean following conditions: operation • The sequencing run was aborted or there was a power failure during the second of two runs started after a single initialization. -
Page 31: Instrument Settings
Appendix A Touchscreen reference Settings The user interface returns to the Home screen when the cleaning is complete. Instrument The Instrument Settings menu provides information about the instrument and allows you to set the instrument name and calibrate the touchscreen. settings Ion GeneStudio S5 Food Protection Instrument User Guide... - Page 32 Appendix A Touchscreen reference Settings Item Description When/How to use About Provides instrument details. To view instrument reference information or access regulatory information. Regulatory Info Lists instrument-specific regulatory information. To view instrument regulatory information. Instrument To change the instrument name. Name Ion GeneStudio S5 Food Protection Instrument User Guide...
-
Page 33: Touchscreen Icons
Appendix A Touchscreen reference Touchscreen icons Item Description When/How to use Screen For troubleshooting if directed to do so Calibration by Technical Support. Touch the red cross with your finger or a stylus each time it appears. In total, you will touch the screen 4 times, one time in each corner. - Page 34 Appendix A Touchscreen reference Touchscreen icons Number Icon Description Network connectivity – connected Network connectivity – not connected Instrument idle Sequencing in progress Instrument ready Error Chip status – Absent Chip status – Standby Chip status – Connecting Chip status – Ready Chip status –...
-
Page 35: Alarms, Notifications, And Events
Alarms, Notifications, and Events Alarms, Notifications, and Events If the Alarms/Notifications indicator appears, press the indicator to open the Notifications screen, then press Alarms or Events to see detailed messages. Ion GeneStudio S5 Ion GeneStudio S5 Alarms and Notifications indicator. Alarm... - Page 36 Appendix A Touchscreen reference Alarms, Notifications, and Events Alarm Description Recommended Action Front/Rear FanX speed below Where X is the fan number and YYYY Contact Technical Support. threshold YYYY. is the low threshold speed for the system fan. FPGA failed to connect in emulate Internal error.
- Page 37 Appendix A Touchscreen reference Alarms, Notifications, and Events Alarm Description Recommended Action Network Manager not connected. Check that the Ethernet cable If the problem persists, contact connecting the instrument to the Technical Support. local area network is properly connected. See “Ion GeneStudio ™...
-
Page 38: Appendix B Troubleshooting
• Available Press the red Alarms icon to see Menu software detailed messages. updates were • If a message states "Newer detected. Ion GeneStudio S5 Software Available": • Connectivity IMPORTANT! After updates are problems were installed, the instrument must be detected. -
Page 39: Initialization Fails
Appendix B Troubleshooting Initialization fails Initialization fails Observation Possible cause Recommended action Chip Check fails • The chip clamp was not 1. Open the chip clamp, closed. remove the chip, and look for signs of water • The chip was not outside the flow cell. - Page 40 Appendix B Troubleshooting Initialization fails Observation Possible cause Recommended action Reagent Check fails A wash failure was detected. 1. Manually clean the instrument (see “Manually clean the instrument“ on page 14.) 2. Replace the Reagents cartridge, Wash Solution bottle, and Cleaning Solution bottle, then repeat initialization of the instrument.
-
Page 41: Troubleshooting Using Control Libraries
Appendix B Troubleshooting Troubleshooting using control libraries Troubleshooting using control libraries Observation Possible cause Recommended action Ion Sphere Test Fragments • Chip loading was poor. 1. Confirm that the Control Ion Sphere ™ ™ are not present in the Test Particles (included in the Ion S5 ™... -
Page 42: Pulse Clean The Ion Genestudio
Appendix B Troubleshooting Solid-state buffer leak ™ Pulse clean the You should pulse clean the Ion GeneStudio S5 Food Protection Instrument only if directed by Technical Support, or your Field Service Engineer (FSE), to recover Ion GeneStudio ™ instrument performance from a diagnosed solid-state buffer leak. S5 Food Protection Note: You must contact Technical Support, or your FSE, to diagnose whether a solid-... -
Page 43: Appendix C Instrument Warranty
Instrument warranty For new Ion Torrent ™ instruments, Life Technologies warrants to and only to buyer for twelve (12) months from the date of shipping, that the Ion Torrent ™ software and ™ Ion Torrent instruments are free from defects in material and workmanship and conform to Life Technologies’... - Page 44 Appendix C Instrument warranty Solid-state buffer leak A PARTICULAR PURPOSE, NON-INFRINGEMENT, OR REGARDING RESULTS OBTAINED THROUGH THE USE OF ANY PRODUCT (INCLUDING, WITHOUT LIMITATION, ANY CLAIM OF INACCURATE, INVALID OR INCOMPLETE RESULTS), WHETHER ARISING FROM A STATUTE OR OTHERWISE IN LAW OR FROM A COURSE OF PERFORMANCE, DEALING OR USAGE OF TRADE.
-
Page 45: Appendix D Safety
Safety WARNING! GENERAL SAFETY. Using this product in a manner not specified in the user documentation may result in personal injury or damage to the instrument or device. Ensure that anyone using this product has received instructions in general safety practices for laboratories and the safety information provided in this document. -
Page 46: Location Of Safety Labels On The Instrument
Appendix D Safety Safety information for instruments not manufactured by Thermo Fisher Scientific Location of safety The Ion GeneStudio ™ S5 Food Protection Instrument has warnings at the location shown: labels on the instrument Safety and regulatory Ion Torrent S5™ XL Sequencer 1234987 00000000 For Research Use Only. -
Page 47: Instrument Safety
Appendix D Safety Instrument safety Instrument safety General CAUTION! Do not remove instrument protective covers. If you remove the protective instrument panels or disable interlock devices, you may be exposed to serious hazards including, but not limited to, severe electrical shock, laser exposure, crushing, or chemical exposure. -
Page 48: Electrical Safety
Appendix D Safety Instrument safety Electrical safety WARNING! Ensure appropriate electrical supply. For safe operation of the instrument: · Plug the system into a properly grounded receptacle with adequate current capacity. · Ensure the electrical supply is of suitable voltage. ·... -
Page 49: Safety And Electromagnetic Compatibility (Emc) Standards
Appendix D Safety Safety and electromagnetic compatibility (EMC) standards Safety and electromagnetic compatibility (EMC) standards The instrument design and manufacture complies with the standards and requirements for safety and electromagnetic compatibility as noted in the following table: Safety Reference Description EU Directive European Union “Low Voltage Directive”... -
Page 50: Environmental Design
Appendix D Safety Safety and electromagnetic compatibility (EMC) standards Environmental Waste and hazardous substances design Reference Description Directive 2012/19/EU European Union “WEEE Directive” – Waste electrical and electronic equipment Directive 2011/65/EU European Union “RoHS Directive” – Restriction of hazardous substances in electrical and electronic equipment Radio compliance Reference Description... -
Page 51: Chemical Safety
Appendix D Safety Chemical safety Chemical safety WARNING! GENERAL CHEMICAL HANDLING. To minimize hazards, ensure laboratory personnel read and practice the general safety guidelines for chemical usage, storage, and waste provided below. Consult the relevant SDS for specific precautions and instructions: ·... - Page 52 Appendix D Safety Chemical safety · Vérifier régulièrement l’absence de fuite ou d’écoulement des produits chimiques. En cas de fuite ou d’écoulement d’un produit, respecter les directives de nettoyage du fabricant recommandées dans la FDS. · Manipuler les déchets chimiques dans une sorbonne. ·...
-
Page 53: Documentation And Support
Documentation and support Related documentation Title Pub. No. Ion 510 & Ion 520 & Ion 530 Food Protection Kit–Chef User ™ ™ ™ MAN0017967 Guide Ion GeneStudio ™ S5 Food Protection System Site Preparation MAN0017966 Guide Food Safety support Website: thermoscientific.com/foodmicro or thermofisher.com/foodsafety Support email: •... - Page 54 thermofisher.com/support | thermofisher.com/askaquestion thermofisher.com 18 October 2018...
Need help?
Do you have a question about the Ion GeneStudio S5 and is the answer not in the manual?
Questions and answers