Table of Contents
Advertisement
Advertisement
Table of Contents

Related Manuals for Woombikes woom


Summary of Contents for Woombikes woom
- Page 1 Bicycle owner‘s manual Version 09.2018...
-
Page 3: Table Of Contents
4.4. Fork ..........................10 4.5. Seat and sitting position ....................10 4.6. Adjusting saddle height (woom 1–2) ................11 4.7. Using the quick-release lever (woom 3–6) ..............11 4.8. Pedals ..........................11 4.9. Pedal cranks and bearings ..................... 11 4.10. Derailleur ......................... 12 4.11. -
Page 4: Preface
1. Preface Welcome to the woom family! Thank you very much for purchasing a woom bike. When used properly, this bike makes it possible for your child to enjoy their bicycle experience. Our woom bikes are tested, hiqh-quality products designed for children and teenagers to provide the best possible companion for bicycling. -
Page 5: Safety In Road Traffic
Always use sturdy and non-slip footwear and appropriate protective clothing for bicycling. Teach your child how to woom correctly. Make sure you explain to your child the function of the brakes in a comprehensible way, and that the child has become familiar with the brakes before the first ride. -
Page 6: Proper Use
For what and for whom is your woom bike suitable? The woom bike is designed for common bicycling in a safe environment. The woom bike is a children‘s bicycle that is tailored to the child’s weight of the intended specific age (de- pending on the model). -
Page 7: Before The First And Every Ride
Before the first ride it is mandatory to put the bike in ready-to-use condition. Follow the supplied assembly instructions and the torques needed for tightening the components in section 8.2. Here you can find a detailed support for assembling the woom bikes in English: https://www.youtube.com/watch?v=orWfMSsvtME. -
Page 8: Components: Function And Handling
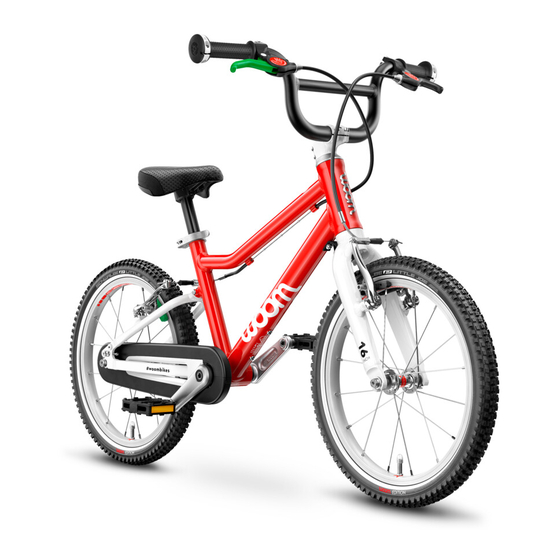
4. Components: function and handling 4.1. The woom bike and its components Image: woom bike components Handlebar Rims Chain protector ring Seatpost Brake lever Pedal crank Seatpost clamp Brake Tires Chain Frame Fork Pedal Derailleur Headset clamp Spokes Inner bearing... -
Page 9: Frame
This is made possible by the frame structure allowing for an upright sitting position and the standard built-in steering limiter of the woom 1, 1 PLUS, 2 and 3. In the event that your bike is stolen, and for insurance matters, you should make a note of the frame serial number. -
Page 10: Fork
There are two seat settings or adjustments: Height: To set the height, use the quick-release lever (woom 3-6). Note the minimum insertion depth of the seat into the frame tube. Horizontal change: By loosening the two screws, you can move the seat to the rear and to... -
Page 11: Adjusting Saddle Height (Woom 1-2)
4.6. Adjusting seat height (woom 1 – 2) For the woom 1, 1 PLUS and 2 the height of the seat can be adjusted by opening the seatpost clamp with a hex key. 4.7. Using the quick-release lever (woom 3 – 6) The quick release consists of two parts, the adjusting nut (1) and the clamping lever (2). -
Page 12: Derailleur
4.10. Derailleur For the woom bikes 4, 5, 6 we use a high-quality SRAM Sx4 GripShift rotational handle as the gear shift. You can change gears with it. After some time of using it, an adjustment might be necessary. -
Page 13: Brakes And Brake Lever
If required, the distance between the brake lever and the grip tap can be adjusted by using a Philips screwdriver. Your woom bike is delivered with a suitable default spacing for the appropriate model. In the case of self-initiated changes make sure that ... -
Page 14: Wheels
The wheel has to sit firmly and centered in the frame or fork, and needs to rotate easily. Use the quick-release (woom 4, 5 and 6) or a 5 mm hex key (woom 1, 1 PLUS, 2 and 3) for fittings, to achieve the appropriate stability. -
Page 15: Care And Maintenance
50-403 means, for example, 50 mm tire width and 403 mm rim diameter. woom exclusively uses car valves (Shrader valves). If you should decide to use diff erent kinds of valves during an inner tube exchange, familiarize yourself with the right way to handle those. -
Page 16: Brake Is Rubbing
Hex screws or with the quick-release skewer. In case of a woom 2 or 3, the following number of teeth has the be visible on the Hebie chainguard: woom 2: 2 teeth, woom 3: 15 teeth (see image). -
Page 17: Other Common Problems
7. Inspection plan Regular thorough inspections of the woom bikes by a skilled expert are extremely impor- tant for the safety of your child. For this reason, we urgently recommend the following inspection schedule: After riding 200 km and at least once in a year, have the tires and wheels checked for being undamaged and being in proper condition. -
Page 18: Technical Data
8.1. Weights and geometry data You can find the net weight and the geometry data for all bikes on our website woombikes.com by clicking on the desired bike and then scrolling down. 8.2. Tightening torque Whenever possible, meet the following recommended maximum tightening torque values... -
Page 19: Environment And Disposal
Tires and tubes are no residual or municipal waste and must be disposed of at a recycling center. If you have no more use for your woom bike, or if you want to dispose of it, we’ll take it back and offer free shipping. - Page 20 09.2018 Rights for content and images: woom GmbH Inkustrasse 1-7 / Halle 14 / Top 5 3400 Klosterneuburg Europe / Austria woombikes.com...
Need help?
Do you have a question about the woom and is the answer not in the manual?
Questions and answers