Table of Contents
Advertisement
Advertisement
Table of Contents

Subscribe to Our Youtube Channel
Summary of Contents for Stenograph Luminex Captioner Student Edition
- Page 2 Stenograph. STENOGRAPH PROPRIETARY: This material constitutes proprietary and trade secret information of Stenograph and shall not be disclosed to any third party, nor used by the recipient, except under the terms and conditions of the purchase agreement between the customer and Stenograph.
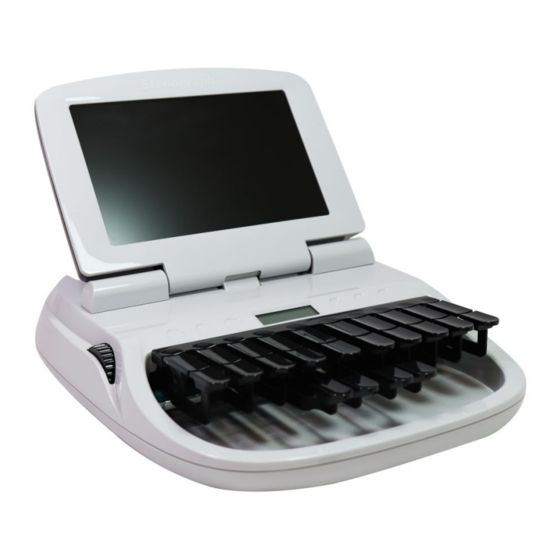
- Page 3 Weighing in at only 3.5 pounds, the Luminex Captioner/Student Edition lightens your load when carrying it from place to place. Remember to check the Stenograph® web site, www.stenograph.com, for updates to the Luminex. The Luminex Captioner/Student Edition was designed with you in mind. We are confident you’ll enjoy using it!
- Page 4 Stenograph encourages all users of our writers to carefully review the following Work Area Checklist and to use appropriate work habits. Remember, personalizing your environment so that it is comfortable for you, promotes a healthy physical and mental work lifestyle.
-
Page 5: Table Of Contents
Turning your writer On and Off ..................2 Tripod Setup ........................2 Charging the Battery ......................4 Install the Luminex Captioner Student Edition USB Driver ..........4 Luminex Captioner Student Edition Technical Support ..........5 Chapter 2 Understanding the Shorthand Machine Chapter 3 Hardware Features Battery .......................... - Page 6 Tilting Screen Appearance ....................36 Time and Date ........................37 USB Communication Option .................... 38 Chapter 5 Troubleshooting Appendix A Updating Captioner/Student Software Appendix B Captioner/Student Edition Utilities Stenograph Writer Utility Programs ................42 2018 Stenograph, L.L.C. All Rights Reserved.
-
Page 7: Chapter 1 Setting Up Your Writer
Update Luminex software from Internet download via USB. · Date and timestamp note files. · Search for and display the last StenoMark, or steno string. · Scroll forward and backward in a file. · Keyboard and individual key sensitivity adjustments. · 2018 Stenograph, L.L.C. All Rights Reserved. -
Page 8: Turning Your Writer On And Off
Luminex Captioner Student Edition. When folded, the tripod is 12 inches long. 1. Fully extend each leg of the tripod, making sure the braces lock. - Page 9 To tilt the Luminex Captioner Student Edition: 1. Open the Tilting screen before adjusting the tilt position of the Luminex Captioner Student Edition. 2. Position one hand on the back of the Luminex Captioner/Student Edition behind the Tilting screen and the other hand on the front of the machine under the vowel keys.
-
Page 10: Charging The Battery
Captioner/Student Edition writing machine and your computer. This includes reading notes, writing realtime and in the rare event, reading log files. Locate the Let Us Help You Get Started insert that came with your Luminex Captioner Student Edition. You can easily install the Luminex Captioner/Student Edition USB drivers by going to stenograph.com/utilitycd... -
Page 11: Luminex Captioner Student Edition Technical Support
3. Connect the appropriate end of the micro USB cable to the USB port on the Luminex Captioner/Student Edition and the other end to a USB port on your computer. 4. On your computer, with the Stenograph Writer Utility dialog box displayed, double click the Install USB Drivers button. -
Page 12: Chapter 2 Understanding The Shorthand Machine
The Number Bar depressed with the asterisk key produces a space in the steno notes. The asterisk key produces an asterisk. The asterisk symbol is generally used to denote a mistake, indicate a correction, or to distinguish homonyms. 2018 Stenograph, L.L.C. All Rights Reserved. - Page 13 The first shorthand machines were developed in the late 1800s and have evolved over time to the present-day Luminex Captioner/Luminex Captioner/Student Edition. To learn more about the evolution of the shorthand machine that brought the technology to this point, visit www.stenograph.com view “The History of Machine Shorthand.” 2018 Stenograph, L.L.C. All Rights Reserved.
-
Page 14: Chapter 3 Hardware Features
Luminex Captioner/Student User Guide Chapter 3, Luminex Captioner/Student Edition Hardware Features provides information about the hardware components of your Luminex Captioner Student Edition. This includes details on battery charging and use; communication port and setup; touch sensors for accessing menus; Status LCD icons;... - Page 15 When the Luminex Captioner/Student Edition is finished charging, the bars move from each side of the screen to the middle of the screen in a “clapping” motion. If the AC adapter/charger is plugged in for a long time, the “clapping” motion stops, however the battery is fully charged. 2018 Stenograph, L.L.C. All Rights Reserved.
-
Page 16: View Battery Charging Status
View Battery Voltage Levels The Battery diagnostic screen displays the voltage level, charging status and most recent charging history for the Luminex Captioner/Student Edition main battery. To view battery voltage and charging status: 2018 Stenograph, L.L.C. All Rights Reserved. -
Page 17: Low Battery Warnings
1. Make sure the charger/adapter is not plugged into the Luminex Captioner Student Edition. If you just disconnected the charger/adapter from the Luminex Captioner Student Edition, turn the Luminex Captioner Student Edition On and wait 10 – 15 minutes to get an accurate battery voltage reading. -
Page 18: Tilting Screen Battery Messages
Backlight brightness setting. To use the micro USB cable, you must install the Luminex USB driver on your computer. See Install the Luminex Captioner/Student Edition USB Drivers for instructions on loading the driver. 2018 Stenograph, L.L.C. All Rights Reserved. -
Page 19: Updating With The Usb Cable
Software updates for your Luminex Captioner Student Edition, when available, can be easily downloaded from the Stenograph web site. Once downloaded onto your computer, you can load the software update onto your Luminex over a USB cable. For more information about updating the... -
Page 20: Usb Virtual Serial Port Communications
4. Set your realtime options. This is a virtual serial port communication via USB cable. Ensure the appropriate COM port is selected. Depending on your CAT software, it may be necessary to select Stentura as the realtime writing machine. 2018 Stenograph, L.L.C. All Rights Reserved. -
Page 21: Touch Sensors (Function Keys)
End again at the prompt. b. Close and save the realtime file. c. Unplug the USB cable from your computer and the Luminex Captioner Student Edition. Touch Sensors (Function Keys) On either side of the Status LCD are three touch sensors. -
Page 22: Keyboard Depth And Tension Control
Adjust Depth of Stroke 1. Face the front of the Luminex Captioner/Student Edition. 2. Do one of the following: • To shorten the stroke depth, roll the left thumbwheel toward the front of the writer. 2018 Stenograph, L.L.C. All Rights Reserved. -
Page 23: Adjust Keyboard Tension
Luminex Captioner/Student Edition. When battery power is low enough to turn off the Tilting screen, the Status LCD continues to show information, indicating the writing machine is still working. The Status LCD provides the following information: 2018 Stenograph, L.L.C. All Rights Reserved. -
Page 24: Tilting Color Screen
· memory capacity indicator, the number of steno strokes for the open file and the estimated number of pages for the open file. steno notes. · 2018 Stenograph, L.L.C. All Rights Reserved. - Page 25 · You can adjust the brightness and font size on the Tilting screen. Adjusting the brightness can reduce battery usage. See the Tilting Screen Appearance section more information about brightness and font size settings. 2018 Stenograph, L.L.C. All Rights Reserved.
-
Page 26: Chapter 4 Writing On The Captioner/Student Edition
Captioner/Student Edition menu features including setting options, viewing and erasing memory, accessing Test Mode and marking, scrolling and searching steno notes. Stenograph recommends that you charge the battery in your Luminex Captioner/Student Edition before using it for the first time. See Charging the Battery for information. -
Page 27: Writing Menus
Touching End on the First Writing menu closes the current job and returns you to the Opening menu. Writing Jobs To begin writing: 1. Turn the Luminex Captioner/Student Edition On. Touch the first function sensor on the left. 2018 Stenograph, L.L.C. All Rights Reserved. -
Page 28: Beeper Volume
In the rare instance your Luminex Captioner/Student Edition experiences an error or an exception, a log file is created. Technical Support may ask you to send the information to Stenograph for analysis. In order to retrieve the log files from the Luminex Captioner/Student Edition, you will need to use the Stenograph Writer Utility - GetSupportInfo. -
Page 29: Strokes Per Minute
Keyboard Layout Keyboard Layout is designed for international use of the Luminex Captioner/Student Edition. Changes to the Keyboard Layout should only be made when your steno keyboard layout uses a specific language steno theory. 2018 Stenograph, L.L.C. All Rights Reserved. -
Page 30: Keyboard Options
Turn on CNN or the equivalent and write against the broadcast for 20 - 30 minutes. The default setting is Balanced. Use the + and - sensors to 2018 Stenograph, L.L.C. All Rights Reserved. -
Page 31: Individual Key Adjustments
1. Ensure the depth of stroke is customized to your writing style. See Keyboard Depth and Tension Controls for details. 2. Access the Adjust Key option. Touch Setup, More, Keyboard, Adjust Keys. 3. The Keyboard Hardware Type screen displays. 2018 Stenograph, L.L.C. All Rights Reserved. - Page 32 -L. You press the letter -L on your steno keyboard until the blue line extends beyond the white line and then you release the key. You see the gray bar as shone below. 5. Perform one of the following adjustments: 2018 Stenograph, L.L.C. All Rights Reserved.
-
Page 33: Memory
4. A list of files contained in the folder displays with the newest folder first. Use the Up/Down sensor and Date Sort to view the files. 5. To return to the first Memory screen, touch Back. 2018 Stenograph, L.L.C. All Rights Reserved. -
Page 34: Read Steno Notes From Memory
Use the following Read options: Device: Student Method: USB Drive: Memory Case CATalyst V11 through V19.04 Use the following Read options: Device: Luminex Captioner/Student Edition Method: USB Drive: Memory Case CATalyst V7 - V10 2018 Stenograph, L.L.C. All Rights Reserved. -
Page 35: Memory Full
Once the Luminex Captioner/Student Edition's memory is full (12,000) strokes, the steno outlines continue to be sent to the captioning/student CAT software but are no longer sent to the writing machine's memory. The following message displays: The title bar displays: 2018 Stenograph, L.L.C. All Rights Reserved. -
Page 36: Erase Memory Files
Options allow you to change the Keyboard Layout, switch the USB communication between Standard and élan Mira emulation , adjust the Beeper Volume and select a prompt when ending a job. ® To access Options: 1. From the Opening Menu, touch Setup, Options. 2018 Stenograph, L.L.C. All Rights Reserved. -
Page 37: Prompt To End A Job Option
2. Very gently wipe the screen using the cleaning cloth that came with your Luminex or a microfiber cloth available in computer, camera and eyeglass stores. Do not use materials such as paper towels, tissue paper or your shirt sleeve. These non-ultra soft materials can 2018 Stenograph, L.L.C. All Rights Reserved. -
Page 38: Scroll
2. Use any of the following menu options: Up - move to a previous line. · Down - move to the following line. · 3. To exit the Scroll menu, continue writing or touch Quit. 2018 Stenograph, L.L.C. All Rights Reserved. -
Page 39: Search
The Serial Protocol option is a fixed option that displays the Luminex Captioner/Student Edition communication protocol when using the Virtual Serial Port driver provided by Stenograph. The Virtual Serial Port is automatically installed when you install the Luminex Captioner/Student Edition USB... -
Page 40: Status
The Steno Test feature puts the Luminex Captioner/Student Edition in writing mode and simulates steno strokes for diagnostic purposes. This feature is generally used at the request of a Stenograph Technical Support Representative to test the Read and Writing features of the Luminex Captioner/Student Edition. -
Page 41: Test Mode
Luminex Captioner/Student Edition is in Test mode. The Luminex Captioner/Student Edition remains in Test Mode until you turn the feature Off or turn the Luminex Captioner/Student Edition Off. Off - stops Test Mode. · 4. To display the Opening menu, touch OK, More, Quit. 2018 Stenograph, L.L.C. All Rights Reserved. -
Page 42: Tilting Screen Appearance
The brightness level is based on a percentage. The screen reflects your selection. Auto Dim After - select the period of inactivity that must pass on the Luminex Captioner/Student · Edition before Backlight dimming occurs. Choose a number between 1-90 seconds or Never. 2018 Stenograph, L.L.C. All Rights Reserved. -
Page 43: Time And Date
To increase the unit of time or date, touch +. · To decrease the unit of time or date, touch -. · 4. Repeat the previous steps for each unit of time or date you want to change. 2018 Stenograph, L.L.C. All Rights Reserved. -
Page 44: Usb Communication Option
Captioner/Student Edition. The writer changes the protocol and resets. The Opening menu displays. The setting is retained until changed. Touch Cancel to retain the current USB Communication option and remain at the Options · screen. To return to the Opening menu, touch OK, More, Quit. 2018 Stenograph, L.L.C. All Rights Reserved. -
Page 45: Chapter 5 Troubleshooting
To load a Luminex Captioner/Student Edition software update, you must first install the Luminex Captioner/Student Edition USB driver on your computer. The Luminex Captioner/Student Edition USB drivers are available for download from the Stenograph website. To load the Luminex Captioner/Student Edition USB driver, see install USB drivers for instructions. -
Page 46: Appendix A Updating Captioner/Student Software
Luminex Captioner/Student User Guide Appendix A Updating Captioner/Student Software Appendix A, Updating Luminex Captioner/Student Edition Software, explains how to download available updates for your Luminex Captioner/Student Edition from the Stenograph web site. You must have an active Internet connection and know your customer number and Luminex Captioner/Student Edition serial number in order to perform the update. - Page 47 Opening menu. Your computer displays the message: Successfully Updated the Luminex. Click OK to Exit. 14. Click OK and in the Luminex Captioner/Student Edition Update dialog box on your computer, click Quit. You can delete the update file. 2018 Stenograph, L.L.C. All Rights Reserved.
-
Page 48: Appendix B Captioner/Student Edition Utilities
Account Control is an important feature of Windows 7. Stenograph does not recommend disabling it. Stenograph Writer Utility Programs Once you download and install the Stenograph Writer Utility setup and run it, the following screen displays: 2018 Stenograph, L.L.C. All Rights Reserved. - Page 49 The GetSupportInfo program (GetSupportInfo.exe) along with the instructions (GetSupportInfo.pdf) are located in the Writer Utilities, Splash Loader and more option and then the Utilities and Splash Photos folder. To retrieve the support information: 2018 Stenograph, L.L.C. All Rights Reserved.
- Page 50 Captioner/Student Edition and the other end to a USB port on your computer. 6. Navigate to the location where you installed the Stenograph Utility files. At the Stenograph Writer Utility dialog box, click the Writer Utilities, Splash Loader and more option, double click the Utilities and Splash Photos folder and then double click the GetSupportInfo.exe.
Need help?
Do you have a question about the Luminex Captioner Student Edition and is the answer not in the manual?
Questions and answers