
Related Manuals for Workzone PT15101201


Summary of Contents for Workzone PT15101201
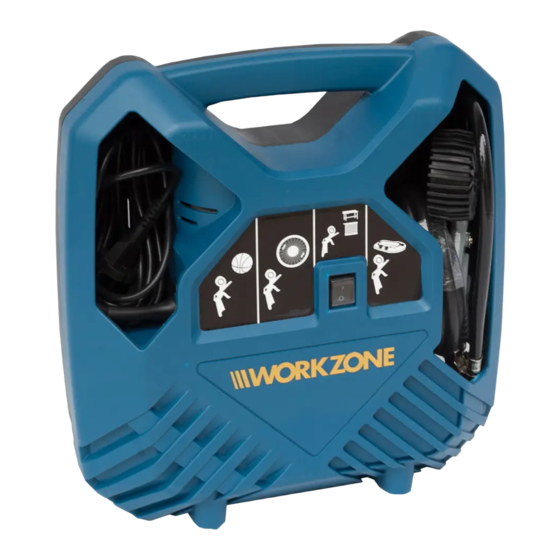
- Page 1 User Manual Spend a little Live a lot PORTABLE COMPRESSOR Original user manual ID: #05007...
- Page 2 QR codes take you where you want to go quickly and easily Whether you require product information, spare parts or accessories, de- tails on warranties or aftersales services, or if you want to watch a product demonstration video, our QR codes will take you there in no time at all. What is a QR code? A QR code (QR = Quick Response) is a type of matrix that can be read with a smartphone camera and that contains a link to a website or contact details,...
-
Page 3: Table Of Contents
Contents Overview ..................... 4 Use ......................5 Product contents/device parts ............6 General information ................7 Reading and storing the user manual .............7 Explanation of symbols ................7 Safety ....................9 Proper use ....................9 Residual risks ....................10 Safety notes ....................10 Safety notes for the compressor.............. 13 Checking the compressor and product contents ...... -
Page 4: Overview
15 14... -
Page 6: Product Contents/Device Parts
Product contents/device parts On/Off switch Compressed air hose Quick coupling Screw-on valve adapter Bleed adapter 8 mm adapter Manometer Nozzle adapter Thick conical universal adapter Thin conical universal adapter Express valve adapter Ball needle Air blow gun nozzle Compressed air connector plug Pneumatic gun Drain valve Trigger switch... -
Page 7: General Information
General information General information Reading and storing the user manual This user manual accompanies this portable compressor. It contains important information on how to set up and handle the device. For improved readability, the portable compressor will be referred to only as the “compressor”... - Page 8 General information Read the user manual. The certified safety seal confirms that the compressor is safe if used as foreseeable. The test seal confirms conformity with the German Product Safety Act (ProdSG). This symbol indicates that this type of packaging can be recycled through kerbside collection programs.
-
Page 9: Safety
Safety This compressor is suitable for inflating balls. This compressor is suitable for inflating tyres. This compressor is suitable for blowing out dust. This compressor is suitable for inflating rubber dinghies. Safety Proper use The compressor serves to produce compressed air for inflating car tyres, bicycle tyres, air mattresses, sports balls, rubber dinghies etc. -
Page 10: Residual Risks
Safety Residual risks Despite proper use, inconspicuous residual risks cannot be completely ruled out. The following risks may arise due to the nature of the compressor: • Hearing loss in the event of failure to use the required ear protection. ATTENTION! When using power tools, the following basic safety measures must be taken in order to provide protection against electric shocks, risk of injury and fire. - Page 11 Safety • Do not operate the compressor in wet or damp rooms. • Ensure that the work area is well lit. • Do not use the compressor if there is a risk of fire or explosion. 3. Protect yourself against electrical shock. •...
- Page 12 Safety 12. Prevent accidental start-up. • Ensure that the switch is off when inserting the plug in the socket. 13. Use an extension cord when working outdoors. • When outside, only use an extension cord that is approved for such use and which is labelled accordingly.
-
Page 13: Safety Notes For The Compressor
Safety Safety notes for the compressor ATTENTION! For your own safety, only operate the compressor after you have read the safety notes. WARNING! Danger of explosion! Operating the compressor in an unsuitable location without adequate venti- lation, at an unsuitable ambient temperature or in a room where dust, acids, vapours or flammable gases are present poses a risk of explosion. - Page 14 Safety − Never create holes or welded seams on the compressor and never change its shape. − Make sure that the compressed air tank is always vented before separating the connections, connecting or removing pneumatic tools. − Move the On/Off switch (pressure monitor) to the “0” (OFF) position once the compressor has been switched off.
- Page 15 Safety − Do not use the compressor if the mains cord or the mains plug is damaged. Have an authorised specialist workshop replace the damaged part with an original part. To do so, contact the customer service department at the service address indicated on the warranty card.
-
Page 16: Checking The Compressor And Product Contents
Checking the compressor and product contents − Wear protective goggles when working with the blow-out gun. Debris and parts that are blown away pose a risk of injury. − Avoid exhaust air coming into contact with your eyes. Exhaust air from the compressor may contain water, oil, metal particles and contaminants from the compressor. -
Page 17: Use
NOTICE! Risk of damage! The compressor is not suitable for continuous operation. The compressor will overheat if operated continuously for an excessive amount of time or if over- loaded. It could be damaged as a result. − Never operate the compressor for longer than 10 minutes at a time. −... -
Page 18: Connecting And Disconnecting The Pneumatic Gun
Connecting and disconnecting the pneumatic gun CAUTION! Risk of injury! If the compressed air hose with the quick coupling recoils uncontrollably when it is disconnected from the pneumatic gun, it could thrash around and you could injure yourself. − Firmly hold the quick coupling in your hand when disconnecting it from the pneumatic gun. -
Page 19: Inflating
6. To vent the air, push the drain valve on the pneumatic gun and check the pressure on the manometer. 7. Set the On/Off switch to the “0” position to switch the compressor off. 8. If you no longer wish to use the compressor, pull the mains plug out of the socket. 9. -
Page 20: Use As A Blow-Out Gun
Valve adapter Bicycle valve (Sclaverand valve, Dunlop valve) Express valve adapter Balls Ball needle Screw-on valves (bathing boats, kayaks, pools or Screw-on valve adapter similar) Air mattresses and similar Conical universal adapter for vent valves (e.g. for a flock bed) Bleed adapter All valves with an inner diameter 8 mm adapter... -
Page 21: Cleaning
Cleaning 2. Screw the hose off of the pneumatic gun. 3. Screw the air blow gun nozzle onto the pneumatic gun. 4. Connect the pneumatic gun to the compressor as described in the chapter “Connecting the pneumatic gun”. 5. You can now switch the compressor on as described in the chapter “Switching the compressor on and off”. -
Page 22: Replacing The Mains Connection Line
Cleaning NOTICE! Risk of damage! Cleaning the compressor with unsuitable cleaners could damage it. − Never clean the compressor with water, solvents or similar. − Do not use any aggressive cleaners, sharp or metallic cleaning utensils such as knives, hard scrapers or similar. They could damage the surfaces. NOTICE! Risk of damage! Improper or irregular cleaning and maintenance could damage the compressor. -
Page 23: Storage
Storage Storage NOTICE! Risk of damage! The compressor can be damaged as the result of incorrect or improper storage. − Pull the mains plug each time before you store the device. − Only store the compressor and all connected pneumatic tools in a vented state. −... -
Page 24: Technical Data
The tools are not working. − Check all hoses, the quick coupling and all tools and have them replaced by a qualified specialist if necessary. Technical data Model: PT15101201 Nominal voltage: 230–240 V~, 50 Hz Motor output: 1.1 kW Type of operation:... -
Page 25: Disposal
Disposal Sound pressure level: L 90 dB (A) Uncertainty K: 1 db (A) Sound power level L 97 dB (A) Uncertainty K: 2 dB (A) Disposal Disposing of the packaging Sort the packaging before you dispose of it. Dispose of cardboard and carton as waste paper and foils via the recyclable material collection service. -
Page 26: Declaration Of Conformity
EC Declaration of Conformity MEROTEC GmbH Hanns-Martin-Schleyer-Straße 18a 47877 Willich Deutschland herewith declare that the product Description: Portable Air Compressor Model No: PT15101201 Function: Inflate bicycle tires, sport balls, inflatable mattresses complies with the following directives: Machinery Directive 2006/42/EC Low Voltage Directive... -
Page 27: Warranty Card
0190 4727501 www.coreservice.co.uk 0190 22605 product please return the completed warranty card together with it. MODELL: PT15101201 PRODUCT CODE: 93207 05/2016 Unit A&B Escrick Business Park Phone lines available Monday to Friday, 8am - 6pm. -
Page 28: Warranty Conditions
Warranty conditions Dear Customer, The ALDI warranty offers you extensive benefits: Warranty period: 3 years from date of purchase. Costs: Free repair/exchange. No transport costs. ADVICE: Please contact our service hotline by phone, e-mail or fax before sending in the device. This allows us to provide support in the event of possible operator errors. - Page 32 ALDI STORES LTD. PO BOX 26, ATHERSTONE WARWICKSHIRE, CV9 2SH. ALDI STORES (IRELAND) LTD. PO BOX 726, NAAS, CO. KILDARE. Visit us at www.aldi.com AFTER SALES SUPPORT 0190 4727501 www.coreservice.co.uk 0190 22605 YEARS MODEL: PT15101201 PRODUCT CODE: 93207 05/2016 WARRANTY...
Need help?
Do you have a question about the PT15101201 and is the answer not in the manual?
Questions and answers