Advertisement
Available languages
Available languages
Quick Links
EN
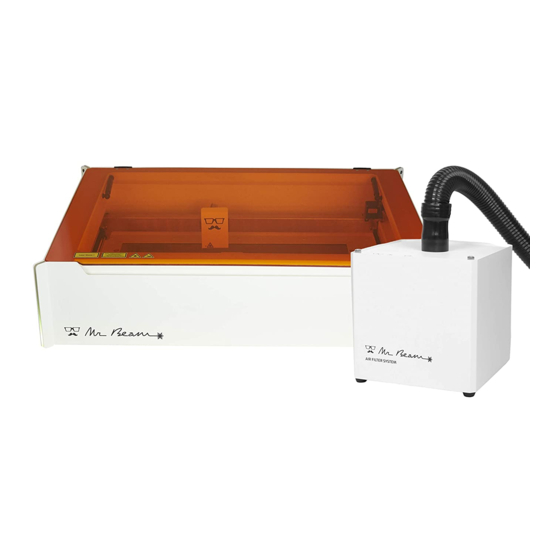
DESKTOP LASER CUTTER
QUICKSTART GUIDE
When you start up your Mr Beam II, remember that it has
been assembled and packed by us with great care. We hope
that you will take the time to unpack and set it up carefully.
Munich, 15. June 2018 | Rev. 1.0
Advertisement

Summary of Contents for Mr. Beams Mr Beam II
- Page 1 DESKTOP LASER CUTTER QUICKSTART GUIDE When you start up your Mr Beam II, remember that it has been assembled and packed by us with great care. We hope that you will take the time to unpack and set it up carefully.
-
Page 2: Safety Instructions
SAFETY INSTRUCTIONS You will find the latest update of this Quickstart Guides and some other informa- tions about your Mr Beam II at the following QR Code. At mr-beam.org/faq you will also find answers to many questions around the Mr Beam II. - Page 3 SCOPE OF DELIVERY - WITH AIR FILTER SYSTEM LASER HEAD 2 KEYS CABLE AIR FILTER MR BEAM II FOCUS TOOL POWER CABLE POWER SUPPLY UNIT AIR FILTER SYSTEM HOSE SUCTION SOCKET SCREWS WASHERS...
- Page 4 SCOPE OF DELIVERY - WITHOUT AIR FILTER SYSTEM LASER HEAD 2 KEYS POWER CABLE MR BEAM II FOCUS TOOL POWER SUPPLY UNIT AIRFILTER SYSTEM For indoor use we recommend a Mr Beam Air Filter System. If you HOSE SUCTION SOCKET don‘t have one yet, order it now...
- Page 5 UNPACKING THE MR BEAM II First remove the small box on the side. The laser head, the power adapter, the key and the Focus Tool are located in it. Remove the transport safeguard inside the de- vice carefully.
-
Page 6: Network Connection (Ethernet)
SETTING UP THE MR BEAM II Name: MrBeam-XXXX S/N: 0000000XXXXXXXXX-2X Vor Beginn von Reinigungs- und aser lasse Wartungsarbeiten das GerŠt immer ausschalten und den Netzstecker ziehen. AIR FILTER Model: Mr Beam SYSTEM Mr Beam Lase Gollierst Vorsicht - sichtbares aserlicht lasse Wartungs- und InspektionstŠtigkeiten... - Page 7 To adjust the laser focus to different material heights, the base plate can be mounted at different heights. Fine adjustment is made via the knurled screw and the slotted hole in the base plate. See the chapter: Focusing Mr Beam II...
- Page 8 Connect the Mr Beam Air Filter System or suction fan to your Mr Beam II. If you operate your Mr Beam II without the Mr Beam Air Filter System, you are obliged to ensu- re that the waste air is discharged properly.
- Page 9 Sicherheitsverriegelung ŸberbrŸckt Zustand von geschultem Personal Bestrahlung von Auge und Haut durchgefŸhrt werden. durch direkte oder Streustrahlung vermeiden Use the key to turn on your Mr Beam II. Name: MrBeam-XXXX S/N: 0000000XXXXXXXXX-2X Vor Beginn von Reinigungs- und Laser Klasse 1 Wartungsarbeiten das GerŠt immer...
- Page 10 STARTING UP...
- Page 11 Bestrahlung von Auge und Haut durchgefŸhrt werden. Made in Germany durch direkte oder Streustrahlung vermeiden Input: 19V that appears on the back of your Mr Beam II and will be used again and again in the following. Name: MrBeam-XXXX S/N: 0000000XXXXXXXXX-2X password: mrbeamsetup Connect your computer to your specific Mr Beam II WiFi.
- Page 12 Mr Beam II. ¹ If your local network is connected to the Internet and your Mr Beam II and your computer are on the same network. ² Applies to common network configurations...
- Page 13 80339 Munich, Ger wenn Abdeckung gešffnet dŸrfen nur im ausgeschalteten www.mr-beam.or und Sicherheitsverriegelung ŸberbrŸckt On the back of your Mr Beam II is your specific Zustand von geschultem Personal Bestrahlung von Auge und Haut durchgefŸhrt werden. Made in Germany durch direkte oder Streustrahlung vermeiden...
- Page 14 ² XXXX will be replaced by your specific device located on the back of your Mr Beam II. ¹ If your local network is connected to the Internet and your Mr Beam II and your computer are on the same network. ² Applies to common network configurations...
- Page 15 MR BEAM II SOFTWARE working area Continue to the material settings design library When the lid of Mr Beam II is open, a live image of the working area is shown here. Double-click anywhere to move the laser head to the desired position.
- Page 16 MR BEAM II SOFTWARE 2. Placement Once a file has been selected, it can be placed in the work area on the work piece. Use the arrows to scale and rotate the graphic. Click on „Laser“ in the upper left corner to ac- cess the laser settings.
- Page 17 Mr Beam II starts to laser. The computer can then be disconnected or turned off from your Mr Beam II, as the laser order is now on your Mr Beam II. Never operate your Mr Beam II unsupervised!
- Page 18 Because the laser light conically leaves the laser head, there is one point at which it is focused maximally, the focus point. At this point, your Mr Beam II has the maximum performance and highest precision. Therefore, the focus point should be positioned exatly on the material and must be manually adjusted to the material height.
- Page 19 For coarse focusing, the laser head can be mounted at different positions. To connect and disconnect the ribbon cable, Mr Beam II must be disconnected from the power supply! First remove the laser head by using the knurled screw and put it carefully aside. It is not neces- sarily needed to disconnect the ribbon cable.
- Page 20 Happy? Not Happy? Tell your friends and Please visit our FAQ section: family! Share your mr-beam.org/faq results on Facebook, Twitter and Instagram or contact our friendly customer service team: #madewithmrbeam support@mr-beam.org © 2018 | Mr Beam Lasers GmbH | Gollierstraße 70d | Munich | Germany | www.mr-beam.org...
Need help?
Do you have a question about the Mr Beam II and is the answer not in the manual?
Questions and answers