Table of Contents
Advertisement
Available languages
Available languages
Advertisement
Table of Contents

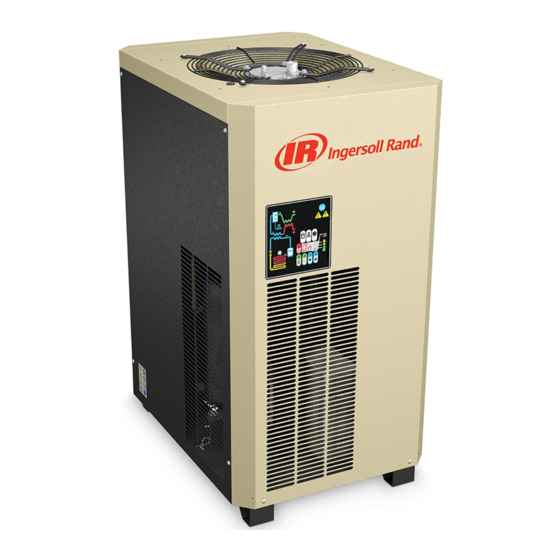
Summary of Contents for Ingersoll-Rand D12IN
- Page 1 For 60 Hz dryers SECHEUR D’AIR A EXPANSION DIRECTE - FR - Manuel des Opérateurs Pour des sécheurs à 60 Hz D12IN D18IN D25IN D42IN D54IN D72IN D108IN D144IN D180IN D300IN D360IN 1 - 27 Cod. 710.0138.39.00 Rev1A – 05.2008...
-
Page 2: Table Of Contents
- EN - - FR - CONTENTS TABLE DES MATIERES 1. GENERAL INFORMATION 1. INFORMATIONS GENERALES 1.1 Functional Description 1.1 Description fonctionnelle 1.2 Safe Use of the Dryer 1.2 Utilisation du séchoir en toute sécurité 2. INSTALLATION 2. INSTALLATION 2.1 Acceptance and Transportation 2.1 Réception et transport 2.2 Installation Site 2.2 Lieu d'installation... - Page 3 - EN - INTRODUCTION This manual is an integral part of the dryer you bought, and must remain with the machine even if this will be resold. It is highly recommended that the qualified*personnel for installation maintenance and/or control will fully comply with the contents of this manual and the prevention and safety rules in force in the country where the system will be used.
-
Page 4: General Information
Correction by the Company of nonconformities whether patent or latent, in the manner and for the period of time provided above, shall constitute fulfillment of all liabilities of the Company for such nonconformities whether based on contract, warranty negligence, indemnity, strict liability or otherwise with respect to or arising out of such Equipment. The Purchaser shall not operate Equipment which is considered to be defective, without first notifying the Company in writing of its intention to do so. -
Page 5: Installation
2. INSTALLATION 2.1 ACCEPTANCE, UNPACKING AND HANDLING Upon receiving your Ingersoll Rand air dryer, please inspect the unit closely. If rough handling is detected, please note it on your delivery receipt, especially if the dryer will not be uncrated immediately. Obtaining the delivery person's signed agreement to any noted damages will facilitate any insurance claims by the customer. -
Page 6: Start Up
3. START UP Ensure that the dryer is by−passed, or there is no load on the cooler. Switch on the main electrical isolation switch (if present). The control panel will show the message OFF, indicating that the line and control voltages are available. Start sequence The dryer will initially start by pressing the local ON/OFF button for 1 second. -
Page 7: Keys Function
3.1.1 KEYS FUNCTION TEST: When pushed for 3 sec. during normal operation, it activates the condensate drain. SET: When pushed and released during normal operation, it displays the dew point set value (decimal). When pushed for 10 seconds, it allows to enter the C8 and C9 condensate drain parameters programming menu (see relevant table). -
Page 8: Anomaly Warning
3.1.3 DISPLAY INDICATIONS The controller is capable of recognizing certain types of anomalies in the drying circuit. In such cases, a message will blink on the display, alternated to the current dew point value. MESSAGE CAUSE OUTPUTS ACTIONS (BLINKING) High dew point value Alarm output ON Resettable by switching off the (delayed alarm) -
Page 9: Before Start Up
3.2 BEFORE START UP Before starting the machine, make sure that all operating parameters correspond to the nominal data. The dryer is supplied already tested and preset for normal operation, and it doesn’t require any calibration. Nevertheless, it’s necessary to check the operating performances during the first working hours. 3.3 START UP The operations specified below must be performed after the first start up and at each start up after a prolonged inactive period of time due to maintenance operations, or any other reason. - Page 10 TROUBLE DISPLAY POSSIBLE CAUSE REMEDY No power in the line. Restore the power in the line. Control panel Problems with cabling. Check cabling; if the trouble persists, replace it. display is Problems with the electronic control Check the electronic control board; if the trouble blank board.
-
Page 11: Dismantling
TROUBLE DISPLAY POSSIBLE CAUSE REMEDY Check the probe; if the trouble persists, replace it. Check the electronic control board; if the trouble Ice formation in the evaporator. persists, replace it. Contact our Service Centre to check the gas charge. Check if the compressed air inlet/outlet is connected properly. - Page 12 - FR - PREAMBULE Le présent manuel fait partie intégrante du séchoir que vous venez d'acheter et doit toujours accompagner la machine, même en cas de revente de cette dernière. Il est indispensable que le personnel spécialisé* chargé des opérations d'installation, d'entretien et/ou de contrôle observe scrupuleusement les consignes données dans ce manuel ainsi que les normes de prévention et de sécurité...
-
Page 13: Description Fonctionnelle
LA SOCIÉTÉ N’ACCORDE AUCUNE AUTRE GARANTIE OU REPRÉSENTATION D’AUCUNE SORTE, EXPLICITE OU IMPLICITE, A L’EXCEPTION DE LA GARANTIE EN OBJET ET TOUTES LES GARANTIES IMPLICITES DE QUALITÉ MARCHANDE ET D’APTITUDE A UNE UTILISATION SPÉCIFIQUE, SONT PAR CONSÉQUENT REFUSÉES. La correction par la société des non-conformités évidentes ou cachées, de la façon et pour la période de temps indiquées ci- dessus, doit constituer l’accomplissement de toutes les responsabilités de la société... -
Page 14: Installation
2. INSTALLATION 2.1 RECEPTION ET TRANSPORT Lors de la réception de votre séchoir d’air Ingersoll Rand, veuillez vérifier attentivement l’appareil. Si vous remarquez des signes de manutention brusque, veuillez les noter sur le bordereau de livraison, en particulier si le séchoir n’est pas déballé... -
Page 15: Mise En Service
3. MISE EN SERVICE S'assurer que le sécheur est activé, et que le refroidisseur n'est pas en condition de travail. Activer le commutateur sur la commande d'isolation électrique principale (si présent). Le panneau de commande affichera le message OFF, indiquant que la tension de ligne et de contrôle est activée. Séquence de démarrage Le sécheur devra tout d'abord être mis en marche en pressant le bouton ON/OFF situé... -
Page 16: Fonction Des Touches
3.1.1 FONCTION DES TOUCHES TEST: Lorsqu'on appuie dessus pendant 3 secondes lors du fonctionnement normal, elle permet d'activer un cycle de purge des condensants. SET: Si l'on appuie dessus pendant le fonctionnement normal, elle affiche la valeur du point de consigne. Maintenu sous pression pendant 10 secondes, elle permet l'accès au menu de programmation des paramètres (Voir le tableau correspondant). -
Page 17: Signalisation Des Anomalies
3.1.3 SIGNALISATION D'ANOMALIES Le contrôleur est en mesure de reconnaître des types d’anomalies déterminés du circuit de séchage qui entraîne l’affichage d’un message d’alarme clignotant sur l’écran alterné à la valeur courante du point de condensation. MESSAGE CAUSE SORTIES ACTIONS (CLIGNOTANT) Réinitialisation par extinction de la Point de condensation élevé... -
Page 18: Opérations Préliminaires À La Mise En Marche
3.2 OPERATIONS PRELIMINAIRES A LA MISE EN MARCHE Avant de mettre la machine en service, s'assurer que tous les paramètres de fonctionnement sont conformes aux spécifications de référence. Le séchoir est fourni déjà testé et préréglé pour un fonctionnement normal et n'a besoin, par conséquent, d'aucun étalonnage ;... - Page 19 PROBLÈME AFFICHAGE CAUSE POSSIBLE REMÈDE L’afficheur Pas d’alimentation sur la ligne. Rétablissez l’alimentation de la ligne. du panneau Vérifiez le câblage et remplacez-le si le problème Problème de câblage. persiste. commande Problème avec la carte de commande Vérifiez la carte de commande électronique et est vide électronique.
-
Page 20: Démantèlement
PROBLÈME AFFICHAGE CAUSE POSSIBLE REMÈDE Vérifiez la sonde et remplacez-la si le problème persiste. Vérifiez la carte de commande électronique et Formation de givre dans l’évaporateur. remplacez-la si le problème persiste. Contactez notre service après-vente pour vérifier la charge de gaz. Vérifiez que l’entrée et la sortie de l’air comprimé... - Page 21 ATTACHMENTS TO THIS MANUAL - ANNEXES AU MANUEL Legend - Légende: Pos. - GB - DESCRIPTION - F - DESCRIPTION Electronic Controller Contrôleur électronique Drain solenoid valve coil Bobine électrovalve de décharge Refrigerant compressor Compresseur réfrigérant Fan Motor Ventilateur High pressure Switch Pressostat haute pression Fan pressure Switch Pressostat de ventilation...
-
Page 22: A) Refrigerant Circuit
A) REFRIGERANT CIRCUIT - CIRCUIT FRIGORIFÉRIQUE Cod. 713.0048.04.00 – Rev. 00 Models D12IN to D180IN Cod. 713.0057.06.00 – Rev. 00 Models D300IN to D360IN Condensate drain Purge de condensant Air inlet Entrée de l'air Air outlet Sortie de l'air Refrigerant line Ligne réfrigérant... -
Page 23: B) Electric Circuit Diagram
B) WIRING DIAGRAM - SCHEMA ÉLECTRIQUE Cod. 714.0164.01.00 – Rev. 00 Models D12IN to D72IN (115V/1Ph/60Hz) Cod. 714.0165.01.00 – Rev. 00 Models D108IN to D180IN (115V/1Ph/60Hz) 22 - 28 Cod. 710.0138.39.00 Rev1A – 05.2008... - Page 24 Cod. 714.0168.01.00 – Rev. 00 Models D300IN to D360IN (230V/1Ph/60Hz) 23 - 28 Cod. 710.0138.39.00 Rev1A – 05.2008...
-
Page 25: C) Technical Data Sheet
C) DATA SHEET - CARACTERISTIQUES TECHNIQUES MODEL D12IN D18IN D25IN D42IN D54IN D72IN D108IN D144IN D180IN D300IN D360IN AIR FLOW M3/h RATE* VOLT/ POW SUPPLY 115/1/60 230/1/60 PH/HZ 1/10 1/10 1/10 0.16 0.16 0.16 0.21 0.37 0.37 0.48 0.57 0.71 1.25... -
Page 26: D) Correction Factors
Legend - Légende: Pos. - GB - DESCRIPTION - F - DESCRIPTION Pos. - GB - DESCRIPTION - F - DESCRIPTION AMB T MIN- Min-Max. ambient Temp. Ambiante min- Air flow rate Performances temperature max. POW SUPPLY AIR W PRESS Power supply Alimentation Air working pressure... -
Page 27: E) Dryer Dimensions
E) DRYER DIMENSIONS - DIMENSIONS DU SECHEUR Models D12IN to D18IN 1/2" 1/2" Ø 115/1/60 V/ph/Hz 12" 14" 16" 2" 1" 2" 13" 15/16" 1" inches 3/16 1/16 9/16 1/16 3/16 Power supply Alimentation Air flow Circulation de l'air Models D25IN to D180IN D25IN 1/2"... - Page 28 Models D300IN to D360IN 1" 1" 230/1/60 Ø 6mm V/ph/Hz 19" 23" 38" 6" 10" 3" 4" 1" inches 13/16 9/16 3/16 15/16 9/16 Power supply Alimentation Air flow Circulation de l'air 27 - 28 Cod. 710.0138.39.00 Rev1A – 05.2008...
-
Page 29: F) Basic Spare Parts
F) BASIC SPARE PARTS - PIÈCES DE RECHANGE ESSENTIELLES Model D12IN D18IN D25IN D42IN D54IN D72IN D108IN D144IN D180IN Element Electronic Controller 38457404 38457404 38457404 38457404 38457404 38457404 38457404 38457404 38457404 Temperature probe 38457412 38457412 38457412 38457412 38457412 38457412 38457412... - Page 30 Model D300IN D360IN Element Electronic 38459608 38459608 Controller Temperature 38459616 38459616 probe Refrigerant 38459624 38459624 compressor Fan Motor Fan blade 38459632 38459632 Grid High pressure 38457511 38457511 Switch Main power 38459657 38459657 switch Complete solenoid drain 38459665 38459665 valve Drain solenoid 38459673 38459673 valve coil Condenser...
- Page 31 DICHIARAZIONE CE DI CONFORMITA' DECLARATION DE CONFORMIDAD CEE EC DECLARATION OF CONFORMITY DECLARACAO DE CONFORMIDADE CEE DECLARATION DE CONFORMITE’ CEE OVEREENKOMSTVERKLARING EG-RICHTLIJN EEG KONFORMITATSERKLARUNG GEMASS EG-RICHTLINIE EC DECLARATION EEG ΔΗΛΩΣΗ ΣΥΜΜΟΡΦΩΣΗΣ CE DEKLARACJA ZGODNOŚCI CE NOI - WE - NOUS - WIR - ΕΜΕΙΣ - NOSOTROS - NOS - WIJ - VI - MY -I- Dichiariamo sotto la nostra esclusiva responsabilità...
Need help?
Do you have a question about the D12IN and is the answer not in the manual?
Questions and answers