
Related Manuals for Racepak 610-KT-SPRTMN

Summary of Contents for Racepak 610-KT-SPRTMN
- Page 1 Installation and Operation Manual #610-KT-SPRTMN 949-709-5555 30402 Esperanza Rancho Santa Margarita, CA 92688 USA Fax: 949-709-5556 www.racepak.com...
- Page 2 Warranty Competition Systems, Inc/Racepak make every effort to insure our products and services are of the highest quality and standards. It is our intention to maintain a mutually beneficial and cordial relationship with each and every customer.
-
Page 3: Table Of Contents
Real Time Telemetry ..........................28 Setting up Real Time Telemetry Parameters .................. 28 Entering Real Time Telemetry Parameters..................28 Starting Real Time Telemetry Session ................... 29 VI: Appendix I – V-Net Module Installation Instructions ...... 31 Racepak Racepak Racepak Racepak 949-709-5555... -
Page 4: Introduction
In addition, make sure you completely test the data logger, and PC before getting to the race track. The race track is a bad place to find out something is not working properly! Racepak Racepak Racepak... -
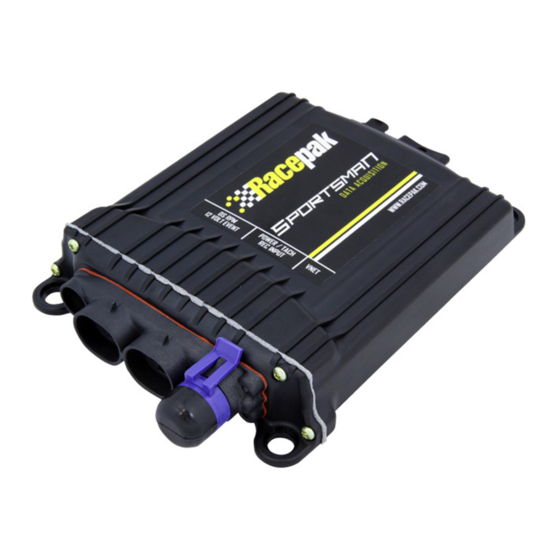
Page 5: Sportsman Data Logger Package Contents
I. USB to Serial Adaptor J. Communication Serial Cable K. 3-Pin Molex and Pins L. Fuse holder and associated terminals M. Momentary Push Button (Start Record Button) Not shown: USB SD Memory Card Reader 5 Amp Fuse Racepak Racepak Racepak Racepak 949-709-5555 www.Racepak.com... -
Page 6: I: Getting Acquainted With The Sportsman Data Logger System
V-Net Devices: V-Net (short for on-board Vehicle Network) is a technology developed by RacePak for use in implementing onboard electronics. This technology allows a variety of devices such as data loggers, gauges, sensors, and actuators to be connected together with a single cable (bus), and to share their information with each other. - Page 7 PC’s USB port using the supplied SD memory card reader. The data is then transferred from the memory card to the Racepak DataLink II software installed on your PC for analysis.
-
Page 8: Harness And Connectors
Clear Wire +12 Volt Event input, connect to +12 volts to mark event Orange Wire Driveshaft +12 power, connects to driveshaft sensor Red Wire Driveshaft Ground, connects to driveshaft sensor Black Wire Connector Rear View Racepak Racepak Racepak Racepak 949-709-5555 www.Racepak.com... -
Page 9: V-Net (Vehicle Network)
V-Net Devices. The connectors are color-coded black for the hardwired sensors system, and blue for the V-Net devices. V- Net Cable V- Net Cable V- Net Cable Terminator 4 EGT Junction Digital Dash V-Net Port Racepak Racepak Racepak Racepak 949-709-5555 www.Racepak.com... -
Page 10: Ii: Hardware Installation
SD memory card connector facing in the direction of travel. If you cannot mount the data logger in this direction contact RacePak for further instructions. Be sure to mount the data logger using the four rubber shock isolators, or “feet”, which protect the data logger from shock and vibration damage. -
Page 11: Driveshaft Collar And Sensor
When the magnet moves out from under the sensor, the signal is lost and the drive shaft RPM is not recorded. In order to avoid this problem, Racepak has made collars that contain two pairs of magnets (total of 4). Each pair of magnets is mounted longitudinally (inline) on the collar, which allows it some freedom to move without the sensor losing contact with a magnet. -
Page 12: Digital Harnesses
+12 Volt Event input, connect to +12 volts to mark event Orange Wire Driveshaft +12 power, connects to driveshaft sensor Red Wire Driveshaft Ground, connects to driveshaft sensor Black Wire DS RPM / 12V EVENT CONNECTOR Connector on Sportsman Racepak Racepak Racepak Racepak 949-709-5555 www.Racepak.com... -
Page 13: Connecting Power And Ground
Intermittent ground connection will cause the system to malfunction. Once the wire is stripped, crimp a ring terminal on wire, and connect to chassis ground, or negative battery. NOTE: FAILURE TO INSURE PROPERLY SECURED CONNECTIONS WILL RESULT IN SYSTEM MALFUNCTION AND/OR NON-OPERATION Racepak Racepak Racepak Racepak 949-709-5555 www.Racepak.com... -
Page 14: Connecting Engine Rpm Tachometer Signal
Wiring Harness (PWR/TACH/REC INPUT) ground or negative battery. Once the wire is stripped, crimp a spade terminal Connect to Chassis Racepak Racepak on wire and connect to the push button Racepak Racepak Ground 949-709-5555 www.Racepak.com... -
Page 15: Connecting Driveshaft Rpm Signal
Orange wire found in Secondary/Digital Input Wiring Harness (DS RPM/12 VOLT EVENT) Trans-brake Solenoid Once the wire is stripped, crimp a spade terminal on wire, and connect to the push button Racepak Racepak Racepak Racepak 949-709-5555 www.Racepak.com... -
Page 16: V-Net Devices
If you do not install this terminator cap, the V-Net devices will not function. The V-Net hardware installation of your Sportsman data logger is now complete. V- Net Cable V- Net Cable V- Net Cable Terminator 4 EGT Junction Digital Dash V-Net Port Racepak Racepak Racepak Racepak 949-709-5555 www.Racepak.com... -
Page 17: Iii: Datalink Ii Software
Sportsman data logger. Please note that DataLink II is the latest generation of Racepak software and supersedes the first generation known as DataLink. The release version numbering of DataLink II started at 1.0. Therefore, DataLink II version 3.4, as an example, is newer than DataLink version 5.5. -
Page 18: Iv: Configuring The Sportsman Data Logger
Sportsman, by left clicking on it with the mouse. The list on the right will now contain the list of configuration files contained in this folder. The factory configuration file for the Sportsman data logger will be located here. Racepak Racepak Racepak... - Page 19 When you are sure you are editing the proper channel, go to the Online Help Scroll Box. Read this section. It will give you step by step instructions on configuring the specific device/channel you are editing. The following two pages describe the basic sections of the edit dialog box and their locations. Racepak Racepak Racepak...
- Page 20 Enter the new value for the option here. Racepak Racepak...
- Page 21 As a final step save the car configuration file to your disk by clicking on the save icon in the DataLink II Toolbar, or select the Save menu item located in the Files main menu selection. You have completed the programming of the device/channel. Repeat the above process for each of the devices you wish to modify. Racepak Racepak Racepak Racepak 949-709-5555 www.Racepak.com...
-
Page 22: Adding Or Removing V-Net Devices On The Sportsman
If you have added modules to the V-Net system, the DataLink II software will automatically insert new channel buttons for the new modules. You should review the programming of the new module(s) as detailed above and change the setup of the new module(s) as required. Racepak Racepak Racepak... -
Page 23: V: Operating The Sportsman Data Logger
This will open your car configuration file. Next click on the Organize Pane icon on the left tool bar. This should bring up run log pane (located on the bottom of the screen) as shown below. Racepak Racepak Racepak Racepak 949-709-5555 www.Racepak.com... -
Page 24: Clearing Data Files From Memory Card
Open Car Configuration. Select the configuration file named Sportsman_Config and click OK 2) This will open your car configuration file. Next, click on the Organize Pane icon on the left tool bar. This should bring up the run log pane as shown below. Racepak Racepak Racepak Racepak 949-709-5555... -
Page 25: Initiating A Recording
When the recording process actually begins and how much data is recorded is determined by how you program the setup features in your data logger. The staff at RacePak will have setup your data logger to start recording via pushbutton using the blue wire located in the “PWR/TACH/REC INPUT”... -
Page 26: Configuring The Record Parameters
The options edit box and option help box, located to the right of the list, will be updated with appropriate information for the selected option. Read the help information, and enter the new value for the selected option. The options for setting the record parameters are discussed in detail below. Racepak Racepak Racepak... -
Page 27: Setting The Start Record Channel
Devices Programmed Successfully. You have completed the programming of your data logger. The new programming will become effective the next time you turn your data logger on. Racepak Racepak Racepak Racepak 949-709-5555 www.Racepak.com... -
Page 28: Recording Data
Data from your Sportsman data logger can be uploaded to your PC for data viewing and analysis using the RacePak DataLink II program. Follow the instructions below to upload data from the SD memory card to your Remove the SD memory card from the Sportsman data logger and place it in the SD memory card reader connected to you PC. - Page 29 Now using left mouse button, click and drag the window larger . After you have identified the data file you would like to upload, select the file by clicking on it with the left mouse button, and then click on the Open button in the lower right corner. Racepak Racepak Racepak...
-
Page 30: Naming And Storing Uploaded Data
A new file tab with the channel data will be opened. You are now ready to view the data. Refer to the DataLink II instruction manual for information on viewing the run data. Racepak Racepak Racepak... -
Page 31: Real Time Telemetry
1000 seconds and stop. If Continue until stopped manually-overwrite oldest data is selected, the program will continuously record until stopped by the operator. Only the last 1000 seconds of data will be stored. Racepak Racepak Racepak... -
Page 32: Starting Real Time Telemetry Session
The Start Data Acquisition icon is shown active on the left. The Stop Data Acquisition icon is shown active on the right. Start Data Acquisition - Green Light Stop Data Acquisition - Red Light Racepak Racepak Racepak Racepak 949-709-5555 www.Racepak.com... - Page 33 Erase from the Telemetry main menu. All previously recorded data will be erased from the file. If you wish to save the data, stop the data acquisition, and click the Save icon located in the tool bar, or select Save located in the File main menu. Racepak Racepak Racepak Racepak 949-709-5555 www.Racepak.com...
-
Page 34: Vi: Appendix I - V-Net Module Installation Instructions
Appendix I – V-Net Module Installation Instructions Racepak Racepak Racepak Racepak 949-709-5555 www.Racepak.com... - Page 35 Racepak Racepak Racepak Racepak 949-709-5555 www.Racepak.com...
- Page 36 MANL-INTL Sport Rev 3a 4/09 949-709-5555 30402 Esperanza Rancho Santa Margarita, CA 92688 USA Fax: 949-709-5556 www.racepak.com...
Need help?
Do you have a question about the 610-KT-SPRTMN and is the answer not in the manual?
Questions and answers