Table of Contents
Advertisement
Advertisement
Table of Contents

Related Manuals for iFLY GPS iFly 740

Summary of Contents for iFLY GPS iFly 740
- Page 1 Extra Features Manual iFly 740...
- Page 2 ▪ The iFly 740 Owner’s Manual is for your convenience and safety when using this product. ▪ Before operating the iFly 740, and to take full advantage of this aviation navigation system, please read the manual carefully and follow its instructions.
-
Page 3: Table Of Contents
Table of Contents 1. GETTING STARTED .................... 4 ) ............. 4 OMPONENTS DEFAULT OPTION IFLY 740 ........... 5 XTERNAL PPEARANCE OF IFLY 740 ................8 NSTALLING AKING OUT EMORY ARD .................. URNING OWER N....................CREEN ....................2. PROGRAMS AND ITS BASIC OPERATION ............ 11... -
Page 4: Getting Started
1. Getting Started © Components (default+option) iFly 740 MAIN BODY SDHC MEMORY CARD SUCTION MOUNT SOFT CASE CIGARETTE JACK AC-DC ADAPTER REMOTE... -
Page 5: External Appearance Of Ifly 740
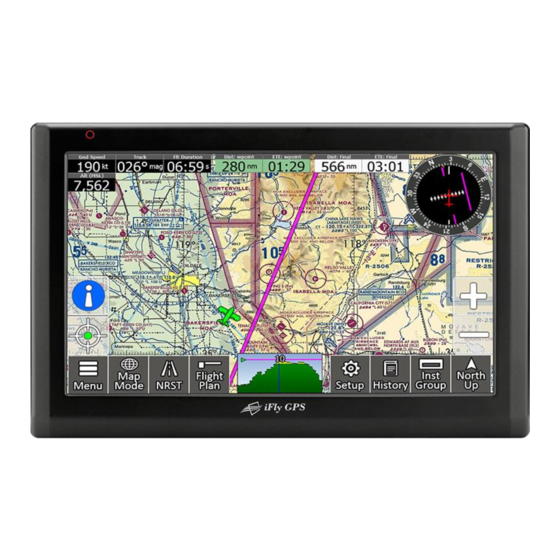
© External Appearance of iFly 740 (Front View) 2 & 3 (Front side information) Touch screen Operate all functions by touching the screen with the stylus pen provided. Indicates battery-charging status. Indication light If the battery is fully charged, the red light will be turned off automatically. - Page 6 (Rear View) (Rear Side Information) External connection in order to improve reception efficiency of GPS. External GPS - For panel mounts or recessed installations. Connection Terminal * Option-sold separately Speaker Audible alerts, vocal guidance and audio output. Mount Holder Mount area. For Ram Ball or Suction Mount attachment.
- Page 7 (Side View) POWER Power button to turn device on and turn off. EXT -IR/SIO IR wired relocation port for panel installs that cover the bezel. Connect USB to Serial Cable for NMEA output. Input from serial ADS-B or AHRS device. External USB memory storage for video or image files or loading GPX flight plan files.
-
Page 8: Installing Ifly 740
Align and connect the 4 prongs of the suction mount into the 4 slots on the back of the GPS. ③ Slide the Suction plate update to secure the mount to the back of the iFly 740. ④ After installation, make sure the device is fixed firmly and then use it. -
Page 9: Taking Out Memory Card
© Turning Power On Connect power (DC cigar jack or AC adaptor) to the IFLY 740. Press down the power button on the right hand side for one or more seconds to apply power. If battery is fully charged, the device can be used without external power connection. However we strong ly recommended you to connect power (DC cigar jack or AC adaptor). -
Page 10: Main Menu Screen
1. Navigation An icon to launch iFly GPS. 2. Update An icon to Update iFly GPS via Wi-Fi or Update Package of USB or SD card. 3. Customer To open iFly Streets. *Must have the iFly Streets option installed. 4. Applications An icon to launch application. -
Page 11: Programs And Its Basic Operation
2. Programs and its Basic Operation © Using Internet Icon Execute this by pressing Internet icon on the Main Menu. ② 1. Menu There are some icons for easy operation. 2. Exit Exit the current menu and return to the main menu ©... - Page 12 ❖❖ MUSIC 1) Getting started Execute this by pressing Music icon on the Main Menu. 1. Title bar Shows the name of current playing file. 2. Progress Bar Shows the process time of the current playing file. 3. Previous file Play the previous audio file.
- Page 13 2) Play list Press the “Play list” button to show play list Select files or folders. 1.File list When you click a file, all files will add to the current play list. Meantime, it plays automatically and returns to the music play screen. 2.Delete Delete a file from the current play list 3.File scroll bar...
- Page 14 ❖❖ PHOTO 1) Getting Started Launch this function by pressing photo icon in the Main Menu. 2) Configuration of Screen Screen It shows images. Play slide show To show images in the play list one by one. Time setting (slide) Time setting for slide show.
- Page 15 3) Full Screen In full screen, there are some buttons as below. <Previous <Next file> <Full screen/Return to Image...
-
Page 16: Using Ifly Streets
© Using iFly Streets Please press iFly Streets icon in the Main Menu to launch the iFly Streets navigation. You must have an SD card with the iFly Streets upgrade in order for this to function. If you do not, a message will advise you to contact Adventure Pilot to purchase an iFly Streets card. - Page 17 ❖❖ Calendar Getting Started Launch this program by pressing the Calendar icon on menu. ❖❖ Calculator Getting Started Launch this program by pressing the Calculator icon on menu. ❖❖ Memo Getting Started Launch this program by pressing the Memo icon on menu.
- Page 18 ❖❖ AV-IN 1) Getting Started Connect the AV cable between AV device and AV-In jack. Launch this function by pressing the AV-IN icon on the launcher screen to see the AV screen from the AV device. [Note]: AV cable is supplied in separate sales and only the following pin type jack is supported. 2) Configuration of Screen You can see the video screen and sound supplied from to AV-IN jack.
-
Page 19: Using Setting Icon
© Using Setting Icon When you press Application icon on the Main Menu, it shows 7 icons as below images. 1. Sound Start the Sound control settings. 2. Screen Start program, Main screen, screen saver, Clock, Calibration settings. 3. Brightness Start the Back Light control settings. - Page 20 ❖❖ Sound 1) Getting Started Launch this program by pressing the Sound icon on menu. 2) Configuration of Screen System volume: You can adjust the volume for the system. Earphone/Speaker volume sync, Button sound, System 1 Sound booting sound: You may select and click the button as the above image.
- Page 21 Start program: Start program by choosing one of the icons. Main Screen: choose Basic screen or Customer screen for your main screen. Screen saver: select the clock as screen saver or turn off the 1. Screen screen saver function. Clock: you have 3 options and may select any of the icons for setting clock.
- Page 22 1. Backlight You may adjust the display backlight level by pressing button, including daytime settings and nighttime settings. Control 2. Close Close the current menu and return to main menu. ❖❖ Option 1) Getting Started Launch this program by pressing the Initial icon on menu. 2) Configuration of Screen TV OUT An icon to open TV out function.
- Page 23 ❖❖ Initial 1) Getting Started Launch this program by pressing the Initial icon on menu. 2) Configuration of Screen You may click the GPS button for GPS reset. 1. Initial Control You may click the Initial button for Factory reset. 2.
- Page 24 Shows system information, including model name and the version 1. System information information on embedded applications. 2.Close Close the current menu and return to main menu. ❖❖ Wi-Fi Network If you click the Network icon on menu, you may see the images as below. A.
-
Page 25: Additional Functions
3. Additional Functions © Multi Tasking Multi Tasking means that you can use several application programs simultaneously. For example, you can use Navigation and Music Player at the same time. If you want Multi-Tasking for those two programs, launch one first. Then press the Menu Button on the front panel and return to the Main Menu. -
Page 26: Using Remote Control (Optional)
Our R-CAM auto detect type is an image detect. If power is on to the camera the iFly 740 pops up the remote camera image automatically. [Note]: A R-Cam cable is supplied separately and only the following pin type jack can be supported ©... -
Page 27: Common Knowledge On Gps
4. Common Knowledge on GPS © What is GPS? GPS (Global Positioning System) is a system to provide services such as position, speed and time measurement using satellite that was developed by U.S. Department of Defense. There are 24 satellites available currently as a standard. <24 satellites available>... -
Page 28: Cause Of Error Occurrence In Gps
© Cause of Error Occurrence in GPS Factors dropping accuracy in position measurement of GPS can be largely classified into 3 parts. First, errors occurring due to structure factors include satellite time error, satellite position error, refraction in ionosphere and troposphere, noise, multi-path, etc.; secondly, there is geometrical error due to arrangement situation of satellite; and lastly, there is SA (Selective Availability) that is the biggest error factor. -
Page 29: Cautions During Use
If other adapters are used, there is a risk of system malfunction and fire. ② Be careful that no foreign materials enter your iFly 740, as this may seriously damage the internal parts. ③ Do not give severe shock to adaptor or dissemble it, as it may cause damage, explosion, or fire.
Need help?
Do you have a question about the iFly 740 and is the answer not in the manual?
Questions and answers