
Related Manuals for Tissue-Tek TEC 5100


Summary of Contents for Tissue-Tek TEC 5100
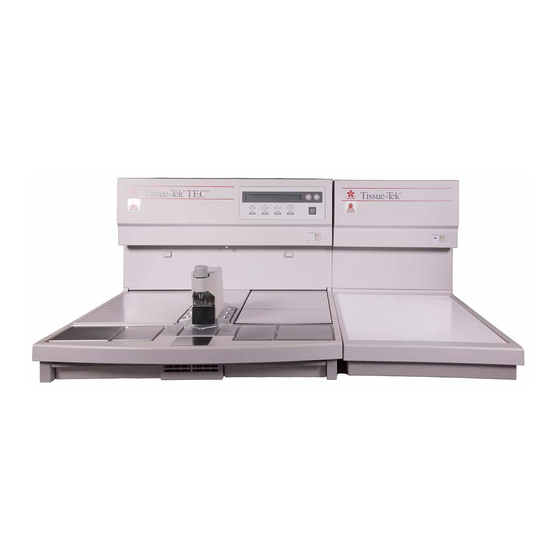
- Page 1 Tissue-Tek ™ ® Tissue Embedding Console System MODEL NUMBERS 5100 (115 VAC, America) 5229 (230 VAC, Europe) 5232 (220-240 VAC, Asia) 5235 (115 VAC, Asia) 5238 (100 VAC, Asia)
- Page 2 IMPORTANT NOTICE If this equipment is used in a manner not specified by the manufacturer, the protection provided by the equipment may be impaired. © 2011 Sakura Finetek USA, Inc. All Rights Reserved Printed in U.S.A. Manufactured for: Sakura Finetek USA, Inc., Torrance, CA 90501 U.S.A. Sakura Finetek Japan Co., Ltd., Tokyo, 135-0007, Japan Sakura Finetek Europe B.V., 2804 AV Alphen aan den Rijn, NL 0001338-02 Rev.C...
-
Page 3: Table Of Contents
TABLE OF CONTENTS Section Page INTRODUCTION General Description ............... 1.1 Features . - Page 4 TABLE OF CONTENTS Section Page TROUBLESHOOTING Error Condition, Cause, Solution ............6.1 CARE OF INSTRUMENT AND MINOR REPAIRS Instrument Care .
-
Page 5: Introduction
INTRODUCTION Section 1 GENERAL DESCRIPTION FEATURES The Tissue-Tek ® TEC™ 5 Tissue A large insulated work space (allows you to manipulate more samples comfortably and effi- Embedding Console System is used to ciently) embed processed tissue in paraffin, form- ing paraffin blocks ready for sectioning. -
Page 6: Operation: Warm Up And Ready Times
INTRODUCTION OPERATION: Cryo Module The Cryo Module is ready to use (reaches set WARM UP and READY TIMES temperature) 15 minutes after the compressor is turned ON. It can also be turned on automatically Embedding Module using the automatic timer mode. When the Embedding Module is turned on, either manually or automatically, 4 hours* is required for Temperature can be set down to -10°C in 1°C incre-... -
Page 7: Specifications
SPECIFICATIONS EMBEDDING CRYO MODULE MODULE Ambient Operating 10° – 40° C 10° – 40° C Temperature and Relative Humidity Range 30% – 85% RH, 30% – 85% RH (noncondensing) (noncondensing) Dimensions/Weight Width 57.5 cm (22.6 in) Width 33.0 cm (13.0 in) Depth 64.2 cm (25.3 in) Depth... -
Page 9: Unpacking, System Description
Tissue-Tek instrument distributor. Unpack each carton. ³ · Missing items?…Dial 1-800-725-8723 (U.S. CARTON CONTENTS Customers, only). If located outside the U.S., contact your nearest Tissue-Tek instrument distributor. ³ Embedding Module · Cryo Module ¿ » » Cryo Module Power Cord ¿... -
Page 10: Embedding Module (Front Panel)
UNPACKING, SYSTEM DESCRIPTION ³ » ¾ · º ¾ ¹ µ ¸ SYSTEM DESCRIPTION Embedding Module (FRONT PANEL) ´ Forceps Warmer Holders – hold forceps; can be set to any temperature at or between ³ Paraffin Chamber – holds up to four liters of 50°–75°C (122°–167°C) using the Hot Plate molten paraffin;... -
Page 11: Embedding Module (Back Panel)
¾ Left and Right Chambers – can be set to any temperature at or between 50° – 75°C (122°–167°F); each chamber can be used for one ³ ³ of the following at any one time (preference depends on your chosen work flow direction): warming area for various sized base molds (close lid to keep heat in and dust out) paraffin bath to keep processed tissue specimens at... -
Page 12: Accessories
UNPACKING, SYSTEM DESCRIPTION Accessories (found inside paraffin chamber; refer to photo on page 2.1) Embedding Module Power Cord – carries electri- cal current to Embedding Module Tampers (1 large and 1 small) – used (as neces- sary) to press tissue firmly against the bottom of the base mold Plastic Scraper –... -
Page 13: Embedding Module (Control Panel)
³ µ ¸ » AUTO/MAN key – selects between automatic Embedding Module and manual operation. The corresponding LED (CONTROL PANEL) will be lit to indicate the current mode of opera- tion. Selecting the Manual Mode of operation ³ LCD Display – consist of two lines of up does not permanently cancel the automatic timer to 40 characters per line. - Page 14 UNPACKING, SYSTEM DESCRIPTION ² HEAT Key – turns the heating components of the Embedding Module ON or OFF. ¶ SET key – allows operator to enter the SETUP mode (See Section 3, Set Up). º EXIT key – allows to return to the previous menu item without saving the changes made in the SETUP mode.
- Page 15 Revised 07/12/11...
-
Page 17: Set Up
INSTALLATION 5. Connect the Cryo Module and Embedding Module power cords into properly grounded out- lets. The power cord with the right angle con- CAUTION: Do not place the Tissue-Tek ® TEC™ 5 nector plugs into the Cryo Module. Embedding System where it would be subjected to direct sunlight and/or direct heat, an open 6. -
Page 18: Attach Magnifying Lens Assembly
SET UP ATTACH MAGNIFYING LENS CONNECT ELECTRIC FORCEPS ASSEMBLY (sold separately, refer to section 8) (sold separately, refer to Section 8) 1. Connect the wire underneath the Embedding 1. Remove the screw from the top of the Module control panel. paraffin dispenser. - Page 19 VERIFY PROPER INSTALLATION If System functions properly: AND SYSTEM FUNCTION press CRYO key to turn off compressor (the mes- sage CRYO IS OFF is back on the display); 1. Set the power switch on the front panel of the Cryo Module to ON ( I ) . continue with “Set Day and Time ”...
-
Page 20: Access Set Up Mode
SET UP ACCESS SET UP MODE SET CRYO MODULE MODE OF OPERATION Access the SET UP mode by pressing the SET key. The Cryo Module can be operated independently of The first two menu items are displayed. the Embedding Module when the MAN/AUTO keys SETUP MODE>... -
Page 21: Change Or View Set Temperatures
SET UP CHANGE OR VIEW SET *Factory set temperatures: Paraffin Chamber 62°C (143.6°F) TEMPERATURES Hot Plate 62°C (143.6°F) Left and Right Chambers 62°C (143.6°F) Temperature settings are retained in memory Cryo Module -5°C (23.0°F) and are not lost when a power failure occurs or Electric Forceps (optional) when the Embedding Module power switch (on the front panel) is set to OFF. -
Page 22: Add Paraffin
SET UP ADD PARAFFIN PLACE BASE MOLDS INTO CHAMBER (Embedding Module) Do not use paraffin with a melting point Place base molds (sold separately, see Section 8) into higher than 75°C (167°F).* empty chamber (either right or left depending on your chosen work flow direction). -
Page 23: What Happens When Power Is Turned Off
WHAT HAPPENS WHEN POWER WHEN TO SET POWER SWITCH IS TURNED OFF ON FRONT PANEL TO OFF Embedding Module Set power switch to OFF when modules are not in When the power is turned off for maintenance proce- use for extended periods of time (e.g., over a month), dures, etc. -
Page 25: Automatic Timer (Optional Use)
AUTOMATIC TIMER (optional use) Section 4 ON AND OFF TIMES FOR Days already programmed will be annoted by a “>” symbol. The current day of the week will be high- SELECTED DAYS OF THE WEEK: lighted. In the above example, the Automatic Timer can be preset* will turn on and off the TEC 5 from Monday to can vary daily (for up to 7 days) -
Page 26: Checking The Status Of The Automatic Timer (What Time Is Set?)
AUTOMATIC TIMER (optional use) CHECKING THE STATUS OF THE AUTOMATIC TIMER (WHAT TIME IS SET?) To view these times whatever the current operating mode is, press the SET key and use the arrow keys to move the cursor to item “3. TIMER”. Press the ENTER key. -
Page 27: Embedding Procedure
EMBEDDING PROCEDURE Section 5 EMBEDDING PROCEDURE Select (and remove from heated chamber) one base mold that would best fit the tissue(s) in the (Example) cassette. Place under the paraffin dispenser. NOTE: The following procedure is an example While holding base mold under paraffin dis- only. - Page 28 NOTE: The paraffin block should easily release from the base mold. If not, the base mold may need cleaning. Use of the Tissue-Tek ® Mold Release Concentrate (product code 4141) will make demolding easier.
-
Page 29: Troubleshooting
Power indicator/other indicators will not illuminate ........ 6.4 In the event this section cannot assist you in solving your instrument problem, call: 1-800-725-8723 (U.S. Customers, only) If located outside the U.S., contact your nearest Tissue-Tek ® instrument distributor or representative. Revised 07/12/11... -
Page 30: Error Condition, Cause, Solution
TROUBLESHOOTING CRYO MODULE ERROR CONDITION CAUSE SOLUTION Alarm (tone) sounds for Cryo Module has Turn Embedding Module power to OFF. Verify that 10 seconds or error malfunctioned or Cryo the Cryo Module is connected to the Embedding . message appears on the Module power is OFF or Module. - Page 31 EMBEDDING MODULE ERROR CONDITION CAUSE SOLUTION Power indicator will not Power outage occurred Check to make sure: illuminate or Cryo Module has power cord is securely plugged into a “live” malfunctioned. power outlet. the power switch on the front panel of Cryo Module is set to ON.
-
Page 32: Paraffin Will Not Dispense Correctly
TROUBLESHOOTING EMBEDDING MODULE ERROR CONDITION CAUSE SOLUTION Paraffin will not Paraffin may not be Check that the LCD display shows <READY> dispense molten. Check the temperature of the room; adjust temperature if necessary. If using the automatic timer, check to verify that the correct AM or PM “On”... -
Page 33: Care Of Instrument And Minor Repairs
INSTRUMENT CARE Set the power switch on the front panel of both Modules to OFF when modules are not in use for long periods of time. The Tissue-Tek ® TEC™ 5 Embedding and Cryo Modules contain sensitive electronic parts. During the day, when the Cryo Module is not being used, turn OFF the compressor (use CRYO Handle modules with extreme care. -
Page 34: Daily Maintenance
CARE OF THE INSTRUMENT DAILY MAINTENANCE Cryo Module Embedding Module Turn off compressor (press CRYO key on REPLENISH PARAFFIN Embedding Module Control Panel). WARNING: MOLTEN PARAFFIN MAY Allow cooling plate to reach ambient temperature. CAUSE BURNS. DO NOT OVERFILL PARAFFIN CONTAINER. Remove condensate from cooling plate (use an absorbent cloth/towel). -
Page 35: Periodic Maintenance (As Required)
PERIODIC MAINTENANCE 4. WARNING: BEFORE PROCEEDING, MAKE SURE THE HEAT KEY IS OFF. (AS REQUIRED) Allow paraffin (in chamber where tray was locat- Embedding Module ed) to solidify. Using the plastic scraper, remove as much solidified paraffin as possible from this CLEAN TRANSFER TRAY (IF USED AS chamber. - Page 36 CARE OF THE INSTRUMENT CLEAN THE FOLLOWING (AND THEN Using a clean cloth, remove loose debris from the chamber used to store/heat base molds. ADD CLEAN PARAFFIN WHERE APPROPRIATE) 7. Using a xylene-dampened cloth, wipe exterior Paraffin Chamber surfaces, ventilation panels and inside surfaces Paraffin Filter of paraffin chamber, paraffin bath, base mold Forceps Wells...
- Page 37 12. Dry paraffin filter and metal ring with a soft, To remove paraffin debris: clean, dry cloth. 1. Dampen a soft cloth with xylene. 13. Replace paraffin filter. Replace metal ring (place 2. Wipe assembly to remove paraffin and other debris. on top of filter).
-
Page 38: Minor Repair
CARE OF THE INSTRUMENT MINOR REPAIR Replacing Light Bulbs Tools Required: None Light Bulbs Required: Use product code 1553 to reorder. Two light bulbs per package. WARNING: Set the power switch on the front panel of the Embedding Module to OFF. Unplug the power cord. -
Page 39: Service And Replacement Parts
SERVICE AND Section 8 REPLACEMENT PARTS SERVICE When you have a problem with either module: Refer to “Troubleshooting” (Section 6). If Section 6 cannot assist you in solving the prob- lem, continue with “How To Report the Problem” (next page). Revised 07/12/11... - Page 40 Call 1-800-725-8723 for help (U.S. Customers, only). 3. Is the “POWER” indicator lit? If located outside the U.S., contact your nearest 4. Does the proper LED Tissue-Tek ® instrument distributor or representative. illuminate when the MANUAL MODE ON/OFF key is pressed? 5.
-
Page 41: Accessories
REPLACEMENT PARTS ACCESSORIES (Available for use with your Tissue-Tek Tissue Part Part Number* Embedding Console System) Plastic Scraper 1550 ® ® Tissue-Tek Uni-Cassette Tamper, Large (3/case) 1551 Embedding Cassettes Tamper, Small (3/case) 1552 ® Tissue-Tek Light Bulbs (2/case) - Page 42 Tissue-Tek – has 1 mm pores (no slots) Biopsy *Catalog is available in the U.S., by dialing 1-800-725-8723. If located outside the U.S., contact your nearest Tissue-Tek Cassette – reduces the need to wrap instrument distributor or representative. specimens which reduces risk of specimen loss –...
Need help?
Do you have a question about the TEC 5100 and is the answer not in the manual?
Questions and answers