Table of Contents
Advertisement
Quick Links
Instruction Manual
You must read and understand this manual
before installing, operating, or servicing this
product. Failure to understand these
instructions could result in an accident causing
serious injury or death.
Keep these instructions for future reference.
TABLE OF CONTENTS
Safety Alert Symbol .............................................. 2
Explanation of Symbols Used ............................. 2
Important Safety Instructions .............................. 3
Introduction .......................................................... 4
Package Contents ................................................ 4
Getting to Know Your ACR®MiniPRO ................. 5
Specifications ....................................................... 6
Equipment Setup and Start-up ............................. 7
Power Input ................................................... 7
Starting Up ......................................................7
Heater Output Cord Attachment ..................... 7
Temperature Sensor Attachment .................... 8
Vacuum Hose Connect ....................................8
Vacuum Venturi ................................................ 8
Touchscreen Operating Instructions ....................9
Operating Menu .............................................. 10
Starting a Program ....................................... 11
Safely Shut Down .......................................... 12
Save a Log File ............................................ 12
Print a Snapshot .......................................... 12
Hold a Program ............................................ 12
Cancel a Program with a Fall ....................... 12
Cancel a Program ........................................ 13
View Plot ...................................................... 13
Alarms ......................................................... 14
Program Menu ................................................ 14
Write a New Program ................................... 15
Edit an Existing Program.............................. 19
Delete a Program ......................................... 19
Edit an Existing Program while Running ....... 20
Change Program Password ......................... 20
System Menu .................................................. 21
Save a Single Log File to USB Drive ............ 21
Save All Log Files to USB Drive .................... 22
Delete a Single Log File ............................... 22
Delete All Log Files ...................................... 22
Save All Program Files to USB Drive ............ 23
Load All Program Files from USB Drive ........ 24
Shut Down System ....................................... 24
Change System Date and Time .................... 24
Change Language ......................................... 25
Change Administrator Password .................. 25
Delete All Program Passwords ..................... 26
Factory Settings ........................................... 26
Cleaning and Decontamination ......................... 26
Equipment Maintenance .................................... 26
Warranty .............................................................. 28
®
© BriskHeat
Corporation. All rights reserved.
®
ACR
3 MiniPRO™ Hot Bonder
SAFETY ALERT SYMBOL
The symbol above is used to call your
attention to instructions concerning your
personal safety. It points out important
safety precautions. It means
"ATTENTION! Become Alert! Your
Personal Safety is involved!" Read
the message that follows and be alert to
the possibility of personal injury or
death.
Immediate hazards which WILL result
in severe personal injury or death
Hazards or unsafe practices which
COULD result in severe personal
injury or death
Hazards or unsafe practices which
COULD result in minor personal
injury or property damage.
SAVE THESE
INSTRUCTIONS!
Additional copies
of this manual are
available upon
request.
2
Advertisement
Table of Contents

Subscribe to Our Youtube Channel
Related Manuals for BriskHeat ACR 3 MiniPRO Hot Bonder

Summary of Contents for BriskHeat ACR 3 MiniPRO Hot Bonder
-
Page 1: Table Of Contents
You must read and understand this manual available upon before installing, operating, or servicing this product. Failure to understand these request. instructions could result in an accident causing serious injury or death. Keep these instructions for future reference. ® © BriskHeat Corporation. All rights reserved. -
Page 2: Important Safety Instructions
Hot Bonder Kits with Heat Curing Blankets also include Failure to observe these warnings may result in Failure to observe these warnings may various composite heat curing blankets. See www.briskheat.com for complete electric shock, risk of fire, and personal injury or result in personal injury or damage to details. -
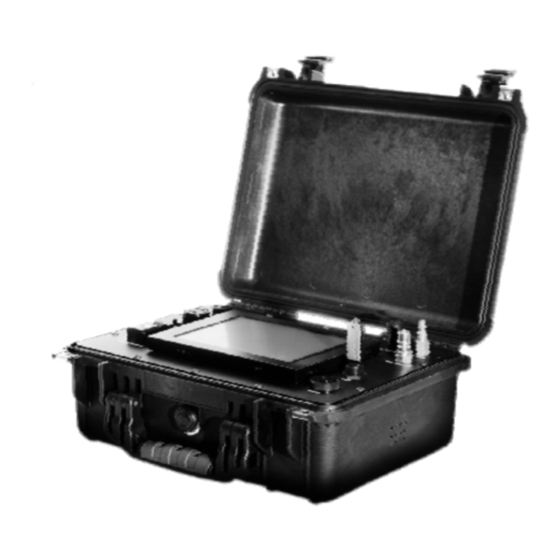
Page 3: Getting To Know Your Acr®Minipro
Vacuum Pump Switch 10 thermocouple sensor inputs per zone Accepts mini Type J thermocouple connectors Power Input Receptacles USB Data Port Heater Output Receptacles ® ® © BriskHeat Corporation. All rights reserved. © BriskHeat Corporation. All rights reserved. -
Page 4: Equipment Setup And Start-Up
Turn the locking ring clockwise 1/2 turn to lock the cord into place. The cord must be fully inserted and locked for proper operation. ® ® © BriskHeat Corporation. All rights reserved. © BriskHeat Corporation. All rights reserved. -
Page 5: Touchscreen Operating Instructions
Vacuum High Alarm: shutdown hot bonder. Displays the high vacuum alarm set point Software Version Number: The newest version of the software can be found at www.briskheat.com. Vacuum Pressure: Displays the actual vacuum measured Vacuum Low Alarm: Displays the low vacuum alarm set point ®... -
Page 6: Starting A Program
Using the keyboard on the data entry screen, enter the required data and touch ENTER. When all necessary data has been entered, press the ENTER button and the program starts. ® ® © BriskHeat Corporation. All rights reserved. © BriskHeat Corporation. All rights reserved. -
Page 7: Cancel A Program
See page 19 for instructions to edit existing program parameters. Red - High / Low Shut Down Alarm Limit Touch at top of screen to return to zone operating screen. ® ® © BriskHeat Corporation. All rights reserved. © BriskHeat Corporation. All rights reserved. -
Page 8: Write A New Program
To enter a password: touch the password field, enter the password, and then press enter. Select the desired temperature profile: FIXED, SINGLE, DUAL, TRIPLE, or MONITOR. ® ® © BriskHeat Corporation. All rights reserved. © BriskHeat Corporation. All rights reserved. - Page 9 16. Press the CONTINUE TO STEP 3 button. NOTE: The end of cycle temperature must be above the ambient temperature for it to complete. ® ® © BriskHeat Corporation. All rights reserved. © BriskHeat Corporation. All rights reserved.
-
Page 10: Edit An Existing Program
Access the PROGRAM menu. Select the program to delete by touching the drop down menu for STORED PROGRAM NAME. Touch DELETE button to delete program. Touch YES to confirm. ® ® © BriskHeat Corporation. All rights reserved. © BriskHeat Corporation. All rights reserved. -
Page 11: System Menu
Touch DELETE ALL FILES button. console. Touch OK button. Touch OK button to confirm Follow remaining on-screen commands. Save a Single Program File to USB Drive: ® ® © BriskHeat Corporation. All rights reserved. © BriskHeat Corporation. All rights reserved. -
Page 12: Save All Program Files To Usb Drive
Touch LOAD SELECTED PROGRAM FROM USB DRIVE button. Follow remaining on-screen commands. Load All Program Files from USB Drive: This function loads all stored programs from a USB flash disk (thumb drive) to ® ® © BriskHeat Corporation. All rights reserved. © BriskHeat Corporation. All rights reserved. -
Page 13: Change Language
Change Administrator Password: Factory Settings: This function permanently changes the administrator password: Requires ® This function is for BriskHeat factory only. It sets up the initial parameters. administrator password. Touch the SYSTEM tab at the top of the screen. CLEANING AND DECONTAMINATION Touch the PASSWORD ADMINISTRATION button. - Page 14 3 MiniPRO™ Hot Bonder WARRANTY INFORMATION Notes: BriskHeat warrants to the original purchaser of this product for the period of eighteen (18) months from date of shipment or twelve (12) months from date of installation, whichever comes first. BriskHeat’s obligation and the exclusive remedy under this warranty shall be limited to the repair or replacement, at BriskHeat’s option, of any parts of the product which may prove defective under...
Need help?
Do you have a question about the ACR 3 MiniPRO Hot Bonder and is the answer not in the manual?
Questions and answers
when I power up my hot bonder error comes up says "No Signal"