Advertisement
Advertisement
Table of Contents

Related Manuals for iBasso DX120

Summary of Contents for iBasso DX120
- Page 1 Audio USER GUIDE...
-
Page 2: Table Of Contents
Contents Package components Main features Specifications Names of parts & functions Basic operation Power on/off Power on/off the screen Reset Charging Connecting to a computer to work as a USB DAC User interface Music playback screen My music Settings Firmware update Certifications... -
Page 3: Package Components
Package Components : DX120 Clear TPU protection case Coaxial cable Burn-in cable USB type-C cable Screen protector Quick start guide Warranty card... - Page 4 Burn-in cable: Plug the burn-in cable into the PHONE out socket, and keep playing music to burn-in the DX120. The burn-in process helps the DX120's sound reach its full potential by forming the capacitors and stabilizing the electronic components used. Use a normal listening volume setting when using the burn in cable.
-
Page 5: Main Features
Main Features: Model: DX120 high performance digital audio player. OS: Mango OS. DAC: AK4495. Output Ports: 2.5BAL,3.5PO,3.5LO,3.5COAX. Screen: 3.2inch 480*800 IPS screen with capacitive touch. Sample Rate: PCM:8kHz-384kHz(8/16/24/32bits) native DSD: DSD64/128. System Clock: Fully synchronization technology with TXCO and PLL. -
Page 6: Specifications
Specifications: 2.5mm Balanced: Output Voltage: 3.6Vrms Frequency Response: 10Hz-45kHz+/-1dB THD+N: 0.00028%,-111dB (without load) 0.00032%,-110dB(32Ω@2.4Vrms) DNR: -117dB S/N: 117dB Crosstalk: -116dB 3.5mm Single Ended: Output Voltage: 1.8Vrms Frequency Response: 10Hz-45kHz+/-1dB THD+N: 0.00042%,-107dB (without load) 0.00056%,-105dB(32Ω@1.2Vrms) DNR: -115dB S/N: 115dB Crosstalk: -115dB Output Impedance: 0.24ohm 3.5mm Line Out:... -
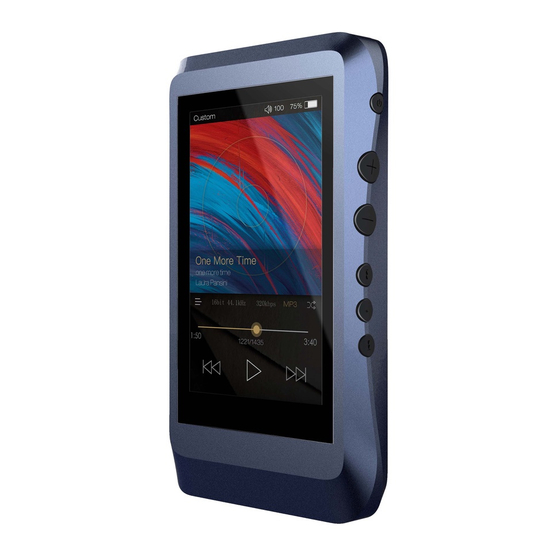
Page 7: Names Of Parts & Functions
Line Out Port 3.5 Single Ended Coaxial Output Port: Use the furnished coaxial cable to play music stored in the DX120. Coaxial output has the highest output priority which would close the phone out or line out when coaxial cable plugged in. - Page 8 Connect the DX120 to an OTG storage device to play music files. Connect the DX120 to a PC or a Mac computer to work as a USB DAC. Micro SD Card Slot: Insert a Micro SD card into the DX120 to access its stored files.
- Page 9 Plug in the earphone and output sound through the phone jack. Line Out Port: Use a 3.5 to 3.5 interconnect cable to play music stored in the DX120 on an external amplifier with a line in port. Micro SD Card Slot USB Type-C...
- Page 10 Power: Short Press - Power the LCD screen on and off. Long Press - Power the DX120 on and off. Volume+: Short - press to increase one step of the volume. Long - press to continuously increase until its maximum.
-
Page 11: Basic Operation
Basic Operation: Power on/off: Press and hold the power button to power on. After the DX120 is powered on, a long press of the Power button to power off. Powering the screen on/off: Single press the power button to power the screen on/off... -
Page 12: Connecting To A Computer To Work As A Usb Dac
Connecting to a computer to work as a USB DAC The DX120 can work as a USB DAC for Windows PC, Mac computer, and Linux computer. It is drvier free on Mac computer and Linux computer. For Windows PC, one can download the driver from iBasso.com and install it following the steps included with the download, before using the USB DAC function. -
Page 13: User Interface
User Interface: The DX120 User interface is composed of fours parts:Music playback screen (homepage), my music, settings, and quick setting menu. On the homepage, one can swipe the screen to right for My Music, or swipe the screen to left for Settings. It does not matter what sub-menu you are on of My Music, one can swipe to the left to go back to homepage. -
Page 14: Music Playback Screen
Music Playback Screen: Volume indicator Battery indicator EQ indicator Album artwork Track name Artist name Bit rate & Sample rate Album name Play mode Menu icon Track number Progress bar Play/Pause previous/Rewind Next/Fast forward... -
Page 15: My Music
My Music:... - Page 16 Now Playing: Now Playing Return Button: Press the Return button on the top left of the My Music or Settings and the screen will move back one page at a time until the home page is once again displayed.
- Page 17 All Music: All Music Sorting Option: Press the icon on the top right to unfold the options. One can choose to sort the songs by track title, album name, artist name, and added time.
- Page 18 Album: Press the icon on the top right to switch to album artwork view. Allbum Allbum Play Playlist Delete All Music/Album/Artist/Genre: Long press a row to pop up the option screen of play music, add to playlist, music info, and delete.
- Page 19 Now Playing: Click the “Plus” button to create a new playlist. The DX120 supports M3U playlist. Please see page 28 regarding to how to import and export the playlist. Playlist Playlist1 Playlist2...
-
Page 20: Settings
Settings:... - Page 21 Equalizer: One can set the equalizer as desired. Press the “reset” to reset a pre-set EQ.
- Page 22 L/R Balance: Slide to R to decrease the volume in the right Channel. Slide to L to decrease the volume in the Left Channel. L/R Balance...
- Page 23 Gapless: One can enable the gapless to eliminate the gap between two tracks. Gapless Gapless on Gapless off Song Info: This shows the detailed information of the currently playing song.
- Page 24 2. DAC.: Allows the DX120 to be used as a USB-DAC. Please see page 11 “Connecting to a computer for USB DAC function” , regarding to how to use the DX120 as a USB DAC. 3. Charge Only: With this option, the computer would charge the DX120 when the DX120 is connected.
- Page 25 After a full media scan, or rescan the library, you can go to Directory and select a song under a folder. After this folder is played, the DX120 will play the next folder. Advanced...
- Page 26 Adjust the screen brightness, and change the wallpaper. 3.Power Management: Auto Power Off: Set the amount of time to power off the DX120 when it stays idle. Sleep Timer: Set the amount of time to power off the DX120, no matter if it is working or idle. The sleep timer would turn off...
-
Page 27: Firmware Update
5. Click “OK” to start the firmware update. 6. The DX120 will reboot after firmware update completed. Select Settings→Advanced→Factory Reset to reset the DX120. This is to avoid conflicts with residual settings from the previous firmware. -
Page 28: Faq
Yes.The DX120 supports Type-C QC2.0, and MTK-PE+ rapid charge. With rapid charge, the DX120 can be fully charged in two hours. The DX120 also can be charged by computer throught the USB port or any USB charger with 5V output voltage and 1A or above output current. - Page 29 9.My DX120 cannot be powered on. What should I check? Usually, it is low battery issue. Charge it for a while, then you should able to power on the DX120. Email us if it is not a low battery issue.
Need help?
Do you have a question about the DX120 and is the answer not in the manual?
Questions and answers
My DX120 is approximately five years old. It has just shut down completely (approx 90%charge) and will not switch back on. If I hold the power switch, the ibasso logo appears as though turning on, but then shuts off. What can you suggest I try?