
Summary of Contents for E. I. Medical Imaging Ibex EVO
-
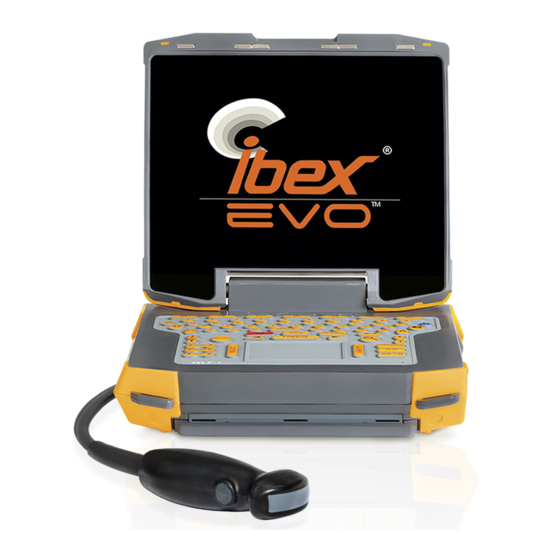
Page 1: Ibex® Evo® Portable Ultrasound User Guide
Ibex® EVO® Portable Ultrasound User Guide Published 9/17/2018 E.I. Medical Imaging User Manual 391250, Rev. 4 ... - Page 2 Ibex® EVO® Portable Ultrasound User Guide E.I. Medical Imaging Proprietary and Confidential – Do Not Copy or Distribute. For Internal Use Only. Copyright© 2018 E.I. Medical Imaging®. All rights reserved. The information presented in this manual is subject to change without notice and does not represent a commitment on the part of E.I. Medical Imaging. The hardware and software described herein are furnished under a license or nondisclosure agreement. The hardware, software, and manual may be used or copied only in accordance with the terms of this agreement. It is against the law to reproduce, transmit, transcribe, store in a retrieval system, or translate into any medium - electronic, mechanical, magnetic, optical, chemical, manual, or otherwise - any part of this manual or software supplied with the Ibex EVO for any purpose other than the purchaser’s personal use without the express written permission of E.I. Medical Imaging. E.I. Medical Imaging, the E.I. Medical Imaging Logo, Ibex, EVO, Insite, and Durascan are registered trademarks of E.I. Medical Imaging. EVOStream is a trademark of E.I. Medical Imaging. All other brand or product names are trademarks or registration trademarks of their respective companies or organizations. Contact Information: E.I. Medical Imaging 110 12TH ST SW UNIT 102 LOVELAND CO 80537-6396 toll-free/1.866.365.6596 phone/970.669.1793 fax/970.669.1902 http://www.eimedical.com/ E-mail: info@eimedical.com Supporting Software Version: 1.5.0.3 ©2018 E.I. Medical Imaging EVO User Manual...
-
Page 3: Fcc Regulatory Information
FCC Regulatory Information FCC Regulatory Information Contains FCC ID: Z64-WL18SBMOD Contains IC: 451I-WL18SBMOD This device complies with Part 15 of the FCC Rules subject to the following two conditions 1) This device must not cause interference, and; 2) This device must accept all interference, including interference that may cause undesirable operation. WARNING: Modification of this device without consent of the responsible party may void the users right to operate this device. EU Compliance Usage restrictions apply. See documentation ... - Page 4 FCC Regulatory Information NOTE: a) USA-Federal Communications Commission (FCC) This equipment has been tested and found to comply with the limits for a Class B digital device, pursuant to Part 15 of FCC Rules. These limits are designed to provide reasonable protection against harmful interference in a residential installation. This equipment generates, uses, and can radiate radio frequency energy. If not installed and used in accordance with the instructions, it may cause harmful interference to radio communications. However, there is no guarantee that interference will not occur in a particular installation. If this equipment does cause harmful interference to radio or television reception, which can be determined by turning the equipment off and on, the user is encouraged to try and correct the interference by one or more of the following measures: Reorient or relocate the receiving antenna. Increase the distance between the equipment and the receiver. Connect the equipment to outlet on a circuit different from that to which the receiver is connected. Consult the dealer or an experienced radio/TV technician for help. Caution: Exposure to Radio Frequency Radiation. This device must not be co-located or operating in conjunction with any other antenna or transmitter. b) Canada - Industry Canada (IC) This device complies with RSS 210 of Industry Canada. Operation is subject to the following two conditions: (1) This device may not cause interference, and (2) This device must accept any interference, including interference that may cause undesired operation of this device. L ' utilisation de ce dispositif est autorisée seulement aux conditions suivantes: (1) Il ne doit pas produire d'interference et (2) l' utilisateur du dispositif doit étre prêt? Accepter toute interference radioélectrique reçu, m?me si celle-ci est susceptible de compromettre le fonctionnement du dispositif. Caution: Exposure to Radio Frequency Radiation. The installer of this radio equipment must ensure that the antenna is located or pointed such that it does not emit RF field in excess of Health Canada limits for the general population; consult Safety Code 6, obtainable from Health Canada's website http://www.hc-sc.gc.ca/rpb. ©2018 E.I. Medical Imaging EVO User Manual...
-
Page 5: Eu Declaration Of Conformity
(Address): Loveland, Colorado 80537, USA Declares that the product: Portable Ultrasound Device for Veterinary Use: Ibex EVO Conforms to the following Directives: Low Voltage Directive 2006/95/EC, Test Report No. EIMI-Ibex-EVO-60601-1 Electromagnetic Compatibility Directive 2014/30/EU Test Report No. EI19032016IEC 04/06 R&TTE Directive 1999/5/EC Test Report No. ER3N2752 TI Module WL1835MODCOM8B EMF Directive 1999/519/EC Test Report No. -
Page 6: Table Of Contents
Table of Contents Table of Contents Ibex® EVO® Portable Ultrasound User Guide FCC Regulatory Information EU Declaration of Conformity Table of Contents 1: Introduction Product Symbols Key Features Key Features Intended Uses Essential Performance Intended Use 2: Getting Started System Specifications Supported Transducers and Available Accessories About the EVO System Physical Interfaces Battery Compartment Powering on the System Transducers Interacting with the EVO Keyboard Side Keyboard... - Page 7 Table of Contents Remote Battery Menus The On-screen Menus Home Menu Super Menu Moving around the screens Using the On-Board Help Examples Training 3: Configuration Welcome Screen Setting Day and Time Setting User Presets Renaming User Presets Changing the Default User Preset Changing the Current Preset/User Resetting Users Adjusting Audio Settings Adjusting Video Settings Adjusting Misc Options Setting Annotations B-Mode Scan Options Enabling WiFi WiFi Indicators To connect to a network: To Enable the EVO as a Wireless HUB Enabling Bluetooth RFID Support 4: Patient Management Entering Patient Identification Information Searching for a Patient 5: Managing Images Freezing Images Saving Images and Cineloops Saving Images...
- Page 8 Table of Contents Saving Cineloops Recalling Images and Cineloops Recalling Saved Images and Cineloops Renaming Images Deleting Images Annotating and Measuring Images Adding Text Labels to Images Adding Text to Saved Images Working with Dual Images Carcass Merit Setting up Carcass Merit Animal Entry N- New Animal Setup Repro Workflow 6: Manipulating Images About Gain Controls Using Auto GAIN B+M Mode Scanning Adjusting Focal Zones Doppler Mode Color Mode Color Doppler Scan Options Power Mode Power Doppler Scan Options Scan Settings for Power Doppler Pulse Wave (PW) Pulse Wave Scan Settings 7: Measuring Images Taking Distance Measurements To associate a distance table to the measurement: Taking Area Measurements PW doppler: PI / RI calculation 8: Exporting Files Saving Files to a USB Memory Stick File Sharing Setting up the EVO...
- Page 9 Table of Contents From your PC 9: EVOStream - Sharing live Images Connecting over WiFi Direct Configuring iPhone® or iPad® Configuring an Android™ Device 10: Advanced System Operations Updating System Firmware Identifying System Firmware Version Downloading New System Firmware Installing EVO System Firmware Resetting your EVO Resetting the System Restoring a Backup 11: Cleaning and Maintaining the EVO Disinfectant List EVO System | Probes/Transducers | Goggles: ICE Extension Handle: InSite2 / I nSite 3 Headset Care and Maintenance Linear Transducer Care and Maintenance Warranty Appendix - Fetal Tables EVO User Manual ©2018 E.I.
-
Page 10: 1: Introduction
1: Introduction 1: Introduction Please read all the instructions and warnings before using the EVO® Portable Ultrasound system. The Ibex EVO Portable Ultrasound User Guide provides an overview of the features and functionality of the EVO ultrasound system. This guide provides you with the information you need to quickly set up, operate, and maintain the EVO. The E.I. Medical Imaging Ibex family of ultrasound scanners are internally battery powered veterinary use ultrasound devices. An external AC adapter is provided for charging the internal battery and powering the Ibex scanners. This guide does not cover the theory or science of diagnostic sonography or clinical veterinary practices. It is intended for users already familiar with ultrasound techniques. ©2018 E.I. Medical Imaging EVO User Manual... -
Page 11: Product Symbols
1: Introduction Product Symbols This table describes the symbols marked on the device. Symbol Name Description You must read, understand, and follow all instructions in this manual including all warnings, cautions, and precautions before using the medical device in veterinary practice. Caution Scanner: Is for veterinary use only. Is not user serviceable. Contact E.I. Medical Imaging if defective or damaged. Use only specified AC adapter/charger. The Probe (Patient Applied Part) is Type BF (floating from Type BF Equipment electrical ground) per the Standard EN 60601-1, which offers a specific level of safety. The system is compliant with the RoHS RoHS Compliant guideline 2002/95/EC Device complies with the European Union Low Voltage Directive (LVD) and EMC directive. Alternately switch the device between the power-on and Standby standby states. USB 2.0 Host I/O Port current limited (100ma per port) for connection to USB FLASH DRIVE file storage and supported peripherals. EVO User Manual ©2018 E.I. Medical Imaging... - Page 12 1: Introduction Symbol Name Description All components (e.g. PCBs) are lead free and can be used in Lead Free lead free solder processes. Protection from dust and splashing from any direction. Ingress Protection Protection from dust and low pressure jets of water from any direction. Do not dispose This device is not allowed to be disposed in domestic waste. Before attempting to use this device, consult the manual Read Manual and/or the quick start guide. ©2018 E.I. Medical Imaging EVO User Manual...
-
Page 13: Key Features
1: Introduction Key Features The Ibex EVO is designed to be flexible and easy to use. Key Features Ibex EVO advanced imaging software Full range of imaging modes: B, B+M, PW, Color, Power Doppler Ruggedized DuraScan® transducers 2-14 MHz Fast boot time for more uptime Customized, veterinary-specific exam presets EVOStream™ W iFi R emote Scanning App EVO User Manual ©2018 E.I. Medical Imaging... -
Page 14: Intended Uses
1: Introduction 8.4 inch sealed, sunlight-readable LCD Display Sealed, LED backlit keyboard 2+ hour battery run time (field swappable) Lightweight 6.1 lbs (2.8 kg) Engineered with DuraScan® technology Continuous record, color doppler, pulse wave doppler, multibeam, harmonic imaging, preset exam types. Speckle reduction. Help system Intended Uses The Ibex EVO is intended for veterinary use; Bovine, Equine, Companion Animal, Swine, Exotic, Marine and Small Ruminants Essential Performance The system can provide 2D ultrasound echo and flow imaging as an aid in diagnosis, data processing and guidance of ovum pickup (OPU). The system uses an OPU guide and collection needles. The system can perform simple geometric measurements and calculations. The system is free from artifacts or distortion in the image or error of a displayed value, which can be attributed to a physiological effect and which may alter the diagnosis. The system displays correct numerical values associated with the diagnosis to be performed. The system does not generate unintended or excessive ultrasound output or transducer surface temperature. Intended Use The system is intended for diagnostic ultrasound imaging or fluid flow analysis of animals, data processing and guidance of OPU and collection needles. The system is for Veterinary Use Only. The system performs simple geometric measurements and calculations in Veterinary Diagnostic Imaging Modes of Operation B-Mode M-Mode ... -
Page 15: 2: Getting Started
2: Getting Started 2: Getting Started System Specifications About the EVO System Interacting with the EVO Physical Operations Menus The On-screen Menus Moving around the screens Using the On-Board Help Training EVO User Manual ©2018 E.I. Medical Imaging... -
Page 16: System Specifications
2: Getting Started System Specifications The following table lists the system specifications for the EVO scanner. Applications Bovine, Equine, Companion Animal, Swine, Exotic, Marine and Small Ruminants Imaging Modes B, B+M, M, PW, Color, Power Doppler 9 x 8.5 x 3 inches System 22.9 x 21.5 x 7.6 cm Dimensions Lightweight 6.1 lbs (2.8 kg) Ruggedized DuraScan® transducers 2.0MHz – 14.0MHz Transducer Support for 2.0 MHz to 14 MHz 128 Element Linear/Curved Linear probes Support for user selectable scan directions USB 2.0 image storage and recall; Connectivity Wireless (802.11) connectivity and Bluetooth connectivity 8.4” diagonal LCD SVGA resolution. Display 21.34 cm 720P HDMI, NTSC/PAL analog video, EVOStream Li-ion battery 2+ hours Power Stand alone external battery charger available; AC Power Adapter for charging or operating; Output: 15V DC 4A Unlimited caliper sets for distance measurements Continuous area of circumference Grid option for quick measurements Touch pad for navigation Scan Calculation tables Measurements On-screen text annotations and arrows Dual image feature for side-by-side comparisons Tendon calculations: % Lesion | % change | % difference. Cardiac calculations: FS | LA/AO 480 frame cineloop memory (60 frames/second frame rate recording) Audio Tags can be stored with image... - Page 17 2: Getting Started Streaming Video via 802.11x using H.264 codec to iOS and Android devices. EVOStream™ W iFi R emote Scanning App Customized, veterinary-specific exam presets Operating EVO: 0° to 40° C Environment InSite2 / InSite 3Headset: 0° to 40° C Storage and Transportation -20° to 50° C Environment EVO User Manual ©2018 E.I. Medical Imaging...
-
Page 18: Supported Transducers And Available Accessories
2: Getting Started Supported Transducers and Available Accessories AC power supply for EVO ultrasound 391950 EVO ultrasound scanner 390200 Bluetooth Remote for EVO 390001 Lithium Ion rechargeable smart battery pack for EVO 391901 Insite2 headset for ultrasound 290701 i3 headset for ultrasound 390700 L6E transducer for EVO, 2m cable 390400 L6E transducer for EVO, 3m cable 390405 MC8E transducer for EVO, 2m cable 390410 MC8E transducer for EVO, 3m cable 390412 L14x transducer for EVO, 3m cable 390417 MC8OPU transducer for EVO, 2m cable 390420 CL3E transducer for EVO, 3m cable 390430 L3ASE transducer for EVO, 3m cable 390450 CLI3E transducer for EVO, 3m cable 390470 C6E transducer for EVO 390440 C9E transducer for EVO, 2m cable 390445 C90PU-HD, transducer for EVO, 2m cable... -
Page 19: About The Evo System
2: Getting Started About the EVO System The EVO system components provide protection against dust and water entering the enclosures as defined in the IEC (International Electromechanical Commission) standards. The EVO has earned a rating of IP54 and is protected against dust and against low-pressure jets of water sprayed from all direction The IEC standard defines degrees of protection expressed as “IP” followed by two numbers, e.g. IP54. These numbers represent the degree of protection. The first digit shows the degree to which the equipment is protected against human contact and solid particles. The second digit indicates its degree of water protection. NOTE: Refer to the section, Cleaning and Maintaining the EVO on page 100, for proper cleaning instructions. Physical Interfaces The EVO has four inputs: Use the 84-pin custom interface to connect the transducers. Use the 8-pin male interface to connect either the headset or the DC power input. Two USB ports. USB supports storage and peripherals. There is no charging capability. One HDMI 720 p EVO User Manual ©2018 E.I. Medical Imaging... -
Page 20: Battery Compartment
2: Getting Started Battery Compartment The EVO system houses the battery in a water-resistant system access compartment. To seal the compartment: 1. Angle to panel inside the metal strip. 2. Slide the metal latch towards the left until it clicks into the locked position. ©2018 E.I. Medical Imaging EVO User Manual... -
Page 21: Powering On The System
2: Getting Started Powering on the System The power button is located on the side keyboard, so it is conveniently accessed when the monitor is open or closed. Press the green power button to power on the EVO. When used near an outlet, the EVO system may be powered directly (with or without the internal Li-Ion Battery Pack installed) by the external Power Supply/Battery Charger or it may be used outdoors (unsheltered locations) as an internally powered system with a charged internal Li-Ion Battery Pack. EVO User Manual ©2018 E.I. Medical Imaging... -
Page 22: Transducers
2: Getting Started Transducers The EVO ultrasound supports transducers. A transducer connects to the scanner with its 84-pin male connector. For more information about attaching transducers, see Attaching Transducers on page 32 Caution: It is critical to power-off or freeze the scanner before changing the transducer types. Failure to do so may cause unexpected behavior. For more information about transducers, contact an E.I. Medical Representative. ©2018 E.I. Medical Imaging EVO User Manual... -
Page 23: Interacting With The Evo
2: Getting Started Interacting with the EVO Keyboard Function The Function keys coordinate with the on screen menu keys. For Keys example, on the home screen, F1 goes with Exam Type Super Key Press the super key to return the system to active scan mode. Press the super key to return to the Home Menu. P ressing the super key from B mode enters the super menu. Use the Help Key to get help on keys and dialogs on the EVO. Help To view the help for a key, press the Help key, then press the key you want to know about. To view the help for a dialog, first view the dialog, then press Help. Press the full screen key to enlarge the image to the edges of the screen. Full Screen The status indicators and labels you see in the normal view do not appear in Full Screen. Press the full screen key again to return to normal view. EVO User Manual ©2018 E.I. Medical Imaging... - Page 24 2: Getting Started Annotate Use the Annotate key to: Add labels to an image, access special characters, and use annotation labels as file names. For more information about adding labels. see Annotating and Measuring Images on page 63. For more about accessing special characters, see Passphrase on page 51 Record Key Press the record key to begin recording what you see on the screen. By default, the recording is saved with an automatic name in a directory for the patient. For more about Recording see Saving Cineloops on page 60 The remaining buttons are listed alphabetically. The auto gain feature allows the system to automatically adjust Gain settings for optimal image quality. Auto Gain calculates the optimal Gain values based on tissue composition. Auto Before pressing the Auto key, make sure the probe is on the target ...
- Page 25 2: Getting Started Use the down arrow to move the cursor on the screen. This is Down/Up particularly useful when entering text into dialogs. Press the Enter key to commit information entered into a field. For example, as you fill in the name, ID and other information for a Enter patient, you can press ENTER to commit the information and move to the next field. The far GAIN control is used to make adjustments to the electronic amplification of the echoes in the image area that are farthest away (far field) from the transducer. Press the Freeze key to freeze and unfreeze the active image on the Freeze screen. Freeze keys are also located on select probes. Gain Press the Gain key to adjust the overall gain up or down. The arrow keys are located on either side of the freeze key. Left Use the arrow keys to move the cursor horizontally. This is useful when n avigating through dialogs. Near Press near key to adjust near gain. Press the patient key to search for patients and create new patient records. Patient To learn more about Patient Management, see Patient Management on page 55 Review Use the review key to view saved images/loops. Images are saved to the EVO's local storage. By default, images are saved with automatic names in a directory for the current patient. Save For more options, see Quick Store on page 46. Select Use the Select key when in caliper mode to set the measurements. Use the space key to enter a space between words when entering text ...
-
Page 26: Side Keyboard
2: Getting Started Side Keyboard When operating the E VO with the LCD monitor closed, use the side key- board buttons to access and navigate the scanner’s menus. Button Description FREEZE Press the FREEZE key to freeze and unfreeze the active image on the screen. There are freeze keys located on selected probes. RECORD Press the record key to begin recording what you see on the screen. By default, the record- ing is saved with an automatic name in a directory for the patient. For more Recording Options, see Quick Store on page 46. SAVE Images are saved to the EVO's local storage. By default, images are saved with automatic names in a directory for the current patient. For more options, see Quick Store on page 46. GAIN Press the Gain key from an active scan to open the gain settings slider controls. In any text entry fields, pressing GAIN displays the on-screen keyboard. This allows access to both upper and lower case characters, along with numerals and special characters. Pressing the SEL button activates the on-screen menus. ©2018 E.I. Medical Imaging EVO User Manual... -
Page 27: Screen Layout
2: Getting Started Screen Layout The following is the home screen of the EVO. Parts of the screen These denote the transducer type attached (L/S - Linear / Sector); the frequency of the transducer; the scanning mode (B or B+M); scanning direction (←/→) G Gain N Near F Far Current ultrasound frame rate in Hz Current mode: LIVE, FROZEN or REVIEW EVO User Manual ©2018 E.I. Medical Imaging... - Page 28 2: Getting Started The gray-scale bar is for tonal reference. This area indicates: User1 (or a custom name) - The preset currently i n use B lack means there is no memory stick. USB Status Green means at least one USB port has a memory stick Bluetooth is disabled Bluetooth is enabled Bluetooth Bluetooth is connected By default WiFi is off. WiFi enabled (gray ) WiFi WiFi connected (white) Battery The battery icon with four green bars indicates a full charge; with one yellow bar, the icon indicates 1/4 charge or less. AC Power When the unit is plugged in, the AC power icon appears. Transmit Focus This appears on the side of the scan area to indicate the focal region. Adjust the focus position with the up/down button . EVO logo used to indicate scan direction. Menu navigation functions differently when using the video headset, since the monitor is off. U se the side keyboard buttons to perform scanning operations. ©2018 E.I. Medical Imaging EVO User Manual...
-
Page 29: On-Screen Keyboard
2: Getting Started On-Screen Keyboard To access the on-screen keyboard, press the Annotate key from any text field menu. EVO User Manual ©2018 E.I. Medical Imaging... -
Page 30: Physical Operations
2: Getting Started Physical Operations This section covers the following topics About the Battery Charging the Battery Replacing the Battery Attaching Transducers Wearing the Scanner About the Video Headset Remote - Optional Accessory ©2018 E.I. Medical Imaging EVO User Manual... -
Page 31: About The Battery
2: Getting Started About the Battery The Ibex family of ultrasound scanners can only be charged using the AC adapter supplied by E.I. Medical Imaging. The system has been shipped to you with a partially charged battery. Once you have received and opened the equipment, it is recommended you completely charge the battery prior to use. Follow the procedure below for charging the battery. Note – Battery runtime varies depending on your system configuration and headset. Charging the Battery To charge the battery: 1. Ensure that the battery is installed in the system. (If it is not already installed, see the instructions for installing the battery). Slide the latch to the lock position to ensure the system access door is properly sealed. 2. Connect the AC adapter to the EVO system by aligning the red dot on the connector. 3. Plug the adapter into a 100-240 VAC Outlet. During the charge cycle the yellow light illuminates indicating the charging process is underway. As the battery reaches its full charge, the light switches off which indicates the battery is at full charge. The total charge time will range between 120 and 180 minutes from a totally drained battery to a fully charged battery. Note: The AC adapter should not be used during outdoor operation. EVO User Manual ©2018 E.I. Medical Imaging... -
Page 32: Replacing The Battery
2: Getting Started Replacing the Battery To replace the battery: 1. Power off the system. 2. Slide the silver latch to the right and lift the handle which extends over the edge of the EVO. 3. Remove the cover. 4. Lift the battery by its cloth tab. 5. Insert the new battery pack by angling it into the compartment, ensuring connection. 6. Lock and seal the door. 7. Power on the system. Attaching Transducers To attach a transducer: 1. Lift the probe cover latch to open position. 2. Align the metal engagement rods with the metal slots on the system side of the female connector. 3. Press the connector in place to seat. CAUTION: Do not toe in connector. Attach straight down. 4. ... -
Page 33: Wearing The Scanner
2: Getting Started Wearing the Scanner The Ibex ultrasound systems can be worn using a shoulder strap or a backpack. Consult with your E.I. Medical representative to find out about these options. About the Video Headset Consult with your E.I. Medical representative to find out about Video Headsets. Remote - Optional Accessory While using a headset or and HDMI connection, you may want to use an optional remote. The remote is paired to the EVO over Bluetooth; for more information about Bluetooth see Enabling Bluetooth on page 53 Pairing the Remote with your EVO To pair the remote with your EVO 1. Enable Bluetooth (for more information about Bluetooth see Enabling Bluetooth on page 53) 2. From the Bluetooth dialog, click Scan for Remotes. 3. Select your remote from the drop down. EVO User Manual ©2018 E.I. Medical Imaging... -
Page 34: Remote Buttons
2: Getting Started Remote Buttons The buttons are configured as shown in the Bluetooth dialog but you can configure them for other functions. For example, to change the FRZ Button, click the Assign Key Freeze in the Bluetooth dialog. When "Press a Key" appears, press the key you want to assign. Remote Battery To replace the battery, remove the screws as shown. Use one CR2032 battery. ©2018 E.I. Medical Imaging EVO User Manual... -
Page 35: Menus
2: Getting Started Menus The On-screen Menus Use the on-screen menus to navigate and execute scanning operations and system functions. Menus can be accessed using the F keys or the touchpad. Home Menu This is the default menu that appears on the screen. Exam type - Various system presets with optimal settings for a specific exam type; for example E quine Repro. Some exam types incorporate Extended View for best performance. Direction - Use this to set the scan direction. Arrow points to the direction of the leading edge of the probe. Rotates in 90 degrees. Default is top left. Dual - Use this to compare a live view to a frozen or recalled image Freq - Frequency cycles through the available frequencies for a specific transducer Scan - This displays the scan options. For more information, see B-Mode Scan Options on page 48 Gain - This displays the gain options. For more information, see Managing Images on page 57 User - Select the user you'd like to work as. For more information, see Setting User Presets on page 41 Super Menu Press the to display the Super Menu Option Video - Adjusting Video Settings on page 44 Audio - see Adjusting Audio Settings on page 43 Misc - Adjusting Misc Options on page 45 Back - press F6 to go back to the Home menu. EVO User Manual ©2018 E.I. -
Page 36: Moving Around The Screens
2: Getting Started Setup USB - see Saving Files to a USB Memory Stick on page 87 Bluetooth - see Enabling Bluetooth on page 53 WiFi - Enabling WiFi o n page 50 System- Clock - see Setting Day and Time on page 40 Reset- this will return the selected user to defaults. Info - this is information about the software. For details, see Identifying System Firmware Version on page 95 Setup - here you can change the clinic name and the host name. Unlock- this is where you can enable features that are ordered separately. Export Logs User - here you can rename the users. For more information, see Renaming User Presets on page 42 Annotations - set labels here. For more information, see Setting Annotations on page 47 Back Moving around the screens The touchpad acts like a mouse to move the cursor on the screen. To select, press the Select key or the Enter key. You can also tap the touchpad. The Function keys coordinate with menu items on the screen. The Super key calls up other menu options. ©2018 E.I. Medical Imaging EVO User Manual... -
Page 37: Using The On-Board Help
2: Getting Started Using the On-Board Help Use the Help Key to get help on keys and dialogs on the EVO. To view the help for a key, press the Help key, then press the key you want to know about. To view the help for a dialog, first view the dialog, then press Help. Examples Help for a key To view the help for t he Fullscreen Key, press then press Help for a dialog To learn about the WiFi Dialog Open the WiFi dialog (super key, F2, F3) When the dialog appears, press Training Training videos may be available on your EVO depending on the device and configuration. To access Training, press , F6 (Super key, Training). EVO User Manual ©2018 E.I. - Page 38 2: Getting Started ©2018 E.I. Medical Imaging EVO User Manual...
-
Page 39: 3: Configuration
3: Configuration 3: Configuration This section covers: Welcome Screen Setting Day and Time Setting User Presets Adjusting Audio Settings Adjusting Video Settings Adjusting Misc Options Setting Annotations B-Mode Scan Options Enabling WiFi Enabling Bluetooth RFID Support EVO User Manual ©2018 E.I. Medical Imaging... -
Page 40: Welcome Screen
3: Configuration Welcome Screen The first time you power on and log in to the EVO, you will see the following screen. Adjust any values as needed. Setting Day and Time If for any reason your system loses its day and time information, reset it by completing the following: 1. From the home screen, press the , F2 , F4, F1 (Super key, Setup, System, Clock). ©2018 E.I. Medical Imaging EVO User Manual... -
Page 41: Setting User Presets
3: Configuration 2. Use the touch pad or the up/down key to move from field to field. Select the format you would like the time to appear in. NOTE: If you are entering a time after 12 noon, even if you choose the 12 hour display format, make sure to enter the time as a 24 time so that it is understood as pm. 3. Click the Update button. Press the Super key to save and return to active scanning. Setting User Presets There are six user presets. This feature allows operators to set the scanner with individual preferences. You can also set suitable presets for different applications. To access the Presets Dialog, press: , F2 , F5 (Super key, Setup, User) User presets allow you to globally predefine the system settings listed here . GAIN and TGCs Video settings Audio settings Scan settings Misc settings RFID settings Quick Store settings EVO User Manual ©2018 E.I. -
Page 42: Renaming User Presets
3: Configuration Renaming User Presets Once you have established the desired settings, you may want to rename user presets. To rename user presets, complete the following: 1. Access the preset dialog: , F2 , F5 (Super key, Setup, User). 2. Select the preset you want to rename and key in a new name. 3. Press the Super key to save and return to active scanning. Changing the Default User Preset To change the default user preset, complete the following: 1. Access the preset dialog: , F2 , F5 (Super key, Setup, User). 2. Select the default field using the up/down arrow keys or the touchpad. 3. ... -
Page 43: Adjusting Audio Settings
3: Configuration Adjusting Audio Settings Use the audio options dialog to configure sound settings. To access the Audio Dialog, press: , F1 , F2 (Super key, Option, Audio) Speaker Volume This controls the volume for all system sounds. By default, this is set to Off. When this is on, a prompt will appear while saving an image to indicate that recording is taking place. Speak into the EVO to record a voice memo without having to press Record memo any additional keys. The voice memo is saved as part of the image file and will play back on the EVO. Can record until internal memory is full; total memory capacity is about 30 minutes. Key Click Enables sounds while typing. When this is on, the system will provide system sounds such as audible battery warn- System Sounds ings. EVO User Manual ©2018 E.I. Medical Imaging... -
Page 44: Adjusting Video Settings
3: Configuration Adjusting Video Settings To access the Video settings, press: F1 , F1 (Super key, Options, Video) The default brightness setting is 75. Adjust as needed; a lower number may be good in a dark LCD Brightness office while a higher number may be optimal when viewing outside. Glasses Set this depending on your device. Format Select from one of four styles to change the color themes used in EVO menus. The default color Style theme is EVO. Chroma Red This adjusts the hue of the image. Chroma Blue This adjusts the hue of the image. To save the selections and return to active scanning, press ©2018 E.I. Medical Imaging EVO User Manual... -
Page 45: Adjusting Misc Options
3: Configuration Adjusting Misc Options Use the Miscellaneous Options dialog to set system preferences. To access Misc Options, press: , F1 , F3 (Super key, Options, Misc) Grid Adjust this setting to add rules to the background. These scale appropriately as you adjust the depth. Clinic Name Set the name of your clinic here. This will appear at the bottom of jpegs and avi's saved on your system. Saved Loop Length Recording length when you press the record button For 2, 4 or 8 seconds, it will automatically stop recording. For Start/Stop, press to start and stop the recording. Keyboard This sets the keyboard backlight timeout. The default is 5 seconds. You may want EVO User Manual ©2018 E.I. Medical Imaging... - Page 46 3: Configuration Backlight to adjust this to save power. Quick When enabled, the caliper key will begin a distance or area measurement when Measure pressed, when disabled the user must select dist. or area before beginning a meas- urement. Temperature Some RFID sensor tags report temperature. This is displayed on the right margin. Units Select Centigrade or Fahrenheit Distance Units Millimeters or centimeters; this is used for caliper measurements Weight Units Kilograms or pounds; seen in patient screen. Quick Store When Quick Store is set to On, images and recordings are saved and named automatically. If a patient has been selected, images are saved to a directory for the patient. If no patient name has been entered, the image is saved in the Unassigned directory By default, Quick Store is On. Probe For probes which support image freezing. On means the button is disabled. You Freeze Disable may want to disable this if the button is frequently bumped. Calipers Stay By default this is off. Visible Repro Work- Turns this workflow on or off. flow Image Format JPEG or Bitmap. The default is JPEG. Export Format Standard or DICOM. The default is Standard. ©2018 E.I. Medical Imaging EVO User Manual...
-
Page 47: Setting Annotations
3: Configuration Setting Annotations The annotations dialog is prepopulated with commonly used labels, but you can change the entries as needed. The same values are available in all exam types. To access the Annotations Dialog, press: , F2 , F6 (Super key, Setup, Annotations) These labels appear when you press the key. Press the annotation key again to cycle through the selections. Unchecking a box to remove the vertical group of annotation options from the button list when selecting an annotation. EVO User Manual ©2018 E.I. Medical Imaging... -
Page 48: B-Mode Scan Options
3: Configuration B-Mode Scan Options B-Mode Scan Options control image adjustment. To access the Scan Options Dialog, press: F5 from the main menu (Home, Scan) The settings vary depending on which probe you are using; you may not see all of these options. Note: Not all settings are available on all transducers. Image Width Adjusts the width of the transducer used. This can improve the frame rate. Persistence is a frame averaging feature which allows you to manipulate images based on application requirements. As a rule of thumb, when persistence is low, the image is faster Persistence and grainier. When persistence is high, the image is smoother and slower; smearing is possible. Provides temporal averaging before speckle filter (contrast with persistence which is FPGA Persistence applied after). Speckle Filter Applies a smart filter to the image to reduce the speckle artifact. Higher number, greater contrast, fewer grays Contrast Only affects ultrasound image; not screen This setting can help sharpen edge detection of the active image by enhancing strong Enhance echoes. Used in conjunction with Contrast, Gamma helps adjust the grayscale intensities of the Gamma active image. Set the minimum frame rate. The range varies depending on the connected transducer. To Min Frame rate acheive the minimum frame rate the EVO reduces the image width. Extended View, also known as Trapezoidal Imaging is available on Linear Probes where the ... - Page 49 3: Configuration outer edges are not perpendicular to the transducer face but instead open up t o allow more image area at bottom of the field of view. Note: only available for straight, linear (non-curved) transducers. Tissue harmonic imaging a djusts the transmit and receive filters in the ultrasound. This filters out reverberation echoes allowing for a cleaner image with better contrast and less artifact. T HI doubles the image acquisition time, reducing the frame rate. For flat linear probes this introduces levels of angle compounding, steering the probe beams for multiple vantage points (multibeam) as well as frequency compounding, using multiple transmit and receive frequencies for a single image. A higher compounding setting Compounding will provide a finer image with reduced speckle artifact. Each higher level will increase the image acquisition time, reducing the frame rate. For curved linear probes this introduces only frequency compounding Synthetic Adjusts beam sharpening to provide a sharper image with better resolution. Adjusts the number of vertical scan lines that make up the image. A higher setting provides Line Density a finer image but increases the image acquisition time, reducing the frame rate. EVO User Manual ©2018 E.I. Medical Imaging...
-
Page 50: Enabling Wifi
3: Configuration Enabling WiFi The EVO uses WiFi technology to communicate with wireless networks. When enabled, you can transfer saved images and loops to and from any computer on the same network. NOTE: Leaving WiFi enabled uses more battery power and shortens battery run times. To access the WiFi settings: press: , F2, F3 ( , Setup, WiFi) The WiFi dialog will appear as shown above. You can also click on the WiFi Icon in the status panel; just tap on the touch pad to launch the WiFi dialog By default, WiFi is disabled; click ON to enable. ©2018 E.I. Medical Imaging EVO User Manual... -
Page 51: Wifi Indicators
3: Configuration WiFi Indicators WiFi O ff WiFi Enabled (gray) WiFi connected (white) To connect to a network: 1. Select WiFi to enable wireless connectivity. 2. Enter the appropriate information for your private WiFi network, including: Off | WiFi| Direct By default, WiFi is off. WiFi Select WiFi to join a wireless network. Select Direct to set the EVO as the wireless hub. When you turn on WiFi, the EVO searches for available networks. Select the network you Networks want. Enter the passphrase for the wireless network. To type a special character, such as a dash (-) or ampersand (&), press the annotate key 1. Press the ( annotate) key. 2. The special characters will appear in an on screen keypad. Passphrase 3. Select characters using the arrow keys or the touchpad 4. To exit the keypad, tap OK on the keypad or press the Annotate key again. Indicates: Connected, Disconnected for WiFi. -
Page 52: To Enable The Evo As A Wireless Hub
3: Configuration sharing. This is autopopulated. Use this value for locating the EVO on your local network for file Workgroup sharing. This is autopopulated. Use this value for locating the EVO on your local network for Password connecting to a network. To Enable the EVO as a Wireless HUB 1. Select Direct 2. Click Activate Network 3. At this time, you can enable Streaming or File Sharing. ©2018 E.I. Medical Imaging EVO User Manual... -
Page 53: Enabling Bluetooth
3: Configuration Enabling Bluetooth The EVO uses Bluetooth to work with Bluetooth RFID readers for remote control To access the Bluetooth settings, press: , F2 , F2 (Super key, Setup, Bluetooth) You can also click on the Bluetooth Icon in the status panel; just tap on the touch pad to launch the Bluetooth dialog. The parts of the dialog are described below. EVO User Manual ©2018 E.I. Medical Imaging... -
Page 54: Rfid Support
3: Configuration By default, Bluetooth is disabled. Turn it on here. Bluetooth Bluetooth will continue to be enabled after a system reboot. Scan for Remotes Click this to initiate a search for remote devices. Remotes Available remote devices are listed here. Select the one you want to use. Connect Remote Click this to establish a connection between the EVO and the selected device. Scan for RFID Click this to initiate a search for RFID Readers. Readers RFID Devices Available RFID Readers are listed here. Select the one you want to use. Connect RFID Click this to establish a connection between the EVO and the selected RFID reader. All remote keys can be reassigned to work as any key on the EVO. Select the key you Assign Key want to reassign from the list, then physically press the new key. RFID Support The EVO supports the following RFID string formats: ISO, Hex and Decimal 2 ©2018 E.I. Medical Imaging EVO User Manual... -
Page 55: 4: Patient Management
4: Patient Management 4: Patient Management Entering Patient Identification Information To maintain a correlation between stored images and the patient, fill in Patient information. 1. Press the patient button on the keyboard to display the Patient Search Screen. 2. Press F3 to display the Create Patient Dialog. Enter the desired information. Use the up/down to key to move from field to field. To enter special characters, press the annotation key The on screen keyboard will appear. To exit this keyboard and continue editing, use the OK button displayed on the keyboard. EVO User Manual ©2018 E.I. Medical Imaging... -
Page 56: Searching For A Patient
4: Patient Management 3. Press F1 (Create) to save the new patient record. When you leave the patient creation screen, an exam will start for the newly-created patient. The PID and TAG information displays at the top of the screen. Searching for a Patient 1. Press the PATIENT button on the keyboard to display the Patient Search Screen. 2. Move from field to field using the u p/down key. Fill in the fields with criteria to search. 3. Select the correct patient from the search results. You can select by double-tapping on the touch pad. You'll be returned to exam mode for the patient selected. ©2018 E.I. Medical Imaging EVO User Manual... -
Page 57: 5: Managing Images
5: Managing Images 5: Managing Images This section covers: Freezing Images Saving Images and Cineloops Recalling Images and Cineloops Annotating and Measuring Images Working with Dual Images Carcass Merit Repro Workflow EVO User Manual ©2018 E.I. Medical Imaging... -
Page 58: Freezing Images
5: Managing Images Freezing Images The EVO allows you to freeze any active image for further analysis. Press the Freeze key on either keyboard t o: Take measurements of images and loops. Review images frame by frame using the left and right arrow keys or the touch pad. Use the right and left arrows (on either side of the Freeze Key) to step through a cineloop when frozen. Press Start and Set End to trim a video. Probes with a freeze button give the added ability to: Freeze images without going to the scanner by pressing and releasing the button once. Store images without going to the scanner by holding the freeze button for two seconds from a frozen image. Saving Images and Cineloops When you save an image/cineloop, the system captures and stores the following information in the f ile: The patient name and ID The timestamp The voice memo Probe Everything displayed The system saves images as jpegs (.jpg) and cineloops as AVIs (.avi) file format. -
Page 59: Saving Images
5: Managing Images Saving Images Images are saved to the EVO's local storage. By default, images are saved with automatic names in a directory for the current patient. If you have added annotations, they will be saved with the image. By default, the image is saved with an automatic name in a directory for the patient. If no patient name has been entered, the image is saved in the Unassigned directory. To save images with user-defined names, disable Quick Store. To disable quick store: 1. Press Super, Options (F1), Misc (F3) 2. Turn Quick Store Off. Now, when you press SAVE, you'll be prompted to enter a file name for the image. When Quick Store is disabled, the Save Dialog will look something like this: Use Annotation Labels as File Names Save images quickly, using annotation labels in the file names. 1. Make sure Quick Store is turned off (described above). 2. Press Save to save an image. When the Save Dialog prompts you for a name, press the Annotation key . Select the label you want pressing the appropriate function key. 3. The image will be saved with the annotation label name. If you attempt to save images to the same directory with the same label name, a prompt will appear asking if you want to overwrite or rename the previous image. Choose rename and you'll be able to save a series, example: Uterus1, Uterus2, Uterus3 and so on. EVO User Manual ©2018 E.I. -
Page 60: Saving Cineloops
5: Managing Images Saving Cineloops Press the record key to begin recording what you see on the screen; you should see a blinking red circle on the right side of the screen indicating that a recording is in progress. T his is a decrementing counter; it indicates the time left untill the recording is complete. By default, the recording is saved with an automatic name in a directory for the patient. To save avi files with user-defined names, disable Quick Store. To disable quick store: 1. Press Super, Options (F1), Misc (F3) 2. Turn Quick Store Off. Now, when you press RECORD, you'll be prompted to enter a file name for the image. The length of the recoding is also set under Misc Options 1. Press Super, Options (F1), Misc (F3) 2. Set Saved Loop Length. You can choose 2 seconds, 4 seconds or 8 seconds. To record longer Loops, choose Start/Stop. When this is selected, press Record to start and stop the record- ing for whatever length you like. ©2018 E.I. Medical Imaging EVO User Manual... -
Page 61: Recalling Images And Cineloops
5: Managing Images Recalling Images and Cineloops You can recall stored images and cineloops for comparison studies. Press the Review key to bring up the Review screen. Recalling Saved Images and Cineloops 1. To recall saved images, press the Review key 2. Select the image or cineloop you'd like to view from the list on the left; to change directories press Up Dir 3. Press Load to View. When you view a cineloop, a blue bar on the right indicates progress. EVO User Manual ©2018 E.I. Medical Imaging... -
Page 62: Renaming Images
5: Managing Images Renaming Images 1. To recall saved images, press the Review key 2. Select the image or cineloop you'd like to rename f rom the list on the left. 3. Press Rename (F1). 4. Rename the file and press ENTER. Deleting Images To delete images and cine loops for the system, complete the following: Caution: The system will not ask if you are sure you want to delete. 1. Press the Review key to 2. Select the image or cineloop you'd like to delete from the list on the left; to change directories press Up Dir 3. Press Delete (F5) ©2018 E.I. Medical Imaging EVO User Manual... -
Page 63: Annotating And Measuring Images
5: Managing Images Annotating and Measuring Images This section covers how to: Add text to images Measure structures Adding Text Labels to Images Follow the instructions below to add text labels to images. 1. Press the (annotate) key 2. When the c ursor appears on the screen, you can move it with the touchpad 3. Enter text, or press one of the function keys to use a common label. Press the Select key or the Enter key to anchor the label. Press Annotate to cycle through the lists. 4. Press SAVE to save an image with the labels The labels stay on the screen until you return to live scanning; to return to scanning, press the Super Key. To adjust font size: Press t he (annotate) key to cycle through the options. On the final screen, press Edit . Use F1 and F2 to increase or decrease the font. ... -
Page 64: Working With Dual Images
5: Managing Images Working with Dual Images The dual image feature of the EVO allows you to examine two side-by-side images at the same time. This feature is useful when: Comparing past scans with current scans Freezing an active scan and repositioning the probe to image the anatomy from a different angle. Imaging bilateral structures. To view dual images: 1. From the Home menu, press Dual (F3). This puts the current view on the left of the screen. 2. Press Review (F3) to select and load an image. This will appear on the left side. 3. To load an image on the right, press Side (F1) and the orange bar moves to the right side of the screen. At this point, you can press Review again to load a saved image, or Live (F2) to view the current live image. ©2018 E.I. Medical Imaging EVO User Manual... -
Page 65: Carcass Merit
5: Managing Images Carcass Merit Carcass Merit functionality is only available with the L3ASE transducer. The purpose of this workflow is to quickly enter animal information pertinent to carcass merit. Setting up Carcass Merit To access Carcass merit, first install the L3ASE transducer Press N. The Carcass Merit dialog appears. The first time it appears, the fields are blank. To access the setup, press F6 Here is the setup. The fields are described below. Required R Count The count required for Rump entry Required U Count The count required for Loin entry Required P Count The count required for Fat entry Weight Required Select yes or no. File delimiter The file delimiter is used to separate parts of the image name. Example: COW NUMBER1.R1.jpg or COW NUMBER1_R1.jpg Animal Entry The screens have been designed to accommodate quick entry. Press the associated letter key on the keyboard to bring up the screen. The keys are: N, R, U and P. N - new, R - rump, U - Loin, P - fat. EVO User Manual ©2018 E.I. Medical Imaging... -
Page 66: N- New Animal Setup
5: Managing Images N- New Animal Setup Press N to bring up the Carcass Merit entry area. Scan Session - Identifier for group of animals: Ranch name or site name. ID - the specific animal's ID. Automatically populated via RFID scan. Weight Fill in the entry fields as needed. R- Rump U- Loin Size P- P Fat If the required number of images for any particular scan is not saved, the system will alert the you to capture additional images. ©2018 E.I. Medical Imaging EVO User Manual... -
Page 67: Repro Workflow
5: Managing Images Repro Workflow To turn on Repro Workflow: Access Misc Options, press: , F1 , F3 (Super key, Options, Misc) and set Repro Workflow to On When Repro Workflow is on, the regular patient area is not available.. Press the Patient Key to open the Repro Workflow dialog. While Repro Workflow is enabled and you save images, they are saved to folders with names using the values set in the Repro Workflow Setup. The scan session becomes the folder name in the patient folder. The animal ID becomes part of the label. The dialog does not let you reuse an animal ID. To access the Repro Workflow Setup, while the workflow dialog is open, press F6. In the Repro Workflow Setup you can rename the hotkey definitions. The default settings are shown below. EVO User Manual ©2018 E.I. Medical Imaging... - Page 68 5: Managing Images Once the Animal ID is entered and you are scanning, the 1,2,3,4, B, and O keys will save an image with the name: AnimalID_hotkey definition_image number.jpg RFID RFID, if used, opens the workflow dialog a nd populates the label the animal ID with the RFID tag#. ©2018 E.I. Medical Imaging EVO User Manual...
-
Page 69: 6: Manipulating Images
6: Manipulating Images 6: Manipulating Images Manipulate images by adjusting the Gain settings. The Gain controls compensate for the reduction in sound amplitude as it travels into tissue. The Gain controls can intensify the returning signals and display images brighter and more visible on the screen. You can adjust the Gain for the near field (higher), far field (lower), or the entire field (overall gain). Excessive increase in Gain will add noise to the image. For optimal diagnostic images, adjust the Gain to produce uniform gray scale responses. About Gain Controls To view all of the Gain settings on one screen, press Gain (F6) from the home menu. Overall GAIN To adjust the overall gain, use the GAIN key. You can increase/decrease t he brightness of the entire field. Near Gain The NEAR Gain control is used to lighten or darken the intensity of the echoes in the near field of the image (the area closet to the transducer). Far Gain The FAR gain control is used to make adjustments to the electronic amplification of the echoes in the image area that are farthest away (far field) from the transducer. Time Gain TGC refers to the time taken for an echo to travel from the transducer to the target area. As the Compensation ultrasound signal travels further into the tissue, more and more of its energy is absorbed causing (TGC) the echoes to decrease in strength. Therefore, at greater depths, the TGC needs to be set at a higher setting. Conversely, at a short distance, for example near the skin line, there is more energy level available and therefore the TGC can be run at nearly a minimum setting. The EVO offers 8 TGC settings. Adjust these using the touchpad. ... - Page 70 6: Manipulating Images The following images are examples of scans created using high, low, and optimal Gain settings: High Gain Setting – Images will appear bright with detail lost. Low Gain Setting – Images will appear dark with no detail. Optimal Gain Setting – Images appear with uniform gray- scale and with optimal detail. ©2018 E.I. Medical Imaging EVO User Manual...
-
Page 71: Using Auto Gain
6: Manipulating Images Using Auto GAIN The auto gain feature allows the system to automatically adjust Gain settings for optimal image quality. Auto Gain calculates the optimal Gain values based on tissue composition. To use the Auto Gain feature, select the Auto button in the Gain Settings dialog, and then press SELECT to apply. B+M Mode Scanning M-MODE (Motion Mode) imaging is a scan that displays motion in a wave-like manner. This mode is especially useful in depicting motion in cardiac applications. By incorporating B Mode functionality with M-Mode strips, you can control the exact position of the desired scan location. The following is an example of B+M mode image. Your B Mode image appears in the top center of the screen. The M-Mode strip appears in the lower half of the screen. You can position the M-Mode scan line using the vertical gold line displayed in the B-Mode image. Use the right/left arrows to set your line in the B-Mode image. Adjust the speed of the positioned line using the slower and faster function keys. EVO User Manual ©2018 E.I. Medical Imaging... -
Page 72: Adjusting Focal Zones
6: Manipulating Images Adjusting Focal Zones You can control areas of focus within an image by adjusting the focal zone. B y default, the area of focus is the center section of the image. H owever, by pressing the Up/Down key , specific focal zone control is enabled. A white arrow will appear on the left side of the image indicating the area of the image with highlighted focus. U se the up/down keys to change the targeted focal area. ©2018 E.I. Medical Imaging EVO User Manual... -
Page 73: Doppler Mode
6: Manipulating Images Doppler Mode To enable Doppler functionality, press the DOP key. B y default, this enters you into Color mode. O ther Doppler modes can be accessed through the function keys. Adjust Control Doppler Gain using the function keys. Overall gain is controlled by the gain keys. Not all doppler modes are available on all transducers. Color Mode Utilizing t he "Doppler effect". Color Doppler is used to visualize blood flow in a p articular region to or away from the transducer face utilizing color s pectrum (colors Red and Blue). When C olor mode is activated, the Region of Interest (ROI) box is displayed with a blue dashed line. A fter the desired ROI box s ize and shape is created, click the touchpad to set the location. The Color gradient bar on right side changes based on scale. Color dictates flow and direction. EVO User Manual ©2018 E.I. -
Page 74: Color Doppler Scan Options
6: Manipulating Images Color Doppler Scan Options Color Doppler Scan Options control image adjustment. The settings vary depending on which probe you are using. The range is probe specific Scale AKA: Pulse repetition frequency low pulse repetition frequency to look at low velocities, high pulse repetition frequency reduces aliasing. Ranges from-75 to 75. No unit of measure. Baseline This is an offset of the scale from the middle region. For CFM, this option is only enable for Color Map = 0. Wall Filter 0 - 7 U sed to remove the low frequency reverberation of an arterial wall motion. ©2018 E.I. Medical Imaging EVO User Manual... - Page 75 6: Manipulating Images Steer Supported on Linear probes only - steers the doppler beam, changes the ROI. Displays a B-Mode image on the left with no doppler color, and an image on the right that Dual is composed of the B-Mode image and the color content. Doppler Probe specific range - depends on the connected transducer. Frequency 1 to 7 S elects the number of transmit pulses per Doppler beam. More pulses provides a No of TX Pulse wider beam, more acoustic power, increases the sensitivity but decreases the resolution 50 to 100% % Scan Size Image width. Reducing the image width to gain frame rate. TX Aperture 0 - 64. Increments by 2. Doppler Speckle On or Off. Reduces speckle. 0 to 1 Selects the bandwidth of the lateral filter. Lateral Filter 0 = weak filter; 1 = strong Radial Filter 0 to 3 T he bandwidth of the lateral filter (0 weak and 3 strong) Persistence 0 to 3 S elects the strength of the color persistence filter (0 = off, 3 strongest) Color MAP 0 to 3 ...
-
Page 76: Power Mode
6: Manipulating Images Power Mode Used i n conjunction with Color, Power Doppler is used to determine the strength of t he Doppler signal as compared to the direction or flow of blood. Power Doppler is non-directional. ©2018 E.I. Medical Imaging EVO User Manual... -
Page 77: Power Doppler Scan Options
6: Manipulating Images Power Doppler Scan Options Power Doppler Scan Options control image adjustment. The settings vary depending on which probe you are using. Scan Settings for Power Doppler Scale The range is probe specific AKA: Pulse repetition frequency low pulse repetition frequency to look at low velocities, high pulse repetition frequency reduces aliasing. Wall Filter 0 - 7 U sed to remove the low frequency reverberation of an arterial wall motion. Dual Displays a B-Mode image on the left with no power doppler , and an image on the right that is composed of the B-Mode image and the power doppler content. Steer Supported on Linear probes only - steers the doppler beam, changes the ROI. Doppler Fre- Probe specific range - depends on the connected transducer. quency No of TX pulse 1 to 7 S elects the number of transmit pulses per Doppler beam. More pulses provides a wider EVO User Manual ©2018 E.I. - Page 78 6: Manipulating Images beam, more acoustic power, increases the sensitivity but decreases the resolution TX Aperture 0 - 64. Increments by 2. % Scan Size 50 to 100% Image width. Reducing the image width to gain frame rate. Doppler Speckle On or Off. Reduces speckle. Lateral Filter 0 to 1 Selects the bandwidth of the lateral filter. 0 = weak filter; 1 = strong Radial Filter 0 to 3 T he bandwidth of the lateral filter (0 weak and 3 strong) Persistence 0 to 3 S elects the strength of the color persistence filter (0 = off, 3 strongest) Strength High 0 to 255 T he strength of the Doppler signal has to be below this threshold. otherwise no color Threshold is shown. Strength Low 0 to 255 T he strength of the Doppler signal has to be above this threshold, otherwise no color Threshold is shown. Use for noise suppression.
-
Page 79: Pulse Wave (Pw)
6: Manipulating Images Pulse Wave (PW) Using a "gate" of determined size, Pulse Wave Doppler determines blood velocities v ersus time. When P W mode is activated, the target line and gate is activated and displayed in o range. The line and gate position can b e changed and manipulated by clicking on the line using the touchpad. To change the gate angle, click on the line a gain which allows for control of gate angle. T he gate angle can be adjusted to +45°, 0°, -90° relative to the p osition line. Once the correct p osition and gate angle have been set, click again to lock the position for s canning. When the gate is solid, you can adjust the gate position When the gate is dashed, you can adjust the gate size. EVO User Manual ©2018 E.I. -
Page 80: Pulse Wave Scan Settings
6: Manipulating Images Pulse Wave Scan Settings Scale The range is probe specific AKA: Pulse repetition frequency low pulse repetition frequency to look at low velocities, high pulse repetition frequency reduces aliasing. Baseline Ranges from-75 to 75. No unit of measure. This is an offset of the scale from the middle region. For CFM, this option is only enable for Color Map = 0. Steer Supported on Linear probes only - steers the doppler beam, changes the ROI. Speed Scroll speed of the time domain. Gate Angle Changes the angle of the W gate. Invert Inverts spectrum around baseline Speaker Volume Adjusts the speaker volume Probe specific range - depends on the connected transducer. Frequency No of TX Pulse 1 to 7 S elects the number of transmit pulses per Doppler beam. More pulses provides a wider beam, more acoustic power, increases the sensitivity but decreases the resolution ©2018 E.I. Medical Imaging EVO User Manual... - Page 81 6: Manipulating Images TX Aperture 0 - 64. Increments by 2. PWD Speckle Speckle filter for the velocity waveform Wall Filter 0 - 7 U sed to remove the low frequency reverberation of an arterial wall motion. Duplex Enable live PW with B-Mode FFT Size Fast Fourier Transform - Larger FFT sizes provide higher spectral resolution but take longer to compute. EVO User Manual ©2018 E.I. Medical Imaging...
- Page 82 6: Manipulating Images ©2018 E.I. Medical Imaging EVO User Manual...
-
Page 83: 7: Measuring Images
7: Measuring Images 7: Measuring Images The EVO auto calculates distance and area measurements. Taking Distance Measurements To take distance measurements, complete the following: 1. Press the Caliper key to freeze the image. Using the touch pad, move the cursor to the location where you want to start measuring. Tap the touch pad to set the start position. 2. Move the cursor again and tap the touch pad again to complete a linear measurement. A label will appear at the end of the line indicating the length Note: If the labels are too big or small, you can adjust the font size. Press Edit (F6), then Font+(F1) or Font- (F2). To associate a distance table to the measurement: After taking a measurement: 1. Press F4 to view Table 2. Select the species from the first drop down. 3. Select the measurement from the lower drop down. Press Enter. The coordinating result (fetal days) will appear below the measurement. Note – If a measurement table has been selected before measuring, the calculation is automatically applied to the measurement. 4. Continue taking measurements by pressing the F2 (DIST) key and repeating steps 2 and 3 until you are done. Press Save to save any images. ... -
Page 84: Pw Doppler: Pi / Ri Calculation
7: Measuring Images 3. Using the touchpad move the crosshairs in a circular direction and delineate the measurement area until you return to the starting position. 4. Press the SELECT key to end the measurement and display the size. The text box turns black. 5. Continue taking measurements by pressing the F3 (AREA) key and repeating steps 2 and 3 until your done, and then press the FREEZE key to return to active scanning. PW doppler: PI / RI calculation 1. From PW mode, with an image acquired, press the CALIPER key. ©2018 E.I. Medical Imaging EVO User Manual... - Page 85 7: Measuring Images 2. Select Calcs (press F4) 3. Select PI RI SD (press F2). EVO User Manual ©2018 E.I. Medical Imaging...
- Page 86 7: Measuring Images 4. This prompts you to trace one (1) cardiac cycle of the PW trace. Press the SELECT key to set the start- ing point, then use the touchpad to follow the top of the PW waveform . 5. Press the SELECT key to complete the measurement and display the results. ©2018 E.I. Medical Imaging EVO User Manual...
-
Page 87: 8: Exporting Files
8: Exporting Files 8: Exporting Files There are two ways to export files from the EVO: (1) on a USB memory stick and (2) via wireless file sharing. Saving Files to a USB Memory Stick 1. Insert the memory stick where you want to save the files into one of the USB ports on the back of the EVO. 2. Navigate to the USB Menu: Press the super key, F2 Setup, F1 USB. The dialog below will display. Note: if you do not have a current patient, the last option will not appear. 3. In this example, we were doing an exam for the patient Otis. To pick and choose which files to export, select Internal storage location and Export Files. The next screen will appear (continued on next page). EVO User Manual ©2018 E.I. Medical Imaging... - Page 88 8: Exporting Files You can select individual files from the list or check Select All at the top of the screen 4. The files will save to the USB thumb drive in a folder structure by patient and date. If you save files without activating a patient record, they will be saved into a folder named Unassigned. ©2018 E.I. Medical Imaging EVO User Manual...
-
Page 89: File Sharing
8: Exporting Files File Sharing You can share files from the EVO across a wireless network. Setting up the EVO 1. On the EVO, enable WiFi. You can connect to a local network or use direct connection. In this example, we're connecting to a local network. For more details about WiFi setup, see Enabling WiFi o n page 50 in the Configuration chapter. 2. Once the EVO is connected to the wireless network, enable File Sharing. From your PC Once wireless is enabled on you EVO, you'll be able to see it from your PC. Access it by mapping a drive to the device. 1. On your PC, go to Computer > Map Network Drive (from Computer right-click and select Map Network Drive). 2. Fill in folder as \\<ip address>\data, using the IP address of the EVO. example: \\10.3.2.117\data EVO User Manual ©2018 E.I. Medical Imaging... - Page 90 8: Exporting Files 3. Select Connect Using different credentials; click Finish. 4. You'll be prompted to authenticate to the EVO. Log in with the WiFi username and password. Below we show the defaults. Click OK and the drive will display the directories on the EVO where images and cineloops are stored. 5. The drive will appear with directories as shown. NOTE: If your windows explorer settings are set to display hidden folders, you may see a few more folders. ©2018 E.I. Medical Imaging EVO User Manual...
- Page 91 8: Exporting Files EVO User Manual ©2018 E.I. Medical Imaging...
-
Page 92: 9: Evostream - Sharing Live Images
9: EVOStream - Sharing live Images 9: EVOStream - Sharing live Images EVOStream lets you share the live video feed to an iOs® or Android™ device. There are two ways of connecting to an EVO from your wireless device. Configure your phone and EVO to connect to the same WiFi network Or configure the EVO to supply its own WiFi (WiFi Direct) and have your device connect to that network. Sample view on an iPad®. ©2018 E.I. Medical Imaging EVO User Manual... -
Page 93: Connecting Over Wifi Direct
9: EVOStream - Sharing live Images Connecting over WiFi Direct 1. Power on the EVO 2. Enable WiFi. To access the WiFi settings: press: , F2, F3 ( Super Button, Setup, WiFi) The WiFi dialog will appear as shown below. You can also click on the WiFi Icon in the status panel; just tap on the touch pad to launch the WiFi dialog 3. By default, WiFi is disabled; click ON to enable. 4. In the WiFi dialog, select the Direct radio button on the first line. This should auto-populate the SSDI with EVO and the Passphrase Galileo1. These are default values that you may change if you want customize your network (for example, if you don't want other people to connect to your EVO, you may want to select a dif- ferent password, or if you have multiple EVOs, you may each give them a different SSID), but you don't need to. 5. Click the Activate Network button. The status line should change to Connected. 6. Set Streaming to On to enable video streaming. 7. At this point your EVO is configured to stream over WiFi direct. EVO User Manual ©2018 E.I. -
Page 94: Configuring Iphone® Or Ipad
9: EVOStream - Sharing live Images Configuring iPhone® or iPad® Download EVOStream™ App from Apple iTunes. 1. Click the Settings icon. 2. Select WiFi; this should bring up a list of networks. 3. You should see EVO (unless you changed the SSID in step 3 above) from that list. Select it. 4. You'll be prompted for the network passphrase (Galileo1 unless you changed it). Once you have entered the correct passphrase, your iPad should connect to the EVO Network. Exit Settings. 5. Launch the EVOStream App. 6. It should auto-detect the unit and start display the video stream from the EVO. Configuring an Android™ Device Download EVOStream™ App from Google Play. 1. Click the Settings icon. 2. Select WiFi; this should bring up a list of networks. 3. You should see EVO (unless you changed the SSID in step 3 above) from that list. Select it. 4. You'll be prompted for the network passphrase (Galileo1 unless you changed it). Once you have entered the correct passphrase, your Android should connect to the EVO Network. Exit Settings. 5. Launch the EVOStream App. 6. ... -
Page 95: 10: Advanced System Operations
10: Advanced System Operations 10: Advanced System Operations Updating System Firmware The system firmware contains all operating software for the system. E.I Medical Imaging recommends you keep your system updated to the latest version of the firmware to take advantage of new features and enhancements. Firmware file names have a .fw extension. For example: 01.04.00001.fw Updating your system involves: 1. Identifying your current system version 2. Downloading the new version from http://learn.eimedical.com/ibex-evo-firmware-update 3. Installing the new version on your system. Identifying System Firmware Version Access the Info dialog to determine the version of firmware currently running on your system. The info dialog is displays information about the hardware and firmware versions loaded on your EVO. This information can be useful when contacting E.I. Medical Imaging. To access the Info dialog, press: F2 , F4, F3 (Super key, Setup, System, Info) EVO User Manual ©2018 E.I. -
Page 96: Downloading New System Firmware
10: Advanced System Operations The serial number of the system. The serial number of the board. FW Version The current version of the firmware running the system. FPGA Version Part of the firmware. Lua Version Part of the firmware. Total Runtime The total runtime in hours, minutes and seconds. Probe Type Reflects the attached probe type (same as the type in the upper right of the screen) . Probe PCB PCB hardware revision of the probe; may be useful for service calls. Probe S/N Serial number of the attached probe. Downloading New System Firmware The obtain new firmware updates 1. Go to the h ttp://learn.eimedical.com/ibex-evo-firmware-update 2. Log in to your E.I. Medical Imaging user account and select the User Downloads link to enter the Secure Download Area. You can register for an account on the Home Page. 3. Select the system type under the Select Category area to view the downloadable version for the system. ©2018 E.I. Medical Imaging EVO User Manual... -
Page 97: Installing Evo System Firmware
10: Advanced System Operations 4. Select the Firmware Version link for your system type. 5. Click the .fw filename link to download the file. 6. Follow your computer system’s instructions for saving the file. 7. Download the Installation Instructions (Ibex_Firmware_Upgrade_Procedure.pdf) file. Installing EVO System Firmware To install the system firmware, complete the following: 1. Load the upgrade file on a thumb drive (USB memory stick) and insert into the lower EVO USB port. 2. Hold the power button while powering on; release when the keyboard starts blinking. 3. Allow the scanner to boot and follow on screen prompts. Note: To recover the EVO from a corrupted firmware update hold the power button down until the keyboard backlight begins to flash and release. Reinitiate the FW update and ensure there is sufficient power connected. EVO User Manual ©2018 E.I. Medical Imaging... -
Page 98: Resetting Your Evo
10: Advanced System Operations Resetting your EVO To access the Reset Dialog, press: , F2 , F4, F2(Super key, Setup, System, Reset) Reset User Press this to reset the currently selected user and exam type to factory defaults. Reset All Resets all users. Reset System Restores the system to factory defaults and erases all saved images. Resetting the System To reset the system: 1. Access the Reset Dialog. Press , F2 , F4, F2(Super key, Setup, System, Reset) 2. Select Reset System. A warning will appear. Press Yes to create a backup Press No to proceed without a backup Press Cancel to exit without resetting ... - Page 99 10: Advanced System Operations 3. Press F7 Cancel 4. Press F 4 Backup 5. Depending on file size this may take up to 60 minutes 6. This same process can be used to restore the files by simply choosing the F5 Restore option rather than the F4 Backup option. EVO User Manual ©2018 E.I. Medical Imaging...
-
Page 100: 11: Cleaning And Maintaining The Evo
11: Cleaning and Maintaining the EVO 11: Cleaning and Maintaining the EVO Make sure you clean your EVO ultrasound system and associated transducers after every use. Routine cleaning and maintenance will help ensure the prolonged life of your system. While the EVO ultrasound is a ruggedized ultrasound device, certain precautions should be used in the care of the system. Do not use any abrasive cleaners on either your ultrasound system or associated transducers Caution: Connect the probe to ensure the most water resistant seal for the connector. To clean, ensure the following: Close and LOCK the battery door before cleaning. To clean the LCD panel, use a soft cloth with an ammonia based (common window cleaner) cleaning agent. The EVO can be wiped down with a damp cloth. For disinfecting the system, Sporicidin ® is recommended. Allow the system to air dry or wipe down with a clean, dry towel ©2018 E.I. Medical Imaging EVO User Manual... -
Page 101: Disinfectant List
11: Cleaning and Maintaining the EVO Disinfectant List The following are approved disinfectants to use on E.I. Medical Products . Effective 2/1/2018. NOTE: Disinfectants must be mixed per manufacturer’s directions EVO System | Probes/Transducers | Goggles: Bleach to use Durvet Chlorhexidine Isopropyl Alcohol Nolvasan Protex Sporicidin Transeptic Oxivir DO NOT use Quatricide Virkon S ICE Extension Handle: Durvet Chlorhexidine to use Nolvasan Protex Quatricide Transeptic Bleach DO NOT use Isopropyl Alcohol Oxivir Sporicidin Virkon S... -
Page 102: Insite2 / Insite 3 Headset Care And Maintenance
11: Cleaning and Maintaining the EVO InSite2 / InSite 3 Headset Care and Maintenance To clean, ensure the following: Using a gentle shower, rinse your InSite2 / I nSite 3 headset to remove large amounts of debris Use a damp cloth to wipe down any excess debris from the headset Allow the headset to air dry or wipe down with a clean, dry towel Linear Transducer Care and Maintenance To clean, ensure the following: Submerse only the transducer end in water and clean with a dry towel. Do not use any coarse cleaning tools (wire brush, scrub brush, etc.) on the face of the transducer. Caution: Caution – Ensure probe connectors are dry and free of debris before connecting to the EVO. DO NOT use mineral oil on any Ibex transducers. To disinfect the Linear probe, use one of the disinfectants listed above Disinfectant List on page 101. ©2018 E.I. Medical Imaging EVO User Manual... -
Page 103: Warranty
Warranty Warranty THREE YEAR LIMITED WARRANTY Limited Warranty This Limited Warranty is provided only to you as the original retail purchaser of the shipped E.I. Medical Imaging IBEX EVO Diagnostic Ultrasound Scanner (the Product), and to no other person. E .I. Medical Imaging warrants to you that for a period of three (3) years with respect to labor and for a period of three (3) years with respect to parts, the Product will be free from defects in materials and/or workmanship. THREE YEAR LIMITED WARRANTY Limited Warranty Transducers, batteries and associated accessories all carry a three (3) year limited warranty from the date of purchase. E.I. Medical Imaging warrants to you that for a period of three (3) year with respect to labor and for a period of three (3) years with respect to parts, the Product will be free from defects in materials and/or workmanship. Your Exclusive Remedy, E.I. Medical Imaging’s entire liability and your exclusive remedy under this Limited Warranty shall be, at E.I. Medical Imaging’s option, either Repair or Replacement of the Product within the specified warranty period. I N NO EVENT DOES THIS WARRANTY COVER DEFECTS OR MALFUNCTIONS DUE DIRECTLY OR INDIRECTLY TO ACCIDENT, MISUSE, OR NEGLECT OF THE PRODUCT, TAMPERING WITH OR ANY INDICATION THAT THE SYSTEM HAS BEEN OPENED BY ANY NON-COMPANY APPROVED INDIVIDUAL OR SERVICE CENTER, OR AN ACT OF GOD. Disclaimer of All Other Warranties Except as specifically provided above, there are no express warranties or claims or representations made by E.I. Medical Imaging regarding the Product. A ny implied warranties, including implied warranties against claims that the product infringes on property rights of third parties, patent rights, implied warranties of fitness for a particular purpose or use, and implied warranties of merchantability, shall terminate three (3) years from the date of purchase. Limitation of Liability To the maximum extent allowed by applicable law, in no event will E.I. Medical Imaging nor anyone else who has been involved in the creation, production or delivery of the product be liable to you or any other person for any direct, indirect, consequential or incidental damages, or any special or punitive damages (for example, damages for loss of profits or business interruption) arising out of the use of or inability to use the Product, a defect in the Product, or the failure of the product to perform, even if E.I. Medical Imaging has been advised of the possibility of such claims or damages. I n no event will E. I. Medical Imaging be liable, regardless of the basis of the claim or action, for any amount exceeding the purchase price actually paid for the Product. S ome states do not allow the exclusion or limitation of incidental or consequential damages, so the above limitations or ... - Page 104 Warranty Obtaining Warranty Service A ll Warranty repair work shall be performed by E. I. Medical Imaging’s employees at the factory or by an Authorized Service Center. I n the event that the Product requires service, please contact E.I. Medical Imaging, or other authorized service provider, to obtain a Return Materials Authorization (RMA) number. This number must accompany your Product upon return in order to obtain service on your unit. Y ou the purchaser are responsible FOR ALL FREIGHT CHARGES ASSOCIATED WITH WARRANTY SERVICE. This Limited Warranty gives you specific Legal Rights; you may also have other rights which vary from state to state. ©2018 E.I. Medical Imaging EVO User Manual...
-
Page 105: Appendix - Fetal Tables
Appendix - Fetal Tables Appendix - Fetal Tables Alpaca Biparietal o n page 106 Alpaca Thoracic Height on page 106 Bovine Crown Rump Length on page 107 Bovine Eye Orbit on page 108 Bovine Biparietal Diameter - External on page 108 Bovine Trunk Diameter on page 109 Buffalo (Bubalus bubalis) Amnionic Vesicle Diameter on page 110 Buffalo (Bubalus bubalis) Biparietal Diameter on page 110 Buffalo (Bubalus bubalis) Crown Rump Length on page 110 Canine Less than 40 days Crown Rump Length on page 110 Canine Less than 40 days Gestational Sac Diameter on page 111 Canine More than 40 days Head Diameter on page 111 Cat More than 40 days Body Diameter on page 111 Cat More than 40 days Head Diameter on page 111 Fallow Deer Chest Depth on page 112 ... - Page 106 Appendix - Fetal Tables Alpaca Biparietal Alpaca Thoracic days days Height Source: Prediction of Gestational Age by Ultrasonic Source: Prediction of Fetrometry in Llamas (Lama Gestational Age by Ultrasonic glama ) and Alpacas (Lama Fetrometry in Llamas (Lama pacos): F rancisca J. Gazitua, glama ) and Alpacas (Lama Paulina Corradini, German pacos): F rancisca J. Gazitua, Ferrando, Luis A. Raggi, Paulina Corradini, German Victor H. Parraguez - Animal Ferrando, Luis A. Raggi, Reproduction Science 66 Victor H. Parraguez - Animal (2001) 81-92 Reproduction Science 66 (2001) 81-92 days days ©2018 E.I. Medical Imaging EVO User Manual...
- Page 107 Appendix - Fetal Tables Bovine Crown Rump mm days Length 66 62 Source: Sonographic 68 63 Fetometry in the Bovine: W . 71 64 Kahn - Theriogenology May 1989 VOL.31 NO.5 pages 1105- 73 65 1121 76 66 mm days 79 67 81 68 10 32 84 69 11 33 87 70 12 34 90 71...
- Page 108 Appendix - Fetal Tables Bovine Biparietal Bovine Eye Orbit mm days mm days Diameter - External Source: Ultrasonic Imaging and Animal Reproduction: Source: Fetometry & Fetal 1998 Cattle Book 3: O .J. Heart Rates Between Day 35 Ginther page 190-191 & 108 in Bovine Pregnancies Resulting from Transfer of Either MOET, IVP-co-culture mm days or IVP-SOF Embryos: S .P. Breukelman, J.M.C. Reinders, et al. - Theriogenology:61 (2004) 867-882 mm days 10 90 11 95 12 100 13 105...
- Page 109 Appendix - Fetal Tables Bovine Trunk mm days mm days mm days Diameter 109 159 Sonographic Fetometry in 110 160 the Bovine: W . Kahn - 111 161 Theriogenology May 1989 VOL.31 NO.5 pages 1105-1121 112 162 113 163 mm days 100 151 101 152 102 153 103 154 104 155 106 156...
- Page 110 Appendix - Fetal Tables Buffalo Buffalo Buffalo Canine (Bubalus bubalis) (Bubalus bubalis) (Bubalus bubalis) Less than 40 days Amnionic Vesicle Biparietal Diameter Crown Rump Length Crown Rump Length Diameter Source: Ultrasonographic Source: Ultrasonographic Source: Fetometry and Fetometry and Performing Ultrasound to Source: Ultrasonographic Determination of Fetal Sex in Determination of Fetal Sex in Evaluate Pregnancy: C VC Fetometry and ...
- Page 111 Appendix - Fetal Tables Canine Canine Less than 40 days More than 40 days More than 40 days More than 40 days Gestational Sac Head Diameter Body Diameter Head Diameter Diameter Source: mm days mm days mm days Performing Ultrasound to ...
- Page 112 Appendix - Fetal Tables Fallow Deer Chest Fallow Deer Head Equine Biparietal Equine Amnion Depth Length Source: Maternal Age and Source: Developed by E.I. Parity Influence Medical Imaging. Source: Current Therapy in Source: Current Therapy in Ultrasonographic Large Animal Theriogenology Large Animal Theriogenology Measurements of Fetal 2: R obert S. Youngquist& 2: R obert S. Youngquist& Growth in Dutch mm days Walter R. Threlfall - Walter R. Threlfall - Warmblood Mares: W .K. Saunders/Elsevier Publishers ...
- Page 113 Appendix - Fetal Tables Goat Goat -Dairy mm days mm days Anglo-Nubian Crown Biparietal 49 37 43 105 Rump Length 50 37 44 106 Source: Determination of 51 37 45 108 mm days Early Pregnancy & Embryonic Growth in Goats by 52 37 46 109 TRANSRECTAL Ultrasound 53 38 Scanning: ...
- Page 114 Appendix - Fetal Tables Goat - Goat - mm days mm days Pygmy Biparietal Toggenburg 36 98 Biparietal Source: Ultrasonic Biparietal 37 100 Diameter of Second Source: Current Therapy in Trimester Pygmy Goat Large Animal Theriogenology Fetuses: J .K. Reichle & G.K. 2: R obert S. Youngquist& Haibel - Theriogenology April Walter R. Threlfall - 1991 VOL.35 NO. 4 pages 689- Saunders/Elsevier Publishers 2007 pages 550-551 mm days mm days ...
- Page 115 Appendix - Fetal Tables Llama mm days mm days Biparietal BPD Source: Prediction of Gestational Age by Ultrasonic Fetrometry in Llamas (Lama glama ) and Alpacas (Lama pacos): F rancisca J. Gazitua, Paulina Corradini, German Ferrando, Luis A. Raggi, Victor H. Parraguez - Animal Reproduction Science 66 (2001) 81-92 mm days EVO User Manual ©2018 E.I. Medical Imaging...
- Page 116 Appendix - Fetal Tables Llama Sheep Booroola mm days mm day Thoracic Height Merino Biparietal Source:Prediction of Source: Real-time Ultrasound Gestational Age by Ultrasonic Imaging for Predicting Ovine Fetrometry in Llamas (Lama Fetal Age: L Sergeev, D.O. glama ) and Alpacas (Lama Kleemann, et al. - pacos): F rancisca J. Gazitua, Theriogenology September Paulina Corradini, German 1990 VOL. 34 NO.3 Ferrando, Luis A. Raggi, Victor H. Parraguez - Animal Reproduction Science 66 mm day (2001) 81-92 mm days ©2018 E.I.
- Page 117 Appendix - Fetal Tables Sheep Booroola Sheep mm day mm days Merino Thoracic Finn Biparietal Depth Source Real Time Ultrasonic Biparietal Diameter of Source: Real-time Ultrasound Second Trimester Suffolk & Imaging for Predicting Ovine Finn Sheep Fetuses: G .K. Fetal Age: L Sergeev, D.O. Haibel & N.R. Perkins - Kleemann, et al. - Theriogenology November Theriogenology September 1989 VOL.32 NO. 5 pages 863- 1990 VOL. 34 NO.3 mm day mm days ...
- Page 118 Appendix - Fetal Tables Sheep - Hair Crown Sheep - Suffolk Swine Crown Rump mm days Rump Length Biparietal Length 40 95 Source: Real Time Ultrasonic Source: Current Therapy in 41 97 Biparietal Diameter of Large Animal Theriogenology 42 99 Second Trimester Suffolk & 2: R obert S. Youngquist& mm days Finn Sheep Fetuses: G .K. Walter R. Threlfall - ...
Need help?
Do you have a question about the Ibex EVO and is the answer not in the manual?
Questions and answers