
Subscribe to Our Youtube Channel
Summary of Contents for AJA OG-X-FR
- Page 1 OG-X-FR openGear Frame Installation and Operation Guide Version 1.0r1 Published July 30, 2018...
-
Page 2: Notices
AJA® and Because it matters.® are registered trademarks of AJA Video Systems, Inc. for use with most AJA products. AJA™ is a trademark of AJA Video Systems, Inc. for use with recorder, router, software and camera products. Because it matters.™ is a trademark of AJA Video Systems, Inc. -
Page 3: Table Of Contents
Copyright ..........2 Contacting AJA Support ........2 Chapter 1 –... - Page 4 Manually Adding OG-X-FR Frames to DashBoard ....34 Re-naming the OG-X-FR Frame in the Tree View ....35 Removing an OG-X-FR Frame from the Tree View in DashBoard .
-
Page 5: Chapter 1 - Introduction
Chapter 1 – Introduction This guide covers the installation and use of the OG-X-FR openGear High Density Modular Frame. The following chapters are included: • Introduction summarizes the guide and provides important terms, and conventions. • Before You Begin provides general information to keep in mind before installing and configuring your OG-X-FR. -
Page 6: Referenced Guides
Menu arrows are used in procedures to identify a sequence of menu items that you must follow. For example, if a step reads “File > Save As,” you would click the File menu and then click Save As. OG-X-FR openGear Frame v1.0r1 www.aja.com... -
Page 7: Chapter 2 - Before You Begin
Chapter 2 – Before You Begin If you have questions pertaining to the operation of OG-X-FR, please contact us at the numbers listed in the section "Contacting AJA Support" on page 2. Our technical staff is always available for consultation, training, or service. -
Page 8: Workflow
An optional advanced networking card, the MFC-OG3-N, adds an on- board Gigabit Ethernet switch, with GigE access to each of the 20 processing card slots. NOTE: Gigabit Ethernet is only available with the MFC-OG3-N installed in the OG-X-FR frame. Figure 1. Workflow of the OG-X-FR... -
Page 9: Chapter 3 - Hardware Overview
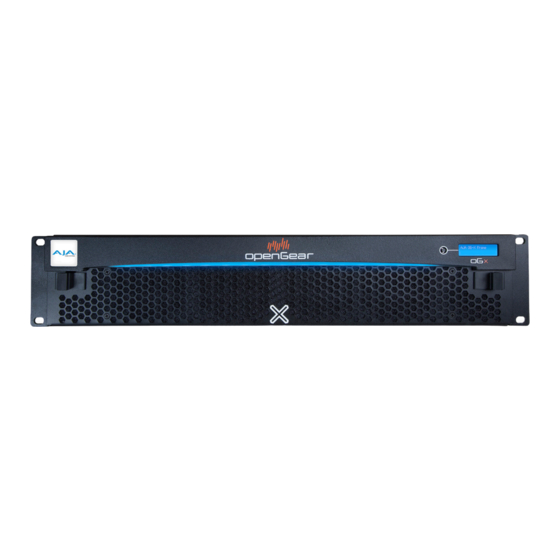
Chapter 3 – Hardware Overview Your OG-X-FR frame is a 2RU modular frame, designed to accommodate openGear cards. A complete list of available openGear cards is available on our website. Front Panel Overview This section briefly summarizes the features of the OG-X-FR front panel. -
Page 10: Og-X-Fr Interior
3. Card Slots There are a total of 20 card slots in the OG-X-FR chassis and are used to install openGear cards into the chassis. Depending on the card model and rear module you are using, multiple slots may be required. Refer to the user guide for your openGear card for installation details for your card. -
Page 11: Opengear Rear Modules
Rear Modules If your OG-X-FR frame was ordered with cards requiring full rear modules or split rear modules, the appropriate modules are installed at the factory or included with the cards. - Page 12 BNC, WECO™, fiber optic, serial, and ethernet connectors. Each module occupies two slots in the frame and accommodates one card. Ensure the openGear card is installed in the correct slot in the OG-X-FR frame. Up to 10 cards can be installed in a frame when using these modules.
-
Page 13: Chapter 4 - Physical Installation
For More Information on... • the technical specifications for the OG-X-FR, refer to "Specifications" on page • installing an openGear card and its rear module in the OG-X-FR frame, refer to the user guide for your openGear card. Before You Begin The OG-X-FR mounts in the rack frame by means of four rack screws fastened through the front mounting ears. -
Page 14: Cooling Fan Module
Cooling Fan Module The OG-X-FR frames come standard with a Cooling Fan Module installed in the frame door. The frame and PS-OGX can supply up to a maximum of 500W of card power, with 15W per card. Under these ventilated conditions, there is no requirement for extra vertical spacing between the frames. -
Page 15: Installing The Fsb-Ogx
Installing the FSB-OGX This section describes how to attach the FSB-OGX rear support bars to a OG-X-FR frame. NOTE: The FSB-OGX cannot be installed on the DFR-8321 or DFR-8310 frames. To install the FSB-OGX 1. Attach the Rack Mount Arms of the FSB-OGX to the OG-X-FR frame. -
Page 16: Connecting To A Power Supply
(OG-X-PS) available for redundancy. For redundancy, and in applications where the equipment is used in a critical signal path, we recommend that two power supplies be used in the OG-X-FR. One A/C power cable has been provided with each power supply ordered. - Page 17 To connect the power cables for an OG-X-FR 1. Connect the cable’s female IEC connector to the frame socket marked PS 1. 2. If the Redundant Power Supply option is installed, plug the second IEC connector into PS 2. NOTE: Each AC connector includes a PowerLock, which is designed to retain the power cable connector.
-
Page 18: Chapter 5 - Ethernet Cabling
The Ethernet port is a standard 10/100/1000 RJ45 Ethernet connector and is used to exchange information with an external monitoring, or control, system over an ethernet network. You must have the MFC-OG3-N installed in the OG-X-FR to take advantage of the Gigabit ethernet connectivity available for cards in the OG-X-FR frame. - Page 19 1. Connect one free end of a straight through CAT5/5e/6 cable to a free port of the network hub. 2. Connect the other end of the same cable to the Ethernet port on the OG-X-FR rear panel. Figure 5. OG-X-FR Frame — Ethernet Cabling OG-X-FR openGear Frame v1.0r1 www.aja.com...
-
Page 20: Chapter 6 - Reference Cabling
To connect a reference source to the OG-X-FR 1. Connect one end of a Belden cable to the REF 1 BNC on the OG-X-FR rear panel. 2. Connect the other end of the same Belden cable to the applicable output port on the external reference source device. -
Page 21: Looping The Reference Signals
Troubleshooting During normal operation, the GFC-8322 must never be removed from the OG-X-FR frame. To ensure this, the metal retaining latch located on the front of the GFC-8322 must be engaged (pushed down) to prevent accidental removal of the GFC-8322 from its slot. -
Page 22: Chapter 7 - Mfc-8322-S Network Card
Chapter 7 – MFC-8322-S Network Card Overview AJA's OG-X-FR openGear frame ships with the MFC-8322-S network card pre- installed. MFC-8322-S Network Card Features • Compatible with the OG-X-FR series frames • Compatible with the OG-3-FR series frames • Monitors frame power usage, the inlet ambient temperature, the airflow requirements of high-powered cards, and sets the fan speed accordingly NOTE: Higher power consumption requires higher fan speed for adequate cooling. -
Page 23: Installation
Network Controller Card installs in the last slot on the right side of the openGear frame (when facing the frame). CAUTION: You must install the MFC-8322-S into an OG-3-FR or OG-X-FR frame. Attempting to install this card in another frame type can damage your card. -
Page 24: Network Configuration
"Custom User Configuration via DashBoard" on page To establish communications 1. Ensure that openGear frame is connected to the same network as your DashBoard computer. 2. Launch the DashBoard application on your computer. OG-X-FR openGear Frame v1.0r1 www.aja.com... -
Page 25: Preset Configuration Using Dip Switches
6. Launch DashBoard on your computer. 7. Power up the openGear frame. 8. Wait approximately 30 seconds while the frame establishes network communications. 9. Verify that the Network Controller Card displays in the Tree View of DashBoard. OG-X-FR openGear Frame v1.0r1 www.aja.com... -
Page 26: Custom User Configuration Via Dashboard
Master Password, or that the user must log into the DashBoard client with a valid user account, to gain access to the node. For More Information on the lock icon, refer to the DashBoard Server and URM User Manual. OG-X-FR openGear Frame v1.0r1 www.aja.com... -
Page 27: Before You Begin
Master Password to. Or you can use the provided menu to quickly select all frames, clear the selections, select only presently locked frames, or select only currently unlocked frames. 8. Click OK. OG-X-FR openGear Frame v1.0r1 www.aja.com... -
Page 28: Accessing A Network Controller Card
Selected Devices dialog. Proceed to step 8. 7. If you are upgrading multiple cards: • Click Next > to display the Select Destination menu. This menu provides a list of the compatible cards based on the card selected in Step OG-X-FR openGear Frame v1.0r1 www.aja.com... -
Page 29: Troubleshooting
Refer to Figure 3.1 for the location of card control features such as the Alarm Mute button, and the Alarm Config jumpers. NOTE: The MFC-8322-S provides a single DashBoard connection. Figure 8. MFC-8322-S Card Controls OG-X-FR openGear Frame v1.0r1 www.aja.com... -
Page 30: Configuring The Dip Switches
Table 2. SW1 and SW2 Positions Controlled via Descriptions Position Position DashBoard The card network settings can be set by the user from the DashBoard Network tab. (default). DHCP Mode is assumed until the user changes the settings in DashBoard. OG-X-FR openGear Frame v1.0r1 www.aja.com... -
Page 31: Monitoring The Mfc-8322-S
SW4 is not implemented at this time and should be left in the OFF position. Monitoring the MFC-8322-S The front card-edge of the MFC-8322-S has LED indicators for the cooling module fan, alarm, and communication activity. OG-X-FR openGear Frame v1.0r1 www.aja.com... - Page 32 Ethernet port on the frame is connected to a functioning Ethernet switch. Flashing Yellow When flashing, this LED indicates that a valid link has been established, and data is currently being exchanged. When off, this LED indicates an absence of Ethernet connection. OG-X-FR openGear Frame v1.0r1 www.aja.com...
-
Page 33: Troubleshooting Checklist
When running from a backup copy that differs from the primary load, the Frame Status indicator in the Hardware tab of DashBoard displays “Running a backup code”. If this message displays, we recommend performing a software upgrade to ensure that all copies remain valid. OG-X-FR openGear Frame v1.0r1 www.aja.com... -
Page 34: Chapter 8 - Using Dashboard
Preferences menu of the DashBoard client. Manually Adding OG-X-FR Frames to DashBoard You must add OG-X-FR frames to the Tree View manually when the frame is on a different subnet from your computer running the DashBoard client. OG-X-FR openGear Frame v1.0r1... -
Page 35: Re-Naming The Og-X-Fr Frame In The Tree View
DashBoard. To specify frame properties manually 1. Type the name of the OG-X-FR frame, as you want it to appear in DashBoard. 2. From the Protocol options select OGP (openGear Protocol). -
Page 36: Removing An Og-X-Fr Frame From The Tree View In Dashboard
NOTE: If the OG-X-FR frame you are removing is in a Custom Folder, you must first delete the frame from the Custom Folder before it can be removed from the Tree View. -
Page 37: Auto-Discovery
Automatic Discovery option off. Using DashBoard to Access openGear Cards in the OG-X-FR Frame The OG-X-FR frame displays in DashBoard as a main node in the Tree View with a series of sub-nodes. Each sub-node represents an openGear card installed in that frame. - Page 38 4. If your openGear card has multiple interfaces: A. Expand the openGear card node. B. Double-click a sub-node to display that interface in the DashBoard window. In the example below, the Configuration interface for an MC1-MK is displayed. OG-X-FR openGear Frame v1.0r1 www.aja.com...
-
Page 39: Chapter 9 - Maintenance
AC standards (100-240V). Each supply has an indicator LED on its front panel, and an error detection circuit that monitors the power supply operation. NOTE: The OG-X-PS power supply installs on the right or left side of the OG-X-FR chassis. To install the power supply 1. -
Page 40: Replacing The Frame Air Filter
Replacing the Frame Air Filter Order the Air Filter Replacement Kit (AFK-OGX) from your openGear sales representative before replacing the frame air filter in your OG-X-FR frame. To remove the old air filter from the frame door 1. Using a Phillips screwdriver, remove the four 3/16”screws (#850-091R) screws that secure the faceplate. -
Page 41: Replacing The Cooling Fan Module
Replacing the OG-X-FR Door The CFM-OGX includes the fan board and filter pre-installed in a new OG-X-FR frame door. You will need to remove the old door from your OG-X-FR frame and replace it with the new door. To remove the old door from the OG-X-FR frame 1. -
Page 42: Chapter 10 - Service Information
4. Output Signal Path — Verify that destination equipment is operating correctly and receiving a valid signal. 5. Unit Exchange — Exchanging a suspect unit with a unit that is known to be working correctly is an efficient method for localizing problems to individual units. OG-X-FR openGear Frame v1.0r1 www.aja.com... -
Page 43: Chapter 11 - Glossary
Network Controller Card — the MFC-OG3-N and any available options unless otherwise noted. NTSC captions — the CEA-608-D: Line 21 Data Services captions. openGear frame — refers to the OG-X-FR frames unless otherwise noted. PAL — PAL-B and PAL-G unless otherwise stated. PCR — program clock reference. -
Page 44: Appendix A - Specifications
Appendix A – Specifications OG-X-FR Series Tech Specs Frame Controller and Fans • Total Power: 50W maximum • Max. Power: +12V Rail 4A, 48W • Max. Power: -7.5V Rail 0.2A (1.5W) GFC-8322 • Total Power: 3.9W maximum • Max. Power: +12V Rail 0.2A (2.4W) •... -
Page 45: Appendix B - Safety And Compliance
Community throughout this document: AUSTRIA, BELGIUM, BULGARIA, CYPRUS, CZECH REPUBLIC, DENMARK, ESTONIA, FINLAND, FRANCE, GERMANY, GREECE, HUNGARY, IRELAND, ITALY, LATVIA, LITHUANIA, LUXEMBOURG, MALTA, NETHERLANDS, POLAND, PORTUGAL, ROMANIA, SLOVAKIA, SLOVENIA, SPAIN, SWEDEN, UNITED KINGDOM, ICELAND, LICHTENSTEIN, NORWAY, SWITZERLAND OG-X-FR openGear Frame v1.0r1 www.aja.com... - Page 46 For more information about where you can drop off your waste for recycling, please contact your local authority, or where you purchased your product. OG-X-FR openGear Frame v1.0r1 www.aja.com...
- Page 47 If this equipment is used in a domestic environment, radio interference may occur, in which case, the user may be required to take corrective actions. Translated Warning and Caution Messages The following caution statements, warning conventions, and warning messages apply to this product and manual. OG-X-FR openGear Frame v1.0r1 www.aja.com...
- Page 48 Aviso! Não instale perto de nenhuma fonte de calor tal como radiadores, saídas de calor, fogões ou outros aparelhos (incluindo amplificadores) que produzam calor. Avviso! Non installare vicino a fonti di calore come termosifoni, diffusori di aria calda, stufe o altri apparecchi (amplificatori compresi) che emettono calore OG-X-FR openGear Frame v1.0r1 www.aja.com...
- Page 49 Aviso! Dado que a ficha principal é utilizada como a desconexão para o dispositivo, esta deve manter-se prontamente acessível e funcional. Avviso! Poiché il cavo di alimentazione viene usato come dispositivo di sconnessione, deve rimane prontamente accessibile e operabile. OG-X-FR openGear Frame v1.0r1 www.aja.com...
- Page 50 Aviso! Desconecte este dispositivo da tomada durante trovoadas ou quando não é utilizado durante longos períodos de tempo. Avviso! Utilizzare soltanto i collegamenti e gli accessori specificati e/o venduti dal produttore, quali il treppiedi e l'esoscheletro. OG-X-FR openGear Frame v1.0r1 www.aja.com...
- Page 51 Advertência! Não abra o chassi. Não há internamente nenhuma peça que permita manutenção pelo usuário. Abrir o chassi anula a garantia, a menos que a abertura seja realizada por uma central de serviços da AJA ou por um local autorizado. Avvertenza! Non aprire lo chassis. All’interno non ci sono parti riparabili dall’utente.
- Page 52 Cuidado! Para atender aos regulamentos de segurança para correntes de fuga, conecte as fontes duplas a circuitos elétricos separados. Attenzione! Per soddisfare le norme di sicurezza sulla corrente di perdita, collegare i doppi alimentatori a circuiti derivati separati. OG-X-FR openGear Frame v1.0r1 www.aja.com...
- Page 53 Caution! The OG-X-FR front fan door is heavy. Remove with Caution. Attention ! La porte du ventilateur avant de l’OG-X-FR est lourde. Enlevez-la avec précaution. Vorsicht! Die vordere Gebläsetür des OG-X-FR ist schwer. Vorsicht beim Entfernen.
- Page 54 Advertencia — En algunos países, puede ser necesario subministrar la red de cable de alimentación correcta. Utilice solamente un cable aprobado de línea IEC 320-13 C Tipo A/C nominal para un mínimo de 10A a 250V y certificado para el país de uso. OG-X-FR openGear Frame v1.0r1 www.aja.com...
-
Page 55: Warranty And Liability Information
AJA Video, with shipping charges prepaid. AJA Video shall pay to return the product to Customer but only if to a location within the country in which the AJA Video service center is located. -
Page 56: Limitation Of Liability
No amendment to or modification of this warranty will be binding unless in writing and signed by AJA Video. The laws of the State of California, USA will govern this warranty and any dispute arising from it. Any translation of this...
Need help?
Do you have a question about the OG-X-FR and is the answer not in the manual?
Questions and answers