Advertisement
Advertisement
Table of Contents

Summary of Contents for DeLaval Activity Meter 2
- Page 1 Activity Meter 2 Tester Quick manual 1 (7)
-
Page 2: Table Of Contents
Table of Contents Federal Communications Commission (FCC) Statement ................. 2 Technical data ............................3 Reading meter serial number ........................4 Batteries ..............................5 Replacing batteries ..........................6 Troubleshooting ............................7 Federal Communications Commission (FCC) Statement Note: This device complies with Part 15 of the FCC Rules. Operation is subject to the following two conditions: (1) this device may not cause harmful interference, and (2) this device must accept any interference received, including interference that may cause undesired operation. -
Page 3: Technical Data
Technical data Nominal voltage 3V DC Battery type AA, 2 pcs Dimensions 185 x 83 x 33 mm Weight 48 g excluding batteries 119 g including batteries Ideal environment Indoor Operating temperature* -20 °C to +55 °C Recommended storage temperature* +10 °C to +35 °C 3 (7) -
Page 4: Reading Meter Serial Number
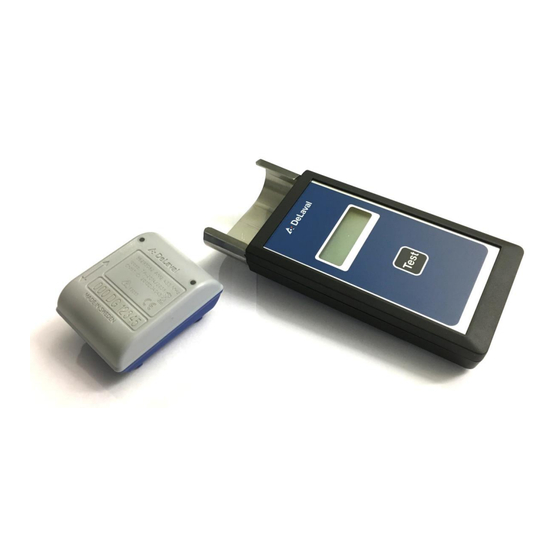
Reading meter serial number DeLaval Activity Meter 2 Tester allows You to read out the serial number from an Activity Meter 2 unit. To read the number from the unit, place the AM2 in the bracket as shown in Figure 1. -
Page 5: Batteries
Note: The shortest interval between two readings of the same AM2 unit is 5 minutes. The serial number will be displayed during 20 seconds and after that the tester will turn itself off. At any time during this interval, the Test-button can be pushed again to start a test of a new AM2 unit. If no AM2 unit is found, the following message in Figure 4 will be displayed and then the tester will turn itself off. -
Page 6: Replacing Batteries
Replacing batteries In order to replace the batteries, perform the following steps: 1. Remove two Philips screws according to picture. Be aware that there are two rubber bushings attached to the screws. See Figure 7. Figure 7 2. Remove the battery lid and replace the two AA batteries. Note so that the direction of the batteries is according to the sketch inside the battery holder. -
Page 7: Troubleshooting
Troubleshooting Symptom Cause Action Tester does not start No/very discharged Check batteries batteries Electrical malfunction Replace the tester Display shows “AM2 No AM2 unit is Insert an AM2 in the bracket and press not found” present Test AM2 unit is not Make sure the AM2 unit is inserted inserted properly according to Figure 1.
Need help?
Do you have a question about the Activity Meter 2 and is the answer not in the manual?
Questions and answers