
Related Manuals for Artusi CAO888X


Summary of Contents for Artusi CAO888X
- Page 1 CAO888X CAO888B CAO888W CAO888X/1 INSTRUCTION MANUAL Do not use the oven until you have read this instruction manual Cod:0040303114 artusi.com.au...
-
Page 2: Table Of Contents
DEAR CUSTOMER TABLE OF CONTENTS Dear Customer Safety instructions ......................4 Thank you for having purchased and given your preference How to save energy......................5 to our product. Unpacking..........................5 The safety precautions and recommendations within this Disposal of the appliance....................6 booklet are for your own safety and that of others. They will Description of the applianc ..................7 also provide a means by which to make full use of the features... -
Page 3: Safety Instructions
HOW TO SAVE ENERGY SAFETY INSTRUCTIONS UNPACKING IMPORTANT SAFEGUARDS & RECOMMENDATIONS During transportation, Using energy in a Do not carry any cleaning or maintenance without first disconnecting the appliance protective packaging was responsible way not from the electrical supply. used to protect the appliance only saves money During and after use of the double oven, certain parts will become very hot. -
Page 4: Description Of The Appliance
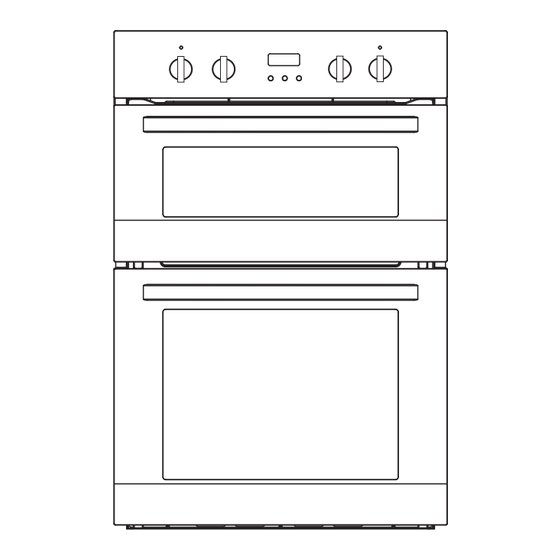
DESCRIPTION OF THE APPLIANCE DESCRIPTION OF THE APPLIANCE BEFORE USING FOR THE FIRST TIME Read the instructions carefully before installing and using the appliance. Clock and timer with keys After unpacking the appliance, check that it is not damaged. In case of doubt, do (Bottom mains oven only) not use the appliance and contact your supplier or a qualified engineer. -
Page 5: Installation
INSTALLATION INSTALLATION IMPORTANT The appliance should be installed by a QUALIFIED INSTALLATION TECHNICIAN. The appliance must be installed in compliance with regulations in force. You need the following housing area to fit your oven correctly. The double oven is designed to fit into a cabinet of 600 mm width. The double oven can be built in the kitchen units, but you must ensure that it is properly ventilated. -
Page 6: Operation
Mains lead should be minimun 1.5m The cable of correct size rating please CAO888B long. follow the below diagram. CAO888W CAO888X/1 CONNECTION DIAGRAM Caution! Voltage of heating elements 220-240V Recommended Caution! In the event of any connection the safety type of... -
Page 7: Top Natural Convection
OPERATION OPERATION Top Natrual Convection Grill Light GENERAL FEATURES This oven features 2 different thermostatic control functions to satisfy all cooking OPERATING PRINCIPLES Bottom Convection requirements, provided by 3 heating elements: Heating and cooking in the natural Upper element, 850W convection oven are obtained: Lower element, 1150W... - Page 8 OPERATION OPERATION OVEN COOKING Grill Bottom Main Multifunction Oven Grill (Grill and the top element) Before introducing the food, preheat the oven to the desired temperature. When the “combined grill” is active it For a correct preheating operation, it is GENERAL FEATURES enables grilling with the grill and with the advisable to remove the tray from the...
- Page 9 OPERATION OPERATION Static Grill Classic convection (Bottom Heat+Top Heat) (Grill and the top element) Grill Convection The upper and lower heating elements When the “combined grill” is active it are switched on. enables grilling with the grill and with the Half Fan Grill Defrost The heat is diffused by natural convection...
-
Page 10: Cooking Advice
COOKING ADVICE Prior first use REGENERATION COOKING WITH FORCED AIR Remove packaging, clean the interior of the oven. Take out and wash the oven fittings with warm water and a little washing-up liquid. Switch on the ventilation in the room or open a window. Fan cooking is more economical and Set the switch to position and the... - Page 11 directly press button 2, Apart from the timer alarm, any other alarms end of cooking time At power on, displays “12.00", Your setting is saved. flashes. End of cooking time end of cooking time End of cooking time = current time + cooking time set either the end of...
- Page 12 end of cooking time- cooking end of cooking time: end of cooking time End of cooking time automatically changes to 5:00. Press button 2 The oven is switched off automatically. end of cooking time to adjust the cook 1 and 3. 1 and 3.
- Page 13 Caution! “0.00”and flashing Electronic programmer Before any setting, press button 4 (Only for CAO888X) to start the oven. Setting the time After connection to the mains or reconnection after a power cut ,the display shows flash”0:00” Set the timer using buttons 5 and 6.
- Page 14 Automatic operation 6. Press any button, the signal function is off, and the signal function If the oven is to be switched on for a and alarm signal will go off. if the starts flashing again. specified period of time and switched off at alarm signal is not turned off a fixed hour then you should set the cooking manually, it will be turned off...
- Page 15 Caution! Press button 3. When it up to10:00, the alarm signal is Work time = switch-off time - Work time = switch-off time - activated, the signal function is off, cooking time For example: and the signal starts flashing. If the current time is 2:00; cooking time set to be 3 hours;...
-
Page 16: Oven
Caution! Do not use cleaning products containing Top Oven guide levels By ensuring proper cleaning and abrasive materials for the cleaning and maintenance your oven you can have a Baking pans and accessories(oven grid, maintenance of the glass front panel. baking tray, etc) may be inserted into the significant influence on the continuing oven in 5 guiding levels. - Page 17 Models With Wire Racks Door removal Removal of the internal glass panel Assemble the wire racks to the oven walls using the 2 screws(fig.4.1-4.2) In order to obtain easier access to the oven Unscrew and unfasten the plastic latch that Slide in ,on the guides, the shelf and the tray(fig.4.3-4.4).
- Page 18 Baking pastry Baking tips In the event of an emergency, you should: Is cake baked? Most appropriate position for baking is the ● Switch off all working units of the oven hot air. Pierce the cake with a wooden skewer at the thickest part, if the dough does not stick to ●...
- Page 19 Pastry Baking Table Attention when roasting! Roasting Tip regarding roasting pans Roasting tables indicate suggested Guide level Temp( ) Temp( Guide level ) ℃ Temp( ) Guide level ℃ temperatures, guide level and roasting ℃ Baking time Type of pastry from down from down For best results, use light enamel...
- Page 20 Roasting table Tips for grilling Grilling Temp Temp Temp Roasting Guide level Guide level Guide level Type of meat Take extra precautions when grilling. Grilling should be carried out with the ℃) ℃) ℃) (from (from time Intensive heat from infrared element (from (from oven door closed.
- Page 21 Grill table Guide Weight Temp( ) Type of meat for grill Grill time CAO888X,CAO888B Model level( from (in grams) (in min.) CAO888W,CAO888X/1 bottom up) Grill Top oven Meat and sausages 2 beefsteaks, rare 14-16 Top element 850W 16-20 2 beefsteaks, medium...
- Page 22 A.B.N. 45868077422 2. What is not Covered by the Warranty. Distributed by Eurolinx pty Ltd The Warranty does not apply if an artusi product is defective by a factor other than a defect arising Office: in the manufacture of the artusi product, including 48-50 Moore Street, Leichhardt N.S.W 2040...
- Page 23 Home Phone: Mobile: Purchase Date: (Please attach proof of purchase to validate warranty) SERIAL NUMBER MODEL NUMBER (if you cannot locate the serial number please call ARTUSI on 1300 856 411) 01082016 Artusi Warranty May 2016.indd 2 14/07/2016 4:37 PM...
Need help?
Do you have a question about the CAO888X and is the answer not in the manual?
Questions and answers
Do not know which setting to use for grilling. Bought house with no manual
What does grilled control symbols look like on artusi oven