Subscribe to Our Youtube Channel
Summary of Contents for Sunny SF-B2721
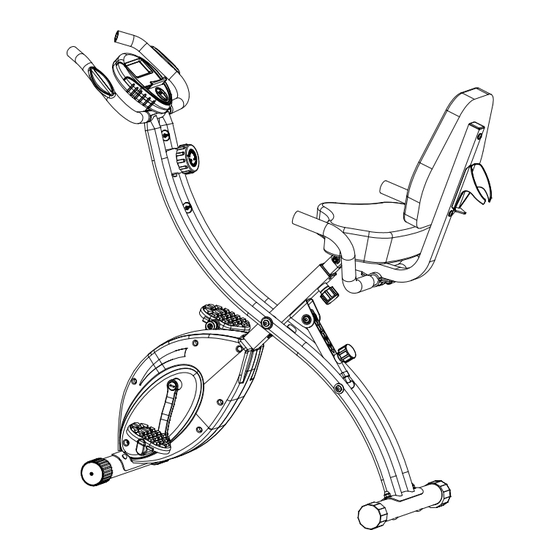
- Page 1 COMFORT XL FOLDING RECUMBENT BIKE SF-B2721 USER MANUAL IMPORTANT! Read all instructions carefully before using this product. Retain owner’s manual for future reference. For customer service, please contact: support@sunnyhealthfitness.com...
-
Page 2: Important Safety Information
IMPORTANT SAFETY INFORMATION We thank you for choosing our product. To ensure your safety and health, please use this equipment correctly. It is important to read this entire manual before assembling and using the equipment. Safe and effective use can only be achieved if the equipment is assembled, maintained and used properly. -
Page 3: Exploded Diagram
EXPLODED DIAGRAM... -
Page 4: Parts List
PARTS LIST Description Spec. Description Spec. Meter Handle Bar Tube Sponge Bushing Bolt Label Bolt Tube Bolt Sleeve Pulse Sensor Washer Bolt Tension Plastic Washer Washer Bolt Screw Seat Bushing Seat Tube Bolt Bushing Cover-R Washer Front Cover Bolt Cover-L Back Pad Seat Connect Tube Wire... -
Page 5: Hardware Package
PARTS LIST Description Spec. Description Spec. Middle Axle Bearing 6000 Wheel Belt Wheel Washer Belt 230J3 Axle Washer Magnet Spacing Spacer Bolt Washer Spring Plastic Idler Iron Sheet Belt 240J3 Magnet Reed Front Tube Rear Tube ront Bolt Washer Iron Sheet Jump Ring Wrench Clamp... -
Page 6: Assembly Instructions
ASSEMBLY INSTRUCTIONS STEP 1: Slightly loosen the Pop-Pin Knob (No. 32) and pull outward to adjust your desired recline angle (1-3 setting). STEP 2: #8 M8 4pcs #40 M8 4pcs #51 4pcs Remove the Cap Nuts (No. 51) and Washers (No. 8) from the Front Tube (No. - Page 7 STEP 4: Loosen Pop-Pin Knob (No. 32), and insert the Seat Support Tube (No. 13) into Main Frame (No. 53). Secure the Pop-Pin Knob (No. 32) after adjusted to your desired height. STEP 5: #23 M8 2pcs #24 2pcs emove preassembled Bolts (No. 23), Nuts (No. #25 M8 2pcs 25), and Washers (No.
- Page 8 STEP 8: #20 M5 2pcs Align Cup Holder (No. 21) against Back Pad Tube (No. 22), and insert Bolts (No. 20) into holes. Then, tighten with Wrench (A). STEP 9: #5 M8 2pcs #8 2pcs Remove preassembled Bolts (No. 5) and Washers (No. 8) from Handle Bar (No.
- Page 9 STEP 12: Attach the Left and Right Pedals (No. 58L/R) to the Left and Right Cranks (No. 57L/R). Left Pedal: align the Left Pedal (No. 58L) with the Left Crank Arm (No. 57L) at 90 degrees. Insert pedal into crank arm, then turn pedal counter-clockwise as tightly as you can by hand.
-
Page 10: The Display Console
THE DISPLAY CONSOLE FUNCTION KEY: 1. MODE: For selecting functions. Press and hold for a few seconds to values to 0. FUNCTIONS AND SPECIFICATIONS: 1. SCAN -- Press “MODE” button until “SCAN” appears, monitor will rotate through all the 6 functions: Time, speed, distance, calorie, ODO and pulse. Each display will be hold 5 seconds. -
Page 11: Operation And Maintenance
OPERATION & MAINTENANCE OPERATING INSTRUCTIONS: 1. Please read all instructions before assembling the equipment. During assembling and use, please make sure to follow all instructions carefully as any improper techniques of use or assembly may result in injury or damage to the equipment. -
Page 12: Adjustment Guide
ADJUSTMENT GUIDE THREE LEVEL AND FOLDING ADJUSTMENT: Turn and pull the knob to adjust the level. LEVEL 3 LEVEL 1 LEVEL 2 FOLDING SEAT TUBE ADJUSTMENT: Turn and pull the knob to adjust the seat tube. TRANSPORT WHEEL Please adjust the end caps if there is a slight imbalance problem caused by uneven ground.


Need help?
Do you have a question about the SF-B2721 and is the answer not in the manual?
Questions and answers