Table of Contents
Advertisement
Quick Links
Advertisement
Table of Contents

Summary of Contents for THORLABS LC100
- Page 1 Smart Line Camera LC100 Operation Manual 2012...
- Page 2 Version: 4.3.0 Date: 06.06.2012 Copyright © 2012 Thorlabs...
-
Page 3: Table Of Contents
2.3.2 Installing SPLICCO 2.3.3 Driver Installation 2.3.4 Start the GUI 3 Operating Instruction LC100 Smart Line Camera 3.1 Connecting a Device 3.2 LC100 Software update 3.3 Integration time 3.4 Program navigation 3.5 Save and Export Data 3.6 Load and Import Data 3.7 Save and Load Device Settings... - Page 4 4.1 What are virtual devices? 4.2 Configuration of virtual devices 4.3 The virtual devices description file 5 Write Your Own Application 5.1 CCS Series 5.2 LC100 Smart Line Camera 5.3 SPX Series 5.4 LC1 Line Camera 6 Maintenance and Service 6.1 Maintenance 6.2 Version Information...
- Page 5 7.4.1 List of acronyms 7.4.2 Thorlabs Worldwide Contacts...
-
Page 6: Foreword
Paragraphs preceeded by this symbol explain hazards that could damage the instrument and the connected equipment or may cause loss of data. Note This manual also contains "NOTES" and "HINTS" written in this form. Please read these advices carefully! © 2012 Thorlabs... -
Page 7: General Information
The initial setup is simple to complete. Following installation of the software, the LC100 line camera is ready to use. Simply plug it into a USB 2.0 port and run the application software SPLICCO. -
Page 8: Ordering Codes And Accessories
Hard disc with at least 100 MB free storage space free USB2.0 port USB cable according the USB 2.0 specification Software Requirements: ® Windows XP (32-bit) SP3, ® Windows Vista (32-bit, 64-bit), ® Windows 7 (32-bit, 64-bit) VISA runtime (version 5.1 or higher) © 2012 Thorlabs... -
Page 9: Installation
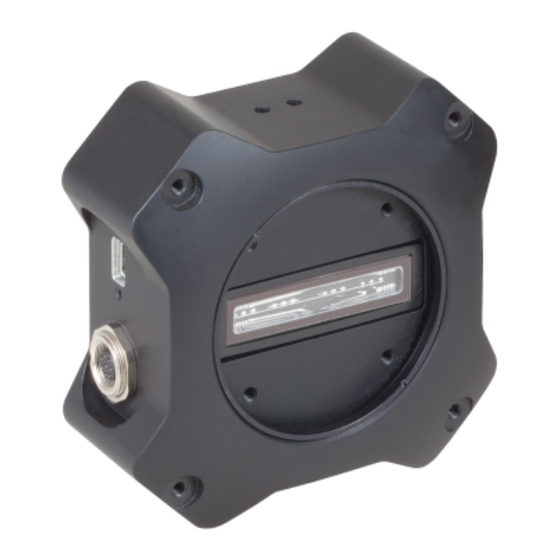
2.1 Parts List Inspect the packaging for damage. If the shipping container seems to be damaged, keep it until you have inspected the contents and you have inspected the LC100 smart line camera mechanically and electrically. Please verify that you have received the following items: LC100 USB 2.0 CCD line camera... -
Page 10: Getting Started
After completing, run the application program SPLICCO. 2.2.1 USB requirements To achieve the maximum performance benefit from your LC100 USB line camera, you must have a dedicated USB 2.0 port available on your PC (a built-in USB 2.0 port is recommended). -
Page 11: Installing Splicco
"Next" in the following two screens: The following window states the next installation steps and notifies, which software will be installed. Click the "Next" button to begin installation or click the "Back" button to change the installation settings. © 2012 Thorlabs... - Page 12 Windows Security system will notify you about device driver installation. You may check the box "Always trust software from "Thorlabs GmbH" prior to click the Install button. A firmware and driver package for all supported devices will be installed as SPLICCO software is designed to control several hardware devices.
-
Page 13: Driver Installation
2 Installation Finally, you will be prompted to restart you computer in order make changes effective: 2.3.3 Driver Installation Upon first connect of a LC100 smart line camera Windows recognizes a new hardware and starts the driver installation. © Using Windows XP Windows starts the driver installation. -
Page 14: Start The Gui
The green status LED lights up, the device is installed and ready for use with SPLICCO. 2.3.4 Start the GUI To start SPLICCO click on the desktop icon or select 'Programs' via the START button in the Windows task bar and navigate to 'All Programs / Thorlabs / SPLICCO / SPLICCO'. © 2012 Thorlabs... -
Page 15: Operating Instruction Lc100 Smart Line Camera
3 Operating Instruction LC100 Smart Line Camera 3.1 Connecting a Device 1. To start a measurement with a LC100 Line Camera connect it to a USB port of your PC with the supplied cable. 2. The SPLICCO connects automatically to all detected devices. -
Page 16: Integration Time
If you decline the LC-100 update, the camera might not work properly with the current SPLICCO version. Note The content of the LC100's internal memory (EEPROM), i.e., the device label and a saved I/ O Setup configuration , are not being overwritten. - Page 17 3 Operating Instruction LC100 Smart Line Camera Integration time can be set via the control on the lower left corner of the device window. The supported range is defined by the line camera and ranges from 1.054 ms to 50 s. The integration time input window uses milli seconds, therefore the values of 1.054 ms -...
-
Page 18: Program Navigation
Help menu You will find the online help in this menu. Furthermore, there is a link to the Thorlabs web page to check for the latest drivers or software version. You can check the current version by selecting 'About...'. - Page 19 3 Operating Instruction LC100 Smart Line Camera Opens a dialog to configure colors Stores the actual measurement plot as reference plot Loads a reference plot out of a JCAMP-DX file Deletes the actual windows reference curve Switches to scope view...
-
Page 20: Save And Export Data
To save the measurement data to a JCAMP-DX file select 'Save As ...' from the File menu or click the button from the toolbar. A file dialog window appears and you can choose the filename and directory. Click to "Browse" to define the location of the file to be saved to: © 2012 Thorlabs... - Page 21 3 Operating Instruction LC100 Smart Line Camera The file extension of this file is *.jdx. Additionally you can choose the range to store. Text entered in the "Comments" field will be stored together with the data. Export Data Measurement data can be exported to a *.csv file for use with e.g. Microsoft Excel™ or MathLab™.
-
Page 22: Load And Import Data
Y axis results from the resolution when the file was saved. By pressing Load the curve is opened in a new window. Note The Load function is used also for loading a reference scan to the current live window. Details are explained in section References © 2012 Thorlabs... - Page 23 3 Operating Instruction LC100 Smart Line Camera Import data To import measurement data from a *.csv file select 'File -> Import CSV...' from the menu. Please specify the character separating the x & y columns and choose which character marks the decimal position in the appearing window.
-
Page 24: Save And Load Device Settings
The advantage is that you can exactly reproduce your measurement conditions say, next day or even in a different lab. The only condition is that the type of device (e.g. LC100) must match. The following parameters are saved: Device type and Device Label... - Page 25 3 Operating Instruction LC100 Smart Line Camera Sample of a configuration file: The background correction is NOT being saved! Also, settings of the graphic user interface, like color settings, released or tabbed view of multiple windows, cannot be saved to the device configuration file.
-
Page 26: Save Settings
SPLICCO 3.7.1 Save Settings Open from the File menu the topic "Save Device Configuration": Select a file name and destination for the configuration file. and click "Save". © 2012 Thorlabs... -
Page 27: Load Settings
3 Operating Instruction LC100 Smart Line Camera 3.7.2 Load Settings Open from the File menu the topic "Load configuration": © 2012 Thorlabs... - Page 28 In case the instrument's serial numbers do not match, you will be noticed about that: Click Ok to get back to the preview pane. You may choose then another configuration file ("Browse") or even load the mismatching file. © 2012 Thorlabs...
-
Page 29: Sequential Recording
3 Operating Instruction LC100 Smart Line Camera 3.8 Sequential Recording SPLICCO software allows a sequential recording of individual scans. The scan results are saved in *.csv file format . Importing sequential results to an appropriate software, e.g., © Microsoft EXCEL , scans can be displayed in a 3rd dimension - time. -
Page 30: Fast Sequential Recording
≥ 10ms. For smaller integration time values it depends on system performance and CCD read-out time. Results are being saved to a single file. Example: Select the desired device Click Browse to open the dialog for selecting a file name © 2012 Thorlabs... -
Page 31: Print
3 Operating Instruction LC100 Smart Line Camera Confirm the entered file name Define the number of scans to be recorded. For triggered recording, check the box "External trigger" Click Go; the recording starts. After finishing, the software needs to process data, which takes some time, depending on the number of scans to be recorded. -
Page 32: Device Windows
The axis is rescaled after confirming the changes. Another way to zoom is holding the CTRL key on the keyboard and left clicking on the graph to zoom in and right clicking to zoom out. © 2012 Thorlabs... -
Page 33: Markers
3 Operating Instruction LC100 Smart Line Camera Note The zoom is limited to 1% of the original size of each axis. Furthermore you cannot zoom out more than the original size. Panning Press and hold the CTRL and SHIFT key on the keyboard to use the mouse to pan the actual graph. -
Page 34: Tab Info
The tab Info contains information about manufacturer, device name, serial number and firmware revision: 3.13.2 Tab Common In this tab, trigger and averaging modes can be set, a smoothing can be enabled and the graphical display can be changed. © 2012 Thorlabs... -
Page 35: Trigger Mode
Hardware Trigger The LC100 line camera is equipped with a hardware trigger input. This input will be enabled by selecting either the "Ext. Trigger Continuous" mode or the "Ext. Trigger Single Shot" mode. -
Page 36: Average Mode
"Box Smoothing". This kind of smoothing is comparable to a low pass filter, suppressing the high frequent noise. This is the simplest form of smoothing. The only parameter needed is the box width, which indicates how many values are averaged. There is no weighting of those values. © 2012 Thorlabs... - Page 37 3 Operating Instruction LC100 Smart Line Camera Click to icon in the toolbar, open the 'Common' tab and enable "Box Smoothing". The smoothing box width can be set below this control. Zero means no smoothing at all. Any change will instantly affect the actual graph.
-
Page 38: Flip And Revert Picture
> 500ms. 3.13.3 Tab LC100 Settings The LC100 Settings tab allows to set a custom device label, save and clear background correction as well as to configure the pattern recognition and the GPIO ports. The two latter topics are explained in detail in the GPIO Port section 3.13.3.1 Device Label... - Page 39 3 Operating Instruction LC100 Smart Line Camera Enter a new device label name and press "Save" Reconnect the device to activate changes: The new device label is displayed in the software: © 2012 Thorlabs...
-
Page 40: Background Correction
SPLICCO session. That means, the background correction will be cleared automatically, when SPLICCO software is terminated and/or a device is disconnected. "Clear Background Correction" deletes the correction data immediately. The background correction can be easily saved and turned on/off from the panel below the scan: © 2012 Thorlabs... -
Page 41: Peak Finder
3 Operating Instruction LC100 Smart Line Camera 3.14 Peak finder SPLICCO offers the possibility to find peaks in an actual measurement. The peak finder can be selected by right clicking on the actual window and selecting "Peak finder..." or from the Tools... -
Page 42: Logarithmic Y Scale
Persistence from the View menu or from the right click to the diagram area dialog. It offers two sliders for duration and intensity of the persistence feature. After you have chosen the parameters, press "Apply" to make the changes effective. Press "Done" to leave the © 2012 Thorlabs... -
Page 43: Gaussian Transformation
3 Operating Instruction LC100 Smart Line Camera dialog. 3.18 Gaussian Transformation SPLICCO is able to display the measurement data as the best-fit Gaussian distribution. The Gauss Transformation dialog can be reached either by clicking to the icon in the menu bar, by choosing 'Gauss Transformation...' from the View menu or from the right click to the... - Page 44 The reference curve is copied into the actual window and can be used for future calculations. Note The reference can be scaled: check the "Enable Scaling" box - then the intensities can be scaled and an offset can be entered. © 2012 Thorlabs...
-
Page 45: Copy To Clipboard
TTL Trigger Input 5 programmable TTL GPIO (General Purpose I/O) ports The I/O setup dialog can be reached via LC100 Device Settings menu, either via the toolbar icon or by right clicking to the diagram area, and then selecting "Properties": 3.22.1 Analog Output... -
Page 46: Trigger Setup
3.22.2 Trigger Setup Trigger Setup allows to independently set the timing between internal (software) or external (hardware) trigger event, exposure control and flash signal. Therefore, 3 sliders are in the tab Trigger Setup: © 2012 Thorlabs... -
Page 47: Gpio
The time diagram to the left illustrates the timing. 3.22.3 GPIO The LC100 smart line camera has 5 programmable I/O ports. These ports are logical ports, i.e., the input/output signals are TTL level, active = HIGH: input voltage: max. - Page 48 - see section Pattern Recognition exposure: In exposure mode, the output is pulsed: pulse duration = 0.5 ms. The rising edge of the pulse is synchronized with start of exposure of the CCD. If the LC100 is in Software Trigger Continuous mode, the pulse is synchronized with starting of a new scan.
- Page 49 3 Operating Instruction LC100 Smart Line Camera GPIO 2 is in exposure mode, it's output is active during exposure. GPIO 3 is in flash mode, so it's output is active during flash. The logical formula for the GPIO 1 output state is:...
-
Page 50: Pattern Recognition
SPLICCO 3.22.4 Pattern Recognition LC100 Pattern Recognition is a powerful tool to evaluate a scan for it's curve shape. By other words, it's possible to observe the intensities detected within certain pixel ranges, compare them with given margins and output the result as a logical signal representing "... - Page 51 3 Operating Instruction LC100 Smart Line Camera LC100 Evaluation boxes - factory default Each evaluation box is defined by a range of pixel numbers (X1 = start pixel number; X2 = end pixel number) and a range of correlated intensities (Y1 = min. intensity; Y2 = max. intensity), this way forming a rectangle.
-
Page 52: Editing An Evaluation Box
Ctrl key and the left mouse button. The cursor changes from . Drag the zoom area to the desired size. The button "Zoom Home" returns to the view of the entire diagram area. © 2012 Thorlabs... -
Page 53: Area Of Interest (Aoi)
3 Operating Instruction LC100 Smart Line Camera Hardware Averaging LC100 hardware is able to average the result of an evaluation box prior. This averaging can be extended to up to 512 scans. A progress bar indicates the averaging status: 3.22.4.2 Area Of Interest (AOI) -
Page 54: Examples
High TRUE FALSE FALSE FALSE FALSE FALSE FALSE TRUE FALSE FALSE FALSE FALSE FALSE FALSE TRUE FALSE FALSE FALSE FALSE FALSE FALSE TRUE FALSE FALSE FALSE FALSE FALSE FALSE TRUE FALSE FALSE FALSE FALSE FALSE FALSE TRUE © 2012 Thorlabs... -
Page 55: Saving And Loading Of I/O Configurations
3 Operating Instruction LC100 Smart Line Camera 3.22.5 Saving and Loading of I/O Configurations Save I/O configuration: all settings of analog output , trigger and of GPIO 1...5 including the settings of pattern recognition , will be saved. Via the LOAD function, previously saved configurations can be re-opened. - Page 56 A previously saved I/O configuration can be re-opened. Click to the Load from File button in either Pattern Recognition or Input/Output Configuration panel. A dialog box for selecting a file name appears: Click to Browse in order to select a file name: © 2012 Thorlabs...
-
Page 57: Stand Alone Operation
Click "Close" to finish: Load from EEPROM A saved to the LC100 camera I/O configuration can be re-opened. Click to the Load from File button in either Pattern Recognition or Input/Output Configuration panel, then in the next dialog "Load from EEPROM":... -
Page 58: Application Note
The result can be seen in the following figures. Please note, that the intensity is around 0.018 which corresponds to 1.8% of the available intensity scale. © 2012 Thorlabs... - Page 59 Blooming Blooming is a property owned by all CCD sensors, as used in the LC100. Strongly overexposed pixels tend to discharge neighboring / adjacent pixels, even if they are not illuminated. This can be seen in the scan by an increased pattern width, which could lead to misinterpretations of the signal.
-
Page 60: Virtual Devices
If the virtual device simulates a spectrometer the "Data Generation Mode" offers the mode "Peaks" only . Each time you select this mode new peaks will be generated. With the help of the control "Noise" the noise level in % can be changed as well as the fluctuation. © 2012 Thorlabs... -
Page 61: The Virtual Devices Description File
The virtual devices serial number. REVISION The virtual devices revision number. ALIAS The virtual devices alias. LOCKSTATUS The virtual devices lock status. 0 means unlocked, 1 means locked. The device can only be opened if the lockstatus is 0. © 2012 Thorlabs... - Page 62 Open the description file, add your device and save it as XML file to above folder. Note Please make sure that serial numbers are unique. Example: The following changes were made; a third device was added in lock state: This leads to the virtual devices dialog as below: © 2012 Thorlabs...
-
Page 63: Write Your Own Application
Beside that, LabVIEW driver vi's are provided with the *.llb container file Note All above environments require also the NI VISA instrument driver dll ! In the next sections the location of above files for all hardware, supported by SPLICCO drivers, is described in detail. © 2012 Thorlabs... -
Page 64: Ccs Series
C:\Program Files\IVI Foundation\VISA\WinNT\Bin\CCS_Series_Drv_32.dll Note This instrument driver is required for all development environments! The source code of this driver can be found in C:\Program Files\IVI Foundation\VISA\WinNT\Thorlabs CCSseries\CCS_Series_Drv.c Online Help for NI VISA Instrument driver: C:\Program Files\IVI Foundation\VISA\WinNT\Thorlabs CCSseries\Manual NI LabVIEW driver C:\Program Files\National Instruments\LabVIEW xxxx\Instr.lib\CCSseries\CCSseries.llb... -
Page 65: Lc100 Smart Line Camera
C:\Program Files\IVI Foundation\VISA\WinNT\Thorlabs CCSseries..\Examples\CSharp\CCS100_CSharpDemo\bin\Release\CCS100_CSharpDemo.exe Example for LabView C:\Program Files\IVI Foundation\VISA\WinNT\Thorlabs CCSseries\Examples..\LabVIEW\CCS Series Sample.llb 5.2 LC100 Smart Line Camera NI VISA Instrument driver: C:\Program Files\IVI Foundation\VISA\WinNT\Bin\LC100_Drv_32.dll Note This instrument driver is required for all development environments! The source code of this driver can be found in C:\Program Files\IVI Foundation\VISA\WinNT\Thorlabs LC100\LC100_Drv.c... -
Page 66: Spx Series
SPLICCO Example for C C:\Program Files\IVI Foundation\VISA\WinNT\Thorlabs LC100\Examples\C sample.c - C program how to communicate with a LC100 Smart Line Camera sample.exe - same, but executable Example for C# Solution file: C:\Program Files\IVI Foundation\VISA\WinNT\Thorlabs LC100\Examples..\CSharp\ LC100_CSharpDemo.sln Project file C:\Program Files\IVI Foundation\VISA\WinNT\Thorlabs LC100... -
Page 67: Lc1 Line Camera
5 Write Your Own Application Static Library C:\Program Files\IVI Foundation\VISA\WinNT\lib\msc\SPX_Drv.lib C:\Program Files\IVI Foundation\VISA\WinNT\Thorlabs SPx\SPX_Drv.lib Function Panel C:\Program Files\IVI Foundation\VISA\WinNT\Thorlabs SPx\SPX_Drv.fp .net wrapper dll C:\Program Files\Microsoft.NET\Primary Interop Assemblies\Thorlabs.SPx_Drv.dll Examples for CVI: C:\Program Files\IVI Foundation\VISA\WinNT\Thorlabs SPx\Examples\CVI contains examples in source code and executable 5.4 LC1 Line Camera... - Page 68 SPLICCO .net wrapper dll C:\Program Files\Microsoft.NET\Primary Interop Assemblies\Thorlabs.LC1_DRV.dll Examples for CVI C:\Program Files\IVI Foundation\VISA\WinNT\Thorlabs LC1\Examples\CVI contains examples in source code and executable Examples for LabVIEW C:\Program Files\IVI Foundation\VISA\WinNT\Thorlabs LC1\Examples..\Labview\LC1-USBexample.llb © 2012 Thorlabs...
-
Page 69: Maintenance And Service
If necessary the unit and the display can be cleaned with a cloth dampened with water. The LC100 line camera does not contain any modules that could be repaired by the user himself. If a malfunction occurs, the whole unit has to be sent back to Thorlabs . -
Page 70: Troubleshooting
SPLICCO cannot find any devices but the virtual devices : Check if VISA runtime 5.1 or higher is installed. Make sure that the connected device is made by Thorlabs. Try to connect the device to another USB port. Installation wizard prompts to specify the path of a ".sys" file: point wizard to "Windows\System32\drivers"... - Page 71 If you want to make relative comparisons of signal heights or areas beneath the curve, try using integration times above 4ms and use the dark current correction (Properties/LC100 settings/ Save dark current correction). The scan seems to be shifted - the intensity at pixel #0 is displayed at pixel # 512 This is a synchronization issue between the camera and the software.
- Page 72 If a USB hub is used, it's power supply might have dropped. A common USB interface failure might have occurred. Possibly, the computer has been turned to Sleep or Hibernate during a running SPLICCO session - after wake up, the session won't be restored. © 2012 Thorlabs...
-
Page 73: Appendix
All technical data are valid at 23 ± 5°C and 45 ± 15% rel. humidity (non condensing) ) ratio of saturation voltage to dark current voltage ) 1.055 ms integration time ) with 10x averaging, depending on integration time; for single shot use CCD dynamic range ) non-condensing © 2012 Thorlabs... -
Page 74: Gpio Port Connector
Trigger Input, LL TTL (max. 3.3V; 0 - 0.4V = LOW, 2.4 - 3.3 V = HIGH) Common GND (Trigger and GPIO) Analog Output, 0 - 4V DC in 4096 increments, max. current 16mA 4 -8 GPIO ports 1-5, LL TTL CAB-LC100 Trigger cable DIN 47100 color code Pin # Color Description... -
Page 75: Dimensions
7 Appendix 7.2 Dimensions © 2012 Thorlabs... -
Page 76: Certifications And Compliances
) Compliance demonstrated using high-quality shielded interface cables. ) Emissions, which exceed the levels required by these standards, may occur when this equipment is connected to a test object. ) Minimum Immunity Test requirement. ) Replaces 73/23/EEC, amended by 93/68/EEC. © 2012 Thorlabs... -
Page 77: Listings
Spectrometer and Line camera Control Software Universal Serial Bus VISA Virtual Instrument Software Architecture Virtual-8086 Mode Enhancement VMEbus eXtensions for Instrumentation VXIPNP VMEbus eXtensions for Instrumentation Plug aNd Play WEEE Waste Electrical and Electronic Equipment Directive eXtensible Markup Language © 2012 Thorlabs... - Page 78 SPLICCO 7.4.2 Thorlabs Worldwide Contacts USA, Canada, and South America Thorlabs, Inc. 56 Sparta Avenue Newton, NJ 07860 Tel: 973-579-7227 Fax: 973-300-3600 www.thorlabs.com www.thorlabs.us (West Coast) Email: sales@thorlabs.com Support: techsupport@thorlabs.com Europe UK and Ireland Thorlabs GmbH Thorlabs Ltd. Hans-Böckler-Str. 6...
- Page 79 7 Appendix Index Input / Output Configuration Integration Time LabVIEW driver *.dll LabVIEW samples LC100 Software Update Load a reference Accessories Load scan data Analog output Logarithmic scale Averaging Markers Background correction Mirroring axes Block average Panning Colors Parts List...
- Page 80 SPLICCO Timed sequential scan Version Information 58, 59 Virtual Devices Zoom © 2012 Thorlabs...
- Page 81 Waste treatment on your own responsibility If you do not return an “end of life” unit to Thorlabs, you must hand it to a company specialized in waste recovery. Do not dispose of the unit in a litter bin or at a public waste disposal site.
- Page 82 Thorlabs warrants material and production of the SPLICCO for a period of 24 months starting with the date of shipment. During this warranty period Thorlabs will see to defaults by repair or by exchange if these are entitled to warranty.
- Page 83 User Manual. Should you require further information on this product, or encounter specific problems that are not discussed in sufficient detail in the User Manual, please contact your local Thorlabs dealer or system installer.
Need help?
Do you have a question about the LC100 and is the answer not in the manual?
Questions and answers