
Summary of Contents for Farm King 1266
- Page 1 OPERATOR AND PARTS MANUAL Conventional Auger Model 1266, 1272, 1276 & 1282 052011 SZ000189...
-
Page 3: Table Of Contents
Table of Contents - 1266, 1272, 1276 & 1282 Conventional Auger Table of Contents Introduction ..........................4 Safety ............................5 • Safety ..........................5 • General Safety ........................5 • Operation Safety ......................5 • Transport Safety .......................6 • Electrical Safety ........................6 • Safe Operation Instructions ....................7 Assembly ............................8... -
Page 4: Introduction
Abuse or modifications to the auger that change the performance other than original factory specifications void the warranty. Farm King reserves the right to make product improvements to the equipment at any time. It shall not be obligated to make such changes to machines already in service. -
Page 5: Safety
Safety - 1266, 1272, 1276 & 1282 Conventional Auger Safety Safety Instructions An Operator‘s Manual is furnished with each grain auger. Additional or replacement manuals are available. Do not operate the unit before reading and understanding the Operator‘s Manual. Understand the operating procedures below to avoid personal injury or death. -
Page 6: Transport Safety
Safety - 1266, 1272, 1276 & 1282 Conventional Auger Transport Safety Care must be used when moving or transporting the auger. Accidental tipping or upending of an auger can occur and may cause serious injury or death to the operator or bystanders. -
Page 7: Safe Operation Instructions
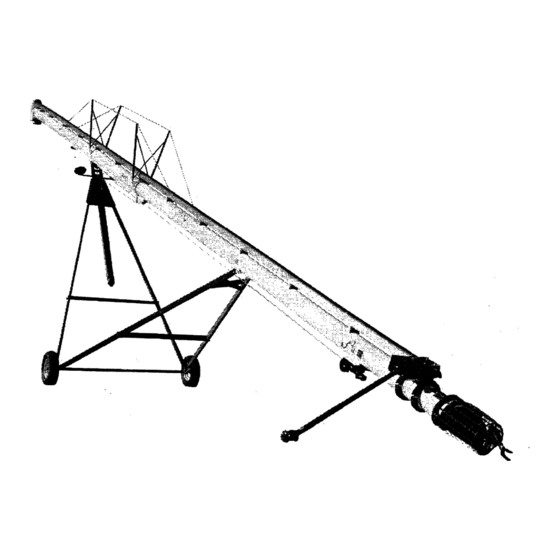
Safety - 1266, 1272, 1276 & 1282 Conventional Auger Safe Operation Instructions There are several decals on the grain auger and its attachments with safety instructions. Read and understand these safety alerts before operating. The shielding has been removed in some of the illustrations for parts demonstration only. -
Page 8: Assembly
Assembly - 1266, 1272, 1276 & 1282 Conventional Auger Assembly Instructions Shear bolt failure indicates an overload on the auger. To remedy the problem: Reduce flow into the intake of the auger. Wet grain requires more power to operate the auger. - Page 9 Assembly - 1266, 1272, 1276 & 1282 Conventional Auger Keep all shields in place during operation.
-
Page 10: Bolt Hub Assembly
Assembly - 1266, 1272, 1276 & 1282 Conventional Auger... - Page 11 Assembly - 1266, 1272, 1276 & 1282 Conventional Auger One must use extreme caution when assembling this auger. Lifting devices (i.e. loader tractor, forklift, etc.) are required as well as various wrenches and tools. Assemble the auger on a flat surface.
- Page 12 Assembly - 1266, 1272, 1276 & 1282 Conventional Auger 9. Assemble the undercarriage. - Attach rear lift arms (Ref. #35R) to axle by sliding the spindle with hub (Ref. #59) through lift arm end into the axle. Bolt using 1/2" x 3-1/2" bolt, nut and lockwasher combination (Ref.
-
Page 13: Assembly Instructions - Pto 540 Rpm Drive
Assembly - 1266, 1272, 1276 & 1282 Conventional Auger When cycling the raising mechanism the first time, stop lifting after the extending member has moved approximately one foot. CAUTION Then lower to be sure extending member will retract. If it will not retract, investigate for problems. -
Page 14: Assembly Instructions - Pto 1000 Rpm Drive
Assembly - 1266, 1272, 1276 & 1282 Conventional Auger Assembly Instructions - 1000 RPM PTO Drive Attach the implement input driveline (IID) (Ref. #82) to the gearbox with 5/16" x 1-3/4" key (Ref. #82) and 1/4" x 2-1/4" spiral pin (Ref. #82). -
Page 15: Assembly Instructions - Electric Drive
Assembly - 1266, 1272, 1276 & 1282 Conventional Auger Assembly Instructions - Electric Drive Assemble the electric mount top support clamp (Ref. #97) and the lower clamp (Ref. #105) on the tube above the gearbox using 1/2" x 4" bolt, nut and lockwasher (Ref. #107). -
Page 16: Parts
Parts - 1266, 1272, 1276 & 1282 Conventional Auger Parts List - 1266, 1272, 1276 and 1282 Conventional Auger Part No. Description Auger Tube (Top Half) w/ Head & Bearing SZ126697T19 Brackets Auger Tube (Top Half) w/ Head & Bearing... - Page 17 Parts - 1266, 1272, 1276 & 1282 Conventional Auger Part No. Description SZ4127420 Driveline Section 240" Long (Under Shield) SZ4127425 Driveline Section 204" Long (Under Shield) SZ4127415 Driveline Section 216" Long (Under Shield) SZ 4127427 Driveline Section 95" Long (Under Shield) SZ 4127426 Driveline Section 119"...
- Page 18 Parts - 1266, 1272, 1276 & 1282 Conventional Auger Part No. Description SZ7124205 217" Rear Undercarriage Arm SZ7124050 105" Extension Arm SZ7124060 120" Extension Arm SZ7124080 150" Extension Arm SZ7124411 Top Half Telescoping Head Weldment SZ7124412 Bottom Half Telescoping Head Weldment Rear Arm Slide Top Wear Pad 1/4"...
- Page 19 Parts - 1266, 1272, 1276 & 1282 Conventional Auger Part No. Description SZ0431282 Flight Extension Shaft w/ 100-30 Sprocket SZ0231150 1-1/2" 10 ga Machine Bushing SZ0043044 #100 Chain x 44 Pitch w/ Connectors SZ8481282 Face Plate w/ Access Hole & Flanges...
- Page 20 Parts - 1266, 1272, 1276 & 1282 Conventional Auger Part No. Description SZ1621289 Electric Mount Top Support Clamp SZ6003801 3/8" x 1" Bolt, Nut & Lockwasher SZ1621286 Electric Belt Shield SZ1621287 Belt Shield Support Bar SZ0164011 11-3/8" x 4 Groove Pulley (Under Shield) SZ0164137 1-3/8"...
-
Page 21: Decals
Parts Instructions - 1266, 1272, 1276 & 1282 Conventional Auger Parts List - Decals (decal location drawing available upon request) Part No. Description SZ06001 Made in USA SZ06010 "Warning" Do not operate the unit before reading the Operator‘s Manual SZ06017 "Notice"... -
Page 22: Pto 540 Rpm Drive
Parts - 1266, 1272, 1276 & 1282 Conventional Auger Parts List - PTO 540 RPM Drive - SZ000353 Ref No. Part No. Description SZ000353 Complete IID - 72" Closed Length SZ0003531 Tractor Half w/ Shield SZ0003535 Machine Half w/ Shield SZ195-3506B 14N 1-3/8"... -
Page 23: Pto 1000 Rpm Drive
Parts - 1266, 1272, 1276 & 1282 Conventional Auger Parts List - PTO 1000 RPM Drive - SZ000358 Ref No. Part No. Description SZ000358 Complete IID - 72" Closed Length SZ0003581 Tractor Half w/ Shield SZ0003585 Machine Half w/ Shield SZ195-1421B 14N 1-3/8"... -
Page 24: 540 Gear Box
Parts - 1266, 1272, 1276 & 1282 Conventional Auger Parts List- 540 RPM Gearbox SZ102925 - Prairie Gear 907 (1:1 Ratio) - Page 25 Parts - 1266, 1272, 1276 & 1282 Conventional Auger Ref No. Part No. Description SZ102925 Prairie Gear 907 Gearbox 1:1 Ratio SZPG-1018 Main Housing SZPG-1659 Key: 3/8 Sq. x 1.46 SZPG-2853 Spacer Tuber SZPG-1620 Snap Ring SZPG-2855 Washer - 1.75 ID x .179 SZ25520 1-3/4"...
-
Page 26: 1000 Gear Box
Parts - 1266, 1272, 1276 & 1282 Conventional Auger Parts List - 1000 RPM Gearbox SZ102923 - Prairie Gear 907 (1.81:1 Ratio) - Page 27 Parts - 1266, 1272, 1276 & 1282 Conventional Auger Ref No. Part No. Description SZ102923 Prairie Gear 907 Gearbox 1.81:1 Ratio SZPG-4143-1 End Cover SZPG-1872 Pipe Plug - 3/8 NPT SZPG-1705 Bolt - 3/8 - 16 UNC x 1.00 - Gr.5 SZPG-1544 Shim - .007 - Cover...
-
Page 28: Warranty
Repair Parts Limited Warranty Buhler Industries Inc. warrants Farm King replacement parts purchased after the expiration of the Buhler Industries Inc. Limited Warranty, and used and serviced as provided for in the Operator’s Manual, to be free from defects in materials or workmanship for a period of thirty (30) days from the invoice date for the parts. - Page 29 Warranty Requirements To be covered by warranty, each Farm King new product must be registered with Buhler Industries Inc. within thirty (30) days of delivery to original retail purchaser. If the customer decides to purchase replacement components before the warranty disposition of such components is determined, Buhler Industries Inc.
- Page 30 Warranty - 1266, 1272, 1276 & 1282 Conventional Auger (Note that some provinces or states do not allow limitations on how long an implied warranty lasts or the exclusion or limitation of incidental or consequential damages, so the above limitations and exclusion may not apply to you.) This warranty gives you specific legal rights and you may also have other rights, which vary from province to province or state to state.
- Page 32 www.farm-king.com 1330 43rd Street NW Fargo, ND USA 58102 Ph.: 701.282.7014 | Fax: 701.282.5865 Toll Free: 888.524.1004 E-mail: info@buhler.com www.farm-king.com Equipment shown is subject to change without notice. ©2010 Buhler Trading Inc. Printed in USA. TSX:BUI a division of Buhler Industries Inc.
Need help?
Do you have a question about the 1266 and is the answer not in the manual?
Questions and answers