Table of Contents
Advertisement
Quick Links
Advertisement
Table of Contents

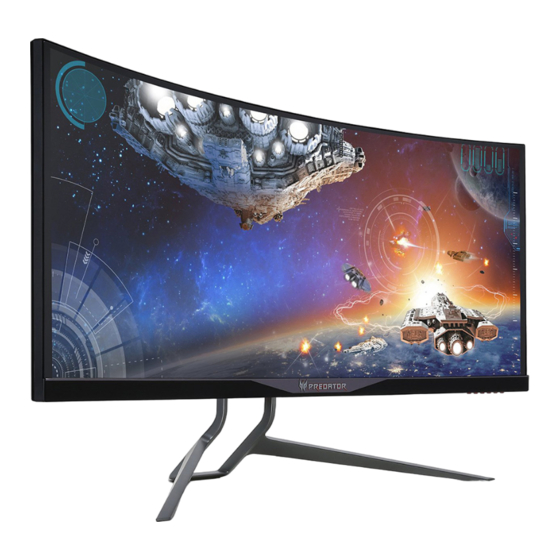
Summary of Contents for Predator X34
- Page 1 Predator X34 Quick Guide...
-
Page 2: Package Contents
(optional) (optional) (optional) guide P redator X34 Quick Guide Connecting your monitor to a computer Turn off your computer and unplug your computer's power cord. Connect the signal cable to the HDMI (optional) and /or DP (optional) input socket of the monitor, and the HDMI (optional) and /or DP (optional) output socket of the graphics card on the computer. -
Page 3: External Controls
External controls 1&2 Power button Turns the monitor on/off.Blue indicates power on. Amber indicates standby/ power saving mode. Function key Main page Press to view .Press again to enter next function in the Function Menu. Function Menu When the is active, press this key selected or move to the next function. -
Page 4: Adjusting The Osd Settings
Adjusting the OSD settings ------------------------------------------------------------------------------------------------------------- Note: The following content is for general reference only. Actual product specifications may vary. The OSD (onscreen display) can be used to adjust the settings of your LCD monitor. Press the MENU key to open the OSD. You can use the OSD to adjust the picture quality, OSD position and general settings. -
Page 5: Adjusting The Volume
Adjusting the volume Open the Volume control and set the Volume using the arrows. When you are done, use to go back one level. Volume Selecting the input Open the Input control and select HDMI or DP. When you are done, use to go back one level. - Page 6 Brightness: Adjust the brightness from 0 to 100. ----------------------------------------------------------------------------------------------------------- Note: Adjusts the balance between light and dark shades. Contrast: Adjust the contrast from 0 to 100. ----------------------------------------------------------------------------------------------------------- Note: Sets the degree of difference between light and dark areas. Blue Light: Filters out blue light to protect your eyes by adjusting how much blue light is shown -- 80%, 70%, 60%, or 50%.
- Page 7 Language English OSD Timeout Refresh rate num Transparency Game mode Aim point Press the MENU key to open the OSD. Using the ▲/▼ keys, select OSD from the OSD. Then navigate to the setting you wish to change. Use the ◄/► keys to adjust any sliding scales. Language: Set the OSD menu language. OSD timeout: Adjust the delay before turning off the OSD menu. Refresh rate num: Display the panel’s current refresh rate on the screen.
-
Page 8: Product Information
Wide mode: You can select which screen aspect you are using. The options are Aspect and 1:1. 10. OverClock: X34 can be overclocked (at the end user’s risk) to a higher refresh rate than advertised by the panel specification. This functions that allows this behavior * After rebooting, use the NVIDIA Control Panel to set the maximum refresh rate. -
Page 9: Standard Timing Table
Standard timing table MODE Resolution Remark 640x480 60Hz 720x480 60Hz 1280x720 60Hz 720x576 50Hz 1280x720 50Hz 1920x1080 60Hz 3440x1440 50Hz 3440x1440* 60Hz Deafault 3440x1440* 75Hz OverClock 3440x1440* 80Hz OverClock 3440x1440* 85Hz OverClock 3440x1440* 90Hz OverClock 3440x1440* 95Hz OverClock 3440x1440* 100Hz OverClock *DisplayPort only. -
Page 10: Regulations And Safety Notices
Regulations and safety notices FCC notices This device has been tested and found to comply with the limits for a Class B digital device pursuant to Part 15 of the FCC rules. These limits are designed to provide reasonable protection against harmful interference in a residential installation. -
Page 11: Specification
SPECIFICATION Driving system TFT Color LCD Size 34 "W (87cm) Pixel pitch 0.233mm(H) x 0.233mm(V) Brightness 300cd/m (Typical) LCD Panel Contrast 100,000,000:1Max. (ACM) Viewable angle 172° (H) 178° (V) (CR≥10) (Typical) Response time 4ms (GTG,Typical) Panel Type In-Plane Switching Video Digital Interface 88KHz~88KHz (3440x1440@60Hz) H-Frequency... - Page 12 Power Button Over drive Input switch Game mode Switch / Buttons Volume Main Menu OSD Page Right/Left Acer eColor Management Color Temp Brightness Saturation Contrast 6-axis color Blue Light Language Dark boost OSD Timeout External Adaptive contrast Refresh rate num Controls: Gamma Transparency...
-
Page 13: What Is Energy Star
ENERGY STAR ® Acer’s ENERGY STAR qualified products save you money by reducing energy costs and helps protect the environment without sacrificing features or performance. Acer is proud to offer our customers products with the ENERGY STAR mark. What is ENERGY STAR? Products that are ENERGY STAR qualified use less energy and prevent greenhouse gas emissions by meeting strict energy efficiency guidelines set by the U.S. - Page 15 X34 xxxxxx; Jul.10,2015...
- Page 16 X34 xxxxxx; Jul.10,2015...
- Page 17 X34 xxxxxx; Jul.10,2015...
- Page 18 X34 xxxxxx; Jul.10,2015...
- Page 19 X34 xxxxxx; Jul.10,2015...
- Page 20 X34 xxxxxx; Jul.10,2015...
- Page 21 X34 xxxxxx; Jul.10,2015...
-
Page 22: Mounting The Monitor
Mounting the monitor Wall mount BKT ------------------------------------------------------------------------------------------------------------------ Note: • The LCD monitor shall only be used with an approved am (e.g.GS mark). • To meet the safety requirements, the monitor must be mounted to an arm that supports the weight of the monitor. •... - Page 23 Jul.10,2015 F41G34M1786-2A---- MU.T3M00.004...
Need help?
Do you have a question about the X34 and is the answer not in the manual?
Questions and answers