Table of Contents
Advertisement
Quick Links
Advertisement
Table of Contents

Related Manuals for InfinitePlay PLEATS


Summary of Contents for InfinitePlay PLEATS
- Page 1 User manual Z4010...
-
Page 2: Table Of Contents
INTRODUCTION ............................. 3 1-Operation ..............................4 1.1-Buttons ............................... 4 1.2-Buttons combination ......................... 5 2-Using the PLEATS video door entry system ....................6 2.1-Answering a call ..........................6 2.2-Making an intercom/SIP call ......................6 2.3-Making a self-start ..........................7 2.4-Using the video door entry system functions..................7 2.5-Changing the volume ......................... -
Page 3: Introduction
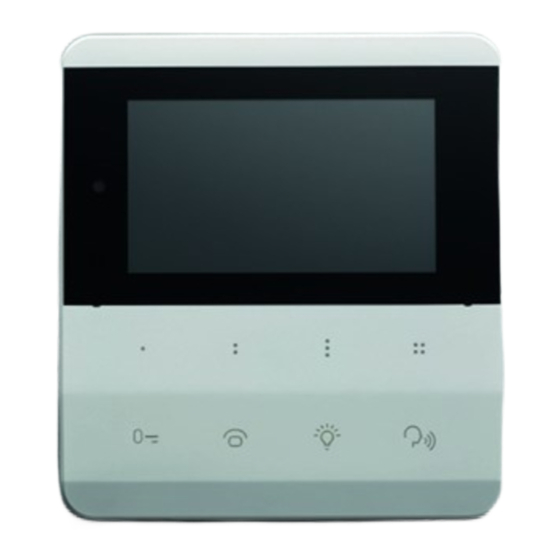
Pleats INTRODUCTION The product PLEATS item Z4010, is a hands-free IP video door entry system with POE power supply. It is provided with a 4.3” LCD display. The video door entry system is equipped with a proximity sensor that turns the device on when the user gets near to it. -
Page 4: 1-Operation
Pleats 1-Operation 1.1-Buttons The PLEATS video door entry system is equipped with 10 touch buttons, the buttons are used to make calls, self-starts, use video door entry functions, navigate menus, adjust volumes and brightness. -
Page 5: Buttons Combination
Pleats BUTTON PRIMARY FUNCTION SYMBOL Programmable button 1 (In the menus it is used as BACK button) Programmable button 2 Programmable button 3 (In the menus it is used as SELECT button) Programmable button 4 (It is used as SOS button if set by the installer) Programmable button 5 (Generally used for video door entry system function "gate electric... -
Page 6: 2-Using The Pleats Video Door Entry System
2-Using the PLEATS video door entry system 2.1-Answering a call When Pleats receives a call, the name and video of the calling device will be displayed (if the calling device does not have a video camera, its avatar will be displayed). -
Page 7: Making A Self-Start
Pleats 2.3-Making a self-start Through the configurable buttons it is possible to make the entrance panels self-start. Then press the button associated with the desired entrance panel. Generally to make a self-start it is necessary to use the button During self-start:... -
Page 8: Changing The Volume
To change the audio of the call, use the + and - button during the conversation. During the change, a volume level indicator will appear. 2.6-Changing the brightness To change the brightness of the PLEATS monitor, press and hold the button and use the lateral buttons + and - to increase and decrease the brightness. -
Page 9: 3-Settings
Pleats 3-Settings To enter the settings menu, press the buttons at the same time. The menu consists of the following items: 3.1-Info In this section it is possible to view all the information about the video door entry system, such as objectID, software version, network status, device model, SOAP status and SIP status. -
Page 10: Language
Pleats 3.3-Language It is possible to select the language of the video door entry system. Then select the desired one from the list. 3.4-Sounds setting Through this menu it is possible to set the ringtones of the various notifications, the volumes and the sound feedback of the buttons pressing. -
Page 11: Call Log
Pleats 3.5-Call log It is possible to enable/disable the call history. Using "Delete” it is possible to delete the call history. 3.6-Automatic answer Through this function it is possible to enable/disable the automatic answer in case of incoming call. 3.7-Do not disturb With this function, you can enable/disable the do not disturb mode. -
Page 12: Doctor Mode
Pleats 3.8-Doctor mode It is possible to enable or disable the “doctor mode”. The doctor mode, in case a call is received, will automatically open the gate electric lock (consult the Z4010 installer guide for the configuration of the gate electric lock opening). -
Page 13: Advanced Settings
Pleats 3.11-Advanced Settings From this section, the installer can operate on the advanced settings of the system, such as entrance panels mapping, visibility of the system functions, visibility of video door entry systems, intercom groups, etc. A pin will be required for access. - Page 14 Pleats Notes...
- Page 15 Pleats Notes...
- Page 16 InfinitePlay S.r.l. Via Antonio Ferrero, 9 - 35133 Padova (PD) ITALY Tel. 049 706344 www.infiniteplay.com – 18901101 RL05 03 18 INFINITEPLAY - ITALY...
Need help?
Do you have a question about the PLEATS and is the answer not in the manual?
Questions and answers