Table of Contents
Advertisement
Quick Links
Protecting Your Digital Assets
CRU
WiebeTech
®
User Manual
Features
• Erases all data from a connected hard drive
• Choose from a dozen preset erase methods, or create your own.
• Can unhide or erase HPA or DCO areas that a computer's OS can't see.
• Attaches natively to SATA and IDE/PATA drives and connects to other types of drives
with optional adapters
• LCD menus make setup and erasure simple
• LCD gives clear indication of time remaining for erasure to complete
• Standalone operation with no computer required
• USB connection allows the Drive eRazer Ultra to be used to prevew drives before
erasure or to confirm erasure after use
• Optionally connects to a ZPL2 serial printer for summary/verification test results
TM
Drive eRazer
®
Ultra
™
Wiebetech Branding
ABCDEFGHIJKLMNOPQRSTUVWXYZ
abcdefghijklmnopqrstuvwxyz
Product Name:
2c85m76y
66c7m7y
Univers 73 Black Extended
PMS 711C
PMS 299C
Advertisement
Table of Contents

Related Manuals for CRU WiebeTech Drive eRazer Ultra

Summary of Contents for CRU WiebeTech Drive eRazer Ultra
-
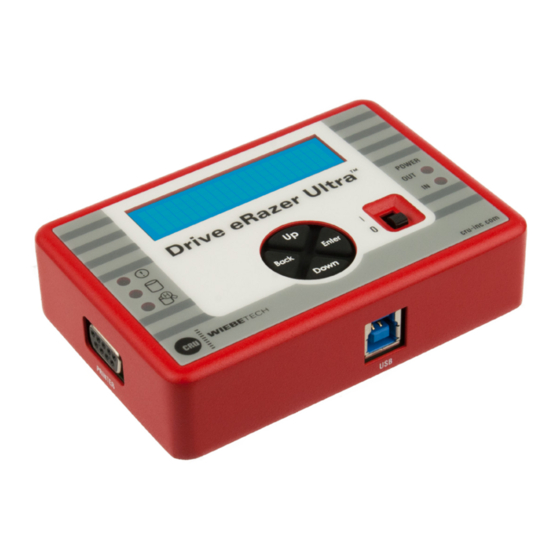
Page 1: Drive Erazer Ultra
Protecting Your Digital Assets WiebeTech Drive eRazer Ultra ® ® ™ User Manual Features • Erases all data from a connected hard drive • Choose from a dozen preset erase methods, or create your own. • Can unhide or erase HPA or DCO areas that a computer’s OS can’t see. • Attaches natively to SATA and IDE/PATA drives and connects to other types of drives with optional adapters • LCD menus make setup and erasure simple • LCD gives clear indication of time remaining for erasure to complete • Standalone operation with no computer required • USB connection allows the Drive eRazer Ultra to be used to prevew drives before erasure or to confirm erasure after use • Optionally connects to a ZPL2 serial printer for summary/verification test results Wiebetech Branding... -
Page 2: Table Of Contents
CRU WiebeTech Drive eRazer Ultra User Manual TABLE OF CONTENTS 1 PRE-INSTALLATION STEPS 1 Pre-Installation Steps 1.1 PACKAGE CONTENTS 1.1 Package Contents The following list contains the items that are included in the com- 1.2 Identifying Parts plete configuration for this device. Please contact CRU if any items 1.3 LED Behavior are missing or damaged: 1.4 Warnings and Notices Accessories Quantity 2 Installation Steps Drive eRazer Ultra 3 Using the LCD Interface and Menu AC adapter 3.1 Home/Start Erasing Metal drive plate 3.2 Review Settings 3.2.1 Erase Type Package of screws and bumpers 3.2.1.1 Supported Erase Specifications SATA power/data cable 3.2.1.2 Custom Erase IDE/PATA power cable 3.2.2 HPA/DCO Handling IDE/PATA data cable 3.2.3 Validation... -
Page 3: Led Behavior
CRU WiebeTech Drive eRazer Ultra User Manual SIDES 1.3 LED BEHAVIOR COLOR STATE DESCRIPTION Power Out- The attached drive is Green Solid powered on. The Drive eRazer Ultra Power Input Green Solid is receiving power. The attached drive has reached 131°F/55°C, Error Solid or an HPA/DCO-related disk command has failed. The attached drive is Drive Activity Solid being accessed. An HPA or DCO area has been detected. HPA/DCO Once lit, it will not be DB9 Serial Connector... -
Page 4: Installation Steps
CRU WiebeTech Drive eRazer Ultra User Manual 2 INSTALLATION STEPS a. Attach the protective metal drive plate to your 3.5” hard drive. (This step is optional.) The purpose of the bottom plate is to provide protection to your drive electronics and aid heat dissipation. b. If you’re erasing an IDE/PATA drive, configure the jumpers on the rear of the drive. The drive must be set to the Master setting. Consult the instructions for your drive. Some drives display configuration information on the drive’s label. c. Ensure that the Drive eRazer Ultra’s power switch is in the OFF (0) position. d. Connect the Drive eRazer Ultra to the drive (or adapter) using either the IDE ribbon cable for IDE/PATA drives or the SATA data/power cable for SATA drives. e. If you’re using an adapter, connect the drive to the adapter. f. Attach the power cable to the Drive eRazer Ultra and to the drive. For SATA drives, the power cable and data cable are combined into a single SATA drive interface. g. Plug the AC adapter into the Drive eRazer Ultra. h. Turn on the power switch. The connected drive will power up and the Drive eRazer Ultra main menu will appear on the LCD screen. 3 USING THE LCD INTERFACE AND MENU Use the LCD and 4-button navigation interface to start erasing drives, adjust settings, view information about the drive and dock, or check on operational status. On the 4-button navigation interface, “Up” and “Down” allow... -
Page 5: Review Settings
CRU WiebeTech Drive eRazer Ultra User Manual 3.2 REVIEW SETTINGS From this screen, the user can choose the erase type, set HPA/DCO handling, verification, and printer output type. 3.2.1 Erase Type • From the “Review Settings” screen, press Enter to get to the “Erase Type” screen. ERASE TYPE > • The current erase mode will display, along with an option to change the setting. Press Enter to change. QUICK ERASE CHANGE SETTING? > • Press the Up and Down buttons to scroll through the different options. Press Enter to select the erase mode you want to use. CHANGE MODE TO CUSTOM ERASE > • After you select the mode, you will be prompted to make your selection the default mode. Press Enter to save the mode as the default. Press Up or Down to set and continue without saving the mode as default. -
Page 6: Custom Erase
CRU WiebeTech Drive eRazer Ultra User Manual Supported Erase Specifications, continued... MODE DESCRIPTION DOD SANITIZE US Department of Defense (DoD 5220.22-M) “Sanitize” standard NIST80088 CLEAR “Clear” standard defined by NIST special publication 800-88 NIST80088 PURGE “Purge” standard defined by NIST special publication 800-88 CSEC ITSG-06 Canada’s data sanitization standard HMG IS5 ERASE Great Britain’s data sanitization standard DSD ISM 6.2.92 Australia’s data sanitization standard. Also satisfies New Zealand’s GCSB NZISM 2010 standard. Removes HPA or DCO areas, then performs a single pass of a random pattern (three passes for drives smaller than 15GB). VERIFY ONLY No overwriting—performs the verification step only Custom Erase If this mode is selected, the user may select the pass count number and overwrite pattern. You can set this mode the default when you select it by pressing Enter. Press Up or Down to set and con- tinue without saving the selection as the future default. # OF PASSES DATA PATTERN 01 >... -
Page 7: Validation
CRU WiebeTech Drive eRazer Ultra User Manual 3.2.3 Validation The user may select the level at which the Drive eRazer Ultra verifies the erasure process at completion. The options are Minimal (factory default selection), Medium, and High. This validation process offers a basic level of assurance that the erasure was successfully completed. NOTE Some erase specifications recommend or require that a separate tool be used for validation. • From the “Review Settings” screen, press Enter, and then Up or Down to get to the “Validation” screen. Press Enter. VALIDATION > • The current validation setting will display, along with an option to change the setting. Press Enter to change. MINIMAL > CHANGE SETTING? • Use the Up and Down buttons to scroll through the verify options: MINIMAL, MEDIUM, or HIGH. Press Enter to select. CHANGE VERIFY TO > MEDIUM • After you select the validation you will be prompted to make your selection the default. Press Enter to save the mode as the default. Press Up or Down to set and continue without saving the setting as default. MEDIUM MAKE DEFAULT? >... -
Page 8: Reset To Factory
CRU WiebeTech Drive eRazer Ultra User Manual • The current Printer Output setting will display, along with an option to change the setting. Press Enter to change, or Up or Down to print a test label, change the number of labels you wish to print, or change whether to print a label when an error is detected or not. LARGE LABEL 1x6 PRINT TEST LABEL > CHANGE SETTING? > # OF COPIES: 1 PRINT ON ERR? N > > CHANGE SETTING? CHANGE SETTING? • Use the Up and Down buttons to scroll through the printer options: “Small Label 4x1” , “Large Label 4x6” , or “PC Output” . Press Enter to select. -
Page 9: View Dock Info
CRU WiebeTech Drive eRazer Ultra User Manual • Use the Up or Down buttons to scroll through and view the following info about the drive. MODE EXPLANATION Capacity (bytes) Capacity of the hard drive, measured in bytes Manufacturer Manufacturing company name of the hard drive Model number Model number of the hard drive Serial number Serial number of the hard drive Firmware Rev Firmware revision number of the hard drive HPA size (bytes) The size of the Host Protected Area of the hard drive, measured in bytes DCO size (bytes) The size of the Device Configuration Overlay of the hard drive, measured in bytes Disk health Displays the S.M.A.R.T. health status of the drive Secure Erase Nor time Time reported by the drive that it will take to use Secure Erase (Normal) Secure Erase Enh time Time reported by the drive that it will take to use Secure Erase Enhanced Start/Stops S.M.A.R.T. information on how many times the drive has spun up and spun down Power Cycles S.M.A.R.T. information on how many power on/off cycles the drive has under- gone Bad Sectors Number of bad sectors reported by the drive 3.4 VIEW DOCK INFO... -
Page 10: Error Indication
CRU WiebeTech Drive eRazer Ultra User Manual Operational Status, continued... STATUS MESSAGE CONDITION/EXPLANATION ESTIMATING ERASE The Drive eRazer Ultra is wiping a portion of the drive (for one minute) for the TIME purpose of estimating how long it will take to erase the whole drive. PASSWORD RESET Briefly displays before the Drive eRazer Ultra resets the hard drive password PASSWORD RESET The hard drive’s password was successfully reset. The user must turn off the CYCLE POWER Drive eRazer Ultra and then turn it back on. HPA RESET HPA was successfully removed DCO RESET DCO was successfully removed VERIFY DONE The erase process and verification completed successfully ERASE DONE The erase process completed successfully; verification not available (only seen with Secure Erase Enhanced mode) PREPARING VERIFY The Drive eRazer Ultra is checking user settings and planning the verification process 3.5.2 Error Indication If your Drive eRazer Ultra unit encounters any errors, a brief explanatory message displays. ERROR MESSAGE... -
Page 11: Frequently Asked Questions
CRU WiebeTech Drive eRazer Ultra User Manual 4. FREQUENTLY ASKED QUESTIONS (FAQ) HOW DOES SECURE ERASE WORK? Secure Erase is a feature on many modern hard drives (greater than 15GB). This feature is activated by a low level command to the drive and causes the drive to erase itself using methods developed by the drive manufacturers in conjunction with the NSA. To protect against malware attacks, operating systems such as Windows and Mac OS (and software applications written for these operating systems) cannot send this command, but Drive eRazer Ultra can. Secure Erase sequentially overwrites the data on the drive, similar to the Drive eRazer Ultra unit’s other erase modes. However, Secure Erase better handles data on “bad blocks” (single pass may stop and report an error at a bad block). Secure Erase is implemented on most drives that were manufactured in 2001 or later. However, an esti- mated time for completion was not added until later. Some drives therefore support Secure Erase but will not give an estimated completion time. HOW FAST WILL MY DRIVE ERAZER ULTRA ERASE THE DATA ON A HARD DRIVE? The Drive eRazer Ultra can erase modern hard drives at up to 7GB/minute or more. The erasure time... - Page 12 CRU WiebeTech Drive eRazer Ultra User Manual WHAT KIND OF CABLE DO I NEED FOR THE PRINTER PORT? The printer port is a standard 9-pin serial RS-232 port. Drive eRazer Ultra requires a male end and most printers also require a male end. If you need to source a new cable, what you need is probably a “Male to Male RS-232 (DB9) Null Modem Serial cable. ” This cable is available from CRU (Part Number 7380-8000-03). Check your printer’s documentation regarding serial cable types. Connecting it to a computer’s serial port is possible with a “Male to Female RS-232 (DB9) Null modem serial cable” . WHAT SIZES ARE THE LABELS THAT THE DRIVE ERAZER ULTRA PRINTS? The Drive eRazer Ultra can print one of two different label sizes: 4”x1” or 4”x 6” , depending upon how it’s configured.
- Page 13 CRU WiebeTech Drive eRazer Ultra User Manual WHY DOES THE USB CONNECTOR LOOK LIKE USB 3.0 BUT THE DOCUMENTATION SAYS IT’S USB 2.0? The Drive eRazer Ultra uses a USB 3.0 style connector because it shares a form factor and many parts with another product. However, the controller chip that drives the Drive eRazer Ultra’s USB connection supports USB 2.0 only. The port can be used with either USB 2.0 or 3.0 type cables and with either USB 2.0 or 3.0 hosts, but it will operate at USB 2.0 speed. The intended purposes of the port are the previewing of a drive and firmware upgrading, rather than for lengthy data transfers. For these two purposes USB 2.0 speed is sufficient. CAN I SWITCH DRIVES OR ATTACH A HARD DRIVE WHEN THE UNIT IS TURNED ON? This is not recommended, because it could cause an electrical short that could damage the Drive eRazer ultra or the drive.
- Page 14 CRU WiebeTech Drive eRazer Ultra User Manual the drive and the Drive eRazer Ultra are fully seated, and do not attempt to move the drive, Drive eRazer Ultra, or cables during the erase process. Make sure the drive has good air flow around it to avoid any pos- sible heat issues. If you continue to see this error message on the drive, the next thing to try is changing to Secure Erase Enhanced mode. This mode doesn’t use write commands; rather, it issues a single com- mand to the drive that causes the drive to erase itself. This mode handles bad blocks better than modes based on write commands. If none of these remedies work, the only way to ensure there are no recover- able data remaining on the drive is to physically destroy it. MY DEPARTMENT REQUIRES 100% VERIFICATION OF ERASURE. DOES THE “HIGH” OPTION VERIFY 100% OF THE DRIVE? No, although the “high” checks a large number of sectors of the drive, performing 100% verification would require a much greater amount of time than the erasure process itself. For this reason, and for the security of having an independent tool, we recommend using a 3rd party tool for 100% verification. Many organizations actually require that the erase tool and the verification tool be separate products. The Australian Government Information Security Manual, November 2010, states that “Verifying the sanitisation of media with a different product to the one conducting the sanitisation process provides an independent level of assurance that the sanitisation process was conducted correctly” (161). If it satisfies your department’s requirements, you could use a hex editor, such as HxD, to visually inspect the contents of the drive to verify that it was erased. Protecting Your Digital Assets...
-
Page 15: Technical Specifications
Limitation of Liability The warranties set forth in this agreement replace all other warranties. CRU expressly disclaims all other warranties, including but not limited to, the implied warranties of merchantability and fitness for a particular purpose and non-infringement of third-party rights with respect to the documentation and hardware. No CRU dealer, agent, or employee is authorized to make any modification, extension, or addition to this warranty. In no event will CRU or its suppliers be liable for any costs of pro- curement of substitute products or services, lost profits, loss of information or data, computer malfunction, or any other special, indirect, consequential, or incidental damages arising in any way out of the sale of, use of, or inability to use any CRU product or service, even if CRU has been advised of the possibility of such damages. In no case shall CRU’s liability exceed the actual money paid for the products at issue. CRU reserves the right to make modifications and additions to this product without notice or taking on additional liability. FCC Compliance Statement: “This device complies with Part 15 of the FCC rules. Operation is subject to the following two conditions: (1) This device may not cause harmful interference, and (2) this device must accept any interference received, including interference that may cause undesired operation. ” This equipment has been tested and found to comply with the limits for a Class A digital device, pursuant to Part 15 of the FCC Rules. These limits are designed to provide reasonable protection against harmful interference when the equipment is operated in a commercial environment. This equipment generates, uses, and can radiate radio frequency energy and, if not installed and used in accordance with the instruction manual, may cause harmful interference to radio communications. Operation of this equipment in a residential area is likely to cause harmful interference in which case the user will be required to correct the interference at this own expense. In the event that you experience Radio Frequency Interference, you should take the following steps to resolve the problem: Ensure that the case of your attached drive is grounded. Use a data cable with RFI reducing ferrites on each end. Use a power supply with an RFI reducing ferrite approximately 5 inches from the DC plug. Reorient or relocate the receiving antenna. FOR OFFICE OR COMMERCIAL USE For more information, Protecting Your Digital Assets visit the CRU web site. www.cru-inc.com Part Number: A9-000-0029 Rev. 3.1 1000 SE Tech Center Drive, Suite 160, Vancouver, WA 98683...
Need help?
Do you have a question about the WiebeTech Drive eRazer Ultra and is the answer not in the manual?
Questions and answers