Table of Contents
Advertisement
Advertisement
Table of Contents

Subscribe to Our Youtube Channel
Related Manuals for Specim IQ

Summary of Contents for Specim IQ
- Page 1 IQ User Manual...
-
Page 2: Table Of Contents
| Contents | ii Contents Introducing the Specim IQ Imaging System............4 Software Concept..............................4 Spectral Imaging..............................5 Data Cube..............................7 Dark Frame............................... 7 White Balance............................7 Illumination............................... 7 Data set..............................7 Disclaimer................................8 Contacting Support............................... 8 Glossary.................................8 S.................................8 Specim IQ User Manual..................8 Camera Parts................................. - Page 3 | Contents | iii Updating Firmware..........................59 Specifications..............................59 Technical Specifications......................... 59 Spectral Camera Specifications......................60 Environmental Specifications......................... 61...
-
Page 4: Introducing The Specim Iq Imaging System
The fundamentals of the Specim IQ system. Figure 1: Specim IQ Software Concept When you use the Specim IQ Studio software and Specim IQ, you will come across with a number of interrelated concepts as depicted in the figure below: Figure 2: Software Concept The concepts are: •... -
Page 5: Spectral Imaging
Model project — Model project is a predefined workflow with a GUI in Specim IQ Studio to create data processing models. The model project is used within Specim IQ Studio to define the model, and it can be saved for future changes and needs. - Page 6 | Introducing the Specim IQ Imaging System | 6 Figure 3: Three Color Channels • In the wavelength range of 400-700 nm When we take a spectral photograph, we gain wavelength information from each recorded pixel: • Through up to hundreds of color channels Figure 4: Hundreds of Color Channels •...
-
Page 7: Data Cube
When we look through the pages of the book, we see the picture in full colour as depicted on the cover of the book in the figure below. In IQ, the book consists of up to 220 pages. The wavelength range of each page is approximately 2.7 nm. Dark Frame Like any camera, the Specim IQ sensor produces some dark current, which accumulates in the pixels during an exposure. -
Page 8: Disclaimer
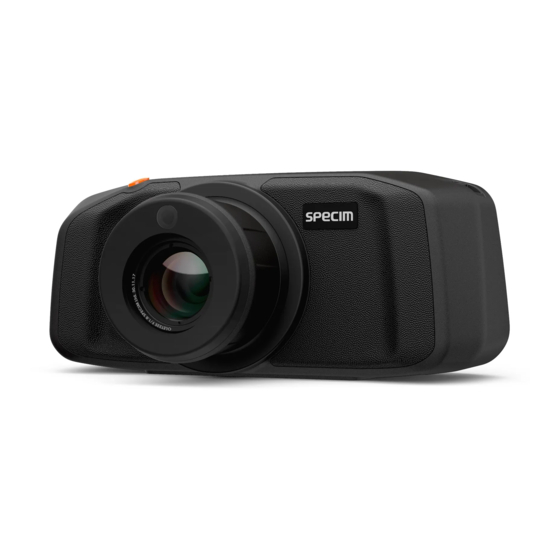
Imaging Oy Ltd reserves the right to make changes to this information without notice. Reproduction of this manual in whole or in part, by any means, is prohibited without prior permission having been obtained from Specim, Spectral Imaging Oy Ltd. - Page 9 | Specim IQ User Manual | 9 Figure 5: Specim IQ Seen from Front The parts are: 1. Viewfinder camera 2. Strap mount 3. Focus ring 4. Focus camera 5. Battery chamber 6. Shutter key Figure 6: Specim IQ Seen from Back The parts are: 1.
-
Page 10: Sales Box Content
Figure 7: Specim IQ Seen from Below The parts are: 1. Type plate 2. Standard camera thread Sales Box Content This section lists the Specim IQ sales box content. The Specim IQ sales box contains items as follows: • Device with front lens cap •... - Page 11 | Specim IQ User Manual | 11 • Variants: EU, US, CHINA, AUSTRALIA, UK • Data cable USB cable type C - USB type A (device – PC Client) • 500 mA cable, lenght 1 m • Battery KEEPPOWER1-2 pcs, depending on pack size •...
-
Page 12: Getting Started
Size (folded): 120mm x 120mm x 10mm (BOM 0,7 EUR) • Sales package, carton box Getting Started This chapter describes the preparatory steps before you start recording data with Specim IQ. Powering ON and Powering OFF This section describes how to power OF/OFF Specim IQ. Proceed as follows: To power ON: 1. -
Page 13: Charging The Battery
SHUTDOWN to switch Specim IQ off. • CANCEL to return to the previous screen. Charging the Battery This section describes how to charge the Specim IQ battery. The battery icon on the viewfinder indicates the remaining battery charge. See on page 14. Viewfinder... -
Page 14: Viewfinder
This icon indicates the device battery level. In the figure, the battery level is 70%. Using Memory Cards This section contains tips on using memory cards with Specim IQ. Use SDHC memory cards of class10, 40 MB/s, or better. Do not remove the memory card from the device while recording data. If you do, the screen below is opened, and you... - Page 15 | Specim IQ User Manual | 15 Figure 11: SD Card Removed while Recording Data When you have copied the recorded data to the Specim IQ Studio software, empty the card by formatting it on the Specim IQ device. If, for example, data recording is interrupted, Specim IQ writes a .lock file on the memory card. You can safely ignore these files.
-
Page 16: Connecting Specim Iq To Your Computer
5. Slide the memory card out as shown. Figure 13: Ejecting the Memory Card Connecting Specim IQ to Your Computer This section describes how to connect Specim IQ to your computer. Proceed as follows: 1. Open the USB cover from its lower left corner. -
Page 17: Illumination
Figure 15: Attaching the USB Cable 3. Open Specim IQ Studio and select DEVICES. Illumination This section describes how to arrange sufficient illumination for capturing data on Specim IQ. About Specim IQ This section describes how to view device information on Specim IQ. -
Page 18: Using The Catalog
Using the Catalog This section contains instructions for using the Catalog. The catalog is used to select and view captured data on Specim IQ. 1. Top open the Catalog, press the SET button, and select Device. The latest captured data set is shown. -
Page 19: Capturing Data
Specim IQ. In the default recording mode, you collect unprocessed data. You can use the default recording mode even if you have an application selected on Specim IQ. Proceed as follows: 1. Press the SET button to open the main menu. - Page 20 | Specim IQ User Manual | 20 Press the WHITE REFERENCE button button to select the white reference method. 5. Select Simultaneous. Figure 19: Selecting the White Reference Method 6. Place the white reference panel next to the target. Figure 20: White Reference Panel 7.
- Page 21 | Specim IQ User Manual | 21 Figure 22: Recording Datacube 10. Validate the recorded data. The screen below is opened: Figure 23: Data Validation For more information, see Quick Data Validation on page 34. Select either: • KEEP — If you are satisfied with data quality, select KEEP to continue.
-
Page 22: Automatic Screening Mode
This section describes how to use the automatic screening mode on Specim IQ. In the automatic screening mode, you create a class and use it for target identification. You can use the automatic screening mode even if you have an application selected on Specim IQ. Proceed as follows: 1. - Page 23 | Specim IQ User Manual | 23 Figure 26: Dataset Thumbnails 2. Select the desired dataset. The screen below is opened: Figure 27: Target not Found Note: However, if the target is found, continue this procedure from step 6. 3. Select OK.
- Page 24 | Specim IQ User Manual | 24 Figure 28: Define Target 4. Select the white reference area from the touch screen. The screen below is opened: Figure 29: Select White Reference The maximum intensity area blinks on the image. If this is the correct area, select it, whereupon it turns green.
- Page 25 | Specim IQ User Manual | 25 Figure 30: Creating a Mask a) Use the touch screen to select a target from the image. The screen below is opened: Figure 31: Selecting a Target b) Use the slider or UP and DOWN buttons to adjust the mask threshold.
- Page 26 | Specim IQ User Manual | 26 Figure 32: Naming the Target d) When done, select SAVE. The screen below is opened: Figure 33: Saving the Target e) Select YES to save the dataset on the SD card. 6. Press the SHUTTER button halfway.
- Page 27 | Specim IQ User Manual | 27 Making Data Recording Settings on page 32. 8. When done, press the SHUTTER button completely. The camera starts the spectral camera, measures a dark frame, and begins scanning. A progress bar is shown on the screen.
- Page 28 | Specim IQ User Manual | 28 Figure 37: Processing Data Cube 12. View the image in the INFO VIEW. The screen below is opened: Figure 38: INFO VIEW For more information, see Info View on page 35. 13. Select a spot for screening, from the touch screen.
-
Page 29: Application Mode
Click the scpectrum to see it in the full-screen mode. 14. Compare the spectra. Application Mode This section describes how to use the application mode on Specim IQ. In the application mode, you collect data that is processed in the desired way. Proceed as follows: 1. - Page 30 | Specim IQ User Manual | 30 Figure 41: Shutter Button 4. Make the data recording settings. on page 32. Making Data Recording Settings 5. When done, press the SHUTTER button completely. The camera starts the spectral camera, measures a dark frame, and begins scanning. A progress bar is shown on the screen.
- Page 31 | Specim IQ User Manual | 31 Figure 43: Data Validation For more information, see Quick Data Validation on page 34. Select either: • KEEP — If you are satisfied with data quality, select KEEP to continue. • DISCARD — If you are not satisfied with data quality, select DISCARD to return to viewfinder.
-
Page 32: Making Data Recording Settings
35. Making Data Recording Settings This section describes how to make the data recording settings when recording data on Specim IQ. Making data recording settings is part of the data recording procedure on every data recording mode. Proceed as follows: 1. -
Page 33: Selecting The White Reference Area
Selecting the White Reference Area This section describes how to select the white reference area when recording data on Specim IQ. Selecting the white reference area is part of the data recording procedure on every data recording mode. Proceed as follows: Select the white reference area from the touch screen. -
Page 34: Quick Data Validation
Quick Data Validation This section describes how to use quick data validation on Specim IQ. By validating data, you ensure that the captured images are good enough to be saved and analysed. You validate the data as part of the image capturing procedure, in the QUICK DATA VALIDATION screen. An... -
Page 35: Info View
| Specim IQ User Manual | 35 • MAXIMUM VALUES — The camera looks into each recorded spectra on the image, and takes the maximum intensity value from each spectrum. These values are shown on the MAXIMUM VALUES histogram. The maximum values indicate the dynamic area that is used as seen against the entire dynamical range of the image (0—4095). - Page 36 Delete — Select this option to delete the image. See • Deleting a Dataset on page 40. Tagging Images This section describes how to tag images on Specim IQ. You can add two types of tags: • A material tag refers to a specific point on the image. •...
- Page 37 | Specim IQ User Manual | 37 Figure 52: Material Tag View 4. Click the plus sign to enter the tag. The screen below is opened: Figure 53: Adding a Material Tag Description 5. When done, select SAVE. Adding a Global Tag 6.
- Page 38 The screen below is opened: Figure 55: Adding a Global Tag Description 8. When done, select SAVE. Viewing Dataset Info This section describes how to view dataset info on Specim IQ. Proceed as follows: 1. Open the image in the INFO VIEW.
- Page 39 • Description — A description of the image. 3. When done, select OK. Editing the Dataset Description This section describes how to edit the dataset description on Specim IQ. Proceed as follows: 1. Open the image in the INFO VIEW.
- Page 40 Figure 59: Editing the Dataset Description 3. Enter the dataset description. 4. When done, select OK. Deleting a Dataset This section describes how to delete a dataset from Specim IQ. Proceed as follows: 1. Open the image in the INFO VIEW.
-
Page 41: Transferring Data To Your Computer
CANCEL to return to the INFO VIEW. • Transferring Data to Your Computer This section describes how to transfer data from Specim IQ to your computer. You can transfer data to your computer by two methods: • By moving the memory card from the camera to your computer memory card reader. - Page 42 3. Insert the memory card to your computer memory card reader. Windows Explorer is opened. 4. Copy the files to a suitable location. 5. Import the files to Specim IQ Studio. Importing Data from the File System. 6. Open the USB cover from its lower left corner.
-
Page 43: Using Time Lapse
Importing Data from Specim Using Time Lapse This section describes how to use the time lapse function on Specim IQ. When defining the time lapse period, pay attention to the fact that a time lapse period shorter than 10 minutes may be too short for long integration times. - Page 44 | Specim IQ User Manual | 44 • Pre-defined — Select a pre-defined white reference. Selecting the White Reference Method on page 19. 3. Define the time lapse settings. Figure 66: Defining the Time Lapse Settings The settings are: HOURS — Use the up and down arrow buttons to define for how many hours the time lapse period will cover.
-
Page 45: Settings
If you want to cancel the time lapse function, press the BACK button Settings This section describes how to view and modify the Specim IQ settings. You can open the settings view by pressing the SET button, and selecting Device. -
Page 46: Focus Peaking
Settings screen. Focus Peaking This section describes how to use focus peaking by default, when recording data on Specim IQ. Focus peaking indicates the focused area by orange color. The more orange you see, the sharper the focus. -
Page 47: Time And Date
| Specim IQ User Manual | 47 Time and Date This section describes how to set the time and date for Specim IQ. Proceed as follows: 1. Press the SET button, and select Device > Time and date. The screen below is opened: Figure 72: Setting the Time and Date 2. -
Page 48: Memory Card
| Specim IQ User Manual | 48 • MINUTES — Use the up and down arrow buttons to set the minutes. • DAY — Use the up and down arrow buttons to set the day. MONTH — Use the up and down arrow buttons to set the month. -
Page 49: Using Power Saving
3. When done, press the BACK button to return to the Settings screen. Using Power Saving This section describes how to use the power saving function on Specim IQ. When power saving is enabled, an unused device will enter sleep state. Tip: You can also set the device in sleep state, and return to normal operation, by quickly pressing the power button. - Page 50 | Specim IQ User Manual | 50 1. Press the SET button, and select Device > Power saving. The screen below is opened: Figure 77: Power Saving The current battery info is shown in the Battery info fields, as follows:.
-
Page 51: Advanced Settings
Allow Raw Data Saving This section describes how to Allow Raw Data Saving, when recording data on Specim IQ. If you allow raw data saving, you can you can press the Custom 1 button when recording data, to save RAW data only. - Page 52 | Specim IQ User Manual | 52 • Calibration tile • White reference panel • Sufficient illumination Proceed as follows: 1. Switch on the camera. 2. Press the SET button, and select Device > Advanced settings > Check calibration > CHECK.
- Page 53 WEB instructions or contact Specim support. Reset Calibration Data This section describes how to reset the calibration data on Specim IQ. Proceed as follows: 1. Press the SET button, and select Device > Advanced settings > Reset calibration data > RESET.
- Page 54 3. If there is need to reset the calibration data, the resetting procedure begins. Self Diagnostic This section describes how to carry out the self-check procedure for Specim IQ. Proceed as follows: 1. Press the SET button, and select Device > Advanced settings > Self diagnostic > RUN.
- Page 55 Select OK and continue by viewing the log file. Factory Reset This section describes how to factory reset your Specim IQ. A factory reset returns all settings and customizations to the original factory settings, and the uploaded applications will be erased.
-
Page 56: Viewing Camera Information
NO to return to Advanced settings. 3. If you selected YES, the resetting procedure begins. Viewing Camera Information This section describes how to view information on your Specim IQ. Proceed as follows: 1. Press the SET button, and select Device > About. -
Page 57: Adjusting The Display Brightness
• SW type label — The software type label shows more information on the camera software. Adjusting the Display Brightness This section describes how to adjust the Specim IQ display brightness. Proceed as follows: 1. From the viewfinder, select: •... -
Page 58: Cleaning The Camera Body And Lens
This section provides troubleshooting instructions for Specim IQ. Table 2: Troubleshooting Symptom Solution Data has not been saved on the The memory card has been removed too soon from Specim IQ. memory card. Specim IQ does not start. Check that: •... -
Page 59: Updating Firmware
Data recording settings screen is opened. Set the images. integration time, after which you can capture images. Updating Firmware This section describes how to update the Specim IQ firmware. Proceed as follows: 1. Switch the device off. Powering ON and Powering OFF on page 12. -
Page 60: Spectral Camera Specifications
| Specim IQ User Manual | 60 Buttons 12 physical buttons Display & keyboard 4.3” touch screen Buzzer Indication sounds for the user Usb connector USB Type-C DIMENSIONS Size 207 x 91 x 74 mm (depth with lens 125,5 mm) Weight 1.3 kg... -
Page 61: Environmental Specifications
| Specim IQ User Manual | 61 Environmental Specifications DEVICE OPERATION IP classification IP53 Temperature, operational +0°C - +40°C Temperature, storage -20°C - +50°C Humidity operational 95% non-condensing STANDARDS Vibration MIL-STD-810G Method 514.6 Precedure I Shock STD-810G Method 516.6 Precedure VI EU directive Radio Equipment Directive 2014/53/EU. - Page 62 Regulatory Information USA Changes or modifications not expressly approved by the party responsible for compliance could void the user’s authority to operate the equipment. This device complies with part 15 of the FCC Rules. Operation is subject to the following two conditions: (1) This device may not cause harmful interference, and (2) this device must accept any interference received, including interference that may cause undesired operation.
- Page 63 Regulatory Information Canada Changes or modifications not expressly approved by the party responsible for compliance could void the user’s authority to operate the equipment. Les changements ou modifications non expressément approuvés par la partie responsable de la conformité pourraient annuler l'autorisation de l'utilisateur d'utiliser l'équipement.
Need help?
Do you have a question about the IQ and is the answer not in the manual?
Questions and answers