
Summary of Contents for Barista Technology PUQpress
- Page 1 Maintenance & repair manual Puqpress - Precision coffee tamper VERSION 2.0.4 DATE: 14-12-2016...
-
Page 2: Table Of Contents
TABLE OF CONTENTS Introduction ......................3 Warranty ......................3 Model types ....................3 Revision status ....................3 Operating faults ....................4 Replacement of various components ..............5 Replace drive unit ..................5 Replace induction sensor ................9 Clean tamper base (daily cleaning) ............. 12 Remove tamper base and clean cavity (weekly cleaning) ...... -
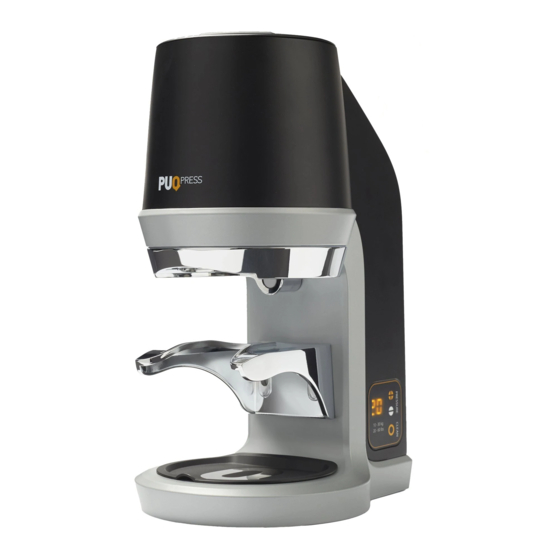
Page 3: Introduction
1 INTRODUCTION In this document the repair and maintenance of the Puqpress precision coffee tamper is described. The unit is maintenance free and only has to be cleaned daily. However due to extensive use various components wear and can break. The sequence of replacing components is described in detail. -
Page 4: Operating Faults
2 OPERATING FAULTS DEFECT CAUSE REMEDY SECTION Tamper disk does not move, unit is ON Fault in drive unit Replace drive unit and display is working Fault in induction Replace induction sensor sensor. Tamped surface is Tamper base is dirty Clean tamper base not even Cavity upper clamp... -
Page 5: Replacement Of Various Components
3 REPLACEMENT OF VARIOUS COMPONENTS 3.1 Replace drive unit Step Description Switch the device ON and activate the CLEAN mode. Tamper base goes down. Switch OFF and remove power cable. Remove main housing – top cover Remove the hexagon bolt M5x100 + spring washer M5 using the Allen key 4mm. - Page 6 Remove the main housing – middle cover which is mounted to the main body with 3 cross head cap screws M4x10 Unscrew 2 screws as is shown in the figure below. Open the main housing – back cover. NOTE: the push buttons (red) are fragile so be careful when opening back cover.
- Page 7 Disconnect the earthing cable from the DC worm gear motor. Unscrew 2 hexagon head cap screws M5x25. Disconnect the connectors as are shown in the figures below.
- Page 8 Remove the drive unit and replace the drive unit with a new unit. Mount the upper clamp to the main body with 2 hexagon head cap screws M5x25. Apply Permabond A1042 on screw threads. Connect both connectors, see step 9. Fasten the earthing cable to the DC motor, see step 8.
-
Page 9: Replace Induction Sensor
3.2 Replace induction sensor Step Description Remove main housing – top cover Remove the main housing – middle cover which is mounted to the main body with 3 cross head cap screws M4x10 Unscrew 2 screws as is shown in the figure below. - Page 10 Open the main housing – back cover. NOTE: the push buttons (red) are fragile so be careful when opening back cover. The sensor is fixed with a set screw M5. Unscrew the set screw using Allen key 2.5mm via the hole as shown below. The drive units doesn’t need to be removed.
- Page 11 Insert a new induction sensor and connect the sensor to the motor controller PCB, see step 6. Fasten the set screw M5, see step 5. Critical: The sensor does not function when too much torque is applied. Check the position of the sensor after assembly Correct NOT correct NOT correct...
-
Page 12: Clean Tamper Base (Daily Cleaning)
3.3 Clean tamper base (daily cleaning) Check our support videos: www.puqpress.com/support Step Description Turn unit ON and push the CLEAN button. Tamper base goes down completely. Clean the tamper base with a dry towel or a brush. Push the clean button again, tamper base goes up. Cleaning... -
Page 13: Remove Tamper Base And Clean Cavity (Weekly Cleaning)
3.4 Remove tamper base and clean cavity (weekly cleaning) Check our support videos: www.puqpress.com/support Step Description Switch the device ON and activate the CLEAN mode. Tamper base goes down. Switch OFF and remove power cable. Remove main housing – top cover Remove the hexagon bolt M5x100 + spring washer M5 using the Allen key 4mm. - Page 14 Remove the tamper base. NOTE: Tamper base has left-hand screw thread Clean cavity with a brush. After cleaning: - Mount tamper base, step 4 - Fasten tamper base with M5x100 hex. cap screw and spring lock washer, step 3 - Mount main housing – top cover, step 2.
-
Page 15: Adjust Lower Clamp
Check our support videos: www.puqpress.com/support Step Description Insert power cable and switch the Puqpress ON. Tamper heads moves to upper position. Remove power cable. Put the unit with back side in the white packing box. Unscrew both bolts as is shown below. You can find the right tool in the box. - Page 16 Insert the portafilter a few times and check if it’s properly clamp between the upper and lower clamp. Fasten both bolts firmly. Insert the portafilter again and check fitting. Lower clamp might be moved during fastening of bolts Incorrect setting: The portafilter should be clamped properly to ensure level tamping.
-
Page 17: Adjust Tamping Force
3.6 Adjust tamping force Check our support videos: www.puqpress.com/support Step Description Change tamping force with + / - push buttons. -
Page 18: Changing Tamper Base
4 CHANGING TAMPER BASE 4.1 Upper clamp types The type of upper clamp can be determined by measuring the diameter of the U- shaped groove in the upper clamp, as is shown in figure below. There are two types of upper clamps: 66 and 71mm. The size 71mm or 66mm is the diameter (mm) of the U-groove, as is shown in figure 4.1 by the red arrow. -
Page 19: Espresso Machine Brand And Tamper Diameter
In general the outer basket diameter scales with the inner diameter (tamper size). In table below the tamper diameters are listed with the required upper clamp type: Tamper Upper diameter clamp type [mm] Some filter baskets are not standard and need another upper clamp size. Therefore check the outer and inner diameter of the filter basket in order to pick the correct setting. - Page 20 5 SOFTWARE SETTINGS 5.1 Tamping cycle counter 1) Turn unit ON and keep in standby mode 2) Hold + button & - button for 3 seconds. 3) Display blinks and shows a number. multiply this number by 3000, max. cycle counter is 99*3000. 4) Cycle counter disappears after 5 seconds 5.2 Clean cycles counter 1) Turn unit ON and put unit in CLEAN modus (tamper disk...
- Page 21 5.4 Change tamping force from KG to LBS 1) Turn unit OFF. Hold CLEAN button and + button, and turn unit ON. ‘CF’ appears on display. 2) Push CLEAN button, ‘C0’ appears on display 3) Push + button for force setting in LBS or push – button for force setting in KG.
-
Page 22: Exploded View: Total Assembly
DO NOT SCALE DRAWING Geometric dimensioning FINISH: and tolerancing according to NEN-ISO1101 and NEN- ISO 2768-1-mK SCALE 1:1 Part name: Barista Technology B.V. Puqpress 58mm EURO Oostelijke handelskade 731 1019 BW Amsterdam The Netherlands Part number:. 1-000-0101-2 MATERIAL: 3880 g Doc: 110-1... - Page 23 DO NOT SCALE DRAWING FINISH: Geometric dimensioning and tolerancing according to NEN-ISO1101 and NEN- ISO 2768-1-mK SCALE 1:1 Part name: Barista Technology B.V. Assy drive unit Oostelijke handelskade 731 1019 BW Amsterdam The Netherlands Part number:. 1-310-0001-1 MATERIAL: Doc: 110-1 Page: 1 of 1 1298.75 g...
-
Page 24: Order Spare Parts
7 ORDER SPARE PARTS 7.1 Order procedure Spare components for repair or maintenance can be order by sending an email to sales@puqpress.com. For ordering spare parts, provide the following information: Model number (see bottom side unit) Serial number (see bottom side unit) Part number and description, see table or exploded views (section 5) All spare parts are listed in the table of section 6.2. -
Page 25: Part List (All Parts)
7.3 Part list (all parts) Part number Descrip�on 1-110-0001-1 AC/DC converter 1-110-0010-1 DC motor 1-110-0014-1 On/off switch 1-110-0015-1 Power entry connector 1-110-0016-1 Power cable (EU, USA, UK type) 1-110-0023-1 Magnet 1-110-0024-1 Cover for magnets 1-110-0025-1 Rivet bush crimp nut 1-110-0031-1 Screw for plastic 1-210-0001-3 Main body...
Need help?
Do you have a question about the PUQpress and is the answer not in the manual?
Questions and answers