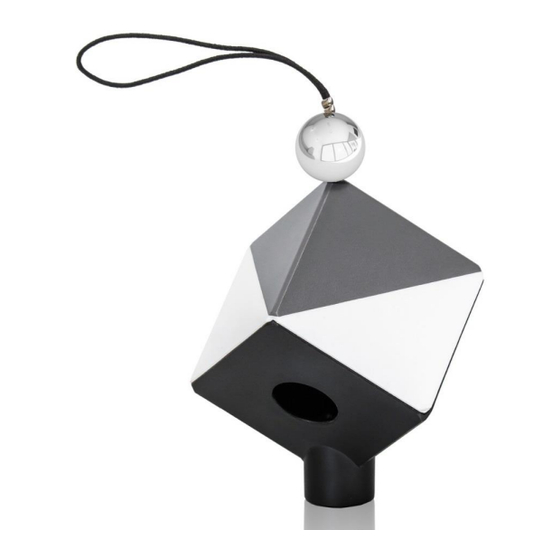
Advertisement
Advertisement

Summary of Contents for Datacolor SpyderCUBE
- Page 1 User Guide...
-
Page 2: Table Of Contents
Introduction ........................3 Why use the SpyderCUBE ....................4 Photographing the SpyderCUBE ..................5 Selecting the White Point in your Software ..............6 Setting the contrast range in your image ................. 9 Apply Settings to multiple images ................. 13... -
Page 3: Introduction
Introduction ® Thank you for purchasing your new SpyderCUBE . This document will provide a step by step guide to getting the most out of using your SpyderCUBE to achieve proper color balanced photographs. -
Page 4: Why Use The Spydercube
2500-2900K and strobes are about 5200K. With such a wide range of color temperatures in your everyday photographic environments, you need a constant to show the software what neutral is. The SpyderCUBE is also very useful in post processing to help set your contrast range properly. -
Page 5: Photographing The Spydercube
Photographing the SpyderCUBE The SpyderCUBE can either be handheld by the subject or an assistant, placed on a light stand or tripod, or placed on or hung from an object in the scene. Orient the SpyderCUBE with the chrome ball on top when taking a picture of it. -
Page 6: Selecting The White Point In Your Software
Adobe Photoshop Camera Raw: White Balance Tool Capture One: Pick White Balance All of these tools have the same function, and that is to tell the software what is a neutral color in the scene, and this is where your SpyderCUBE comes in. Adobe Camera Raw:... - Page 7 Lightroom Capture One:...
- Page 8 When you are doing your processing, bring up the image that you captured with the SpyderCUBE in it. Using the white balance tool in your software, use the eye dropper to select the visually lightest grey face on the cube, the side facing the primary light...
-
Page 9: Setting The Contrast Range In Your Image
Setting the contrast range in your image In addition to the grey faces on your SpyderCUBE, there are 4 other useful tools; the chrome ball, the white faces, the black face, and the black trap. When processing your images, you can use all of these tools to ensure you have the correct range of detail in your image. - Page 10 While it is okay to have a highlight warning on the chrome ball, you do not want to have the warning appear on the white faces:...
- Page 11 Next, keep an eye on the black faces and the black trap. It is okay to have a shadow warning on your black trap:...
- Page 12 You do not want to have the warning appear on the black faces: Once you have a properly exposed image, you can proceed to batch apply these settings to the rest of the images in this sequence.
-
Page 13: Apply Settings To Multiple Images
In most programs, you can select this as the image to use to sync other images with. In some other programs, you will have to save the settings from the SpyderCUBE image as a preset to apply to your other images from the same lighting.


Need help?
Do you have a question about the SpyderCUBE and is the answer not in the manual?
Questions and answers