
Related Manuals for Sportplus FITNESS TRAMPOLINE

Summary of Contents for Sportplus FITNESS TRAMPOLINE
- Page 1 BEDIENUNGSANLEITUNG FITNESS-TRAMPOLIN INSTRUCTION MANUAL FITNESS TRAMPOLINE MODE D'EMPLOI TRAMPOLINE DE GYM SP-T-110 SP-T-110-IM-V06-DE-GB-FR.indb 1 15/9/2016 4:09 PM...
-
Page 2: Table Of Contents
Dear Customer, Congratulations for choosing a SportPlus product. We have every expectation that you will be fully satisfied with your new purchase. To guarantee optimal function of this product, please adhere to the following instructions: • Before using this product for the first time, please read the manual carefully! •... -
Page 3: Safety Instructions
SAFETY INSTRUCTIONS INTENDED PURPOSE • This product is intended for private indoor use and is not suitable for medical, therapeutic or commercial purposes. • The maximum permissible user weight for this product is 130 kg. • The minimum age for using the product is 14 years. •... - Page 4 • Make sure your work environment is hazard-free. For example, do not leave any tools lying around. Place the packaging materials somewhere where they will not pose any hazards during assembly. Packaging foil or plastic bags pose a suffocation hazard for children! •...
-
Page 5: Part List
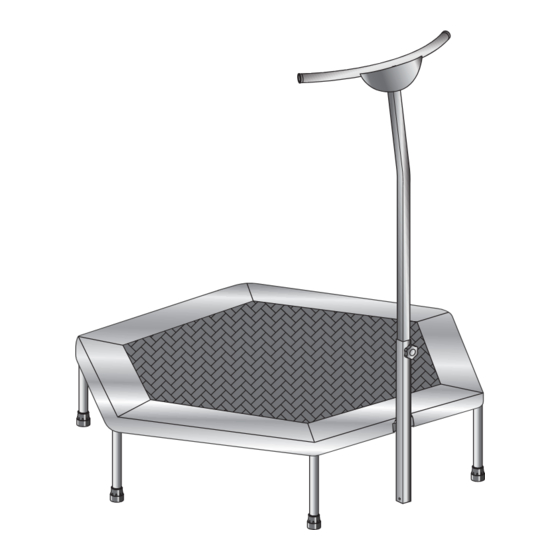
3. PART LIST DESCRIPTION FIGURE QUANTITY Trampoline net Trampoline net cover Frame tube Frame tube with metal plate Support frame with rubber foot Handle Top frame Bottom frame Flexible attachment loop Bolt Spring washer Washer Set screw Wrench Hex key Outil pour tendre Protection ring SP-T-110-IM-V06-DE-GB-FR.indb 27... -
Page 6: Assembly Instructions
4. ASSEMBLY INSTRUCTIONS Take all parts out of the packaging carefully and place them on a flat surface. When doing this, use suitable padding to protect the working surface. Assembly of the individual parts should be carried out by 2 people! Before assembly, check the parts list to verify that all parts are present. - Page 7 4. ASSEMBLY INSTRUCTIONS STEP 2 Slide one protective ring (18) on each longer arm of the frame parts (3, 4). STEP 3 Put the 6 frame tubes (3, 4) together. SP-T-110-IM-V06-DE-GB-FR.indb 29 15/9/2016 4:09 PM...
- Page 8 4. ASSEMBLY INSTRUCTIONS STEP 4 Slide the protective rings (18) over the contact points of the frame parts (3, 4). Note: The protective rings protect the mounting loops (9) from friction on the tube edges. SP-T-110-IM-V06-DE-GB-FR.indb 30 15/9/2016 4:09 PM...
- Page 9 4. ASSEMBLY INSTRUCTIONS STEP 5 Fix the trampoline net (1) to the trampoline frame. To do so, attach the 36 flexible attachment loops (9) using the clamping tool (17). Start with one of the two attachment loops located on the metal plate and guide the loop through the opening in the metal plate (see detailed diagram).
- Page 10 4. ASSEMBLY INSTRUCTIONS STEP 6 31 20 7 28 3 1 35 Continue assembling the trampoline net using the remaining 32 elastic attachment loops. Refer to the upper picture for more details on the order of attachment. Secure 6 elastic attachment loops each to each of the 6 sides. SP-T-110-IM-V06-DE-GB-FR.indb 32 15/9/2016 4:09 PM...
- Page 11 4. ASSEMBLY INSTRUCTIONS STEP 7 ß ¿ Using the metal plate, attach the bottom frame (8) to the respective mounting metal plate on the frame tube (4). Secure the connection with 2 nuts (11). To do so, us the wrench (15) provided. SP-T-110-IM-V06-DE-GB-FR.indb 33 15/9/2016 4:09 PM...
- Page 12 4. ASSEMBLY INSTRUCTIONS STEP 8 ” Insert the top frame (7) into the bottom frame (8). Adjust the length as desired and secure the connection by screwing the set screw (14) onto the mount of the bottom frame. SP-T-110-IM-V06-DE-GB-FR.indb 34 15/9/2016 4:09 PM...
- Page 13 4. ASSEMBLY INSTRUCTIONS STEP 9 „ “ ¸ Attach the handle (6) to the top frame (7). Secure the connection with 2 bolts (10), 2 spring washers (12) and 2 washers (13). SP-T-110-IM-V06-DE-GB-FR.indb 35 15/9/2016 4:09 PM...
- Page 14 4. ASSEMBLY INSTRUCTIONS STEP 10 Place the trampoline net cover (2) on the trampoline framework. Check the correct position of the recess for the bottom frame. SP-T-110-IM-V06-DE-GB-FR.indb 36 15/9/2016 4:09 PM...
- Page 15 4. ASSEMBLY INSTRUCTIONS STEP 11 Attach the trampoline net cover (2) to the support frames of the framework using the straps. SP-T-110-IM-V06-DE-GB-FR.indb 37 15/9/2016 4:09 PM...
- Page 16 4. ASSEMBLY INSTRUCTIONS STEP 12 ” Adjust the handle height (6) to your body height by adjusting the length of the holding rod accordingly. Make sure the marking on the top frame (7) will not be visible after installation. Secure the height using the set screw (14). SP-T-110-IM-V06-DE-GB-FR.indb 38 15/9/2016 4:09 PM...
-
Page 17: Training
To achieve your set training target, it is necessary that you read this user manual to inform yourself about important points regarding the general development of a workout program and the exact use of your fitness trampoline. Therefore, please thoroughly read all of the points listed here and pay them close attention. - Page 18 5. TRAINING ENDURANCE EXERCISE 1: LIGHT JOGGING. Do not lift the knees up too high; avoid bouncing or jumping movements. Stabilize your leg axis correctly (keep foot, knee and hip in one line, avoid knock- knees) 5 to 45 minutes depending on endurance. EXERCISE 2: JUMP LATERALLY FROM ONE LEG TO THE OTHER.
- Page 19 5. TRAINING, POWER EXERCISE 5: SLOWLY BEND AND EXTEND YOUR FRONT KNEE. Big stride; weight on the front leg; the back leg touches the trampoline only slightly; foot, knee and hip in one line. Keep the leg axis stable. Do not fully straighten the knee;...
- Page 20 5. TRAINING, COORDINATION EXERCISE 9: WRITING YOUR NAME Stand on one leg. Knee slightly bent; write your name into the air using your free leg. Keep the supporting leg stable during the whole exercise. Keep the leg axis stable. Avoid <<extreme jiggling>> with your body.
-
Page 21: Maintenance, Cleaning And Care
6. MAINTENANCE, CLEANING AND CARE • After the assembly and before using the home trainer, always make sure that all bolts/ nuts are fully and correctly tightened. • Clean the unit regularly with a slightly damp cloth and a mild cleaning agent. •... -
Page 22: Service And Replacement Parts
Our service team is naturally available at any time to assist you with additional questions regarding the assembly and use of your SportPlus product as well as ordering spare parts. Service time: Service time: Monday to Friday, 9.00 a.m. -
Page 23: Warranty
9. WARRANTY SportPlus guarantees that the product this warranty applies to was manufactured using high-quality materials and has been inspected with the utmost attention. Should there be any defects within the hereinafter stipulated warranty period and under normal use and maintenance conditions, please contact our service team. - Page 24 Servicehotline: + 49 (0) 40 - 780 896 – 35* (12ct/min aus dem deutschen Festnetz) E-Mail: service@sportplus.org URL: http://www.sportplus.de Pour des questions techniques, des informations sur nos produits et pour les commandes de pièces de rechange, notre équipe de service vous est disponible comme suit: Heures de service: du lundi au vedredi de 9h 00 à...
Need help?
Do you have a question about the FITNESS TRAMPOLINE and is the answer not in the manual?
Questions and answers