Table of Contents
Advertisement
Quick Links
Advertisement
Table of Contents

Related Manuals for Endeavour Tools ET8636

Summary of Contents for Endeavour Tools ET8636
- Page 1 BATTERY CHECKER Instruction Manual ET8636...
-
Page 2: Table Of Contents
INTRODUCTION Thank you for purchasing "BATTERY CHECKER ET8636". To obtain the maximum performance of this instrument, read this Instruction Manual carefully, and take safe measurement. CONTENTS 1 - 3 SAFETY PRECAUTIONS ・・・・・・・・・・・・・・・・・・・・・・・・・・・・・・・・・・・・・・・・・・・・・・・・・・・・・・・・・・・・・・・・・・・・・・ OPERATING PRECAUTIONS ・・・・・・・・・・・・・・・・・・・・・・・・・・・・・・・・・・・・・・・・・・・・・・・・・・・・・・・・・・・・・・・・・・・ FEATURES ・・・・・・・・・・・・・・・・・・・・・・・・・・・・・・・・・・・・・・・・・・・・・・・・・・・・・・・・・・・・・・・・・・・・・・・・・・・・・・・・・・・・・・・・・・・・・・・・ UNPACKING AND INSPECTION ・・・・・・・・・・・・・・・・・・・・・・・・・・・・・・・・・・・・・・・・・・・・・・・・・・・・・・・・・・・・・... -
Page 3: Safety Precautions
SAFETY PRECAUTIONS (strict observance is required) This instruction manual contains the important contents to prevent harm to user or others and damage of property, and to use the instrument safely and correctly. Read this manual carefully and obey the contents after having understand the following terms and symbols. - Page 4 SAFETY PRECAUTIONS (strict observance is required) WARNING Take the measurement under well-ventilated environment. The hydrogen gas which stayed around battery catches fire from the spark that occurred when connecting the Battery Clips and might explode. Make sure that the shift lever is set to "Parking" position (set to "Neutral" for stick shift car).
- Page 5 SAFETY PRECAUTIONS (strict observance is required) WARNING Be careful about your hands, gloves and clothes not to be caught in the engine belt or cooling fan. Important to prevent injury. Do not use the instrument if it is in the abnormal condition. Stop using the instrument immediately and consult with your local dealer when recognizing smoke, strange smell, or abnormal noise.
-
Page 6: Operating Precautions
OPERATING PRECAUTIONS ●Do not apply the engine oil to the metal part of the Battery Clips or USB Plug to prevent contact failure. ●Do not apply engine oil, gasoline, antifreeze or battery fluid to the instrument to prevent any damage on its surface. ●Do not polish the case with the fluid that contains alcohol to prevent the cracking. -
Page 7: Features
FEATURES ■Batteries for the vehicle equipped ■ET8636 can test State of Charge with charge control system or idle (SOC), State of Health (SOH), Start reduction system are testable. Performance and Charging System of the car battery. ■Test result can be printed on site by built-in printer. -
Page 8: Unpacking And Inspection
UNPACKING AND INSPECTION (Check before use) Confirm if the following items are contained in the package in good condition. If there are any damages or missing items, ask your local dealer for replacement. ①Battery Checker…1 pce. ②USB Cable (937)…1 pce. GOOD CHARGE ③Printer Paper…2 rolls... -
Page 9: Name Illustration
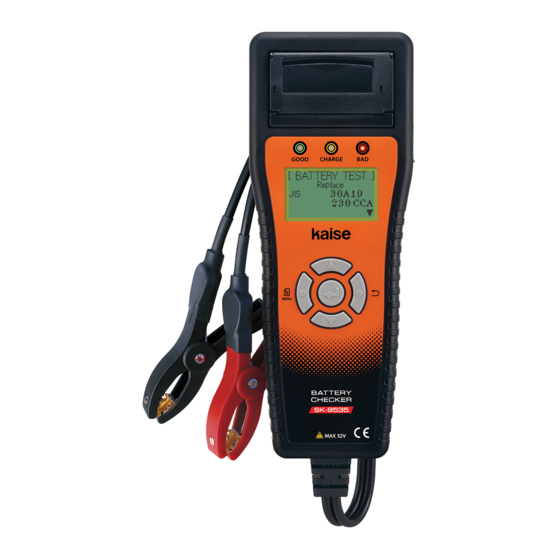
NAME ILLUSTRATION Front Side LED Indicators ● ①GOOD (Green LED): Lights up when battery test result is "Good". ②CHARGE (Yellow LED): GOOD CHARGE Lights up when the battery is weak and needs re-charging. ③BAD (Red LED): lights up when battery test result is "Replace"... - Page 10 NAME ILLUSTRATION Rear Side WARNING TO AVOID ELECTRICAL SHOCK, DO NOT CONNECT BATTERY WITH WET HAND OR WET BATTERY CLIP. 感電事故防止のため、手やバッテリークリップ等がぬれた 状態で、バッテリーに接続しないでください。 Serial Number SERIAL No. ● 0 0 0 0 1 www.kaise.com 4301-8530-1 1106 KAISE JAPAN Battery Clip Holder ●...
-
Page 11: Specifications
SPECIFICATIONS 1. General Specifications Dot presentation, 128×64dots LANGUAGE Japanese, English, Chinese (Default: English) DISPLAY RATE OF 1 time/second VOLTAGE MEASUREMENT LED INDICATION Green:Lights up when battery test result is "Good" Yellow:Lights up when battery is weak and needs re-charging Red:Lights up when battery test result is "Replace" Flashes when battery test result is "Attention"... -
Page 12: Before Use
SOC is the charging condition of the battery, the state is expressed in percentage (%). Definition of SOC in this product: ET8636 defines as SOC 100% when the battery voltage is higher than 12.756V. (Higher than 13.056V for the battery for industry) ※ET8636 does not show the exact measurement voltage when testing the battery just after... -
Page 13: Language / Date & Time Settings
BEFORE USE ●What is Ripple Voltage? Ripple Voltage is the feeble change of charging voltage which occurs when rectifying the generated voltage by diode. If diode is damaged, the ripple voltage fluctuated sharply and adversely affects battery and in-vehicle apparatus. 2. -
Page 14: Measurement Procedures
MEASUREMENT PROCEDURES 1. Battery Test CAUTION ●This instrument forced to be restarted if the testing battery is extremely exhausted and cannot afford to supply the workable current. ●Test the battery in the state of the engine shutdown to obtain the accurate measurement. - Page 15 MEASUREMENT PROCEDURES Test Preparation ●Check the battery visually before connecting Battery Clips to the battery terminals. ●Replace the Battery Terminals if there is corrosion or crack occurs on the Terminals. ●Connect the Battery Clips to the Battery Terminals tightly without loosening. ●Clean up the Battery Terminals and Battery Clips if there is greasy dirt.
- Page 16 MEASUREMENT PROCEDURES ②The instrument is powered on automatically and enters Test Battery Selection (step ③) after showing the following model number / software version number indication. BATTERY CHECKER ET8636 Soft Version Number Ver 2.00 Current version number ③Select the battery voltage to be tested.
- Page 17 MEASUREMENT PROCEDURES ⑤Choose testing mode with using △(UP Testing Mode ▲▼ SCROLL) / ▽(DOWN SCROLL) Keys and press (ENTER) Key. In the case of Standard battery for the cars with charge controller or idle reduction systems, choose "Charge Charge Controller/ Controller / Idle Reduction".
- Page 18 ●Battery test is effective for only 12V lead battery. ●Generally, industrial battery is recommended to be replaced when CAUTION the internal resistance comes up to double of the unused battery. Based on this, ET8636 judges "Bad" when the test result becomes double of the input industrial rating.
- Page 19 MEASUREMENT PROCEDURES (When choosing "YES") Input mΩ Input mΩ value with using △(UP SCROLL) / ▽ (DOWN SCROLL) Keys and press 50.0 mΩ (ENTER) Key. Battery test starts. Test Start Press (BACK) Key to go back to the Input Industrial Rating screen. Input mΩ...
-
Page 20: Battery Test
MEASUREMENT PROCEDURES ⑨When battery test is completed, the test Green LED lights up when result screen is displayed as shown in the test result is "Good" right. Confirm test result with using △ (UP SCROLL) / ▽ (DOWN SCROLL) Keys. GOOD CHARGE LED indicator lights up or flashes depending... - Page 21 Check error point. abnormality on the battery terminals and terminal cables. ②C heck for ET8636 Make sure there are not any dirt or abnormality on the metal part of battery clips and clip cables. ※Battery may be damaged if keeping getting errors in spite of checking above.
-
Page 22: Battery System Test
MEASUREMENT PROCEDURES 2. Battery System Test Start performance ability of the battery (the ability that battery starts an engine) and charg- ing system on vehicle (condition of alternator) are testable. ※Battery System Test for 12V battery is available after the Battery Test. ①Press (ENTER) Key during Battery Test BATTERY SYSTEM TEST... - Page 23 MEASUREMENT PROCEDURES ③Battery System Test starts when detecting a voltage change of the battery. ※The screen shown right is displayed during Battery System Test. (about 1 minute max) Start the engine. ※If retest is necessary after Battery System Engine started? Test, the right screen is displayed.
- Page 24 MEASUREMENT PROCEDURES ※The following results are displayed. ・Start performance test result ・Starting voltage (cranking battery voltage) ・Start performance (the ability that battery starts an engine) ・Charging system test result ・Charging voltage (battery voltage at the time of charging) ・Ripple voltage (ripple voltage of diode) ・Comment ※Operating Instructions are displayed in the last page of the test result.
-
Page 25: Print Out
MEASUREMENT PROCEDURES 3. Print Out This instrument can print out the results of Battery Test and Battery System Test. ※Unclear printing or unstable operation of this instrument may occur when using weak battery for printing. In this case, save the test results in reference to "4. Test Result Saving"... - Page 26 MEASUREMENT PROCEDURES Printing Sample Battery Test Report Store Name Store name and person in charge Person in Charge Testing date and time Date and Time 2013/5/15 15:0 0 BATTERY TEST Battery test mode (Aging Test Mode) Test Result : Good Battery test result Battery Type Battery Size...
- Page 27 MEASUREMENT PROCEDURES Test Result Five levels: ①Good ②Good/Charge ③Caution ④Charge/Retest ⑤Replace ●Check Point In case of the test result "Caution", increase frequency of battery test because deterioration of the battery is progressing. ●Advice It is effective to get auxiliary charged of the battery periodically to be able to use the battery for a long time.
-
Page 28: Test Result Saving
MEASUREMENT PROCEDURES 4. Test Result Saving This instrument can save the result of Battery Test and Battery System Test up to 99 data. ※Each data is saved with following file name. ■Example of file name (In case of the third time on the same day, May 15th, 2013) 1351503.TXT Year (2013) Number of savings on... - Page 29 MEASUREMENT PROCEDURES ※Up to 99 data can be saved to the internal -WARNING- memory. If the saved data exceeds 99, the Can't save the data. message as shown in the right is displayed. The number of saved Delete unnecessary data in reference to "6. data exceed the l imi t.
-
Page 30: View The Saved Data
MEASUREMENT PROCEDURES 5. View the Saved Data Saved data can be displayed in the following procedures. ①Menu screen as shown in the right is 2013/05/15 15:00:00 displayed by pressing (MENU) Key during MENU displaying Battery Voltage Selection screen MENU (Step ③ on Page 14) or Battery Type View Save Data Selection screen (Step ④... -
Page 31: Delete The Saved Data
MEASUREMENT PROCEDURES 6. Delete the Saved Data Saved data can be deleted in the following procedures. ①Menu screen is displayed by pressing MENU 2013/05/15 15:00:00 (MENU) Key during displaying Battery Voltage Selection screen (Step ③ on Page MENU 14), Battery Type Selection screen (Step ④ Print on Page 14), the Result of Battery Test screen Save Data... -
Page 32: Connecting To Pc
Serial Number : 00001 ※Internal memory is recognized as mass- Soft Ver : 2.00 storage device (kaise ET8636 USB Device) when PC connection is completed. Current version number is displayed. ●Detach USB Cable after completing USB removing process from CAUTION... - Page 33 MEASUREMENT PROCEDURES ③Access to the memory of this instrument by PC operation to copy and paste the data to the PC. Data format is "text" which is suitable for print out from PC. ■PC screen display example 1351503.TXT - Notepad File Edit Format...
-
Page 34: Setting Of Date And Time
MEASUREMENT PROCEDURES 8. Setting of Date and Time ①Menu screen is displayed by pressing MENU 2013/05/15 15:00:00 (MENU) Key at Battery Voltage Selection MENU screen (Step ③ on Page 14) or Battery Type Selection screen (Step ④ on Page 14). View Save Data Select "Date/Time Settings"... -
Page 35: Setting Of Language
MEASUREMENT PROCEDURES 9. Setting of Language ①Menu screen is displayed by pressing 2013/05/15 15:00:00 MENU (MENU) Key at Battery Voltage Selection MENU screen (Step ③ on Page 14) or Battery Type Delete Save Data Selection screen (Step ④ on Page 14). Select "Select Language"... -
Page 36: Temperature Setting
MEASUREMENT PROCEDURES 11. Temperature Setting Temperature of the battery at Battery Test can be set manually. ①Menu screen is displayed by pressing MENU 2013/05/15 15:00:00 (MENU) Key at Battery Voltage Selection MENU screen (Step ③ on Page 14) or Battery Type Select Language Selection screen (Step ④... -
Page 37: Cca Value List For Battery Manufacturers And Their Models
MEASUREMENT PROCEDURES 12. CCA Value List for Battery Manufacturers and Their Models ●Confirm the battery standard (model) and input modes, EN(DIN), SAE(BCI) or CCA Input, when input CCA value of the battery. ●If the CCA value printed on the testing battery is different from this table, input the printed value. - Page 38 MEASUREMENT PROCEDURES OPTIMA ATLAS EXIDE Moll Red Top EA Series MOLL AGM Model Model Model CCA EN(DIN) Model CCA EN(DIN) CCA EN(DIN) CCA SAE(BCI) 572-20 EA530 81070 1050S 571-13 EA602 81095 1050U 544-59 EA640 925S m3 plus 4DLT EA722 Model CCA EN(DIN) 925U 543-17...
-
Page 39: Maintenance
MAINTENANCE 1. Printing Paper Setup The screen as shown in the right is displayed when Printer Paper is running out or unset. Set new Printer Paper in the following procedure. Paper out・・・ Pull up the ①Pull up Printer Lever as shown in the right. Printer Lever Printer Cover lifts up. - Page 40 MAINTENANCE ④Push down the Printer Lever, then close Close the Printer Cover with Push down pushing both side. Printer Cover with putting it over the printer this Printer (Do not push Lever first. paper. Cut the extra paper away. center part.) ※Be sure to push both side of Printer Cover when closing it.
-
Page 41: Formatting Of Removable Disk
MAINTENANCE 2. Formatting of Removable Disk ●All saved data are deleted after formatting removable disk. CAUTION ①Insert the provided USB cable to the USB Format Removable Disk (K:) Format Removable Disk (K:) port on the right side of the unit and Capacity: connect another to PC. -
Page 42: Periodical Check And Calibration
MAINTENANCE ⑤Format of Removable Disk is completed Linking to PC… when screen shown right displayed after finishing the internal Serial Number memory formatting. 00001 Soft Ver : 2.00 ⑥Detach USB Cable after completing USB removing process from PC to prevent unexpected trouble. -
Page 43: Trouble Shooting & Repair
TROUBLE SHOOTING & REPAIR If there are any failure with this instrument, check the following trouble shoots before asking repair service. Ask KAISE CORPORATION AUTHORIZED SERVICE AGENCY through your local dealer when there are any questions or troubles with this instrument. - Page 44 WARRANTY ET8636 is warranted in its entirety against any defects of material or workmanship under normal use and service within a period of one year from the date of purchase of the original purchaser. Warranty service is available at KAISE AUTHORIZED SERVICE AGENCY through your local dealer.
Need help?
Do you have a question about the ET8636 and is the answer not in the manual?
Questions and answers