Table of Contents
Advertisement
Quick Links
Advertisement
Table of Contents

Subscribe to Our Youtube Channel
Related Manuals for Catrike TRAIL


Summary of Contents for Catrike TRAIL
- Page 1 Owner’s Manual ALL CATRIKE MODELS More resources available Catrike.com...
-
Page 2: Table Of Contents
Table of Contents Introduction ....................3 Register your Catrike ..................4 Serial numbers ....................4 III. Catrike Models ....................5 Safety and riding tips ..................6 Safety tips Riding tips Maintenance tips Assembly ....................... 11 Wheels Prepare the spindles Headset assembly... - Page 3 VIII. Road ) ......................43 Folding Assembly Instructions (5.5.9, Dumont & Trail) .................... 50 How To Fold (5.5.9, Dumont & Trail)............56 Thru-Axle Instructions (700) ............... 57 Catrike Limited Warranty ................58 XII. IF YOU HAVE A PROBLEM ................61 XIII.
-
Page 4: Introduction
Introduction Congratulations on purchasing a Catrike! You made a great decision buying a Catrike. We are sure you will enjoy riding it for years to come. Please take a moment to read through this document, especially, the sections on safety and riding tips. -
Page 5: Register Your Catrike
Serial numbers The serial number is located on the main frame of your Catrike. The main frame is the largest diameter part of the frame and serial numbers are located towards the back of the Catrike behind/below the seat. -
Page 6: Catrike Models
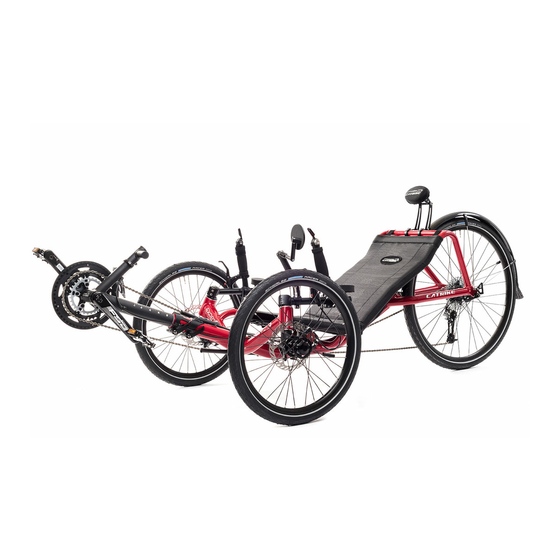
Catrike Models OWNER’S MANUAL PAGE 5... -
Page 7: Safety And Riding Tips
Catrike, with blinking lights and reflective stickers. But you also must ride in such a way that you engage the attention of motorists, making eye contact, signaling your intentions, being courteous, smiling and waving. -
Page 8: Riding Tips
We strongly recommend the use of the mirror that comes standard with every Catrike. You can also order dual mirrors (one on each side). However, don't rely entirely on your mirrors. Turn and look before changing lanes or turning across the line of traffic. - Page 9 There is a plastic shim included between the boom and the main frame to eliminate any gap and to increase clamping action. Make sure the plastic shim is correctly placed before riding your Catrike. If for any reason, you are unable to install or tighten the boom clamp or are OWNER’S MANUAL...
-
Page 10: Maintenance Tips
Catrike and contact your Catrike Dealer. Failure to do so might cause the boom to twist and cause serious injury. Maintenance tips Make it a habit to inspect your trike from time to time, especially when new. Fasteners have a habit of working loose at first and this can cause a safety hazard. - Page 11 If you're adjusting the trike to fit another rider, make absolutely certain that the chain is of the right length. In order to get the maximum possible gear range, the Catrike drive train pushes the derailleurs close to their maximum capacity. The chain must be long enough to handle the big chain ring/big cog combination…if it's too short;...
-
Page 12: Assembly
Assembly set up and fitting performed by authorized Catrike dealer. Your Catrike should be fully assembled, tested and fine-tuned by your Catrike dealer or local bike store. Here are the assembly instructions in order to show how this process is done. - Page 13 ✓ Gear cable housing ✓ Cable ferrules and cable ends ✓ Flag mount ✓ Safety flag ✓ Derailleur hanger ✓ Computer sensor mount ✓ Space Neck Rest (Expedition & 700). ✓ RockShox Monarch R Shock (Road & Dumont). ✓ Two front wheels with tubes and tires installed. ✓...
- Page 14 Cassette installation tool (for standard cassette) ✓ The frame and many other parts of your Catrike are made of aluminum. It is very easy to strip aluminum threads especially if steel fasteners are going into them. Be careful not to cross thread or over tighten any fastener.
-
Page 15: Wheels
Wheels Prepare the wheels Attach the brake rotors to the front wheels using the screws provided with the brakes. Both the brake rotors and the tread on the tire are directional so attention must be paid to how they are mounted. The direction of the brake rotor and tire must match! Direction of rotation shown on brake rotors Direction of rotation shown on tire sidewall Installing the derailleur hangar... - Page 16 Installing the rear wheel Insert quick release into the non-drive side of the hub and partially thread quick release nut. Insert rear wheel into dropouts. Click HERE or scan QR code below to video aids. Push lever side of quick release against the outside face of the left dropout. With the lever in the open position, tighten the quick release adjusting nut until nut contacts derailleur hanger.
-
Page 17: Prepare The Spindles
Prepare the spindles Spindles connect the front wheels to the handlebars and steering mechanism. • First, identify the right and left spindles Mount the brake calipers on the spindles. The left-hand assembly has the brake caliper on top, and the right hand has the brake caliper underneath. Use the provided M6 washers between the head of the calipers mounting brackets and the plates to space out the bolt. -
Page 18: Headset Assembly
Headset assembly OWNER’S MANUAL PAGE 17... -
Page 19: Handlebar Adjustment
Your new Catrike adjustable handlebars can be adjusted in many ways to give each Catrike owner a custom fit. The long, horizontal portion of the handlebar has a gentle incline to it. For those riders who prefer lower handlebars, this can be installed upside down to provide a gentle downward slope. -
Page 20: Install Tie Rod
Handlebars can be adjusted wide out for a better turning radius or in close to the body for better aerodynamics. The grip portion of the handlebar is also fully adjustable. TIP: Be sure the tightening bolts are completely loosened before attempting to move or rotate the short grip portion of the handlebar to avoid scratching the surface of the bar. - Page 21 TIE RODS for all Catrikes except 5.5.9 (below) TIE ROD for 5.5.9 only (below) OWNER’S MANUAL PAGE 20...
- Page 22 Tie Rod Adjustment To adjust, loosen the jam nuts and twist the tie rod between your fingers to adjust the length. Make sure the rod ends are parallel when tightening the jam nuts. Flats are provided on the tie rod to fit an 11mm wrench. The conical spacer included on the tie rod assembly goes between the tie rod end and mounting plate on the spindle as shown for the model.
-
Page 23: Setting The Toe (Front Wheel Alignment)
The measured distances should be the same or 1/16th of an inch closer in the front; a very slight toe-in. This can be done with a tape measure or a Catrike Calibro tool. Make sure to have the wheels point straight ahead using either method. When using a tape measure, it is best to measure from the centerline of the tire to the centerline of the other tire at axle height (approximately 9 ½”... -
Page 24: Brake Cable Routing
TIP: The toe should be set by your Catrike dealer as part of the original assembly setup. Once properly adjusted and set it should stay set in place. If you notice... -
Page 25: Brake Adjustment
Brake adjustment Next, adjust the calipers. One of the nice things about the Avid disc brakes on your Catrike is that they are very easy to adjust. If the caliper mounting bolts have been tightened, loosen them. • Adjust the brake pads; use the knurled plastic adjuster knobs on either side of the caliper until the pads are firmly contacting the rotor. -
Page 26: Install The Boom On The Main Frame Tube
If for any reason, you are unable to install or tighten the boom clamp enough, please don't ride and contact your Catrike dealer. Failure to do so might cause the boom to twist and cause damage to the Catrike or even cause injury. -
Page 27: Install The Derailleurs
Install the derailleurs Install the front derailleur on the derailleur post. Line up the derailleur cage with the chain rings and position the curve of the derailleur cage so that it clears the big chain ring by about 2mm (1/8”). There should be a small plastic guide taped to the cage to assist you in this. - Page 28 Below are images showing cable routing Dumont OWNER’S MANUAL PAGE 27...
-
Page 29: Install The Pedals
The cleats that clip into the pedals provided with every Catrike are Shimano SPD type. They're not only safer; they're far more efficient, convenient and comfortable than using flat pedals. -
Page 30: Install The Seat
Install the seat Lay the seat mesh on top of your Catrike with the patch toward the top of the seat. Insert the buckles into each other on the back of the seat leaving the straps loose and position the seat mesh so that it is square on the frame, with the cutouts for the lower seat support tubes positioned properly and tighten all the straps. -
Page 31: Set The Boom Length
Set the boom length Sit on the trike, wearing shoes like those you'll have on when riding, and adjust the boom length. This is done by loosening the boom quick releases enough to allow the boom to move, then putting your instep on one pedal and extending your leg fully (the boom will rotate…just move it back to vertical with your hand). -
Page 32: Install The Chain
Install the chain Start at the chain rings in the front of the trike. Run the chain through the front derailleur; between the main cross member and the tie rod; through the upper chain tube; under the idler wheel; over the rear cassette; through the rear derailleur and back through the lower chain tube. -
Page 33: Adjust The Derailleurs
Adjust the chain length. To do this, shift onto the largest cog on the rear and the largest chain ring in the front. Pull the chain taut, so that the rear derailleur cage is fully extended. Then add two links. That will be close to the ideal length for the chain. Use the included Powerlink to hold the chain together. -
Page 34: Seat Back Adjustment
Seat back Adjustability The 5.5.9, Dumont, Road , Trail & Villager have adjustable seats that allow the angle of the seat back to be adjusted to four different angles to suit the rider’s preference. This is a quick and simple adjustment. Loosen the quick release. Choose the desired setting and tighten the quick release to keep the seat angle in place. -
Page 35: Install The Mirror
Install the flag Your Catrike comes with a flag mount. Using the provided M5x14 socket head cap screw & M5 washer. Install flag mount into rear threaded hole of the left drop out. For thru- axle equipped models install into rear threaded hole in right drop out. -
Page 36: Adjust The Neck Rest
Adjust the neck rest Remove the screws from the clamps to mount on the top horizontal seat bar. Place shims in clamps and center the space neck rest. Snug up the clamp bolts. You’ll likely be moving these clamps as you adjust the neck rest. You can now adjust the space neck rest height and angle to fit rider. -
Page 37: Rear Suspension Instructions (Dumont & Road Ar )
Rear Suspension Instructions (Dumont & Road Dumont Secondary Pulley Installation OWNER’S MANUAL PAGE 36... - Page 38 Road Secondary Pulley Instruction OWNER’S MANUAL PAGE 37...
- Page 39 Shock Sub Assembly OWNER’S MANUAL PAGE 38...
- Page 40 Shock Mounting to Frame OWNER’S MANUAL PAGE 39...
- Page 41 Rear Suspension Assembly OWNER’S MANUAL PAGE 40...
- Page 42 Catrike Dumont & Road Suspension Set-up Instructions Monarch shocks can be set up and tuned for your particular weight, riding style, and terrain. When tuning suspension, always make one change at a time and write it down. This allows you to understand how each change affects your ride.
- Page 43 • Move the travel indicator O-ring next to the air can. • Gently get onto your tricycle and sit in your normal riding position, then carefully step out of your Catrike. o Important: If you jump on your tricycle or move too much while getting on or off, you will not get an accurate sag measurement.
-
Page 44: Suspended Spindle Instructions (Dumont & Road Ar )
Suspended Spindle Instructions (Dumont & Road Cellasto Installation & Information OWNER’S MANUAL PAGE 43... - Page 45 Left Spindle Assembly Step 1 OWNER’S MANUAL PAGE 44...
- Page 46 Left Spindle Assembly Step 2 OWNER’S MANUAL PAGE 45...
- Page 47 Left Spindle Assembly Step 3 OWNER’S MANUAL PAGE 46...
- Page 48 Right Spindle Assembly Step 1 OWNER’S MANUAL PAGE 47...
- Page 49 Right Spindle Assembly Step 2 OWNER’S MANUAL PAGE 48...
- Page 50 Spindle Assembly Step 3 OWNER’S MANUAL PAGE 49...
-
Page 51: Folding Assembly Instructions (5.5.9, Dumont & Trail)
Folding Assembly Instructions (5.5.9, Dumont & Trail) Hinge Assembly Note: Front refers to front of Catrike OWNER’S MANUAL PAGE 50... - Page 52 Frame Lock Assembly OWNER’S MANUAL PAGE 51...
- Page 53 Roller Wheel Assembly OWNER’S MANUAL PAGE 52...
- Page 54 Roller Wheel Attaching to Frame OWNER’S MANUAL PAGE 53...
- Page 55 Kickstand Assembly OWNER’S MANUAL PAGE 54...
- Page 56 Kickstand Installation OWNER’S MANUAL PAGE 55...
-
Page 57: How To Fold (5.5.9, Dumont & Trail)
4. Loosen quick release on hinge—Loosen lever, unscrew the quick release skewer nut enough to allow the hinge to fold. 5. Tilt Catrike to one side—Tilt in the direction that will allow the rear wheel section to fold. 6. Secure using frame lock—Once folded, secure the frame in the folded position using the frame lock and close Velcro strap attached to frame lock. -
Page 58: Thru-Axle Instructions (700)
Thru-Axle Instructions (700) Parking Brake Assembly Rear Derailleur Assembly OWNER’S MANUAL PAGE 57... - Page 59 Rear Wheel Assembly Click HERE or scan QR code below to video aids. OWNER’S MANUAL PAGE 58...
-
Page 60: Catrike Limited Warranty
Catrike dealer or Big Cat HPV. Useful product life cycle Every Catrike tricycle and frameset has a useful life cycle. This useful life cycle is not the same as the warranty period. The warranty identifies the period of time that Big Cat HPV will replace the product if this becomes necessary. - Page 61 Catrike tricycle or frame set. Any one or a combination of these conditions may result in an unpredictable failure of a Catrike tricycle or frame set that would not be covered by this warranty. All Catrike tricycles and frame sets should be periodically checked by an...
-
Page 62: If You Have A Problem
If you elect to repair a defective product yourself or use the services of someone other than a Catrike authorized dealer, or if you use a replacement part not supplied by Big Cat HPV, Big Cat HPV will not be liable for any damage, failure or loss caused by the use of such unauthorized service or parts. -
Page 63: Thank You For Choosing Catrike
Register your Catrike and give us your feedback online at: http://www.catrike.com/register Look over Catrike resources and manuals at knowledge.catrike.com Participate in the Catrike message board at http://catrike.yuku.com Ride your Catrike as much as possible and spread the Catrike lifestyle! Happy Trails! OWNER’S MANUAL PAGE 62... - Page 64 Registration Form -- if you are unable to register online at http://www.catrike.com/register Use this form and mail to: Catrike (Attn: Registration) 2016 Stanhome Way, Orlando, FL 32804 Please note: Registering online is the best method. All items below are required...
Need help?
Do you have a question about the TRAIL and is the answer not in the manual?
Questions and answers