Advertisement
Advertisement

Related Manuals for VOLTA BCN 2015

Summary of Contents for VOLTA BCN 2015
- Page 1 OWNER’S MANUAL Volta BCN...
- Page 2 Barcelona, 2015 This owner’s manual should be considered a permanent part of your Volta and remain with the Volta if it is ever resold. This manual contains information that was available at the time of printing. Volta reserves the right to make changes at any time, without notice and without any further obligation.
- Page 3 The manual also contains information on maintenance to enhance operating safety and contribute to maintaining the value of your VOLTA throughout its life. We wish you an enjoyable riding expe- rience.
- Page 4 Use your own criteria to avoid potential damages , and in case of any doubt, contact with a service point authorized by Volta. Read carefully the information when you see the following signs:...
-
Page 5: Table Of Contents
TABLE OF CONTENTS This page give an overview of the con- tents of your owner’s manual. INDEX Motorcycle Safety........6 Instruments & Controls......9 Before Riding..........14 Basic Operation & Riding.......20 Charge and Batteries......27 Servicing your Volta........31 Technical Information......47 Warranty..........49 Index...............55 Notes..............57... - Page 6 Also boots, jacket, gloves and other kind inspect your Volta before every ride, of approved motorcycle protection and do not modify your Volta without equipment. the supervision of a Volta Authorized Service Point. Practice: Please, take a while to practice with your Volta.
- Page 7 We strongly advise you not to remove any original equipment or modify your selection, installation, and use of non- Volta in any way that would change its Volta accessories. design or operation. Such changes could seriously impair your Volta’s handling,...
- Page 8 To accomplish with regulations, some labels can be found on your motorbike. Don’t remove any of them. If any becomes hard to read, please contact with your Volta Authorized Service Point. The VIN number is required for your Volta registration. It may also be required when ordering parts or services.
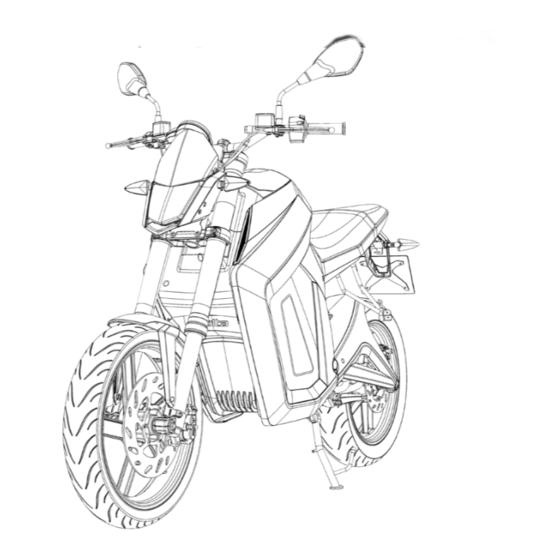
- Page 9 OPERATION COMPONENT LOCATION This section shows the location of all controls, gauges, and indicators you would normally use before or while riding your Volta. Left side of the handlebar: 1. Headlight switch Low beam on- The light switch is turned downwards.
- Page 10 OPERATION COMPONENT LOCATION Right side of the handlebar: 1. Front Brake lever The front brake is engaged using right hand brake lever 2. Traction switch Traction Switch on- This position is neces- -ON- sary for operation as it closes the traction circuit.
- Page 11 GAUGES, INDICATORS & DISPLAYS The gauges, indicators and displays on your Volta keep you informed, alert you to possible problems, and make your riding safer and more enjoyable. Refer to the gauges, indicators and displays frequently. Their functions are described on the following pages.
- Page 12 GAUGES, INDICATORS & DISPLAYS State of Charge Shows the state of the charge of traction battery ( %) Low battery LED lights when under 20% battery level (Auto start ECO Mode) LED2 Critical Problem (red) Shows an electrical problem. (pag 13). LED3 Speed control (green) Shows when speed control is active (pag 9) LED4 Electric motor enabled (green)
- Page 13 All indicators will light for a few seconds When the Volta powers up, the LCD If the light does not disappears, or the and then turn off when the Volta powers display will temporarily show all black power of the bike gets dramatically up.
- Page 14 Power up the Volta and check for normal operation of the gauge and indicators. Periodic maintenance should be done at least once a month, no matter how often you ride. Remember, be sure to take care of any problem you find, or have your Volta Authorized Service Agent correct it before you ride.
- Page 15 Key Position Function 1. ON Drive mode. The ignition switch is used to turn on your Volta , and also to lock the 2. OFF No electrical steering for theft prevention. Tur- functions avai- ning your key clockwise you will unlock lable the steering and turn on your Volta.
- Page 16 Place the kick stand in the up position: NOTE Step 1: Switch the key in DRIVE MODE. Even the Volta is turned on, the traction system will be disabled Step 2: Enable the drive system by until if the kick stand is down switching ON the traction button , the placed.
- Page 17 IS MY VOLTA READY TO RIDE? WARNING The Volta does not emit any sound or noise to alert that it’s turned on. Please, be sure that you are ready to ride and do not twist the throttle until you are 100% sure...
- Page 18 ARE YOU READY TO RIDE? Before you ride, you need to make sure WARNING WARNING you and your Volta are both ready to ride. To help get you prepared, this Not wearing a helmet increases the ALCOHOL AND MOTORCYCLING IS...
- Page 19 ARE YOU READY TO RIDE? Protective Apparel Additional Riding Gear For your safety, we strongly recommend In addition to a helmet and eye-protec- that you always wear an approved tion, we also recommend: motorcycle helmet, eye protection, boots, gloves, long pants, and a long- •...
-
Page 20: Before Riding
T h i s s e c t i o n g i v e s b a s i c r i d i n g instructions, including how to turn on your Volta, how to enable and disable the drive system, how to use the throttle, and brakes. - Page 21 BRAKING Your Volta is equipped with disc braking Systems which are hydraulically acti- vated. Operating the left brake lever applies the rear brake. Operating the Rear Brake Pedal right brake lever applies the front break. Front Brake Lever For full braking effectiveness, use both...
- Page 22 Avoid braking while turning. Braking drivers. in a turn may cause one or both wheels to slip and reduce control of your Volta. When riding in wet or rainy conditions, or on loose surfaces, the ability to maneuver and stop will be reduced.
- Page 23 DRIVING MODE SELECT The Volta BCN features different driving Driving mode details: modes to optimize your riding. Standard modes are Eco and City. Sport mode Eco: Smooth driving, low power, reduced is an optional equipment (equipped top speed, optimized to save battery.
- Page 24 DISABLING THE DRIVE SYSTEM - TURNING VOLTA OFF Disabling the Drive System There are several ways that the Volta’s drive system can be disabled: 1. Place the OFF/ON switch in the OFF position. 2. Put the kickstand down. 3. Turn the ignition switch countercloc- kwise to the OFF position.
- Page 25 3. Push in on the ignition key and turn • Keep your owner’s manual, current curb with the Volta at a 45 degree angle it to the LOCK position (counter clock registration, and insurance information to the curb.
- Page 26 PARKING Storage Trunk / Mobile charger The Volta is equipped with a storage trunk located in front of the seat. To open the storage, with the key on the ON position, push the switch (1) on the left handle, and the trunk cover will open.
-
Page 27: Charge And Batteries
4 hours if the battery assure long life and best performance is fully depleted. The Volta is powered by electric energy. of your Volta’s battery pack. To supply and manage this energy, your Volta is equipped with a Battery pack,... - Page 28 CHARGING YOUR VOLTA Your Volta can be charged in any do- Charging information mestic or public socket (110v-220v), you don’t need any special adaptor, electric During the charging process, your Volta station or special feature. will be informing of the charging state.
- Page 29 States of charging process: NOTE Charging Tips: You don’t need to wait until your Volta is fully discharged to charge it, you can charge the bike at your discretion. The bike is connected to the AC, but the bike has not started charging.
- Page 30 You don’t need to unplug the bike if The bike is charged, and the cells balancing is being done (try not to disconnect the battery is fully charged, the Volta the bike while this operation): switches off the power automatically, so the energy consumption stops.
- Page 31 In addition to the regular maintenance and the daily pre-ride inspection, please consider performing the periodic checks on the following table at least once a month, even if you haven’t ridden your Volta. If your ride frequently we truly recommend to do this check once a week.
- Page 32 To clean your Volta use water, soft soap absolutely dry, or you could get and motorcycle cleaner spray. hurt by electrocution and the bike could be damaged.
- Page 33 LONG STORAGE CONSERVATION If you are not going to ride your Volta, - If the bike cannot be connected, please we recommend following the next WARNING ensure that: steps to prepare the bike for the long storage: Never disconnect the service ·...
- Page 34 THE IMPORTANCE OF MAINTENANCE Keeping your Volta well-maintained If your Volta overturns or is involved in a WARNING is absolutely essential to your safety. crash, be sure your Volta Service Agent It’s also a good way to protect your inspects all major parts, even if you...
- Page 35 Volta in the best owner’s manual. or death. Any kind of manipulation conditions and for a long time, having a not authorized by Volta nullifies safe performance.
- Page 36 Volta Authorized Service The service intervals in this Maintenan- Agent knows your Volta best and is fu- ce Schedule are based on average riding lly equipped to maintain and repair it. If conditions.
- Page 37 MAINTENANCE SCHEDULE I = Inspection S = Substitution 1 year 2 years 3 years 4 years 5 years 6 years 7 years 8 years 9 years 10 years Software Check version Battery pack Brakes Brake pads Brake fluids Brakes Wheels Tyres Motor Brushes must be changed every 10.000km, not depending on the age of the bike.
- Page 38 MAINTENANCE COMPONENT LOCATION 1. Rear brake fluid reservoir 2. Rear brake lever 3. Front brake fluid reservoir 4. Front brake lever...
- Page 39 MAINTENANCE COMPONENT LOCATION 1. Belt 2. Fuse Box (under the seat) 3. Service Battery (under the seat)
- Page 40 MAINTENANCE COMPONENT LOCATION 1. Front brake caliper 2. Rear brake caliper 3. Front tyre 4. Rear tyre...
- Page 41 Fluid Level Inspection 1. Make sure there are no fluid leaks If the brake lever free-play does not 1. Place your Volta in an upright position 2. Check for deterioration or cracks in feel within the normal range while riding, on a firm, level surface.
- Page 42 If the thickness is less than 2mm, we recommend to change the brake pads. To check the front brake pad wear, pla- Visit your Volta Authorized dealer for a ce yourself in the opposite side of the brake service. brake caliper (right side). From this point you have a clear vision of the brake pads.
- Page 43 Always check air pressure when your tyres for wear and damage, and our tyres are “cold” – after the Volta has recommendations for tyre repair and been parked for at least three hours. If replacement.
- Page 44 The tyres that came on your Volta were designed to match the performance Tread Wear capabilities of your Volta and provide...
- Page 45 Service battery and fuses All of the electrical circuits on your How to remove the seat: Volta have fuses to protect them from • Open the rear seat (page 28) damage caused by excess current flow • Unscrew the 4 bolts under the rear (short circuit or overload).
- Page 46 Your Volta has an onboard security system that is coded to the transponders in each of your keys. The (2) two keys that came with your Volta are the only keys that will power your bike up. Volta recommends that you keep one spare in a safe location in case you misplace the other.
- Page 47 TECHNICAL SPECIFICATIONS Dimensions Overall length 2.051 mm Overall width 790 mm Over height 1.162 mm Wheelbase 1.450 mm Weight 130 Kg Ground clearance 235 mm Capacities Passenger capacity 1 operator + 1 passenger Maximum weight capacity 250 Kg Motor specifications Power 11 Kw / 14,96 Hp Torque...
- Page 48 TECHNICAL SPECIFICATIONS Chassis & Suspension Caster 24,5º Front tyre size 110 / 70 / R17 Rear tyre size 150 / 60 / R17 Tyre type Radial Tubeless Front tyre pressure (cold) 29 psi (200KPa, 2.0 kg/cm2) Rear tyre pressure (cold) 32 psi (221Kpa, 2.2 kg/cm2) Batteries Main battery cells...
- Page 49 Warranty Card (at the end of this the expiry of the warranty period, plea- book). If the purchase have been done se bring it to the attention of your Volta Warranty conditions dealer who will, together with Volta, give...
- Page 50 Lubricants: Brake liquid, suspension reduction of greater than 30% of the published nominal capacity, as measured passenger capacity, engine speed and fluids and other items specified by Volta. others. l) Cleaning, inspection, adjustment and by an authorized Volta dealer. To e) Any damage that results from use other periodic maintenance items.
- Page 51 Plan routine servicing well in advance in be repaired/replaced by an authorised order that the necessary work may be Volta dealer free of charge provided the Looking After Your Machine carried out at the specified period and conditions under which the warranty is Perform a pre-ride inspection daily at your and your dealers convenience.
- Page 52 ID : ___________________________________ Adress : ______________________________________________ ZIP Code : __________________________________ City : ________________________________________________ Country : __________________________________ E-mail : ______________________________________________ Phone : ___________________________________ Motorcycle’s data: Model: Volta _________________________________________ Frame number: _______________________________________ Registration number: _________________________________ Authorized Dealer: ____________________________________ Date of purchase: ____________________________________...
- Page 53 SERVICE CONTROLS Mileage Date Dealer data Next service Signature & Stamp...
- Page 54 SERVICE CONTROLS Mileage Date Dealer data Next service Signature & Stamp...
-
Page 55: Servicing Your Volta
INDEX (A-R) Accessories Fuse box 39,45 Setting time 11-12 A/C power cord Headlight ON/OFF Speedometer A/C connector Helmet Storing your Volta Are you ready to ride? High beam indicator Technical specs 47-48 Batteries Horn Throttle 10,14 Battery low indicators Ignition switch... -
Page 56: Notes
NOTES... - Page 57 NOTES...
- Page 58 VOLTA MotorBikes ® c/ Vilatenim 33, Nau 3.1 17600 Figueres. Girona - Spain info@voltamotorbikes.com www.voltamotorbikes.com...
Need help?
Do you have a question about the BCN 2015 and is the answer not in the manual?
Questions and answers