Table of Contents
Advertisement
Quick Links
Advertisement
Table of Contents

Summary of Contents for Zupapa Safump
- Page 2 Please attention: If you find that there’s any problem with our product, please contact us without any hesitation before you use it.We will answer your questions and resolve your problems within 24 hours.
-
Page 4: Safety Information
Attentions You Would Not Want To Miss Trampolines, being rebounding devices, propel the user to unaccustomed heights and into a variety of body movements. Just like any other type of physical recreational activity, participants can be injured. To reduce the risk of injury, be sure to follow appropriate safety rules and tips. Safety Information: Do not use trampoline without adult or knowledgeable supervision. - Page 5 trampoline. 20. Do not hold any foreign objects in your hand. 21. Do not place any objects on the trampoline while anyone is playing on it. 22. Do not use the trampoline as a device to bounce onto or into another object. 23.
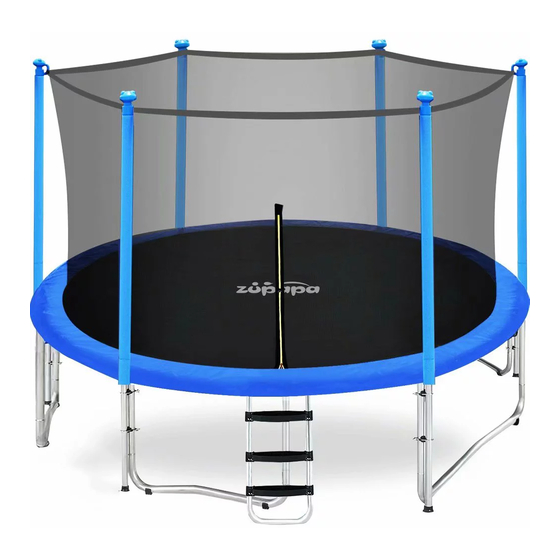
- Page 6 The minimum overhead clearance required is 24 feet (7.3 meters). The minimum overhead clearance required is 24 feet (7.3 meters). Use the trampoline in a well Use the trampoline in a well-lighted area. Zupapa® Zupapa® Trampoline Specifications pecifications Part Part image Description...
- Page 7 Vertical Leg Extension Steel Upper Net Pole with Foam Pad Steel Lower Net Pole Safety Net Clamp Set Galvanized Springs Spring Loading Tool Steel Ladder Trampoline Rain Cover...
- Page 8 Lawn Stake for Trampoline Slip-resistant Parts for Base Legs Size: 15FT Maximum Weight Capacity: 375LBS (170 KGS) How to Assemble My Trampoline? Prior To Assembling: Please read the assembly instructions before beginning to assemble the product. It is recommended that a minimum of 2 persons participate in the assembly of this product. The assembly steps use these descriptions and numbers as reference for your convenience.
- Page 9 15' FT( 6 Legs ) To connect the parts, simply slide a section To connect the parts, simply slide a section All parts with the same part number are All parts with the same part number are (male) tubing that is smaller on one end (male) tubing that is smaller on one end interchangeable and have no interchangeable and have no “right”...
- Page 10 STEP 3-Top Rail Assembly Two people will be necessary at this point to assemble the trampoline. One person lifts the Two people will be necessary at this point to assemble the trampoline. One person lifts the Two people will be necessary at this point to assemble the trampoline. One person lifts the Support Assembly from step 2 to a standing (vertical) position and inserts one of the sockets Support Assembly from step 2 to a standing (vertical) position and inserts one of the sockets Support Assembly from step 2 to a standing (vertical) position and inserts one of the sockets...
- Page 11 Wear heavy duty working gloves to protect your hand and avoid pinch your fingers. duty working gloves to protect your hand and avoid pinch your fingers. duty working gloves to protect your hand and avoid pinch your fingers. • Lay the jumping mat (#1) inside the Lay the jumping mat (#1) inside the Use the spring loading tool (#12) to attach a Use the spring loading tool (#12) to attach a...
- Page 12 If you notice that you have skipped a If you notice that you have skipped a hole Attach the remaining springs until all the Attach the remaining springs until all the and v-ring connection, recount and ring connection, recount and spring are placed on the frame and spring are placed on the frame and remove or attach any spring required to...
- Page 13 Tie all black webbings which sewn on the Attach the hook of the elastic strap to the inner arc of padding to steel “V” rings. V-ring rounding the outside of the top rail frame. Important tips for avoiding tearing the pad. If there is no spacer(no gap)between two Our trampoline have spacer between the tubes of your trampoline, to avoid tearing the...
- Page 14 Cut a small gap section on pad’s flap Cut a small gap section on pad’s flap Fold the small gap section to make sure Fold the small gap section to make sure around the pole. that it won’t be jammed between the two that it won’t be jammed between the two tubes.
- Page 15 Place the safety enclosure mesh on Slide the pole with foam into safety trampoline tidily as shown ready for next enclosure mesh pole jacket in turn. step. Repeat with remaining until make all poles Carry gathered mesh/poles (#7) to jacketed firmly. chosen entrance site on trampoline.
- Page 16 Working clockwise, poles go on alternating Working clockwise, poles go on alternating After succeeding in the first pole, After succeeding in the first pole, repeat legs until you reach the entrance area. Safety legs until you reach the entrance area. Safety with remaining orderly.
- Page 17 Get the leg base (#5) stuck on the ground by Congratulations! Your trampoline safety inserting the lawn stake (#15) into the lawn, enclosure is now complete! to avoid the risk of accidents occur. Every leg base (#5) has one lawn stake to fix. How To Use My Trampoline? Information On Use Of the Trampoline All jumpers need to be supervised, regardless of skill level or age.
- Page 18 the next bounce without first mastering the previous, you increase your chances of getting injured. To stop your bounce, flex your knees when you land on the mat with your feet. Keep your eyes on the mat to maintain control. If you do not, you could lose balance or control.
- Page 19 maneuvers until you have mastered the basic, fundamental bounce. Education is also key to safety and very important. Read, understand, and practice all safety precautions and warnings prior to using the trampoline. A controlled jump is when you land and take off from the same location. For additional safety tips and instructions, contact a certified trampoline instructor.
- Page 20 Lesson 3 Review and practice skills and techniques learned in previous lessons. Front Drop-To avoid mat burns and teach the front bounce position, all students should be requested to assume the prone position(face down on the ground) while the instructor checks for faulty positions that could cause injury.
- Page 21 Knee Bounce Start with basic bounce and keep it low. Land on knees keeping back straight, body erect and use your arms to maintain balance. Bounce back to basic bounce position by swinging arms up. Seat Bounce Land in a flat sitting position. Place hands on mat besides hips.
- Page 22 How To Maintain My Trampoline? Prior To Know About All Zupapa® trampolines get TÜV certified. TÜV is German organization that work to validate the safety of products of all kinds to protect humans and the environment against hazards. As independent consultants, they examine products which require monitoring. All Zupapa®...
- Page 23 Windy Conditions In severe wind situations, the trampoline can be blown about. If you expect windy weather conditions, the trampoline should be moved to a sheltered area or disassembled. Another option is to tie the round, outside portion (top frame) of the trampoline to the ground using ropes and stakes.
- Page 24 This Warranty Is Valid Only In The United States! Contact Us If you have any question want to contact us, you could send us email directly: official@zupapa.us Attention: We usually reply you in 36 hours. If there is no reply from us, that might be assigned to Spam because of your mail box setting.
- Page 25 It’s exactly our honor to have the chance to introduce ourselves again to you. We've been focusing solely on offering top quality products. As you know, all Zupapa® trampolines get TÜV certified. Take Zupapa® trampoline home, take safe entertainment for your family. TÜV is German organization that work to validate the safety of products of all kinds to protect humans and the environment against hazards.
Need help?
Do you have a question about the Safump and is the answer not in the manual?
Questions and answers