Table of Contents
Advertisement
Quick Links
151657 Bikehut 11 Function Computer
a.
k
l
LOCK/
LIGHT/
SET
RESET
j
MODE
b.
Data Setting Mode
j
MODE
2s
2s
k
k
0 1 2 3 4
0~3
18 Inch
0~9
l
9 8 7 6 5
20 Inch
22 Inch
OK!
24x1.75
24 Inch
24x 1 3/8
c.
BATTERY CHANGE
26x1.40
26x1.50
26x1.75
26x1.95
26x2.1
+
3V
700C TUBULAR
700x20C
CR2025
700x23C
700x25C
Low battery
700x28C
indicator
700x32C
700x35C
700x38C
O-ring
27.5 Inch
28 Inch (700B)
28.6 Inch
English
MAIN UNIT SETUP (Fig. 1)
English
When setting up the computer do not have
thecomputer on the handlebar bracket and ensure that the computer is only held by the sides.
INITIATE THE COMPUTER (ALL CLEAR)
1. A battery is already loaded in the main unit when purchased.
2. Hold down the SET button
and RESET button
simultaneously for more than 3
k
l
seconds to initiate the computer and clear all data. IMPORTANT: Be sure to initiate the
computer before it is be used, otherwise the computer may run errors.
3. The LCD segments will be tested automatically after the unit is initiated.
4. Press MODE button
to stop LCD test, then the flickering "KM/H".
j
UNIT SELECTION
Press MODE button
to choose KM/H or M/H. Then press the SET button
j
selection.
WHEEL CIRCUMFERENCE
l Precise Measurement (Fig. a)
Roll the wheel until the valve stem is at its lowest point close to the ground, then mark this
first point on the ground. Get on the bicycle and have a helper push you until the valve
stem returns to its lowest point. Mark the second point on the ground. Measure the
distance between the marks. Enter this value to set the wheel circumference.
l Quick Table (Fig. b): Get a suitable circumference value from the table.
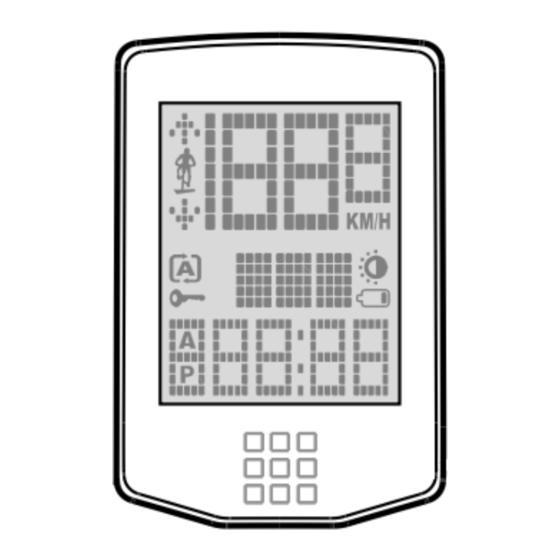
FUNCTIONS (Fig. 3)
: Current Speed
0.0–199.9Km/h (120.0 Mile/h), 0.1Km/h (Mile/h), +/- 1%
The current speed is always displayed on the upper set when riding. It displays current
speed up to 199.9 Km/h or 120.0 Mile/h (for wheel diameters over 24 inches).
CLK: 12HR or 24HR Clock
1H00M–12H59M or 0H00M–23H59M, 1 Minute, +/- 0.3%
It can display the current time either in 12HR or 24HR clock.
DST: Trip Distance
0.00–999.99Km (Miles), 0.01Km (Mile), +/- 0.01%
The DST function accumulates the distance data from the last RESET operation as long as
the bike is being ridden.
RTM: Riding Time
0M00S-59M59S, 1 Second, 0H00M-99H59M, 1 Minute, +/- 0.03%
1. The RTM totals the riding time from the last RESET operation.
2. It displays in 1 second increments when RTM is less than 1 hour and changes to 1 Minute
1
ALL CLEAR
4403000000_20090423_v1
3s
LCD
j
WHEEL CIRCUMFERENCE
k
SEGMENTS
+
AUTO TEST
l
2
l
2nd
1st
j
POPULAR TIRES
CIRCUMFERENCE
REFERENCE TABLE
Circumference
1
12
0
23
Tire Size
~
~
Nunber
3
1436 mm
CLOCK
1596
1759
1888
1916
1942
j
1995
2030
2045
2099
2133
4
2117
2092
2112
2124
2136
2155
2164
2174
2193
2234
2281
increments after 1 hour. It will restart from zero after 100 hours.
AVG: Average Speed
0.0–199.9Km/h (120.0Mile/h), 0.1Km/h (Mile/h), +/- 0.1%
1. It is calculated from the DST divided by the RTM. The average data counted is from the
last RESET to current point.
2. It will display "0.0" when RTM is less than 4 seconds.
3. It is updated about one second when RTM is over 4 seconds.
MAX: Maximum Speed
0.0–199.9Km/h (120.0Mile/h), 0.1Km/h (Mile/h), +/- 1%
It shows the highest speed from the last RESET operation.
TMP: Current Temperature °C / °F
ODO: Odometer
0-99999Km (Miles), 1Km (Miles), ± 0.1%
The ODO accumulates total distance as long as the bicycle is running, the ODO data can be
cleared by the All Clear operation only.
to store
k
: SCAN
1. Auto-Scanning Display Mode.
Press the MODE button
till the
symbol is displayed. The computer will change the
j
display modes in a loop sequence automatically every 5 seconds.
2. Fixed Display Mode.
Press the MODE button
j
to turn off the
symbol and select a desired display mode; the
computer will stop the auto-scanning display operation.
/
: Speed Pacer
It flashes the
speed pacer arrow while the current speed is higher than the average
speed and the down arrow
flickers conversely.
BUTTON AND OPERATIONS
After 15 minutes of inactivity the computer will lock the mode
button and will show a key on the screen (fig e), to unlock press button
MODE BUTTON
j
Quickly press this button to move in a loop sequence from one function screen to another.
LOCK/SET BUTTON
k
Hold down this button 2 seconds to get in or out the setting screens when you want to reset
to bike, or the current time of the CLK.
LIGHT/RESET BUTTON
l
1. Light for 4 seconds after each press. (Fig. d)
2. The symbol "
" will apper to indicate the EL back-light functuon is at working status.
UNIT SELECTION
CIRCUMFERENCE SETTING
k
l
j
0~3
0~9
j
CLOCK SETTING
j
l
k
0
5
~
0~9
0
23
+1
~
DST
RTM
AVG
MAX
j
j
j
RESET OPERATION (DST=0, RTM=0, AVG=0, MAX=0)
l
j
j
2s
3. Hold down the "RESET" button
computer will RESET the DST, RTM, AVG, MAX.
CLOCK SETTING (Fig. 2)
1. Change the LCD display to CLK screen.
2. Press the SET button
to enter the clock adjusting screen to setting the clock.
k
3. A quick press of the MODE button
4. Adjust the clock data as the data setting procedures.
RESET OPERATION (Fig. 4)
-10°C ~ 60°C (14°F ~ 140°F)
1. Hold down the RESET button
computer will reset AVG, DST, RTM and MAX data from stored values to zero.
2. It cannot reset ODO, CLK.
AUTOMATIC START/STOP
1. The computer will automatically begin counting data upon riding and stop counting data
when riding is stopped.
2. The flickering symbol "
" indicates that the computer is at start status.
POWER AUTO OFF
To preserve battery, this computer will automatically switch off and just displays the CLK
data when it has not been used for about 15 minutes. The power will be turned on by
pressing the SET button
(Fig. g).
k
LOW BATTERY INDICATOR
1. The symbol "
" will appear to indicate the battery is nearly exhausted.
2. Replace battery with a new one within a few days after the symbol was appeared,
otherwise the stored data may be lost when the battery voltage is too low.
BATTERY CHANGE (Fig. c)
1. All data will be cleared when battery is replaced.
.
2. This computer allows you to re-key in data of ODO which you have had rode
k
after replacing battery.
3. Keep record the ODO data before you remove the old battery.
4. Replace with a new CR2025 battery in the compartment on the back of the computer
with the positive (+) pole toward the battery cap.
5. Initiate the main unit again.
PRECAUTIONS
1. Do not leave the main unit exposed to direct sunlight when you don't ride the bike.
2. Do not try to disassemble the main unit or its accessories.
END SETTING
d.
k
k
l
+1
0~9
2s
2s
k
ODO SETTING
e.
j
l
k
+1
2s
TMP
ODO
SCAN
ON
f.
j
j
j
j
j
3. Check relative position between sensor, magnet and main unit periodically.
l
till the LCD digit is blank, then release it. The
4. Don't use thinner, alcohol or benzine to clean the main unit or its accessories when
they become dirty.
5. Remember to pay attention to the road while riding.
TROUBLE SHOOTING
to select 12HR or 24HR.
j
PROBLEM
No display
till the LCD digit is blanked, then release it. The
l
No current
speed or
incorrect
data
Irregular
display
LCD is black
Display is
slow
Battery Operating Life: CR2025 in Main Unit About one year
Wheel Circumference Setting: 1mm - 3999mm (1mm increment)
Operation Temperature: 0°C ~ 50°C (32°F ~ 122°F)
Storage Temperature: -10°C ~ 60°C (14°F ~ 140°F)
General Mode
Touch key Stuck (Mode key)
EL Back-light
Sensing zone
l
KEY-LOCK
5s
Key Stuck
k
k
Release
OFF
OK!
g.
Power Off
Mount On Bracket
Auto Key-lock
Mount On Bracket
k
k
15m
15m
OFF
Stop
Riding
Status
Status
Check the following before taking unit in for repairs.
CHECK YOUR COMPUTER
REMEDY
1. Is the battery dead?
1. Change one new battery.
2. Is the battery installation correct?
2. Be sure that the positive pole of the
battery is facing the battery cap.
1. Is it at the MAIN UNIT SETUP or
1. Refer to the setting procedure and
other setting displays?
complete the adjustment.
2. Is the relative position, gap between
2. Refer to Installations and re-adjust
sensor and magnet correct?
position and gap correctly.
3. Is the circumference value input correct?
3. Refer to "Circumference Setting" and
4. Is the sensing distance too long or the
enter correct value.
installation angle of the sensor
4. Refer to Installations and adjust distance or
incorrect?
angle between the main unit and the sensor.
5. Is the sensor battery nearly exhausted?
5. Change one new battery.
6. Is there any strong interference source
6. Move the computer from this interference
nearby?
source.
Refer to the "Main Unit Setup" and initiate
the computer again.
Have you left the main unit exposed to
Place main unit in the shade to return to normal
direct sunlight and no riding for a long time?
state. There won't be negative effect for data.
Is the temperature below 0°C (32°F)?
Unit will return to normal state when the
temperature rises.
Sensor: No Contact Magnetic Sensor.
Battery Type: 3.0V Battery X 1 (Typical No. CR2025)
(based on the average riding time of 1.5 hours per day)
CR2032 in Speed Transmitter Around 24000km
Dimensions/Weight: 33 x 51 x 13.5mm / 22.4g
Advertisement
Table of Contents


Need help?
Do you have a question about the 151657 and is the answer not in the manual?
Questions and answers